


Repair Your Honda 9.9 HP Outboard Tilt Lock: Fixing the Broken Spring
- How the Honda 9.9 HP Tilt Lock Works
- Symptoms of a Failed Tilt Lock Spring
- Tools and Parts You'll Need
- Step 1: Access the Tilt Lock Assembly
- Step 2: Remove the Stuck Adjusting Rod and Spring
- Step 3: Source the Correct Replacement Spring
- Step 4: Install the New Spring and Reassemble
- Step 5: Test the Tilt Lock
- Preventing Future Tilt Lock Failures
- When to Call a Professional
- Does This Repair Apply to Other Honda Models?
- Frequently Asked Questions
- OEM vs. High-Quality Aftermarket Parts
- Before You Trailer Your Boat

If your Honda 9.9 HP outboard won't hold its tilt position or the lever feels loose when you try to lock it, you've got a broken or corroded spring. I've pulled apart hundreds of these stern brackets over the years, and it's almost always the same story: rust eats the spring, the lock stops holding, and the motor either won't stay up or bounces around when you hit the trailer.
The tilt lock on the Honda 9.9 is manual—no hydraulics, just a lever, rod, and spring tension. When that spring snaps or loses its tension, you lose the lock. This isn't just inconvenient. A motor that won't lock can drop unexpectedly, crack your transom, or break loose during trailering. The Honda 9.9 weighs around 85 pounds, and if it comes down on your hand or shifts while you're loading the boat, you're in trouble.
This guide walks through diagnosing the problem, getting the stuck parts apart, sourcing the correct spring, and putting it back together so it holds.
How the Honda 9.9 HP Tilt Lock Works
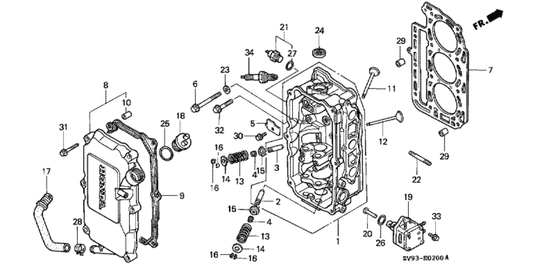
The tilt lever sits on the stern bracket. Move it to the "TILT" position, and you disengage the lock. Raise or lower the motor by hand, and a transom angle adjusting rod clicks into notches at 30°, 45°, or 71°. The spring inside the tilt link assembly or reverse lock mechanism provides the tension that keeps those surfaces engaged. When you lock it back in the "RUN" position, the spring holds the rod tight against the thrust of the motor in the water.
No power trim here—just leverage and a coil spring. If the spring breaks or rusts out, the lock won't hold. You'll feel it immediately: the lever moves but nothing clicks, or it clicks but slips right back out.
Saltwater accelerates this. The salt residue gets into the aluminum housing, starts surface corrosion on the steel spring, and within a season or two, the spring either seizes in place or snaps. Freshwater boats see this too, but it takes longer. If you beach your boat regularly or store it tilted without rinsing, you're speeding up the failure.
Symptoms of a Failed Tilt Lock Spring
The lock won't hold the motor up when you tilt it for beaching or trailering. You might hear a weak click, but the motor sags back down under its own weight. Or the lever moves freely with no resistance—no snap, no tension. Sometimes the rod won't pull out at all because rust has locked it into the housing.
If the spring hasn't fully broken yet but has lost tension, the lever will feel spongy instead of snapping back firmly. That's your warning sign. Fix it before it breaks completely and leaves you holding 85 pounds of outboard by hand.
Tools and Parts You'll Need

You don't need a full shop for this, but you do need the right pieces:
- 10mm and 12mm wrenches or sockets (for any stern bracket bolts you might need to loosen for clearance)
- Needle-nose pliers or a small punch for cotter pins
- Propane torch or heat gun
- Penetrating oil (PB Blaster or equivalent)
- Brass drift or wooden block (to protect paint when tapping the rod)
- Marine-grade grease
- Replacement spring—Honda part #50333-921-003 is the common tilt spring for many 9.9 models, but verify your serial number
The serial number is stamped on the transom bracket. Use it to look up your parts on the Honda Marine manuals page or a parts diagram site like PartsTree. Different years of the BF9.9A, BF9.9D, and related 8HP or 15HP models might share the same bracket and spring, but confirm before you order.
Step 1: Access the Tilt Lock Assembly

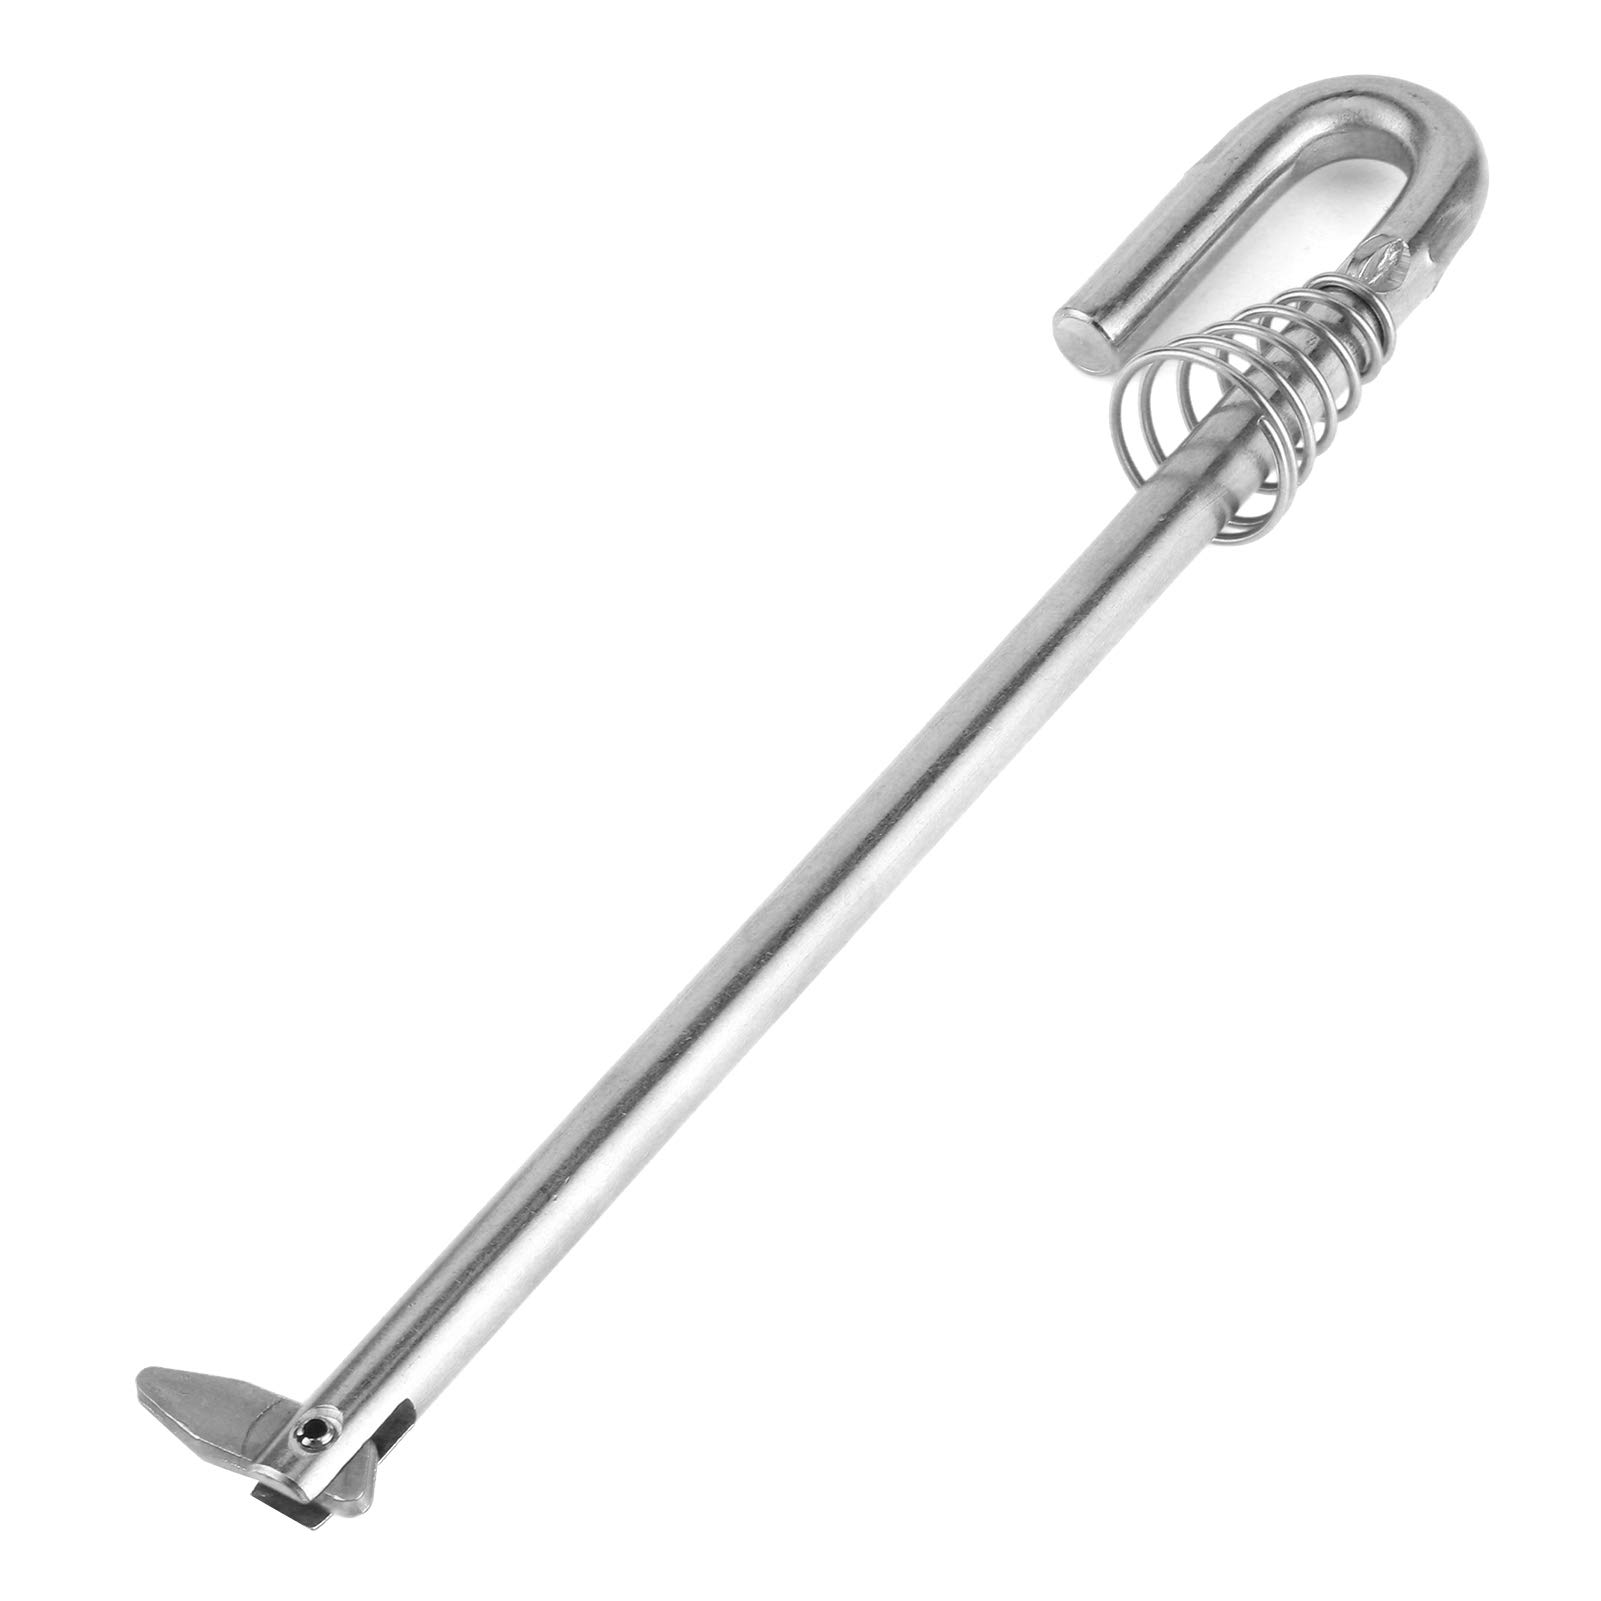
Move the tilt lever to "TILT." Raise the motor by hand to whatever angle gives you the best access to the transom angle adjusting rod. Usually, 45° works. The rod end has a small bent tab or collar that slides into the bracket notch.
If the rod is not rusted tight, you can pinch or twist the end tab and pull it out by hand. If it's stuck—and in saltwater boats, it usually is—don't force it yet. Spray penetrating oil around the rod where it enters the housing and let it sit for 10 minutes.
Safety note: The motor weighs 85 pounds. If the tilt lock is already broken, the motor has no support when the rod is out. Use a block of wood under the motor or have someone hold it while you work.
Step 2: Remove the Stuck Adjusting Rod and Spring

If penetrating oil didn't free the rod, apply heat. Use a propane torch on the aluminum housing around the rod, not directly on the rod itself. Heat the aluminum for about 30 seconds—it expands faster than the steel rod and breaks the rust bond. Do not heat near the plastic bushings on the swivel case or near any fuel lines. If your motor has plastic tilt lever components or nearby hoses, shield them or remove them first.
Once the housing is warm, tap the rod from the opposite side using a brass drift or a block of wood between the hammer and the rod. A few solid hits usually break it free. If you use a steel hammer directly on the rod or bracket, you'll chip the paint and potentially damage the threads.
Pull the rod out. Inside, you'll see the spring—or what's left of it. On most Honda 9.9 brackets, the spring is a small coil held in place by a cotter pin or a washer and pin assembly. Use needle-nose pliers or a small punch to remove the pin. The spring should slide out.
If the spring is broken, you'll see the fractured coil or just find one end sitting loose. If it's intact but seized with rust, you'll need to clean the housing before installing the new one. Use a wire brush or a rag soaked in vinegar to remove the salt and oxidation from the spring pocket. Let it dry completely.
Step 3: Source the Correct Replacement Spring
Honda OEM springs are available from any Honda Marine dealer in the US, and you can order online through their official parts lookup. The common part number is #50333-921-003, but this can vary depending on your specific model year. Check your serial number against the parts diagram before ordering.
OEM is reliable, but you're paying for the Honda label. Expect $15–$25 for a small spring that costs a few dollars to manufacture.
Cheap aftermarket springs from random sellers are a different problem. I've seen $8 kits where the spring is the wrong wire gauge, the cotter pin doesn't fit the hole, or the steel rusts out in three months. You'll be doing this job again next season.
We manufacture direct-from-factory aftermarket parts that meet OEM specs without the dealership markup. The springs are the correct tension, the fitment is exact, and the steel is treated for saltwater. You get the quality you need to get the job done right the first time.
Required parts list:
- Tilt spring (Honda #50333-921-003 or equivalent)
- Replacement cotter pin (usually 2mm diameter, 20mm length—buy two in case one bends)
- Washer (if yours is corroded or damaged during disassembly)
Buy the cotter pins before you start. They almost always break when you pull them out, and hardware stores don't stock marine-grade stainless versions.
Step 4: Install the New Spring and Reassemble
Slide the new spring into the housing. The orientation matters—the spring should compress when the rod is inserted, providing tension in the direction that locks the rod in place. If you're unsure, compare to the parts diagram you used to order the spring.
Here's the hard part: you need to hold the spring compressed while you slide the rod back through and insert the cotter pin. This is where a lot of DIYers get stuck. Use a zip tie to temporarily compress the spring, slide the rod in, then cut the zip tie once the pin hole lines up. Or use a small screwdriver to hold the spring back while you push the rod into place.
Once the rod is seated, insert the new cotter pin through the hole. Bend the ends of the pin outward so it can't back out, but don't bend them so far that you can't slide the rod in and out of the bracket notches. The rod needs to move laterally for the tilt mechanism to function.
After the pin is secure, pull the rod out slightly and push it back in a few times to check that the spring tension is correct. It should snap back into place with a firm click. If it feels weak or spongy, the spring might not be seated properly, or you might have the wrong part.
Apply marine-grade grease to the rod where it slides into the housing and on the pivot points of the tilt lever. This keeps salt and moisture out and prevents the next rust seizure. For best results, use one of the best marine greases and lubes for your outboard to protect and extend the life of your parts.
Step 5: Test the Tilt Lock
Lower the motor back down to the "RUN" position. Lock the tilt lever. The motor should hold firm against your hand pushing down on the cowling. Raise it to each tilt angle—30°, 45°, and 71°—and check that it locks at each notch with an audible click.
If the lock doesn't hold at shallow angles (30° or 45°) but works at full tilt, the spring tension might be borderline, or the rod itself is worn. The shallow angles put more stress on the lock because the motor's weight is angled forward. A worn rod can mimic a broken spring—if the locking surfaces are rounded off from years of use, even a new spring won't hold properly.
If you suspect rod wear, inspect the contact surfaces on the rod and the bracket notches. If they're rounded or pitted, you'll need to replace the rod as well. That's a separate part, usually listed in the stern bracket assembly diagram.
Preventing Future Tilt Lock Failures

Saltwater boaters need to rinse the tilt mechanism with fresh water after every trip. I don't mean a quick spray—run fresh water into the bracket where the rod enters the housing and move the tilt lever through its full range to flush out the salt. Once a month, pull the rod out, clean it, and re-grease it.
Freshwater boaters can get away with a seasonal schedule: grease the rod and check for rust at the start and end of the season. If you store your boat outside, check it mid-season too. UV and rain degrade grease faster than you'd think.
If you beach your boat regularly, tilt the motor up and rinse the bracket before you lock it back down. Sand and mud get into the housing and act like grinding paste when you move the rod.
For more preventative maintenance tips, see our guide on anti-corrosion tips for winter storage saltwater boats.
When to Call a Professional
If the rod is so corroded that heat and penetrating oil won't free it, or if you've disassembled the bracket and can't figure out the spring orientation, take it to a certified marine mechanic. They have bracket presses and specific pullers that can remove seized rods without damaging the housing.
If you're unsure about which parts to order, we can help. Send a photo of your transom bracket and serial number to our support line, and we'll confirm the correct spring and any other components you might need.
Does This Repair Apply to Other Honda Models?

The Honda 8HP, 9.9HP, and 15HP models built on the same generation bracket often share the same tilt lock assembly. If you have a BF8D, BF9.9A, BF9.9D, or BF15A, this guide likely applies. Check the parts diagram for your specific serial number to confirm.
The tilt lock mechanism on these smaller Hondas is identical in function, even if the part numbers differ slightly year to year. The repair process is the same: access the rod, remove the broken spring, replace it, and reassemble.
Frequently Asked Questions
How do I know if the spring is broken or just weak?
If the tilt lever moves but the motor won't hold any angle, the spring is broken or missing. If it holds some angles but not others, or if it holds for a few seconds then slips, the spring has lost tension. Either way, replace it.
Can I use any coil spring that fits?
No. The spring tension is specific to the weight of the motor and the geometry of the locking mechanism. A hardware store spring might fit the housing, but it won't provide the correct tension. Use the OEM part number or a verified equivalent.
How often should I lubricate the tilt lock?
Saltwater: every month during the season. Freshwater: start and end of season. If you store the boat tilted for long periods, grease it before and after storage.
What if the new spring pops out during reassembly?
You're fighting the spring tension without the rod fully seated. Use a zip tie to compress the spring before you insert the rod, or hold it back with a screwdriver while you align the pin hole. Once the pin is in, the spring will stay in place.
Will this repair void my Honda warranty?
If your motor is still under factory warranty, check with your Honda dealer before you disassemble anything. Most Honda warranties cover defects, not wear items like tilt lock springs, but DIY repairs can complicate a warranty claim if something else fails. If you're past the warranty period, you're free to do the work yourself.
OEM vs. High-Quality Aftermarket Parts
OEM parts are built to Honda's exact specs, and you're paying for that consistency. A Honda spring will fit and function correctly every time. But you're also paying for the dealer network, the Honda branding, and the markup at every step of the supply chain.
Cheap aftermarket parts are the opposite problem. The $10 spring kit from a random online seller is made with whatever steel was cheapest that week, the tolerances are loose, and the cotter pin is soft pot metal that bends when you try to install it. I've seen customers come back three months later because the spring rusted through or snapped under normal use.
High-quality aftermarket parts—like the ones we manufacture at JLM Marine—are built in the same factories that produce OEM components, often using the same tooling and materials. We source from factories with excess capacity, which means you get OEM-level quality without the Honda price tag. Our springs are stainless or treated steel, the cotter pins are marine-grade, and the fitment is exact. You're not gambling on quality, and you're not overpaying for a name.
If you're doing the repair yourself, buy quality parts. The time you spend pulling the bracket apart is worth more than the $10 you'll save on a cheap spring that fails next season.
Before You Trailer Your Boat

Always check that your tilt lock is holding before you load the boat. A motor that shifts or bounces on the trailer can crack the transom, damage the lower unit, or come loose entirely. Lock it at the angle you need for your trailer, then push down hard on the cowling to confirm it's secure. If it moves, don't load it. Fix the lock first.
Grease the tilt rod pivot points every few trips to keep salt from building up in the housing. For parts and accessories to aid in your maintenance, shop our full range of boat accessories and Honda outboard motor parts.
For more on maintenance and troubleshooting, visit the JLM Marine home page.
For Honda Outboard Owners:
About JLM Marine
Founded in 2002, JLM Marine has established itself as a dedicated manufacturer of high-quality marine parts, based in China. Our commitment to excellence in manufacturing has earned us the trust of top marine brands globally.
As a direct supplier, we bypass intermediaries, which allows us to offer competitive prices without compromising on quality. This approach not only supports cost-efficiency but also ensures that our customers receive the best value directly from the source.
We are excited to expand our reach through retail channels, bringing our expertise and commitment to quality directly to boat owners and enthusiasts worldwide.
Honda Parts on Sale
- $12.99
$25.99- $12.99
- Unit price
- per
- $59.99
$71.00- $59.99
- Unit price
- per
- $6.20
$7.00- $6.20
- Unit price
- per

- $16.00
- $16.00
- Unit price
- per

- $16.99
$20.00- $16.99
- Unit price
- per

- $34.20
$40.00- $34.20
- Unit price
- per
- $46.50
$55.00- $46.50
- Unit price
- per
- $46.50
$65.00- $46.50
- Unit price
- per


- $27.00
$35.00- $27.00
- Unit price
- per

- $45.99
- $45.99
- Unit price
- per
- $71.00
- $71.00
- Unit price
- per

- $22.49
$26.00- $22.49
- Unit price
- per

- $42.39
$50.00- $42.39
- Unit price
- per


- $46.75
$65.00- $46.75
- Unit price
- per

- $32.00
$38.00- $32.00
- Unit price
- per

- $54.99
$65.00- $54.99
- Unit price
- per

- $19.02
- $19.02
- Unit price
- per

- $37.00
$44.00- $37.00
- Unit price
- per

- $14.79
- $14.79
- Unit price
- per


- $35.99
- $35.99
- Unit price
- per
