


Adapting an Older Yamaha 9.9 Outboard Carburetor: Solutions for Obsolete OEM Parts
- Finding Compatible Carburetors When OEM Parts Are Discontinued
- Rebuilding Obsolete Carburetors When Full Assemblies Are Unavailable
- Ultrasonic Cleaning and Advanced Rebuild Techniques for Obsolete Carburetors
- Swapping 15HP Carburetors onto 9.9HP Blocks
- Step-by-Step Carburetor Removal for Yamaha 9.9 4-Stroke Models
- Cleaning and Inspection: What to Check on a Disassembled Carburetor
- Installing a Rebuilt or Replacement Carburetor
- Initial Startup and Idle Mixture Adjustment
- Common Problems After Carburetor Installation
- Avoiding Low-Quality Aftermarket Carburetor Parts
- Ethanol Fuel and Long-Term Carburetor Maintenance
- Parts Availability for Obsolete Yamaha 9.9 Models
Finding Compatible Carburetors When OEM Parts Are Discontinued

If you've got an older Yamaha 9.9 with a carburetor that's no longer manufactured, you're not stuck. The key is knowing which newer carburetors physically bolt on. For 1985-1995 2-stroke models, the 1996+ Yamaha 9.9HP carburetor that replaces the 6E8-14301 series is a direct swap. We've installed these dozens of times—no choke adjustments needed after installation.
For 4-stroke models like the 1985 F9.9AM (European version), a 1992 T9.9EXHQ carburetor fits despite being marked incompatible in parts diagrams. The main differences are the automatic choke apparatus and throttle adjustment linkage. You'll need to adapt the linkage by either drilling a new mounting hole in the throttle arm or fabricating a simple bracket using 16-gauge aluminum. The choke can either be bypassed entirely or reconnected if your original choke solenoid still functions. According to mechanics on the Marine Engine forum, this swap works reliably as long as you verify the intake manifold flange is identical—measure bolt hole centers with calipers before ordering.
One critical issue: newer carburetors sometimes include an electronic temperature sensor solenoid that older engines lack. Check if your engine block has the threaded sensor port. If not, you'll need to either plug the solenoid's electrical connector or remove it and install a blanking screw with thread sealant.
Rebuilding Obsolete Carburetors When Full Assemblies Are Unavailable

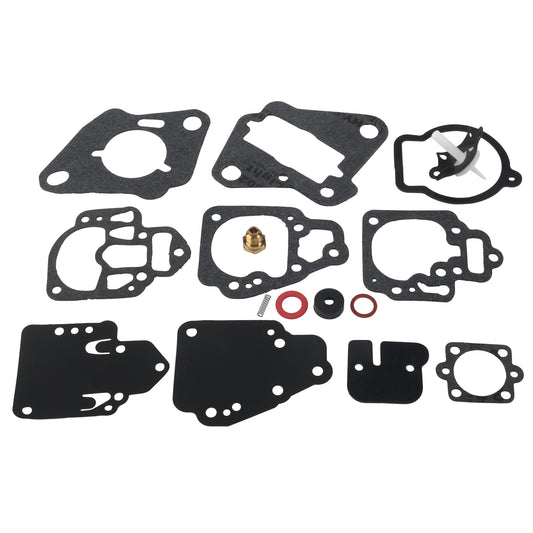
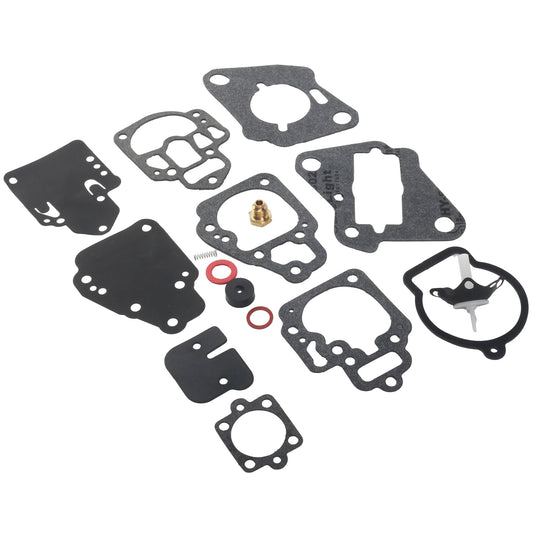
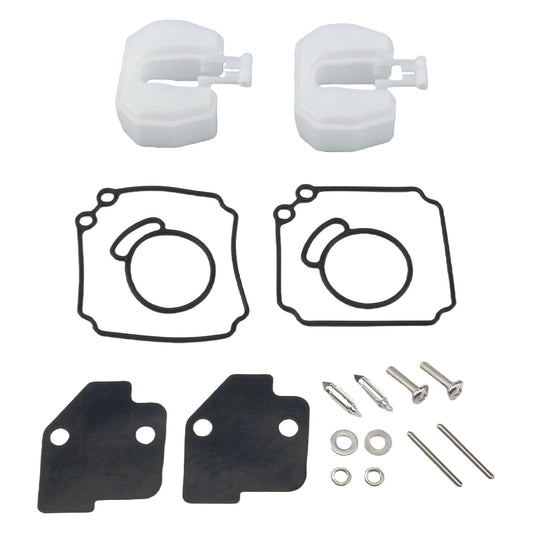
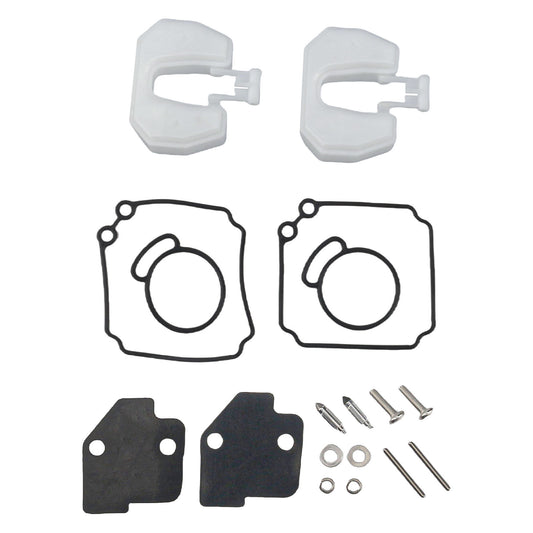
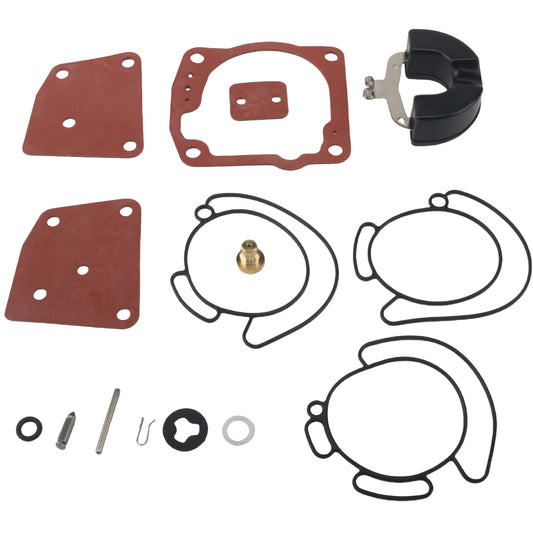
For 1980s models like the 1988 F9.9SG, full carburetor assemblies (6G9-14301-21-00 or 22-00) are discontinued. Parts like the pilot jet (6G8-14342-24-00), main nozzle (6G8-14341-20-00), float chamber body (6G8-14381-02-00), and starter rod (6G8-14379-00-00) are all marked obsolete by specialty suppliers. This is where rebuild kits and salvage become essential.
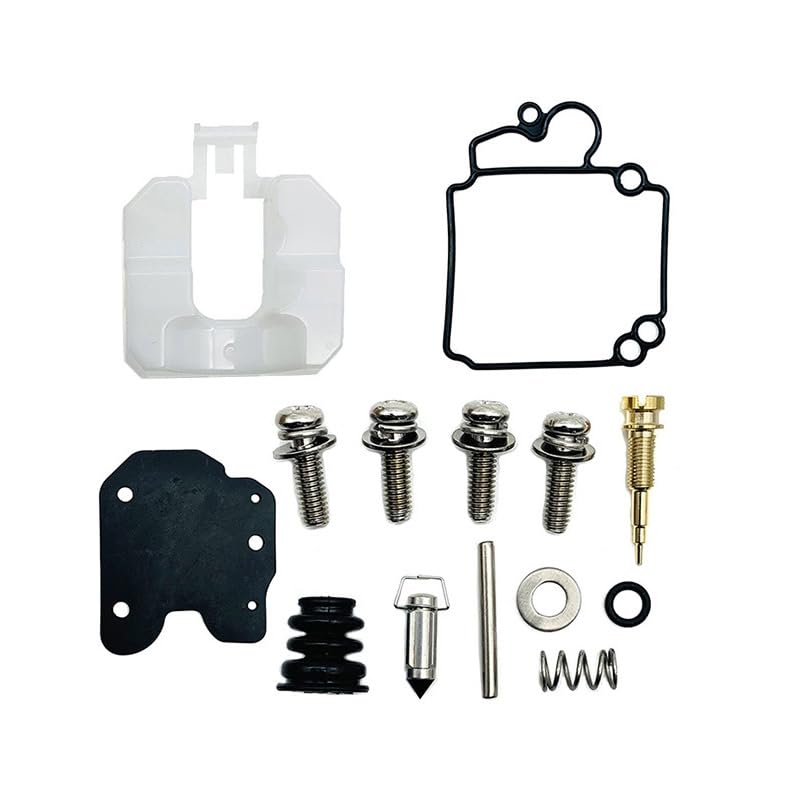
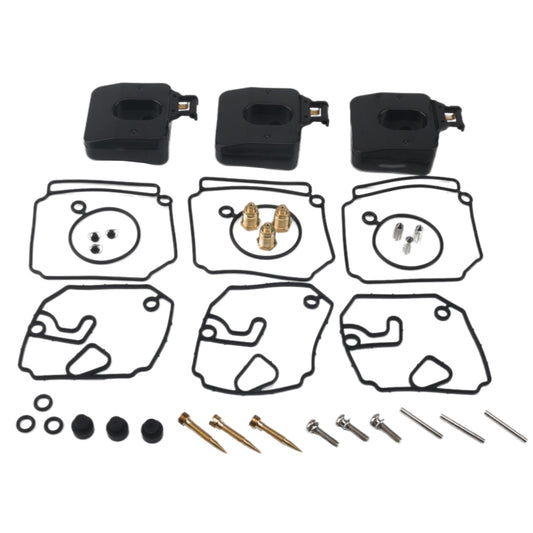
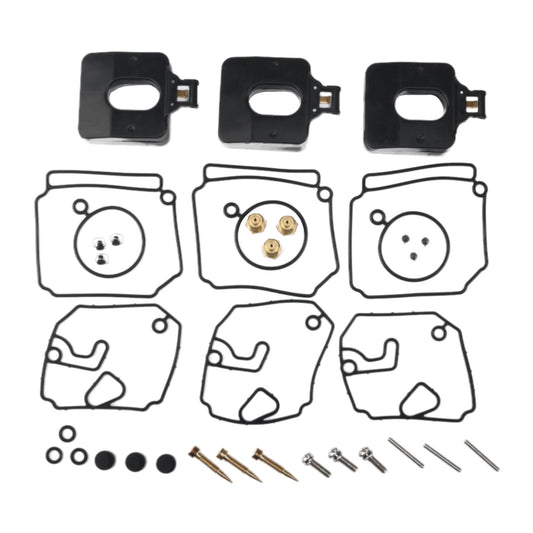
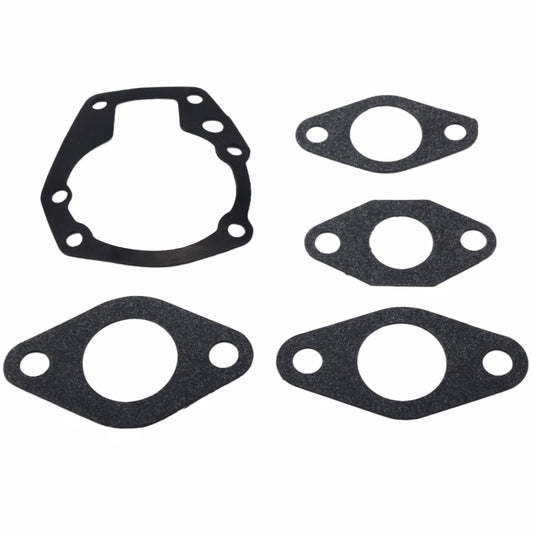
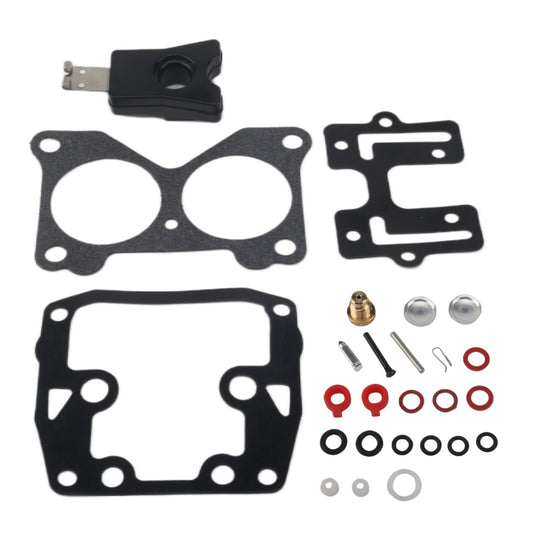
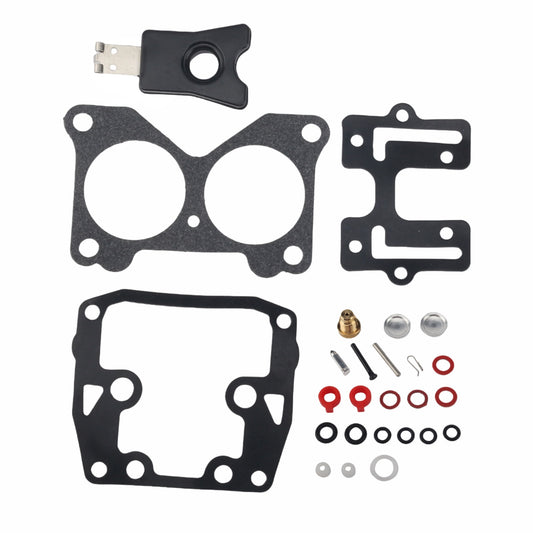
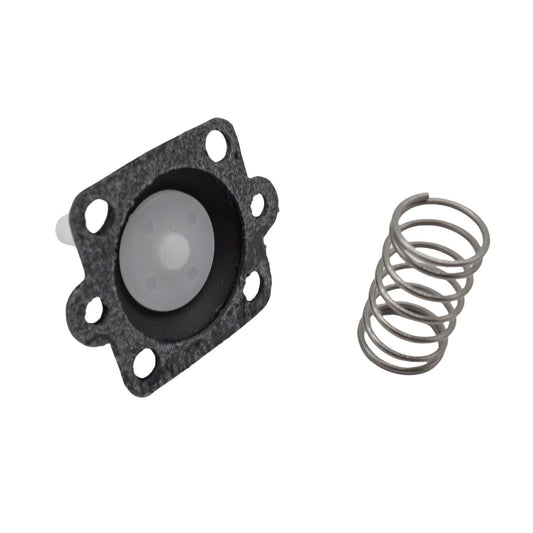
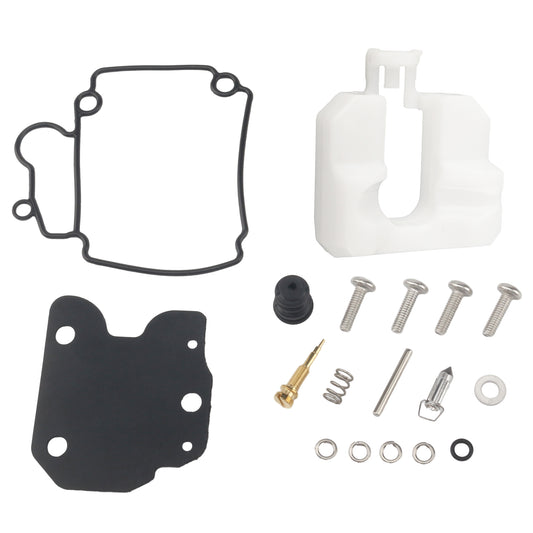
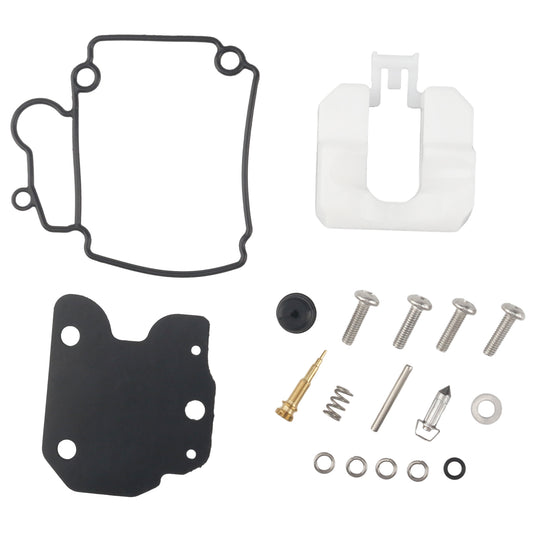
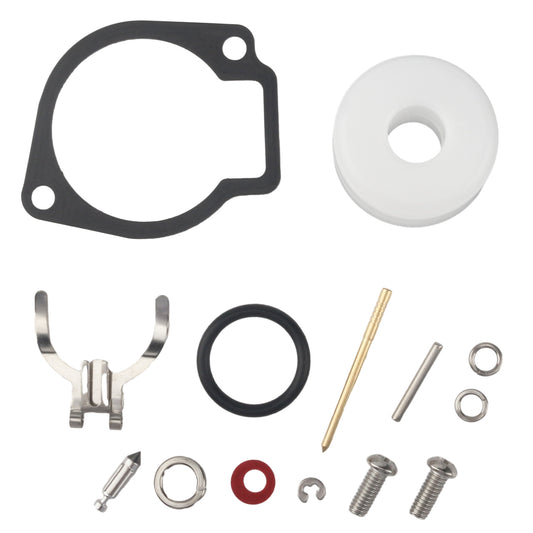
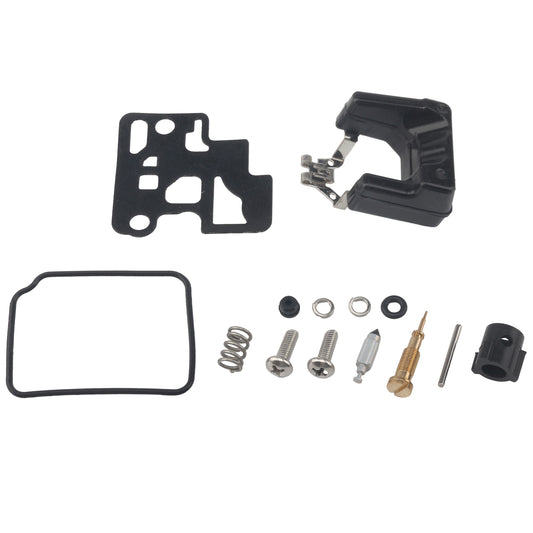
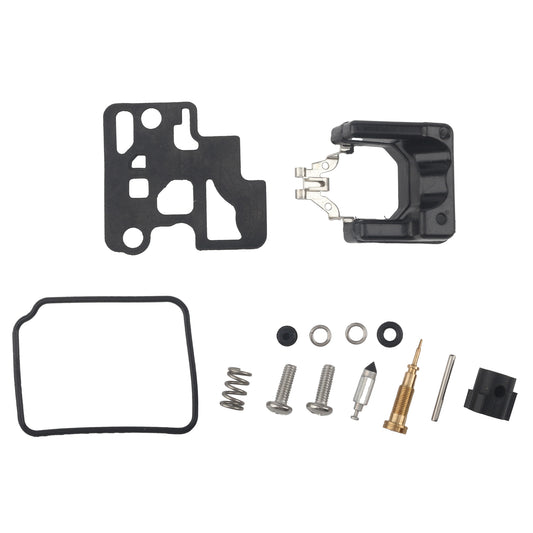
We stock carburetor rebuild kits for 9.9HP and 15HP 4-stroke engines covering models F9.9C, FT9.9D, and F15A. These replace Yamaha part numbers 66M-W0093-00-00, 66M-W0093-01, and 66M-W0093-01-00. The kits include all gaskets, O-rings, needle valve, float pin, and inlet screen. For 2-stroke models from 1985-1995, aftermarket kits compatible with the 6E7-W0093-04 spec work well. For comprehensive options on carburetor maintenance and rebuild supplies, browse our carburetor repair kits collection.
When the main nozzle or pilot jet itself is obsolete and not included in standard kits, you have three options:
Option 1: Micro-drilling existing jets. If your pilot jet is partially clogged and cleaning fails, you can carefully enlarge it using numbered drill bits. The factory 9.9HP pilot jet typically flows around 0.024 inches (drill size #73). If you need to compensate for a slightly leaner aftermarket carb body, stepping up one size to #72 (0.025") can restore proper idle fuel flow. Chuck the bit in a pin vise, not a power drill—hand pressure only. One wrong move and you've ruined the brass seat.
Option 2: Sourcing compatible jets from other carburetors. Many Yamaha 9.9 and 15HP models used Mikuni-style carburetors. Mikuni pilot jets with the correct thread pitch (typically 5mm x 0.8mm) and orifice diameter can substitute directly. Measure your original jet's threads with a pitch gauge before ordering. We've successfully used Mikuni #42.5 and #45 pilot jets on early-90s 9.9 models when the Yamaha-branded versions were unavailable.
Option 3: Fabricating or repairing float mechanisms. If your OEM float is cracked or the needle seat is pitted beyond repair, salvage floats from later 15HP models often work. The float height spec for most 9.9 and 15HP carburetors is 14-16mm measured from the carburetor body gasket surface to the bottom of the float with the carburetor inverted. Use digital calipers and a Yamaha-specific float height gauge (part of the factory tool kit, but you can improvise with a machinist's depth gauge). If the needle seat bore is worn, some mechanics have success carefully installing a Viton O-ring shim under the seat to raise it slightly, but this is a temporary fix.
Ultrasonic Cleaning and Advanced Rebuild Techniques for Obsolete Carburetors
Standard carburetor cleaner spray won't always revive a carburetor that's been sitting for years. For heavily varnished units, ultrasonic cleaning is far more effective. We use an industrial ultrasonic cleaner set to 65°C (150°F) with a 50/50 mix of Simple Green and distilled water. Run the cycle for 20-30 minutes, then blow out all passages with compressed air at 90 psi. For detailed cleaning guides and ultrasonic methods, check our outboard carburetor rebuild tutorial.
For carburetors with corrosion inside the float bowl or on brass jets, soak disassembled components in Berryman's Chem Dip for 24 hours. Do not submerge rubber or plastic parts—only metal. After soaking, use a 0.020" piano wire (available at hobby shops) to clear jets, not drill bits at this stage. Push the wire through gently; if it doesn't pass, the passage is blocked with a solid particle, and you'll need to soak longer.
One mechanic with 20+ years on Yamaha 9.9 and 90HP models, Tohsgib on the Continuous Wave forum, states he has rebuilt carburetors multiple times using only Berryman's, torch tip files, and compressed air, avoiding the $150 OEM kit cost each time. His method works when the carburetor body and critical machined surfaces are undamaged—only the passages are clogged.
Inspect the throttle plate shaft for wear. If it has any side-to-side play, air is leaking past the shaft bushings, causing a lean condition that no jet adjustment will fix. Some carburetors allow bushing replacement, but many older Yamaha 9.9 carb bodies do not. In that case, you'll need a replacement body, which circles back to the compatibility swap options above.
Swapping 15HP Carburetors onto 9.9HP Blocks
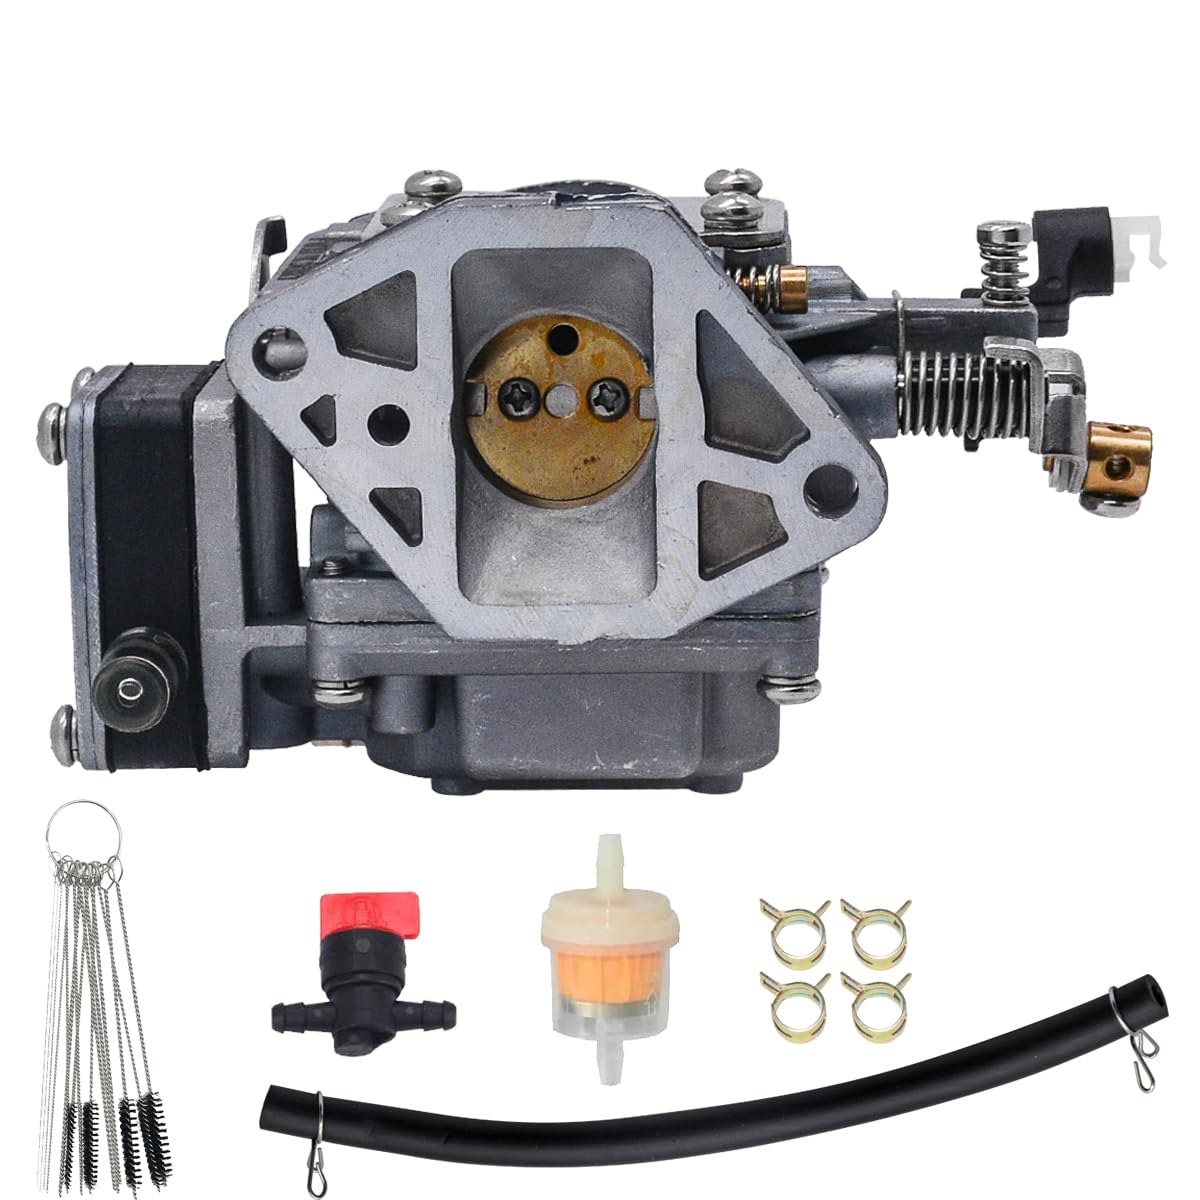
The Yamaha 9.9 and 15HP engines from the same generation are often mechanically identical—the difference is in the carburetor throat diameter and jetting. Swapping a 15HP carburetor onto a 9.9 block is common, but results vary.
We installed a 15HP carburetor on a 2012 9.9HP Enduro model after verifying the intake manifold bolt pattern and throat diameter matched. The engine ran, but despite also swapping reed valves, we saw no measurable power gain. According to a detailed case on the Yamaha Outboard Parts forum, this is a known outcome—the carburetor swap alone doesn't unlock the full 15HP unless you also change the propeller pitch and possibly the exhaust restriction. The factory limits the 9.9 with a smaller prop and sometimes an exhaust baffle.
If your goal is to restore a worn-out 9.9 carburetor and you happen to have access to a 15HP unit, it will work as a functional replacement. Just don't expect a performance upgrade without additional modifications.
Step-by-Step Carburetor Removal for Yamaha 9.9 4-Stroke Models

Remove the top cowl by releasing the latches on both sides. On most F9.9 models, there are four bolts securing the cowl at the base—two in front, two in back. Lift it straight up.
Locate the carburetor mounted to the intake manifold on the port side of the engine. You'll see the throttle cable connected to the throttle arm via a ball-and-socket joint. Pinch the socket with your thumb and forefinger while pulling upward—it'll pop off. If it's stuck, spray it with penetrating oil and wiggle it side to side.
Disconnect the fuel line. Older models use a spring clip on the brass barb; newer ones have a squeeze-to-release plastic fitting. Have a shop rag ready—fuel will drip out of both the line and the carburetor inlet.
If your carburetor has an automatic choke, there will be a two-pin electrical connector on the choke solenoid. Pull the connector straight off. Some models also have a small vacuum hose running from the intake manifold to the fuel pump—disconnect this at the carburetor end.
Unbolt the carburetor from the intake manifold. There are typically two 10mm bolts or nuts securing it. On 4-stroke models, there's a spacer plate and gasket between the carb and manifold. Keep track of the order—gasket, spacer, gasket—when you remove them. If you lose or tear a gasket, the engine will run lean and overheat.
Cleaning and Inspection: What to Check on a Disassembled Carburetor

Once the carburetor is off the engine, flip it upside down and remove the four screws holding the float bowl. Expect old fuel to spill out—if it's orange or smells like varnish, that's your problem.
Lift out the float assembly and needle valve. Inspect the needle's rubber tip for grooves or flat spots. If you see any, it's not sealing, and the carburetor will flood. Check the float itself for cracks or fuel inside—shake it next to your ear. A damaged float will sink, causing flooding and black smoke.
Remove the main jet and pilot jet. The main jet is the larger brass hex in the center of the bowl; the pilot jet is smaller and usually located near the intake side. Use a flathead screwdriver that fits snugly—stripping these jets is a common mistake. Once out, hold each jet up to a light source. You should see a clean, round hole. If you see partial blockage or discoloration, soak them in carburetor cleaner and blow them out with compressed air.
The carburetor body has tiny internal passages connecting the pilot jet to the idle circuit. Spray carburetor cleaner into every visible hole and passage. You should see the cleaner exit from another hole—this confirms the passage is clear. If cleaner doesn't come out, the passage is blocked. Use compressed air to blow it out, directing the nozzle into the same hole where you sprayed the cleaner.
Inspect the throttle plate and shaft. The plate should sit flush when closed. If there's a gap or the shaft is bent, the carburetor won't idle correctly. Check the choke plate the same way.
Check all rubber O-rings and gaskets. The bowl gasket, inlet needle seat O-ring, and any fuel passage O-rings should be soft and pliable. If they're hard or cracked, replace them. Using old gaskets guarantees a vacuum leak.
For high-quality replacement parts and gaskets, see our dedicated Yamaha carburetor parts and repair kits.
Installing a Rebuilt or Replacement Carburetor
Clean the intake manifold mounting surface with a rag and a small amount of carburetor cleaner. Remove any old gasket material stuck to the surface. You want metal-to-gasket contact, not metal-to-old-gasket-to-new-gasket.
Place the new gasket on the manifold, then the spacer plate (if your model uses one), then the second gasket. Position the carburetor on top and hand-thread both mounting bolts. Tighten them gradually in a crosshatch pattern to 8-10 ft-lbs using a torque wrench. Over-tightening will warp the carburetor body and cause a vacuum leak. Under-tightening will also cause a leak.
Reconnect the fuel line. Push it firmly onto the barb until you feel it seat, then install the spring clip or snap the plastic fitting into place. Give the line a gentle tug to confirm it's secure.
Reattach the throttle cable to the throttle arm. The ball should snap into the socket with light pressure. Move the throttle grip through its full range and watch the throttle plate—it should open fully and close completely with no binding.
If your carburetor has a choke solenoid, reconnect the electrical plug. Check that the choke plate moves when you turn the key to the "on" position (engine not running). If it doesn't move, either the solenoid is bad or there's no power to the connector.
Reconnect any vacuum hoses exactly as they were routed. A misrouted vacuum line will cause erratic idle or fuel delivery problems.
Initial Startup and Idle Mixture Adjustment
With everything reconnected, turn the fuel valve on and let the carburetor bowl fill for 30 seconds. Prime the engine if it has a primer bulb—squeeze it until it's firm.
Pull the starter cord or turn the key. The engine may take several pulls or cranking cycles to start, especially if the carburetor and fuel system were completely dry. Once it starts, let it warm up for 3-5 minutes.
With the engine at normal operating temperature and running in neutral, locate the idle mixture screw. On most Yamaha 9.9 carburetors, it's a flathead screw on the intake side of the carburetor body, near the base. The factory setting is usually 1.5 to 2 turns out from lightly seated.
Turn the screw inward slowly (clockwise) until the engine starts to stumble or RPM drops. Then turn it outward (counterclockwise) until RPM peaks. Continue turning outward slowly until RPM just starts to drop again. Now turn it back inward (clockwise) about 1/8 turn. This is your "lean best idle" position. The engine should idle smoothly without hunting or sputtering.
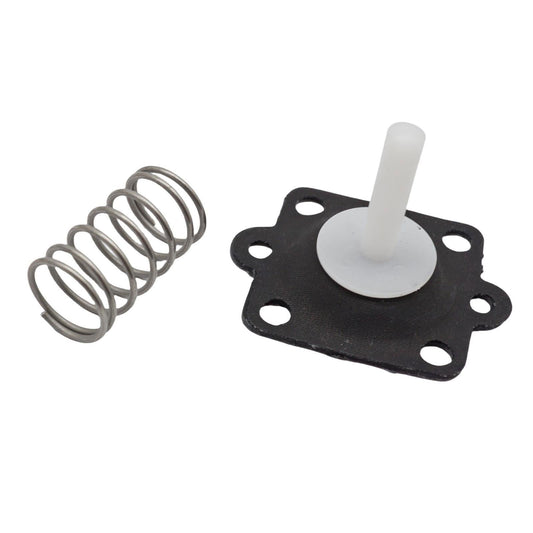
If the engine won't idle at all, the pilot jet is clogged or the idle mixture screw is set too lean. If it idles but bogs when you snap the throttle open, the accelerator pump diaphragm may be torn or the main jet is too small.
Common Problems After Carburetor Installation

Engine floods immediately: Float is set too high, or the needle valve isn't seating. Remove the float bowl and measure float height with the carburetor inverted. Spec for most 9.9/15HP models is 14-16mm from the gasket surface to the bottom of the float. Adjust by carefully bending the float tang.
Engine runs but dies at idle: Pilot jet is partially blocked, idle mixture screw is too lean, or there's a vacuum leak at the manifold gasket. Spray a small amount of carburetor cleaner around the base of the carburetor while it's idling. If RPM increases, you have a leak. Re-torque the mounting bolts and replace the gaskets if necessary.
Engine runs lean (backfires, overheats, lacks power): Main jet is clogged, fuel supply is restricted, or there's a massive vacuum leak. Check the fuel filter and fuel line for kinks. Confirm the main jet is the correct size and fully threaded into the carburetor body.
Choke won't disengage: Automatic choke solenoid is sticking or the linkage is binding. Manually move the choke plate to confirm it's free. If the solenoid is bad and replacements are unavailable, convert to a manual choke setup by removing the solenoid and installing a choke cable kit. You'll need to drill a small hole in the cowl for the cable knob and fabricate a bracket to connect the cable to the choke plate shaft. We've done this conversion on dozens of older 9.9s when the automatic choke solenoids failed and Yamaha discontinued the part.
Engine starts cold but stalls when warm: This usually indicates a failing ignition coil or stator, not a carburetor issue, but it's worth checking the choke. If the choke stays partially closed after warmup, it will flood the engine. Confirm the choke plate is fully open once the engine reaches operating temperature.
Avoiding Low-Quality Aftermarket Carburetor Parts

The carburetor rebuild kit market is flooded with cheap offshore parts that cause more problems than they solve. We've seen kits where the rubber inlet needle was molded with the wrong durometer—too hard to seal, causing constant flooding. We've also seen float assemblies that were 3-4mm off spec, making proper adjustment impossible.
When comparing parts, OEM Yamaha components are the gold standard for fit and longevity. However, many older 9.9 parts are discontinued, and OEM prices at the dealership can be excessive—sometimes $200+ for a rebuild kit that contains $40 worth of rubber and brass.
Reputable non-OEM suppliers manufacture parts that meet or exceed OEM specifications. Some of these factories produce components for the OEM brands and use excess capacity to make non-OEM versions of the same part. For example, JLM Marine carburetor kits are manufactured to OEM tolerances and include Viton seals instead of standard Buna-N rubber. Viton resists ethanol fuel breakdown far better than Buna-N, which matters in the US where E10 is standard.
What to avoid: any kit that doesn't specify the material composition of gaskets and O-rings, any kit with no listed country of manufacture, and any kit priced suspiciously low (under $15 for a complete rebuild kit is a red flag). Check user reviews for complaints about parts not fitting or engines running poorly after installation.
For trusted, high-quality carburetor repair kits and parts, visit our JLM Marine carburetor repair kit collection.
Ethanol Fuel and Long-Term Carburetor Maintenance
Ethanol-blended fuel is the leading cause of carburetor failure in stored engines. Ethanol attracts water, and the mixture separates in the float bowl, corroding jets and passages. Over time, the ethanol also breaks down into varnish that clogs everything.
If you store your Yamaha 9.9 for more than 30 days, drain the float bowl. There's a small brass drain screw on the bottom of the bowl—loosen it with a flathead screwdriver and catch the fuel in a container. Retighten it once fuel stops dripping. Some mechanics also recommend running the engine dry by turning off the fuel valve and letting it run until it stalls, but we've found this can leave the needle valve stuck open.
Use ethanol-free fuel if available, or add a fuel stabilizer like Yamaha Fuel Stabilizer or Gas Shok to every tank. According to advice on the Yamaha Outboard Parts forum, mechanics who rely on ultrasonic cleaning see a much higher success rate than the "50% shop success" statistic often cited—most failures stem from improper cleaning technique or using the wrong chemicals, not from the carburetor being unsalvageable. Draining the bowl and using stabilizer eliminates most of the problem before it starts.
For more tips on protecting your engine in saltwater, don’t forget to perform a daily engine flush for saltwater boats to prevent corrosion.
Parts Availability for Obsolete Yamaha 9.9 Models
Van's Outboard Parts and specialty suppliers maintain inventory of hard-to-find components for older Yamaha outboards, including discontinued jets priced at $10-45 each when available. However, many parts for 1980s models like the F9.9SG are listed as "unavailable" even from these sources.
For components like the pilot jet (6G8-14342-24-00) or main nozzle (6G8-14341-20-00), the most reliable solution is adapting compatible parts from later models or using Mikuni generic jets with the correct thread and orifice specs. Crowley Marine and other US suppliers stock some of these cross-compatible items, but expect to verify fitment yourself—parts diagrams alone won't always show you which jets interchange.
When ordering, always provide your engine's complete model and serial number. The serial number plate is usually on the transom bracket or stamped into the engine block. A single digit difference in the model code can mean different carburetor internals. For help understanding your engine, see our Yamaha Outboard Serial Number Guide (2025).
We ship carburetor kits and assemblies directly from the factory to your location worldwide, typically arriving in 5-15 days. If a part isn't in stock, we'll tell you upfront and suggest the closest compatible alternative rather than leaving you waiting on a backordered item that may never arrive.
For a wider selection of parts and accessories, visit the JLM Marine main website hub.
Sources:
- https://www.readysetboat.com/yamaha-9-9hp-2-stroke-outboard-carburetor.html
- https://www.marineengine.com/boat-forum/threads/1985-9-9-can-i-use-different-carburetor.415785/
- https://continuouswave.com/ubb/Forum4/HTML/006765.html
- https://www.yamahaoutboardparts.com/forum/general-discussion/yamaha-outboard-forum/230963-convert-9-9hp-15-hp-2-stroke-failed
- https://ssimarine.co.uk/products/carburettor-repair-kit-yamaha-9-9hp-15hp-4-stroke-66m-w0093-01
- https://jlmmarine.com/products/carburetor-repair-kit-for-yamaha-9-9hp-15hp-2-stroke-6e7-w0093-04
- https://www.yamahaoutboardparts.com/forum/general-discussion/yamaha-outboard-forum/217569-upgrade-t9-9lpb-to-15hp-carburetor
- https://forums.iboats.com/threads/1988-yamaha-9-9hp-f9-9sg-carburetor-parts-issues.739261/
- https://www.youtube.com/watch?v=6pxdXasawh4
- https://www.youtube.com/watch?v=nj0Jr0kdLAw
- https://jlmmarine.com/blogs/outboard-101/outboard-carburetor-adjustment-and-tuning-for-optimal-performance
After every saltwater run, connect a flushing muff to your lower unit and run fresh water through the cooling system for 10 minutes with the engine at idle—this prevents salt crystals from building up in the cooling passages and keeps your thermostat from seizing.
For Outboard Owners:
To assist you in maintaining and repairing your marine engines, we hope the following resources may be of use:
-
Carburetors from JLM Marine
-
Carburetor Rebuild Kits from JLM Marine
About JLM Marine
Founded in 2002, JLM Marine has established itself as a dedicated manufacturer of high-quality marine parts, based in China. Our commitment to excellence in manufacturing has earned us the trust of top marine brands globally.
As a direct supplier, we bypass intermediaries, which allows us to offer competitive prices without compromising on quality. This approach not only supports cost-efficiency but also ensures that our customers receive the best value directly from the source.
We are excited to expand our reach through retail channels, bringing our expertise and commitment to quality directly to boat owners and enthusiasts worldwide.
Carburetor Repair Kits on Sale
- $46.00
$55.00- $46.00
- Unit price
- per
- $18.13
$59.00- $18.13
- Unit price
- per
- $24.99
$29.00- $24.99
- Unit price
- per

- $19.50
$23.00- $19.50
- Unit price
- per
- $15.19
$32.00- $15.19
- Unit price
- per
- $11.39
$22.50- $11.39
- Unit price
- per

- $12.99
$15.00- $12.99
- Unit price
- per
- $9.99
$13.00- $9.99
- Unit price
- per

- $12.79
$15.00- $12.79
- Unit price
- per


- $15.99
$24.00- $15.99
- Unit price
- per

- $16.99
$20.00- $16.99
- Unit price
- per

- $19.99
$23.00- $19.99
- Unit price
- per

- $19.99
$23.00- $19.99
- Unit price
- per
- $14.72
$18.00- $14.72
- Unit price
- per
- $17.58
$23.00- $17.58
- Unit price
- per

- $15.99
$19.00- $15.99
- Unit price
- per

- $17.59
$13.00- $17.59
- Unit price
- per
- $27.50
- $27.50
- Unit price
- per
- $18.99
$16.00- $18.99
- Unit price
- per
- $44.99
$25.50- $44.99
- Unit price
- per