


Anti-Corrosion Tips for Winter Storage (Saltwater Boats)

After twenty years wrenching on outboards, I can tell you saltwater corrosion during winter storage ruins more boats than people think. You pull a boat out in spring and find the lower unit pitted like swiss cheese, electrical terminals green and crusty, or gel coat so oxidized it looks chalky. Most of this is preventable if you prep right before you winterize.
Saltwater is a conductor. It accelerates electrochemical reactions—that's corrosion in plain English. According to research on marine corrosion, saltwater corrodes metals up to ten times faster than freshwater. Aluminum alloys used in hulls and components corrode at roughly 0.1-0.2 mm per year when constantly exposed. That adds up. The white powder you see on aluminum is galvanic corrosion; orange streaks on steel fittings are ferrous rust; chalky haze on fiberglass is oxidation from salt and UV combined. Different problems, same root cause: salt residue left sitting during storage.
Winter storage amplifies the issue. Cold air holds moisture. If your boat has salt crystals on it when you store it, those crystals pull humidity out of the air—they're hygroscopic. That creates a micro-environment of moisture on metal surfaces even when the boat looks dry. In places like South Florida where humidity stays high, surface rust can appear in 1-3 months on unprotected metals. Electrical connections degrade in 3-6 months. Leave a boat neglected for a full year and you're looking at performance loss and expensive fixes.
Worldwide, marine corrosion costs exceed $2.8 billion annually. The U.S. Navy and Coast Guard alone face over $2.7 billion yearly from saltwater damage, according to surface metrology studies. For recreational boats, ignoring gel coat oxidation can cost $4,000 to $15,000 to restore properly. Compare that to $500-$1,500 per year on preventive detailing and protection. Proper anti-corrosion systems extend a boat's useful life by 40-50%. The math is simple.
Freshwater Flush Before Storage
This is non-negotiable. After your last saltwater trip of the season, rinse everything with fresh water. I mean everything: hull, deck, railings, rod holders, cleats, hinges, the engine cowling, and especially the lower unit and propeller. Use a garden hose with good pressure. Get into crevices around the rub rail, under the gunwales, and around the battery compartment hatches.
Salt doesn't rinse off easily once it dries and bonds to surfaces. If you let it sit for weeks while you prep other winterization tasks, you've already lost ground. The crystals form a hard crust that holds moisture against the metal or gel coat underneath.
For the engine, run fresh water through the cooling system. Use flush muffs that clamp over the lower unit water intakes. Turn the hose on before you start the engine—never run it dry even for a second. Let it idle for 10-15 minutes. If the engine has a flushing port, hook a hose directly to that. For inboards, connect to the raw water intake or sea strainer. Some guys use a salt-removing engine flush additive; it helps break down deposits inside the cooling passages. I've seen engines where salt built up so thick inside it restricted water flow and caused overheating even after flushing. Don't skip this. For detailed maintenance on cooling components, see our collection of cooling system parts.
After rinsing, dry what you can with microfiber towels or a blower. Pull drain plugs and tilt the engine to get trapped water out of the bilge and lower unit. Open hatches and storage compartments to air them out. Moisture left inside creates condensation during temperature swings.
Apply Protective Barriers
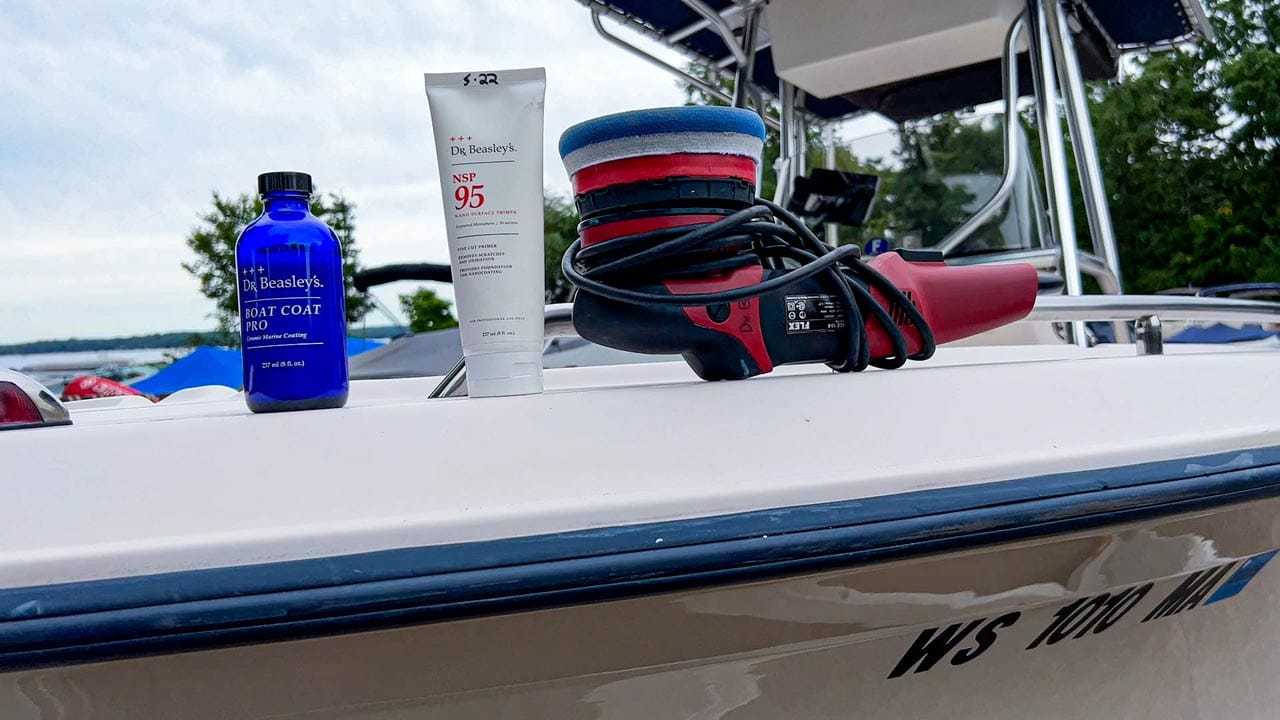
Once the boat is clean and dry, you need to seal surfaces. For the hull and gel coat, use a marine ceramic sealant or high-quality wax. Ceramic sealants bond at a molecular level and create a harder, more durable barrier than traditional wax. They last longer—some claim up to a year or more. Wax is cheaper and easier to apply, but you'll need to reapply every 3-6 months.
The process: work in sections, apply the product with a foam pad, let it haze according to the instructions, then buff it off with a clean microfiber towel. The surface should bead water aggressively. This hydrophobic layer makes it harder for salt, dirt, and moisture to stick during storage. It also makes spring cleaning easier.
For metal components—stainless rails, aluminum T-tops, outboard brackets—use a dedicated marine anti-corrosion spray. Some mechanics swear by products like Corrosion-X or CRC Heavy Duty. Spray it on, let it penetrate, and wipe off the excess. It leaves a thin film that displaces moisture. Don't forget hinges, latches, and trolling motor shafts.
Electrical connections need dielectric grease. It's non-conductive and seals out moisture. I pull apart battery terminals, wire connectors, and trailer plug connections, clean them with a wire brush if there's any green or white corrosion, then coat the metal parts with grease before reconnecting. This prevents the powdery buildup that kills electrical systems. If you see green powder, that's copper corrosion from moisture. White powder on aluminum connectors is oxidation. Both mean the connection is compromised.
Check your sacrificial anodes—zincs on outdrives, trim tabs, or hull. If they're more than 50% eroded, replace them before storage. Their job is to corrode instead of your expensive parts. A spent zinc is useless. I've seen props with deep pitting because the owner ignored a worn-out anode. New zincs are cheap; new stainless props are not.
Upgrading hardware? Explore corrosion-resistant product options in our boat accessories collection for marine-grade fittings and coatings to further protect your vessel.
Storage Location and Covers
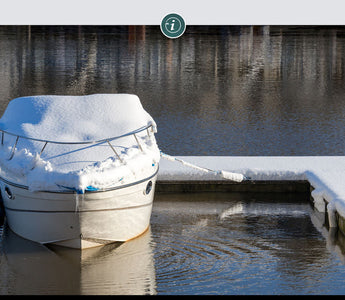
Where you store the boat matters as much as how you prep it. Ideal is indoor, climate-controlled dry storage. That eliminates exposure to rain, salt mist, humidity swings, and UV. Most of us don't have that option or can't afford it. Next best is a covered rack or canopy that keeps rain and direct sun off the boat but allows airflow.
If you're storing outside on a trailer, invest in a good boat cover. It has to be breathable—non-breathable covers trap moisture and create a sauna effect that accelerates mold and corrosion. Get a cover that fits snug with tie-down straps; a loose cover flaps in the wind and wears through. Make sure it's rated for UV resistance and designed for winter weather.
Support the cover with a frame or poles so water doesn't pool on top. Standing water eventually seeps through seams or soaks the fabric, dripping onto the boat. Elevate the boat off the ground if possible using blocks or a trailer. This improves airflow underneath and keeps the hull away from ground moisture.
For enclosed storage like a garage or shed, use a dehumidifier if the space is damp. We also use vapor corrosion inhibitor capsules in engine compartments, bilges, or cabins. These VCI emitters release a vapor that condenses on metal surfaces and forms an invisible protective layer. A Minnesota yacht owner wrapped his boat in MilCorr VCI film for winter storage and it came out of a harsh winter with no corrosion. That film seals the boat and continuously emits VCI. Capsules work on the same principle but for smaller spaces—they're good for 1-2 years.
Practical Sailor tested desiccants like calcium chloride for moisture absorption in stored boats. Over 90 days, the desiccant absorbed up to 5 pounds of water from the air, which would otherwise condense on cold metal. That's a cheap addition to your winterization kit.
Remove batteries and store them on a wooden rack or plastic shelf, not directly on concrete. Clean the terminals with a wire brush and baking soda solution, rinse, dry, then apply grease. Keep them on a trickle charger if possible. A dead battery can sulfate and fail permanently; a corroded terminal is a pain to clean come spring. For best battery care during the off-season, see our comprehensive guide on battery care during the off-season.
Material Choices for Long-Term Durability
If you're replacing hardware, fittings, or components before or during winter prep, use corrosion-resistant materials. For saltwater, 316 marine-grade stainless steel is the standard. It has higher molybdenum content than 304 stainless, which makes it far more resistant to pitting and crevice corrosion from chlorides. Industry sources confirm 316 stainless is built for marine environments. Cheaper stainless can still rust in saltwater—I've seen it.
For larger structural parts like fuel tanks, rails, or brackets, marine-grade aluminum alloys (5000 and 6000 series) are common. These alloys form a protective oxide layer, but they still need anodizing or coating in harsh environments. Aluminum is also vulnerable to galvanic corrosion if it contacts dissimilar metals without isolation. Use nylon or plastic washers between aluminum and stainless fasteners.
Bronze is traditional for propeller shafts and through-hulls due to its natural corrosion resistance and strength. It's heavier and more expensive than aluminum but holds up better in constant immersion.
For electrical wiring, use marine-grade tinned copper wire. The tin coating protects the copper from corrosion. Regular automotive wire will corrode quickly in a saltwater boat. Heat-shrink connectors with adhesive sealant are better than crimp connectors alone—they seal out moisture.
When sourcing parts, OEM components are reliable but overpriced. Non-OEM quality varies wildly. Some factories that manufacture OEM parts also produce non-OEM using the same tooling and specs—those are often indistinguishable in quality. Others cut corners with inferior materials. For example, JLM Marine manufactures parts to OEM specifications but sells them without the dealership markup. A cheap impeller kit from an unknown seller might use rubber that's too hard or the wrong size; you'll tear the motor apart again next season. It's not worth the headache. Browse OEM quality parts direct from factory for trusted marine engine components at the best price.
For dock lines, cleats, and anchors, use products specifically rated for marine use. We've supplied dock lines from manufacturers like JLM Marine that resist UV degradation and salt far better than generic hardware-store rope. The difference shows after one season outdoors.
Engine Fogging and Internal Protection

Fogging the engine is critical for winter storage, especially if you're in a climate with freeze-thaw cycles or high humidity. Fogging oil is a spray lubricant you shoot into the cylinders and carburetor or throttle body while the engine is running. It coats internal parts—cylinder walls, pistons, valves—with a protective film that prevents rust from forming when the engine sits idle.
The procedure: with the engine running at idle, remove the air intake or carburetor cover. Spray fogging oil into the intake while keeping the engine running. You'll see thick white smoke pour out the exhaust—that's normal. Keep spraying until the engine starts to bog down or stalls from the oil. That means the cylinders are coated. For two-strokes, you can also pull the spark plugs and spray directly into the cylinders, then crank the engine a few times by hand to distribute it. Reinstall the plugs.
For four-stroke outboards, change the oil and filter before storage. Old oil holds moisture, combustion byproducts, and acids that corrode internal parts over months of sitting. Fresh oil is cheap insurance.
Add fuel stabilizer to the tank and run the engine for a few minutes to get the treated fuel into the carburetor or fuel injection system. Untreated gas degrades, forms varnish, and clogs jets and injectors. Ethanol fuel is hygroscopic—it absorbs water—which leads to phase separation and corrosion in the fuel system.
For inboards and sterndrives, drain the raw water cooling system or add marine antifreeze to prevent freeze damage and corrosion. Follow the manufacturer's procedure—some systems have multiple drain points.
Grease all fittings on the outdrive, steering, and trim systems. Water pumps out, grease stays in. This keeps seals lubricated and prevents moisture intrusion.
For related steps on outboard winterizing, see our detailed guides on how to winterize your outboard engine step-by-step and Johnson/Evinrude off-season maintenance tips.
Regular Inspection During Storage
Don't just cover the boat in November and forget it until April. Check on it periodically, especially after heavy snow, ice, or rainstorms. Make sure the cover hasn't shifted or torn, that water isn't pooling, and that tie-downs are secure. If the boat is outside, brush snow off the cover before the weight causes it to sag or rip.
Open compartments and the engine cover on dry days to air them out. Look for condensation, mold, or musty smells. If you find moisture, wipe it down and consider adding more desiccant or a dehumidifier.
Inspect visible metal parts for early signs of corrosion: discoloration, white or green powder, orange rust streaks. Catching it early means you can treat it before it spreads. For example, if you see surface rust on a stainless rail, hit it with a rust remover or polish and reapply protectant.
Check battery voltage if you're storing them. A fully charged battery is less likely to freeze and sulfate. If you're not using a trickle charger, charge them once a month during winter.
Look at hoses, belts, and wiring for cracks, brittleness, or corrosion. Cold makes rubber stiff and can expose weaknesses. Replace questionable parts now rather than during spring commissioning when everyone else is doing the same and parts are backordered.
For boats stored in the water—wet slips or moorings—the challenges are different. You're fighting constant immersion, marine growth, and galvanic corrosion 24/7. Bottom paint helps with growth but doesn't stop corrosion. Zincs wear out faster and need checking every few months. Underwater metals like props, shafts, and through-hulls are at highest risk. If you have shore power connected, ensure your galvanic isolator or isolation transformer is working—stray current from the dock accelerates corrosion dramatically. I've seen boats lose props in a season from galvanic corrosion caused by faulty shore power grounds.
Pre-Spring Launch Checklist

Before you splash the boat in spring, reverse your winterization steps and do a thorough inspection. Remove the cover and air out the boat. Inspect for any corrosion, damage, or leaks that developed over winter. Clean any salt or grime that accumulated despite the cover.
Reinstall and reconnect batteries. Check terminals for corrosion again—clean and grease if needed. Test the battery voltage and charging system.
Change the lower unit gear oil. Water intrusion is common in outdrives and lower units, especially if seals aged over winter. The oil should be clean and honey-colored. If it's milky or grey, you have water contamination, which means a seal failed. Fix that before you launch or you'll grenade the gears.
Flush the fogging oil out of the engine by running it. It'll smoke heavily at first—that's the oil burning off. Check the water pump impeller. Impellers can take a set or crack if the engine sat dry all winter. A $20 impeller is cheaper than an overheated engine. We've seen impellers come out looking like hardened plastic instead of flexible rubber after a winter of sitting. For impeller options, visit our water pump impeller collection.
Check fuel for phase separation if you used ethanol gas. If there's water or separation visible, drain and refill with fresh fuel. Prime the fuel system and check for leaks.
Grease all fittings again, check fluid levels, inspect belts and hoses. Test all electrical systems: lights, pumps, gauges, electronics. Corrosion can cause intermittent failures that are hard to diagnose on the water.
Run the engine on muffs or a flushing port before launching. Listen for unusual noises, check the telltale pee stream, and make sure it reaches operating temperature without overheating. If something's wrong, you want to find out in the driveway, not three miles offshore.
Inspect the hull for blisters or damage. Check through-hulls and seacocks for corrosion or cracks—these can fail catastrophically if they corrode through. A Sitka, Alaska fisherman shares his annual winterization routine, emphasizing freshwater flushing with a salt-removing cleanser after oil changes and fogging the engine. He's kept his boat reliable for years with that simple checklist.
Launch, run the boat at idle in the slip or close to shore, and check for leaks, proper operation, and any issues before heading out. First trip of the season should be a shakedown, not a long offshore run.
Once you're confident everything works, enjoy the water. But after every saltwater use, rinse the boat and engine with fresh water. It takes ten minutes and saves thousands in repairs.
For more boat parts, repairs, and maintenance supplies for your saltwater boat, visit the JLM Marine homepage.
Sources:
- Legendary Marina: Preventing Saltwater Corrosion in Storage
- Zerust: Winter Boat Storage to Reduce Rust and Corrosion
- EZ Detail: What Saltwater Does to Your Boat
- Cortec VCI: Minnesota Winter Boat Storage Case Study
- Practical Sailor: High and Dry Winter Storage
- Pat Kruger: How Marine Systems Withstand Saltwater Corrosion
- Fish Sitka: Winterizing a Saltwater Fishing Boat
- Surface Metrology: Corrosion Studies
Hi—I’m Jim Walker
I grew up in a Florida boatyard, earning pocket money (and a few scars) by rebuilding outboard carbs before I could drive. That hands-on habit carried me through a Ph.D. in mechanical engineering, where I studied how salt water quietly murders metal.
I spent ten years designing cooling systems for high-horsepower outboards, then joined JLM Marine as CTO. We bench-test every new part in the lab, but I still bolt early prototypes onto my own 23-foot skiff for a weekend shake-down— nothing beats real wake and spray for finding weak spots.
Here on the blog I share the fixes and shortcuts I’ve learned so your engine—and your day on the water—run smooth.

For Boat Owners:
To assist you in maintaining and repairing your marine engines, we hope the following resources may be of use:
- Mercury Serial Number Guide
- Owner's Manuals from Mercury
- Official Model Number Reference Guide PDF from BRP
- Johnson Serial Number Guide
-
Boat Accessories from JLM Marine
About JLM Marine
Founded in 2002, JLM Marine has established itself as a dedicated manufacturer of high-quality marine parts, based in China. Our commitment to excellence in manufacturing has earned us the trust of top marine brands globally.
As a direct supplier, we bypass intermediaries, which allows us to offer competitive prices without compromising on quality. This approach not only supports cost-efficiency but also ensures that our customers receive the best value directly from the source.
We are excited to expand our reach through retail channels, bringing our expertise and commitment to quality directly to boat owners and enthusiasts worldwide.
Boat Accessories on Sale
- $54.00
- $54.00
- Unit price
- per
- $38.50
- $38.50
- Unit price
- per
- From $39.13
$45.50- From $39.13
- Unit price
- per
- $53.50
- $53.50
- Unit price
- per
- From $54.00
- From $54.00
- Unit price
- per

- $34.50
- $34.50
- Unit price
- per
- $45.00
- $45.00
- Unit price
- per
- $23.50
- $23.50
- Unit price
- per
-
Red
-
Blue

- $34.50
- $34.50
- Unit price
- per
- $54.00
- $54.00
- Unit price
- per
- $54.00
- $54.00
- Unit price
- per
- $32.00
- $32.00
- Unit price
- per
- $40.00
- $40.00
- Unit price
- per
- $22.80
- $22.80
- Unit price
- per
-
Red
-
Blue

- $22.80
$27.00- $22.80
- Unit price
- per

- $31.50
- $31.50
- Unit price
- per
- $22.80
- $22.80
- Unit price
- per
-
Red
-
Blue
- $54.00
- $54.00
- Unit price
- per


- $59.00
- $59.00
- Unit price
- per

- $32.00
- $32.00
- Unit price
- per