


Off-Season Outboard Maintenance Checklist
- When to Start Your Off-Season Prep
- Fuel System: Stop Breakdowns Before They Start
- Engine Oil and Filter (4-Stroke Essentials)
- Fogging and Internal Protection
- Gear Lube and Lower Unit
- Cooling System and Grease Points
- Battery Care and External Protection
- Tools and Supplies You'll Need
- Parts: OEM vs Aftermarket
- Disposal of Old Fluids
- Spring Startup Reminder
- Not a DIY Person?
You don't want to pull up to the ramp in April only to find your engine won't start. Most spring failures aren't from wear—they're from skipping off-season prep. According to industry data, 25 to 35% of spring repair work comes directly from poor winterization, not defects or normal use.
When to Start Your Off-Season Prep
Get this done in October or November, before the rush. Waiting until February means you're fighting for shop time with everyone else who procrastinated. You'll be staring at a six-week backlog while the weather turns nice.
Fuel System: Stop Breakdowns Before They Start

Stale fuel gums up carbs and injectors faster than anything else. Here's the fix:
Add Stabilizer and Top Off the Tank
Pour marine fuel stabilizer into your tank. If you have a vented tank, fill it to 95%—leaving 5% headspace allows for thermal expansion without overflow, while minimizing the tank wall surface where condensation forms. Run the engine 10-15 minutes so the stabilizer cycles through the entire fuel system, including the carburetor or injectors.
Replace the Fuel Filter
Swap out the inline fuel filter. Also check or replace your water-separating fuel filter canister if your engine has one—these are standard on most modern outboards and catch debris the inline filter misses. For reliable replacement parts, browse our selection of fuel filters to ensure the best fit for your motor.
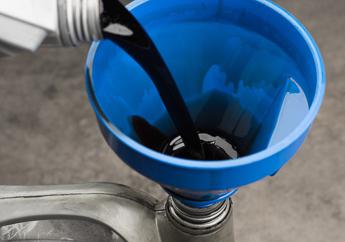
Engine Oil and Filter (4-Stroke Essentials)
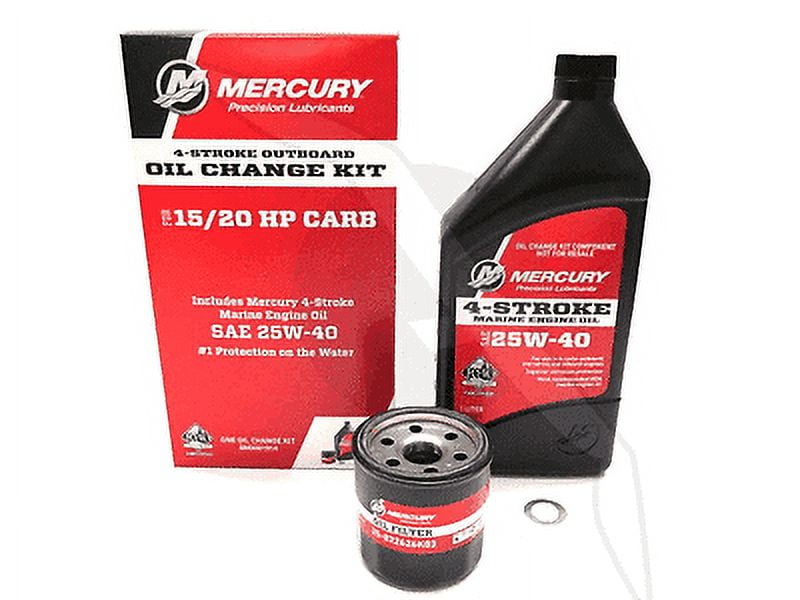
Old oil holds acids and combustion junk that eat metal when the engine sits. Change oil and filter every 100 hours or once per season, whichever comes first, even if you barely ran the motor. After filling with fresh marine-grade oil (check your manual for the exact spec), run the engine a few minutes to circulate it and watch for leaks around the new filter. Don't skip this—we've pulled engines with seized rings because someone thought old oil was "good enough."
Fogging and Internal Protection

Fogging stops rust from forming on cylinder walls while the engine sits dormant.
Conventional Two-Stroke Engines
Pull the spark plugs and spray a heavy shot of fogging oil into each cylinder. Crank the engine a few times by hand to spread the oil, then install new plugs gapped to spec. Don't reuse old plugs.
DFI Two-Stroke Engines
Standard fogging spray harms the injectors. Use DFI outboard oil instead—inject about one ounce into each cylinder. The injectors can't handle aerosol propellant, which is why you need the liquid oil.
Torque Warning
Consult your owner's manual for spark plug torque specs. Over-tightening into an aluminum head will strip the threads, and that's an expensive fix.
Gear Lube and Lower Unit

Water intrusion here will crack your gearcase when it freezes. It's also one of the most common issues we see.
Drain and Inspect
Pull the lower drain plug and let the old lube drain into a pan. If it's milky, you've got water in there—that means a bad seal. If it smells like burnt popcorn, your gears are already hurt. Either way, you need to address it before spring.
Refill from the Bottom
Use a gear lube pump and fill from the lower drain hole until fresh lube comes out the top vent. Then button it up, bottom plug first, then top.
Inspect the Prop and Shaft
Pull the propeller. You'd be surprised how much fishing line wraps around the prop shaft and cuts into seals. While it's off, grease the shaft liberally before reinstalling. This keeps it from seizing to the hub over the winter.
Cooling System and Grease Points
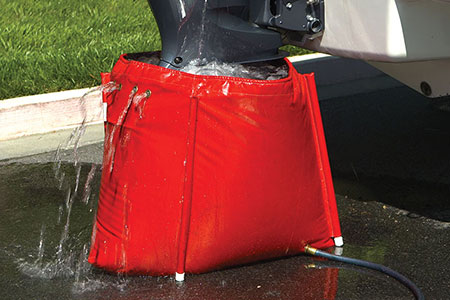
Flush with Fresh Water
Hook up your earmuffs or flush adapter and run fresh water through the engine for 10 minutes. This clears out salt, sand, and debris stuck in the cooling passages. For saltwater boats, consider using a descaling product like Salt-Away in addition to plain fresh water—salt crystals are aggressive even after a flush. You can also find quality parts to maintain your cooling system at our cooling system collection.
Never Run Dry
Do not run the engine without water supply connected. You'll destroy the impeller in seconds. We've seen it happen more times than we care to count. Make sure your water pump impeller is in good condition by reviewing our guides such as How to Replace a Mercury Outboard Water Pump Impeller.
Grease the Zerks
Find every grease fitting on the steering linkage, throttle cables, and tilt/trim pivots. Hit them all with marine grease. These points seize up if ignored.
Check the Anodes
Inspect your sacrificial anodes (zincs). If they're more than 50% gone, replace them. They corrode so your engine block doesn't.
Verify Trim Fluid
Pop the trim reservoir cap and check the fluid. It should be bright red and at the proper level. If it's dark or smells burnt, something's wrong in the hydraulic system.
Battery Care and External Protection
Remove and Store the Battery
Pull the battery out. Clean the terminals with a wire brush. If it's a serviceable type, check the water levels and top off with distilled water. Store it on a maintenance charger in a cool, dry spot—not directly on a concrete floor if the temperature swings wildly, as cold kills batteries faster than anything.
Coat Everything
Spray a corrosion inhibitor on the powerhead and lower unit. After flushing, give the powerhead a light shot of fogging oil or corrosion spray down the intake before storing. It adds another barrier against moisture.
Touch Up Paint
Any nicks or scratches in the paint are rust waiting to happen. Hit them with touch-up paint now.
Store It Right
Trim the engine all the way down or to the vertical position so any remaining water drains out completely. Don't leave it partially trimmed—water will pool.
Tools and Supplies You'll Need
Get this together before you start:
Hard Tools:
- Socket set and wrenches
- Spark plug socket
- Oil filter wrench
- Gear lube pump
- Marine grease gun
- Earmuffs or flush adapter
Consumables:
- Marine-grade engine oil (4-stroke)
- Oil filter (4-stroke)
- Fuel stabilizer
- Fuel filter (inline and water separator)
- Fogging oil (or DFI oil for DFI engines)
- Gear lube
- Spark plugs
- Marine grease
- Corrosion inhibitor spray
- Touch-up paint
Estimated Time: 2–4 hours depending on your engine size and how thorough you are.
Parts: OEM vs Aftermarket
You'll need to buy filters, plugs, and fluids. OEM parts are fine—reliable quality—but you're paying extra for the logo on the box. Cheap no-name aftermarket stuff is a gamble. We've seen $10 water pump kits with rubber so hard it won't seal, and you'll be tearing the lower unit apart again in a month.
The smart move is quality aftermarket from a reputable supplier. Some factories that produce OEM parts also make aftermarket versions during off-peak capacity, and the quality is nearly identical. JLM Marine is a good example—you get factory-spec quality without the dealership markup. It fits right, lasts, and doesn't burn a hole in your wallet. Explore the full range of inboard & outboard motor parts to find everything you need.
Disposal of Old Fluids
Don't dump used oil or gear lube. Most auto parts stores and marinas accept used motor oil for recycling. Gear lube often goes in the same waste oil container, but confirm locally. The job isn't done until the waste is handled properly.
Spring Startup Reminder
Tape a note to your steering wheel listing what you did: "Battery removed. Oil changed. Fuel stabilized." Six months from now, you won't remember, and you don't want to flood a fogged engine or forget to reconnect the battery.
Not a DIY Person?
Print this checklist and hand it to your mechanic. Ask them to confirm each item is covered. It keeps everyone on the same page and ensures nothing gets skipped.
After every ride, even in-season, hit your outboard with a quick freshwater flush. It takes five minutes and stops salt from building up in the cooling passages, which means your thermostat won't seize and your impeller will last longer. For detailed instructions, see our guide on how to winterize your outboard motor.
For more expert tips, parts, and guides on marine engine care, visit the JLM Marine homepage.
Sources: