


Fogging Your Engine for Winter: Why and How
- Why You Need to Fog
- What Fogging Oil Actually Does
- Which Engines to Fog—and Which to Avoid
- Step-by-Step: How to Fog Through the Intake
- Optional Step: Fogging the Cylinders Directly
- What to Do If You Have a Diesel
- Other Storage Methods and Why They Fall Short
- Why We Use Foggit in the Shop
- Spring Startup: What to Expect
- The Real Cost of Skipping This
- Making It Part of Your Routine
Look, I've been wrenching on outboards for 20 years now, and I can tell you the number one thing that kills engines over winter isn't wear from running—it's sitting idle. Moisture gets inside, condensation forms on the cylinder walls, and by spring you've got rust pitting that'll score those cylinders the second you fire it up. That's where fogging oil comes in.
Why You Need to Fog
When your engine sits cold through winter, temperature swings pull humid air into the cylinders. That moisture condenses on bare metal—pistons, rings, cylinder walls, valve stems. In the US, especially in the Midwest, Northeast, and coastal areas, this is guaranteed. You get freeze-thaw cycles inland, salt air on the coasts, and humidity everywhere in between.
Without protection, surface rust starts within weeks. Cast iron cylinder walls pit first. Piston rings can seize to the walls. Valves stick in their guides. I've seen engines that looked fine from the outside come in for spring service with cylinders that needed a full rehone—sometimes overbore—because the owner skipped fogging. A midsize outboard rebuild runs $2,500 to $4,500. A can of fogging oil costs maybe fifteen bucks.
According to marine industry data, roughly 25-35% of the spring repair work we see stems from improper winter storage, and a big chunk of that is corrosion from unfogged engines. That's preventable money walking out the door.
What Fogging Oil Actually Does
Fogging oil is a heavy petroleum-based lubricant in an aerosol can. You spray it into a running engine's intake, and it gets pulled through the combustion chamber, coating everything it touches—cylinder walls, piston crowns, rings, valve faces, and stems. The oil doesn't just sit on top; it clings. That's the key difference from regular motor oil or fuel additives.
When you shut the engine down after fogging, that coating stays put for months. Moisture can't reach the metal. Instead of water sitting on bare steel, it beads up on an oil film. No contact, no rust.
Compare that to just running the engine once a month. Sure, you're circulating oil, but you're not coating the upper cylinder walls where the rings don't reach at idle. You're also introducing new moisture every time you start it cold. Fuel stabilizers keep your gas fresh—they do nothing for internal protection. Products like Sea Foam or Marvel Mystery Oil have their place for cleaning and light lubrication, but they're not formulated with the same film strength or cling time as dedicated fogging oil. Marvel's been around forever and works great as a fuel additive, but it won't leave the thick, tacky barrier you need for six months of storage.
If you're curious about keeping your engine and fuel system in top shape over time, understanding how fuel additives protect components is just one piece of that puzzle. For more on fuel care, see our guide on Fuel Additives Showdown: Do Cleaners and Stabilizers Work?
Which Engines to Fog—and Which to Avoid

Most traditional carbureted gasoline engines are perfect candidates. That includes older outboards, stern drives, carbureted car and truck engines, motorcycles, ATVs, lawn equipment, generators, anything with a carburetor or older throttle-body fuel injection.
Do not fog diesel engines through the intake. This is critical. Diesel engines can use oil as fuel. If you spray fogging oil into a running diesel's air intake, the engine can run away—revving uncontrollably, unable to be shut off with the key because it's burning the oil you just gave it. It's dangerous and can destroy the engine. If you need to store a diesel, use a fuel additive designed for diesel storage or consult the manual for the correct procedure.
Modern gasoline direct-injection (GDI) engines need caution too. These engines have fuel injectors that spray directly into the cylinders, and they often have sensitive mass airflow (MAF) sensors positioned right in the intake tract. Spraying oil near a MAF sensor can foul it, leaving an oily film that throws off the sensor's readings and triggers a check engine light. If your car has a GDI engine, check the owner's manual first. Some manufacturers say it's fine if done carefully; others advise against it. If you do fog a GDI engine, locate the MAF sensor—usually right after the air filter housing—and avoid spraying directly at it. You can remove the sensor temporarily or spray downstream of it if possible.
Also watch out for engines with catalytic converters. Some fogging oils can leave residues that damage cats over time. Make sure the product label specifically says it's safe for use with emission control systems. If it doesn't say, don't use it.
Always read the can. The manufacturer will list compatible engine types and any warnings.
If you're interested in the differences in engine types and how to maintain them, take a look at our blog on Old Carbureted vs. New EFI Outboards: Is It Time to Upgrade? for insights.
Step-by-Step: How to Fog Through the Intake

This is the main method. You'll need fogging oil (the aerosol can with the red extension straw), a few rags, and maybe a screwdriver or socket set depending on your air intake setup.
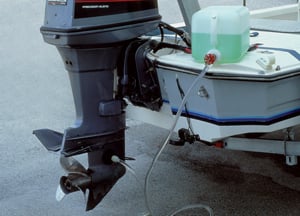
Prep the engine:
Run it for 5-10 minutes until it's fully warmed up to normal operating temperature. For an outboard, hook up the muffs or have it in a tank with water circulating. For a car, just let it idle in a well-ventilated area—outside, garage door open.
Add fuel stabilizer to the tank before you start if you haven't already, and let it run long enough to get that treated fuel through the whole system.
Access the intake:
On a carbureted engine, remove the air cleaner housing or the flame arrestor on top of the carburetor. You want a clear shot into the throat of the carb.
For a fuel-injected engine, you'll usually remove the intake tube between the air filter box and the throttle body, or pull off a cover to expose the throttle plate. Some modern cars make this a pain—lots of plastic clips and clamps. Just take your time. If there's a MAF sensor in the way, either carefully work around it or disconnect it and remove it temporarily.
For detailed help on carburetor servicing and access, check out our Yamaha Outboard Carburetor Rebuild Tutorial which covers related parts and maintenance techniques.
Spray the fogging oil:
With the engine idling—try to keep it around 1,100-1,200 RPM if you can bump the throttle a bit—start spraying short bursts of fogging oil into the intake opening. Don't just hold the trigger down and flood it. Short bursts, maybe one to two seconds at a time.
You'll see thick white smoke start pouring out of the exhaust almost immediately. That's the oil burning off as it goes through the combustion chamber. It's normal and exactly what you want. The smell is strong and oily—you'll know it when you smell it.
Keep spraying in bursts. The engine will start to stumble and choke as more oil floods in. That's fine. You're trying to get enough oil in there to coat everything and eventually stall the engine. The goal is to kill it with fogging oil, leaving the cylinders full of that protective mist.
After 30-60 seconds of heavy smoking, the engine should stall out on its own. If it doesn't after a couple minutes, you can manually shut it off, but ideally you want it to die from oil saturation.
A tip from the shop: Tape or zip-tie the red extension straw to the can if it's loose. I've seen those straws shoot off the can and disappear into an intake manifold more than once. Not fun to fish out.
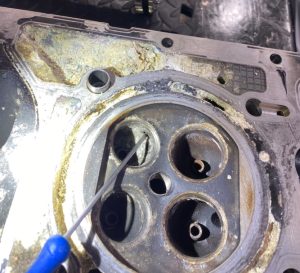
Optional Step: Fogging the Cylinders Directly
For engines stored longer than six months, or high-performance engines you really want to baby, add this step. It's more involved but gives you better coverage.
Once the engine has stalled, shut off the fuel supply if you can (turn the petcock, pull the fuel pump fuse, whatever applies). Let it sit for a minute to cool slightly.
Remove the spark plugs:
You'll need a spark plug socket—usually 5/8" or 13/16" depending on the engine. Pull all the plugs out and set them aside on a rag in order so you remember which cylinder they came from.
Spray into each cylinder:
Stick the extension straw from the fogging oil can into each spark plug hole and give it about a one-second spray—roughly one ounce per cylinder. You don't need to drown it, just coat the walls.
Distribute the oil:
Now you need to rotate the crankshaft to spread that oil around the cylinder walls. On a car or truck, disable the ignition system first. Pull the fuel pump fuse and the ignition coil fuse, or disconnect the coil wire if it's an older vehicle. Check your fuse box lid or owner's manual—it'll say which fuse is which. If you don't disable the ignition and you crank it over, you risk trying to fire the engine with raw fuel or oil in the cylinders, which can hydraulic-lock it or cause a backfire.
Once disabled, bump the starter for two or three seconds. That'll rotate the crank and spread the oil. On a motorcycle or small engine, you can sometimes just turn the crank by hand with a socket on the crank pulley bolt.
For outboards, you can usually turn the flywheel by hand or use the starter with the kill switch engaged.
Reinstall the plugs:
Wipe off any excess oil from the plug threads, then screw them back in. Torque them to spec—usually around 18-25 ft-lbs for most engines, but check your manual. Overtightening can strip the threads in an aluminum head; undertightening can cause a compression leak or let the plug blow out.
What to Do If You Have a Diesel
Since you can't fog a diesel through the intake, here's what you do instead: use a diesel-specific storage additive in the fuel, and make sure you change the oil right before storage with fresh oil and a quality filter. Some guys will pull the glow plugs or injectors and spray a small amount of diesel-rated fogging oil or straight motor oil into each cylinder, then rotate the engine by hand. That works, but it's more involved. Check your engine's service manual for the manufacturer's recommendation. For most light-duty diesels stored in a garage, fresh oil and a fuel additive is usually enough. If it's stored outside or for over a year, consider the direct-cylinder method.
Other Storage Methods and Why They Fall Short

Some folks try to get by with just starting the engine once a month. The idea is you're burning off condensation and circulating oil. In practice, it's hit or miss. A cold start introduces moisture into the exhaust and crankcase. If you don't run it long enough to get everything up to full temp—at least 15-20 minutes—you're just making it worse. And even then, you're not coating the upper cylinder walls the way fogging does.
There are also combination products like Sea Foam that you can spray into the intake. Sea Foam's great for cleaning carbon and varnish, and it does leave a light oil film, but it's not as thick or long-lasting as a dedicated fogging oil. It's more of a cleaner than a protectant. You can use it as part of your storage routine, but I wouldn't rely on it alone for a full winter.
Marvel Mystery Oil added to the fuel has a similar story—good for keeping injectors and carbs clean, light lubrication, but not the heavy-duty film you need to prevent rust for months on end.
Bottom line: if you're storing an engine for more than a month in any kind of unheated or outdoor environment, fogging oil is your best bet. It's cheap, it's fast, and it works.
Why We Use Foggit in the Shop
We stock and recommend Foggit Fogging Oil for customers who want the best protection, especially for high-performance or expensive engines. Full disclosure: we sell it, but we also use it ourselves on race engines and customer builds. The formulation is designed for extreme protection—thicker film, better cling, longer-lasting barrier.
Mike DeVore, a racer we work with, had a bare block come back from the machine shop. He sprayed it with Foggit, bagged it up, then had a health issue that delayed the build for three months. When he unwrapped it, the block looked like it had just been machined—no surface rust, no staining. He's been using it on his class and bracket cars ever since.
Another example from Hutira Motorsports: they fogged their race engine for winter using the intake method, then pulled the plugs and added more oil directly to the cylinders. Sealed up the headers, stored it in the shop. Spring came, they reinstalled the rockers, set the lash, dropped in fresh plugs, and it fired right up. No stuck valves, no scoring, no issues.
For a lawn mower or a beater outboard, any quality fogging oil will do the job. For a built motor, a classic car, or anything you've dumped serious money into, we go with Foggit. The cost difference is a couple bucks, and the peace of mind is worth it.
That said, any fogging oil is better than none. If you've got a can of the generic stuff from the auto parts store, use it. Don't skip the step just because you don't have a premium brand.
Spring Startup: What to Expect 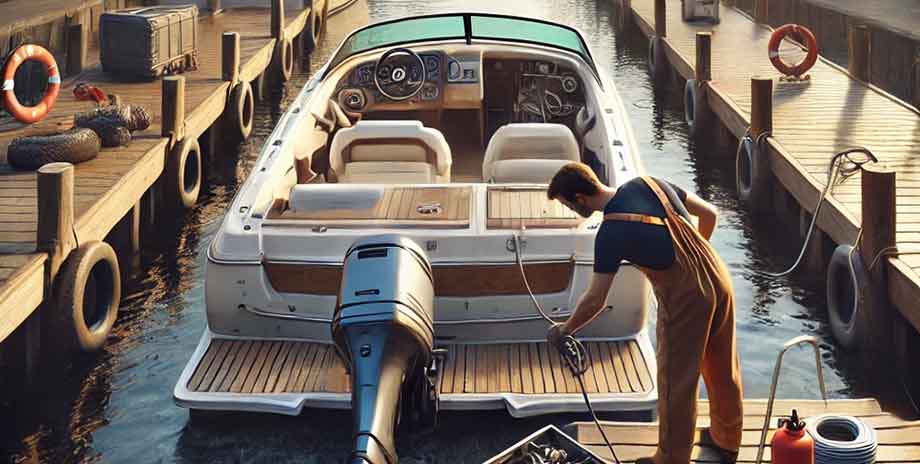
When you go to fire up a fogged engine in the spring, expect some smoke. It'll puff white for the first 30 seconds to a minute as the residual fogging oil burns off. Totally normal. Let it run and clear out.
If you fogged the cylinders directly, you might want to use an old set of spark plugs for that first startup. The plugs can get fouled from the oil. Run it for a few minutes, let it smoke, then shut it down and swap in a fresh set if needed. Check the old ones—if they're just oily but otherwise fine, you can clean them and reuse them later.
Before you start, do a quick walk-around. Reinstall the air filter or intake components you removed. Check the oil level. Make sure the battery is charged. If you drained the cooling system, refill it. On an outboard, reconnect the fuel line and prime the bulb.
Once it's running, let it warm up fully and check for any leaks or weird noises. After the initial smoke clears, it should run exactly like it did before storage.
If you're doing a full winterization, consider combining fogging with other steps like changing oil and flushing. Our comprehensive guide on How to Winterize Your Outboard Engine (Step-by-Step) covers all essential storage prep.
The Real Cost of Skipping This
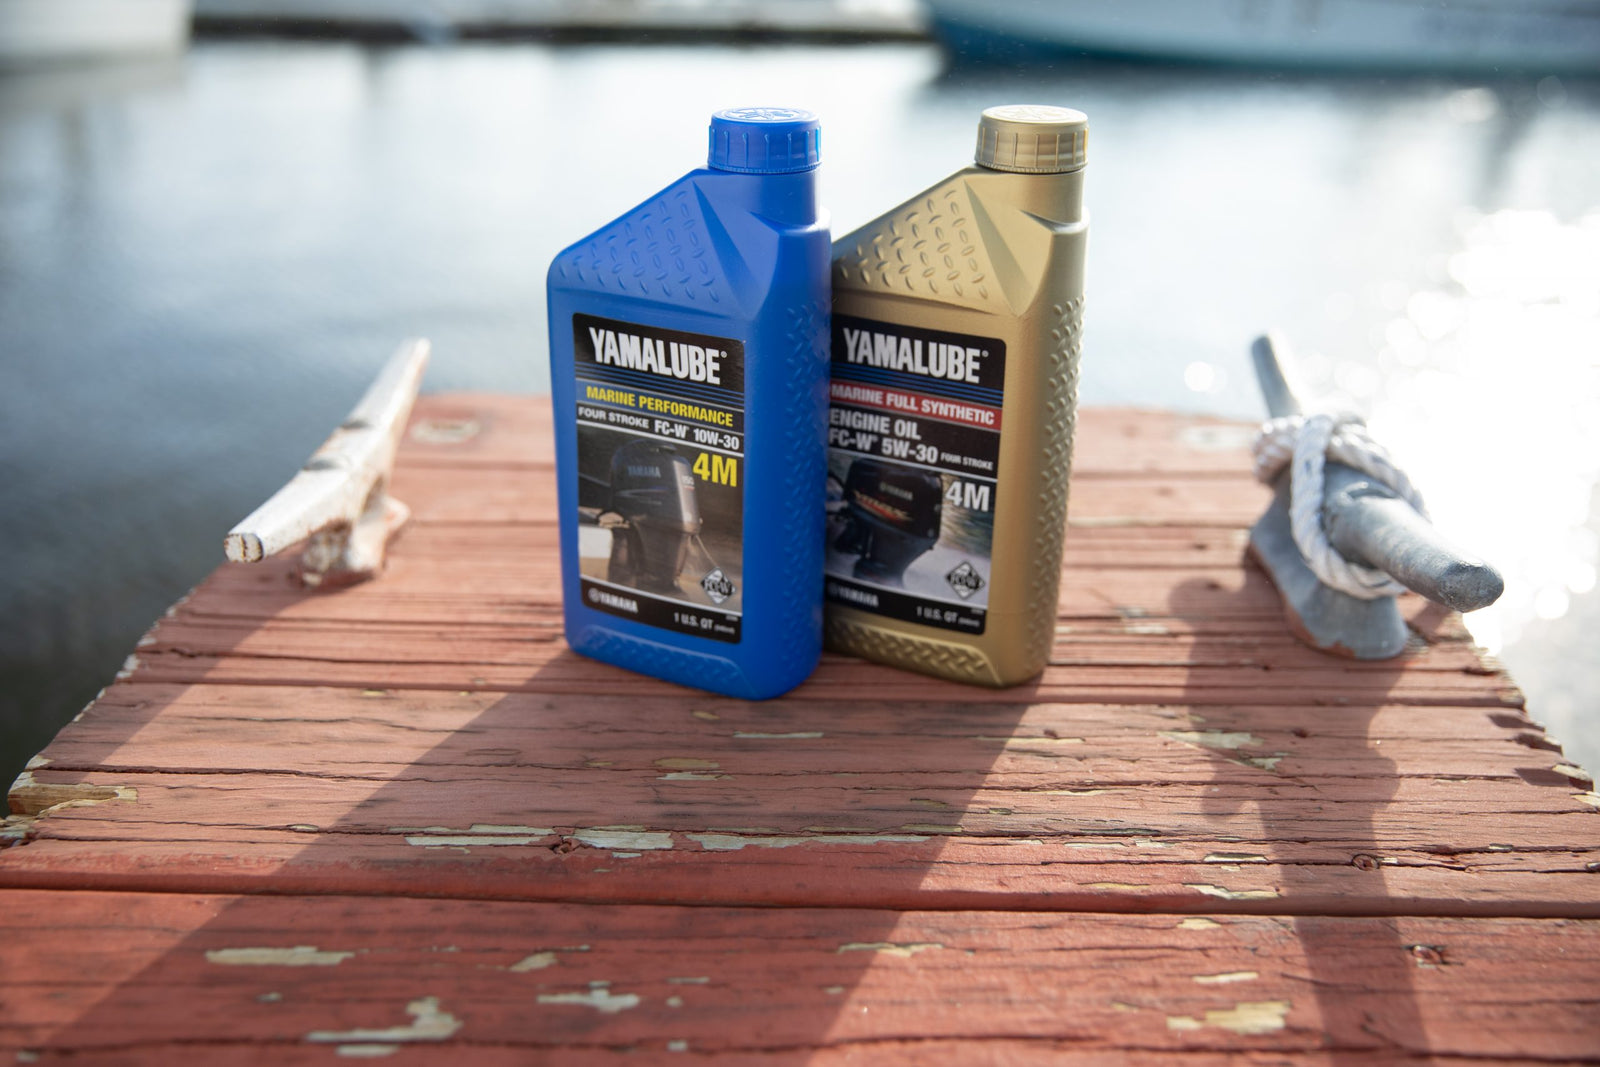
I had a customer bring in a Yamaha four-stroke outboard last spring. He'd stored it all winter in an unheated barn, didn't fog it, didn't even run stabilizer through the fuel. When we pulled the head, the cylinder walls had rust pitting you could catch a fingernail on. The rings were stuck. We ended up boring the cylinders over and fitting new pistons, new rings, full valve job. The bill was just under four grand. A can of fogging oil would've been twelve bucks and fifteen minutes of work.
That's not a scare tactic. That's real. We see it every year. The engines that get fogged come back fine. The ones that don't, we're either rebuilding or the owner's trading them in at a loss.
Making It Part of Your Routine
Fogging should be as automatic as changing your oil or flushing the cooling system. If you're putting the boat away for winter, it's part of the winterization checklist. Same for a motorcycle, a classic car, a race engine, whatever. It's not optional; it's maintenance.
At the same time you fog, do the rest of the storage prep: change the engine oil and lower unit oil (for outboards), add fuel stabilizer and top off the tank to minimize air space, pull the battery and put it on a tender, grease all the fittings, flush the cooling system if it's raw-water cooled. The whole process takes maybe an hour, and your engine will be ready to go when you are.
Don't overthink it. Warm it up, spray it until it stalls, maybe pull the plugs and add a bit more if you're feeling thorough, button it back up, and you're done.
For more details on the full process and tips on flushing the cooling system and drain plugs, see the Yamaha Outboard Winterization Guide.
Daily tip: After every ride, give your outboard a freshwater flush—especially if you're in saltwater. Run it on the hose or muffs for five minutes. Keeps the cooling passages clean and prevents salt buildup that'll corrode the water pump housing and thermostat. Do that all season, and you'll have a lot less headache come winterization time.
For parts and quality accessories to help maintain your outboard through every season, browse the Boat Accessories collection and the extensive Inboard & Outboard Motor Parts collection at JLM Marine.
For more articles and resources to keep your engine running strong year-round, visit our JLM Marine homepage.