


How to Winterize Your Outboard Engine (Step-by-Step)
You want your outboard to fire up every spring. If you're letting it sit all winter without proper prep, you're asking for trouble. I've seen engines come into the shop in April sounding like a bag of wrenches – cracked cylinder walls from frozen water, seized fuel systems, corroded internals. A proper winterization costs a few hundred bucks. A cracked engine block? Anywhere from $5,000 to over $24,000 to replace.
Why Winterize Your Outboard?
Freezing temps and months of sitting destroy engines. Water expands 9% when it freezes, generating up to 30,000-43,000 PSI – enough to crack blocks, manifolds, and plumbing. Stale fuel gums up carburetors and clogs injectors. Corrosion eats internal components. Even in warm climates like Texas and California – which lead the US in freeze-damage claims due to complacency – humidity and fuel breakdown cause major issues.
Professional winterization runs $300-$600. DIY costs about $80 in materials. Either way, it's cheap insurance.
DIY or Dealer?

Professional Service
Certified techs catch things you'll miss. Scott Klein, President of Wendt's Marine, explains: "When we are winterizing engines, we might see things that are wrong with them that our customers might not catch. It could be something minor, like a throttle or shift cable out of adjustment, but that can affect how the motor performs. We'll also check for bigger issues, like loose transom bolts or a bent propshaft."
Dealers use marine-specific fluids, know factory recalls, and warranty their work. Chad Taylor, owner and former certified tech at Taylor's Marina, points out: "Certified dealerships have technicians who are trained and certified in boat maintenance and winterization procedures. They have the knowledge and experience to ensure that your boat is properly winterized to protect it from cold weather damage and generally use the highest quality products."
Average dealer labor runs $130/hour, but you're paying for experience and a second set of eyes.
DIY Approach
If you're doing it yourself, get your owner's manual. Don't wing it. Your exact engine model determines oil capacity, torque specs, and whether you need specific procedures for DFI systems.
Tools and Supplies Checklist:
- Fuel stabilizer (marine-grade)
- Engine oil (FC-W rated for 4-stroke marine) and filter
- Gear lube (check manual for SAE 90 or 80W-90 spec)
- Fogging oil
- Marine grease and grease gun
- Corrosion inhibitor spray
- Flushing muffs (dual-ear type)
- Drain pan (at least 5-quart capacity)
- Oil filter wrench
- Gear lube pump
- Basic wrenches (typically 10mm, 12mm, 14mm for drain plugs)
- Spark plug socket (usually 5/8" or 13/16")
- Flathead and Phillips screwdrivers
For parts, we've found that high-quality aftermarket from manufacturers like JLM Marine gives you factory-spec quality without the dealership markup. OEM is reliable, sure, but you're paying a premium for the logo. Skip the $10 kits from random sellers – the rubber's too hard, fitment's off, and you'll be tearing into it again by mid-season.
Step-by-Step Winterization (Approx. 2 Hours)

1. Fuel System: Stabilization and Flushing
Stale fuel is the number one cause of spring headaches. Tim Hurney, Mercury Marine Dealer Team Lead, hammers this: "Most of the issues our dealers run into are caused by stale fuel. When possible, at the end of the season try to run your boat fuel tank almost empty and then add fresh fuel before storage. If the fuel in your tank is more than a month old and it's too late in the season to use it up, have it pumped it out and replace it with fresh fuel."
Ethanol-blend fuels are the worst for storage. Ethanol attracts water through phase separation – the ethanol literally pulls moisture out of the air and separates from the gasoline, settling at the bottom of your tank. That water-ethanol mix corrodes fuel systems and won't burn. Use ethanol-free fuel (REC-90) if you can get it.
Procedure:
- Burn off old fuel or pump it out.
- Fill tank 90-95% with fresh fuel (leaves expansion room).
- Add marine fuel stabilizer per bottle instructions.
- Hook up flushing muffs to lower unit intakes with fresh water running, or run in a barrel.
- Start engine, let it run 10-15 minutes at idle to fast idle. This circulates treated fuel through lines, vapor separator, fuel pump, and injectors/carbs.
- While running, replace fuel-water separator and primary fuel filter. Drain the separator bowl first (usually a thumb screw at bottom), then unscrew canister. Check for water or debris.
For replacement parts like fuel filters or fuel pumps, explore JLM Marine's fuel components for high-quality, direct-from-factory options.
2. Engine Oil and Filter Change (4-Stroke Only)
Old oil is acidic and full of combustion byproducts that corrode bearings and cylinder walls during storage. Change it warm so it flows out completely.
Procedure:
- Warm the engine (the fuel flush step does this).
- Locate the oil drain plug (usually on lower oil pan, sometimes on side of powerhead). Check your manual.
- Place drain pan underneath. Remove plug. Let it drain completely (5-10 minutes).
- While draining, remove the oil filter with a filter wrench. Expect oil to spill – have rags ready.
- Before installing the new filter, coat the rubber gasket lightly with fresh oil.
- Hand-tighten the new filter until the gasket contacts the mount, then turn an additional 1/2 to 3/4 turn. Don't over-torque.
- Reinstall drain plug with a new crush washer if your manual calls for it (typically Honda and some Yamahas). Torque to spec (usually 20-30 ft-lbs – check manual).
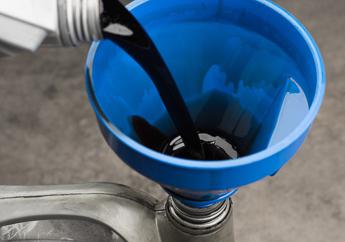
- Refill crankcase with the correct amount and grade of FC-W certified marine oil. Use a funnel. Typical 4-stroke outboards take 3-5 quarts depending on size.
- Critical step: Start the engine again. Let it run 2-3 minutes. Shut it off. Check for leaks around the filter and drain plug.
Tim Hurney warns: "After you change the oil, it's always a good idea to start the engine again, to circulate fresh oil through the engine and to check for leaks. It's not uncommon for the oil filter gasket to stick to the engine and, if it's not removed, oil can leak past the old gasket after a new filter is installed. I've seen engines ruined because the owner didn't notice engine oil leaking out past a doubled gasket."
For 2-Stroke Engines: No crankcase oil change needed. You'll be fogging the cylinders in the next step, which handles internal protection. If you have an oil-injection system, check the reservoir for water contamination (it'll look milky or separated). Top it off with the correct TC-W3 certified 2-stroke oil.
3. Fogging for Internal Corrosion Protection
Fogging oil coats pistons, rings, and cylinder walls with a protective film that prevents rust during storage.
For Conventional Carbureted Engines (2-Stroke and 4-Stroke):
- With the engine warmed up from previous steps, shut it off.
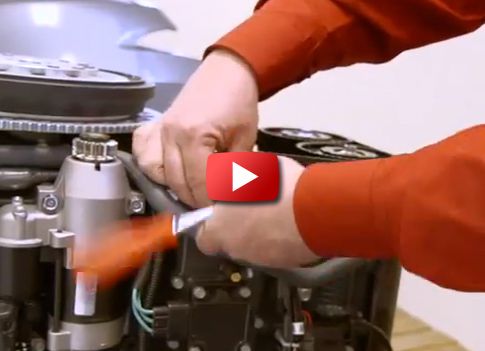
- Remove the engine cowling.
- Remove all spark plugs. Set them aside if they're in good shape (check gap, no heavy deposits), or replace them now if they're due (typically every 100 hours or annually).
- Spray fogging oil liberally into each spark plug hole. Use a full 2-3 second burst per cylinder.
- Alternatively, with the engine running at idle, remove the air intake cover and spray fogging oil directly into the carburetor throat while someone slowly revs the engine. Keep spraying until the engine dies from oil saturation (it'll smoke heavily – that's normal).
- Reinstall spark plugs. Hand-tighten, then snug with a spark plug socket (typically 15-20 ft-lbs, but finger-tight plus 1/4 turn works if you don't have a torque wrench). A little anti-seize on the threads helps for next season.
Considering spark plug quality and replacements? Check out high-performance options at JLM Marine's spark plug selection.
For Direct Fuel Injection (DFI) and EFI Engines – Critical Difference:
Do not spray fogging oil into the air intake on modern EFI/DFI engines. It can damage Mass Air Flow (MAF) sensors and throttle position sensors. Instead:
- Remove spark plugs.
- Spray fogging oil directly into each cylinder through the spark plug holes.
- Or, use a fogging adapter kit that attaches to a portable fuel tank with pre-mixed fogging oil and fuel, then run the engine until it dies.
Consult your manual. Some newer Mercury and Yamaha DFI models have specific fogging procedures or don't recommend fogging at all due to built-in corrosion protection.
4. Lower Unit Gear Lube Replacement
Water intrusion into your lower unit is a slow death sentence for gears and bearings. You're looking for milky oil when you drain it – that's water, and it means you've got a seal issue that needs fixing before spring.
Procedure:
- Locate the drain screw on the very bottom of the lower unit housing.
- Locate the vent/fill screw higher up on the side of the gearcase.
- Place a drain pan under the lower unit.
- Remove the vent screw first (this lets air in so the lube drains faster).
- Remove the drain screw. Let the old lube drain completely into the pan. Inspect it. Gear lube should be honey-colored to dark brown and translucent. Milky, creamy, or separated lube means water got in. Note the condition – you might need a seal replacement.
- Here's the critical part most guides get wrong: With both screws still out, insert the spout of your gear lube pump into the bottom drain hole.
- Pump new gear lube upward from the bottom hole. This forces any air bubbles out the top vent hole as the lube fills the case from the bottom up. Pumping from the top down traps air, which causes catastrophic gear failure due to lack of lubrication under load.
- Keep pumping until fresh, bubble-free lube flows steadily out of the top vent hole.
- Quickly reinstall the vent screw first (while lube is still oozing out) to prevent air re-entry.
- Remove the pump, then immediately reinstall the bottom drain screw. Use new washers if your manual specifies (Mercury and Yamaha usually include them in the lube bottle cap). Torque to spec (typically 10-15 ft-lbs).
Pro Tip: Use a new crush washer on the lower unit drain plug every single time. Reusing the old one is the number one cause of water intrusion I see in the shop.
For gear lube pumps, seals, and washers, browse JLM Marine's lower unit parts collection for OEM-quality replacements.
5. Propeller Shaft Inspection and Lubrication
While you're down at the lower unit, pull the prop.
Procedure:
- Remove the cotter pin or lock tab from the prop nut.
- Use a block of wood wedged against the prop blade to keep the shaft from turning, then loosen the prop nut with a socket (size varies – usually 24mm to 1-1/16").
- Slide the prop off the shaft.
- Inspect the shaft. Look for fishing line wrapped tight around the shaft behind the prop. Even a few wraps can cut into the rubber seal lip and cause water intrusion into the lower unit. Cut and remove all line.
- Check the prop hub for spun rubber (you'll see the inner hub rotated inside the outer rubber bushing if it's spun).
- Clean the shaft with a rag and solvent.
- Apply a coat of marine grease to the shaft splines or smooth shaft.
- Reinstall the prop, tightening the nut to spec (check your manual – usually 40-55 ft-lbs). Reinstall the cotter pin or tab lock.
Power Trim Fluid: Check the trim reservoir (usually on the engine's side or near the transom bracket). Top off with the correct ATF or trim fluid per your manual.
You can find marine grease, prop nuts, and cotter pins in the boat accessories section at JLM Marine for quality parts.
6. Sacrificial Anodes Inspection and Replacement
Anodes protect your engine from galvanic corrosion – they corrode instead of your expensive aluminum and steel parts.
Locations: You'll typically find anodes on the lower unit (near the cavitation plate and on the nose cone), on the powerhead (small button-style), and sometimes on trim tabs.
Inspection: If they're more than 50% eaten away, replace them. They're cheap (usually $5-$15 each). They bolt or screw on.
Anode Types:
- Zinc: Saltwater
- Aluminum: Brackish water or mixed salt/freshwater
- Magnesium: Freshwater only
Use the correct type for your environment. Mixing types reduces effectiveness.
7. Grease Points and Corrosion Protection
Find every grease fitting (zerk) on your engine. Common locations:
- Tilt tube pivot points (port and starboard)
- Steering arm pivot
- Tilt ram (if applicable)
- Shift linkage pivots
Procedure:
- Clean each fitting with a rag.
- Attach a marine grease gun loaded with marine-grade waterproof grease.
- Pump grease until you see a small bead of fresh grease squeeze out around the fitting. This purges old grease and water.
Corrosion Barrier:
- Spray a corrosion inhibitor (like Mercury Corrosion Guard or similar) liberally on all external metal surfaces: powerhead, lower unit, brackets, bolts, electrical connections. Hit everything that can rust.
- Wipe down any painted or polished surfaces to avoid buildup.
Marine grease and corrosion inhibitors are available in the boat accessories collection from JLM Marine for marine-grade protection.
8. Battery Removal and Storage
A dead battery in spring is almost guaranteed if you leave it in the boat all winter.
Procedure:
- Locate your battery (usually under a seat or in a compartment).
- Disconnect the negative cable first, then the positive. This prevents shorts.
- If the battery is serviceable (has removable caps), check the electrolyte level in each cell. The plates should be covered by about 1/4" of fluid. If low, top off with distilled water only (not tap water).
- Clean the terminals with a wire brush and baking soda solution if there's corrosion.
- Fully charge the battery with a marine battery charger.
- Remove the battery from the boat. Store it in a cool, dry location (ideally 40-60°F). A concrete floor is fine despite old myths.
- Keep it on a maintenance charger (also called a smart charger or float charger) all winter. These deliver a low trickle charge that prevents sulfation without overcharging or boiling off electrolyte. Avoid old-style "trickle chargers" that can overcharge.
9. Storage Position and Final Checks
Tilt the engine down vertically. This is critical. Tilting down allows any residual water in the cooling passages, exhaust ports, and midsection to drain completely. Water trapped in the powerhead can freeze and crack castings.
For most outboards, you don't need to run antifreeze through the cooling system if you've drained it properly. Tilt down, let it sit for an hour, then tilt it back up and down a couple times to shake out any remaining water. However, if you're in extreme cold (below 0°F consistently) or your manual specifies it, you can run marine-grade propylene glycol antifreeze (rated to -50°F or lower) through the cooling system via the flushing muffs until it exits the telltale/pee hole.
Pest Prevention: Mice love engine cowlings. They nest in air intakes and chew wiring. Place dryer sheets inside the cowling or use commercial rodent repellent pouches. Remove them before starting in spring.
Cover: Use a breathable engine cover or leave the cowling vented. Don't seal it up tight with plastic – condensation will form inside and cause rust.
For cooling system maintenance or parts like water pump impellers, see the cooling system collection at JLM Marine.
Warm Climate Considerations

If you're in Florida, Southern California, or Texas, you might think winterization is overkill. It's not. While freezing isn't a risk, fuel stabilization and corrosion protection are still vital. Humidity causes internal corrosion. Fuel still goes stale, especially ethanol blends. Follow the fuel, fogging, and lubrication steps. You can skip antifreeze and focus on drainage.
Disposal and Documentation
Waste Oil and Filters: Don't dump used oil or old filters in the trash. Most auto parts stores (AutoZone, O'Reilly) and marine service centers accept used oil and filters for recycling at no charge. It's EPA-required.
Documentation: Write the winterization date on a piece of tape and stick it inside your cowling. Note the hours on the engine. This helps you track service intervals.
Spring Commissioning Preview
When you're ready to fire it up next season, here's what you'll need to reverse or check:
- Reinstall battery (fully charged).
- Remove any rodent repellents from the cowling.
- Check fuel for separation or odor. Add fresh fuel if it sat more than 3-4 months.
- Visually inspect all fluid levels (oil, gear lube, trim fluid).
- Check for rodent damage to wiring or hoses.
- Reconnect any fuel lines or hoses you disconnected.
- Do a quick visual inspection of the lower unit, prop, and anodes.
- Fire it up on muffs first, check the telltale stream, let it warm, and confirm no leaks or odd noises before heading to the water.
After every ride, flush your engine with fresh water for 10 minutes, especially if you run in salt or brackish water. It takes five minutes and prevents 90% of the corrosion and salt buildup that'll eat your cooling passages and wreck your summer.
For more detailed weekly and seasonal outboard maintenance tips, be sure to visit our main resource hub at JLM Marine.
Sources:
- https://www.mercurymarine.com/us/en/lifestyle/dockline/how-to-winterize-your-outboard
- https://www.baymarine-sc.com/blog/do-i-really-need-to-winterize-my-boat-in-texas--102912
- https://www.ssmarina.com/blog/10-things-to-consider-before-winterizing-your-boat--63332
- https://seatow.com/how-to-winterize-outboard-motor/
- https://www.fawcettboat.com/blogs/articles/how-to-winterize-an-outboard-motor-a-step-by-step-guide
- https://www.yachtingmagazine.com/gear/winterizing-outboard-engines/
- https://club.benningtonmarine.com/threads/my-first-boat-winterization.12616/
- https://continuouswave.com/ubb/Forum3/HTML/014605.html
- https://www.nmma.org/press/article/25121
- https://www.epropulsion.com/news-media/electric-boating-blog/outboard-motor-winterization