


Replacing the Impeller and Fluids Before Summer
- When to Replace Your Impeller
- Signs Your Impeller Is Done
- How to Replace the Impeller: Step-by-Step
- Fluids to Change Before Summer
- DIY or Professional?
- OEM vs Aftermarket Impeller Kits
- What Happens If the Impeller Fails Underway
- Cost Breakdown: Prevention vs Repair
- Regional Considerations for US Boaters
- The Pre-Summer Maintenance Window

Your engine's overheating at the dock, or worse, the temp gauge is climbing mid-lake. Nine times out of ten, it's the impeller. We've torn down hundreds of seized blocks that could've been saved with a $30 rubber part swapped out in March instead of waiting till July.
When to Replace Your Impeller
Most manufacturers spec 100-300 hours or 1-3 years, but that's just a starting point. For saltwater, I'm swapping it every year, no exceptions. Mercury recommends 300 hours or three years for freshwater, but drop that to 100 hours or annually in salt. The rubber degrades whether you're running it or not—winter storage hardens the vanes, and the first hot day in June finishes it off.
If you're in sandy water or pulling a ski boat hard all summer, cut that interval in half. Sand acts like grinding paste on the rubber. I pulled one last season that looked like it'd been through a belt sander after 50 hours in the Tennessee River.
Saltwater guys: Don't gamble. Annual replacement saves you from the catastrophic failure rate—70% of engine meltdowns trace back to cooling system neglect.
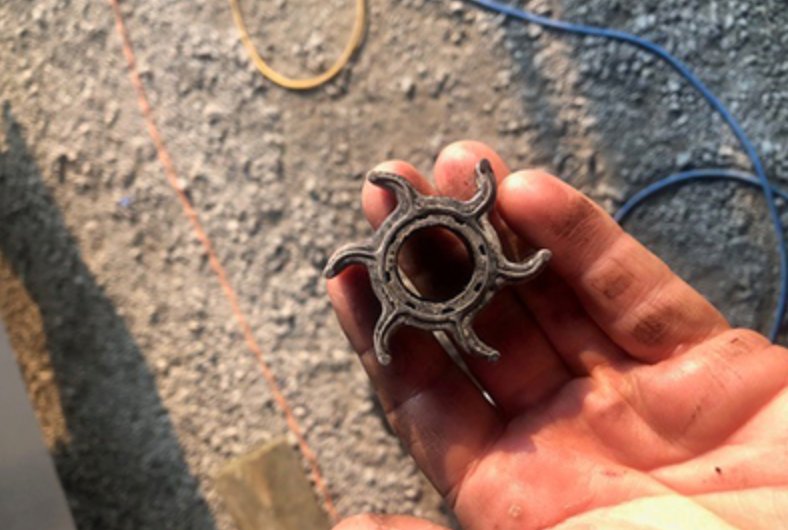
Signs Your Impeller Is Done

Pull the lower unit and inspect it. Cracked vanes, missing chunks, or rubber that feels like dried-out window caulk—all done. But here's what most guys miss: check the wear plate and pump housing for scoring. Deep grooves in the aluminum mean your new impeller will chew itself up in 20 hours. If the housing's pitted, you're replacing that too, or you're wasting your time.
The telltale (pee hole) is your early warning. Strong stream at 3000 RPM? Good. Dribbles at idle but picks up with throttle? Impeller's marginal—replace it now before it grenades. No stream at all? Shut it down immediately; you're already cooking the head gasket. For more about recognizing worn impellers, see Signs Your Outboard Impeller Needs Replacement.
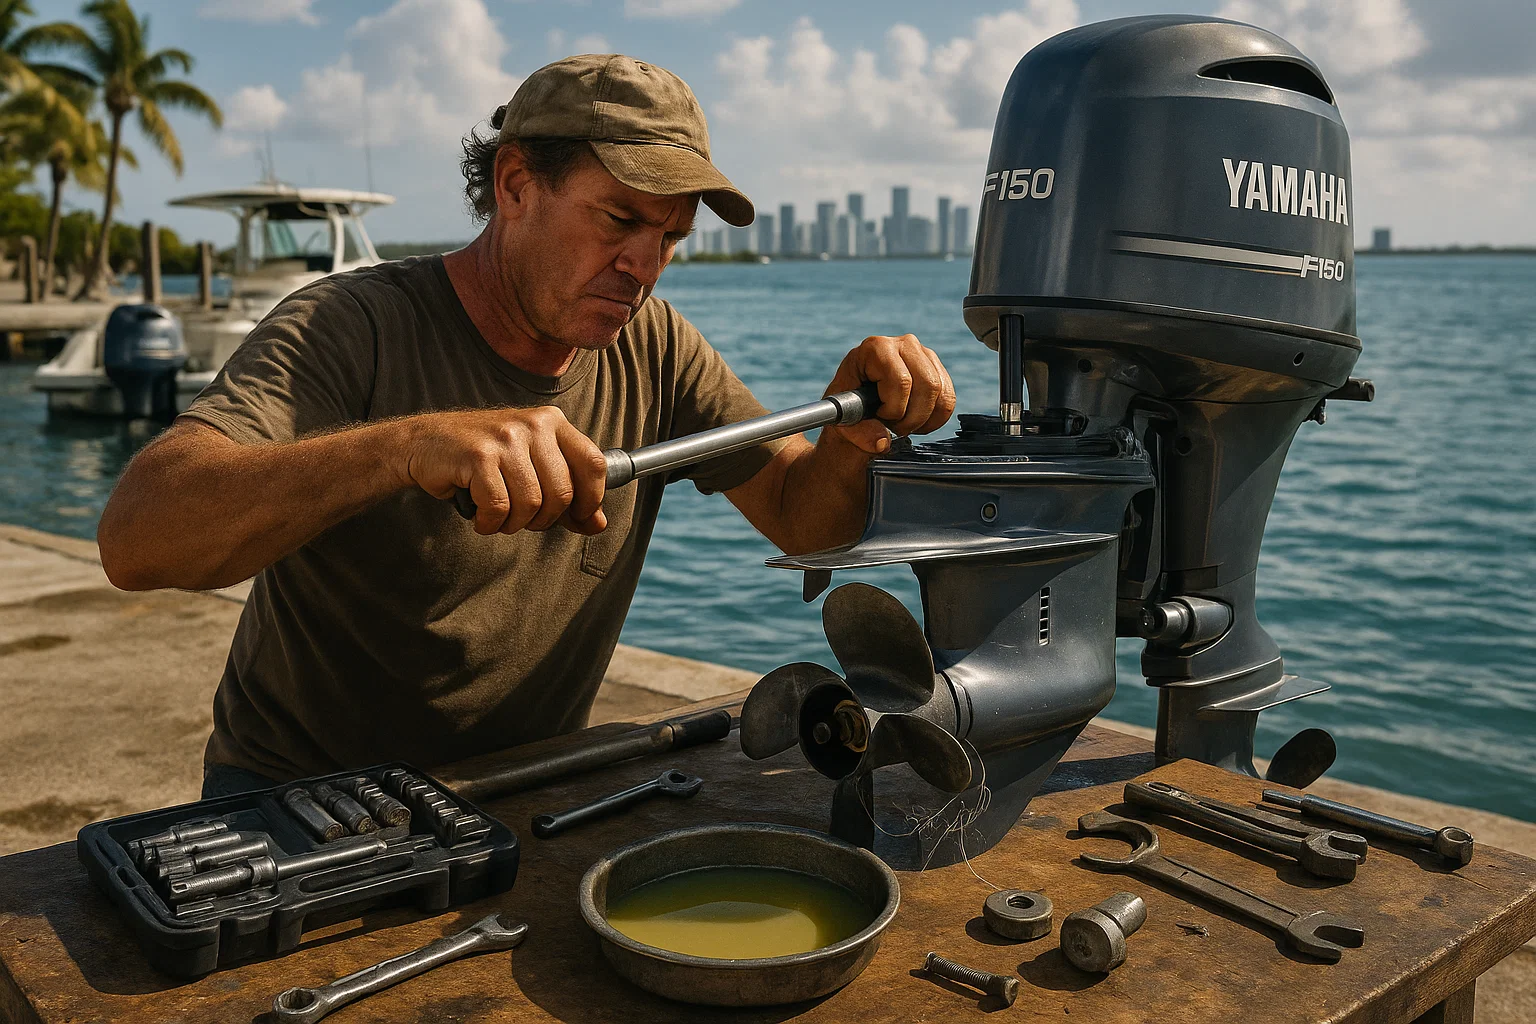
How to Replace the Impeller: Step-by-Step
This is for outboards and Alpha/Bravo sterndrives. If you've got a pod drive or direct inboard, hand it to a pro.
Safety first: Pull the battery cable and remove the safety lanyard. I've seen lower units drop on hands because someone bumped the trim switch.
Tools You Need
- 10mm, 13mm, and 17mm sockets (depends on your engine—check your manual)
- Flat gasket scraper
- Small flathead screwdriver or impeller puller
- Glycerin or water pump grease (never petroleum—it swells the rubber and destroys it chemically)
- Torque wrench
The Process
1. Tilt the engine up fully. Drain the lower unit gear lube first if you're changing that too (you should be). Check out our Cooling System parts collection for replacement components.
2. Disconnect the shift linkage. This trips up more DIYers than anything else. On most Mercs and Yamahas, there's a plastic clip or pin at the top of the lower unit. Don't force it—wiggle and pull straight out. Mark the position with a Sharpie so reassembly is correct.
3. Remove the lower unit bolts. Usually six bolts around the midsection. Some are different lengths—lay them out in order on a rag.
4. Pull the lower unit straight down. Watch the water tube (the thin copper or plastic tube that feeds the pump). It slides out of a grommet in the midsection. If it kinks, you'll chase an overheat all summer.
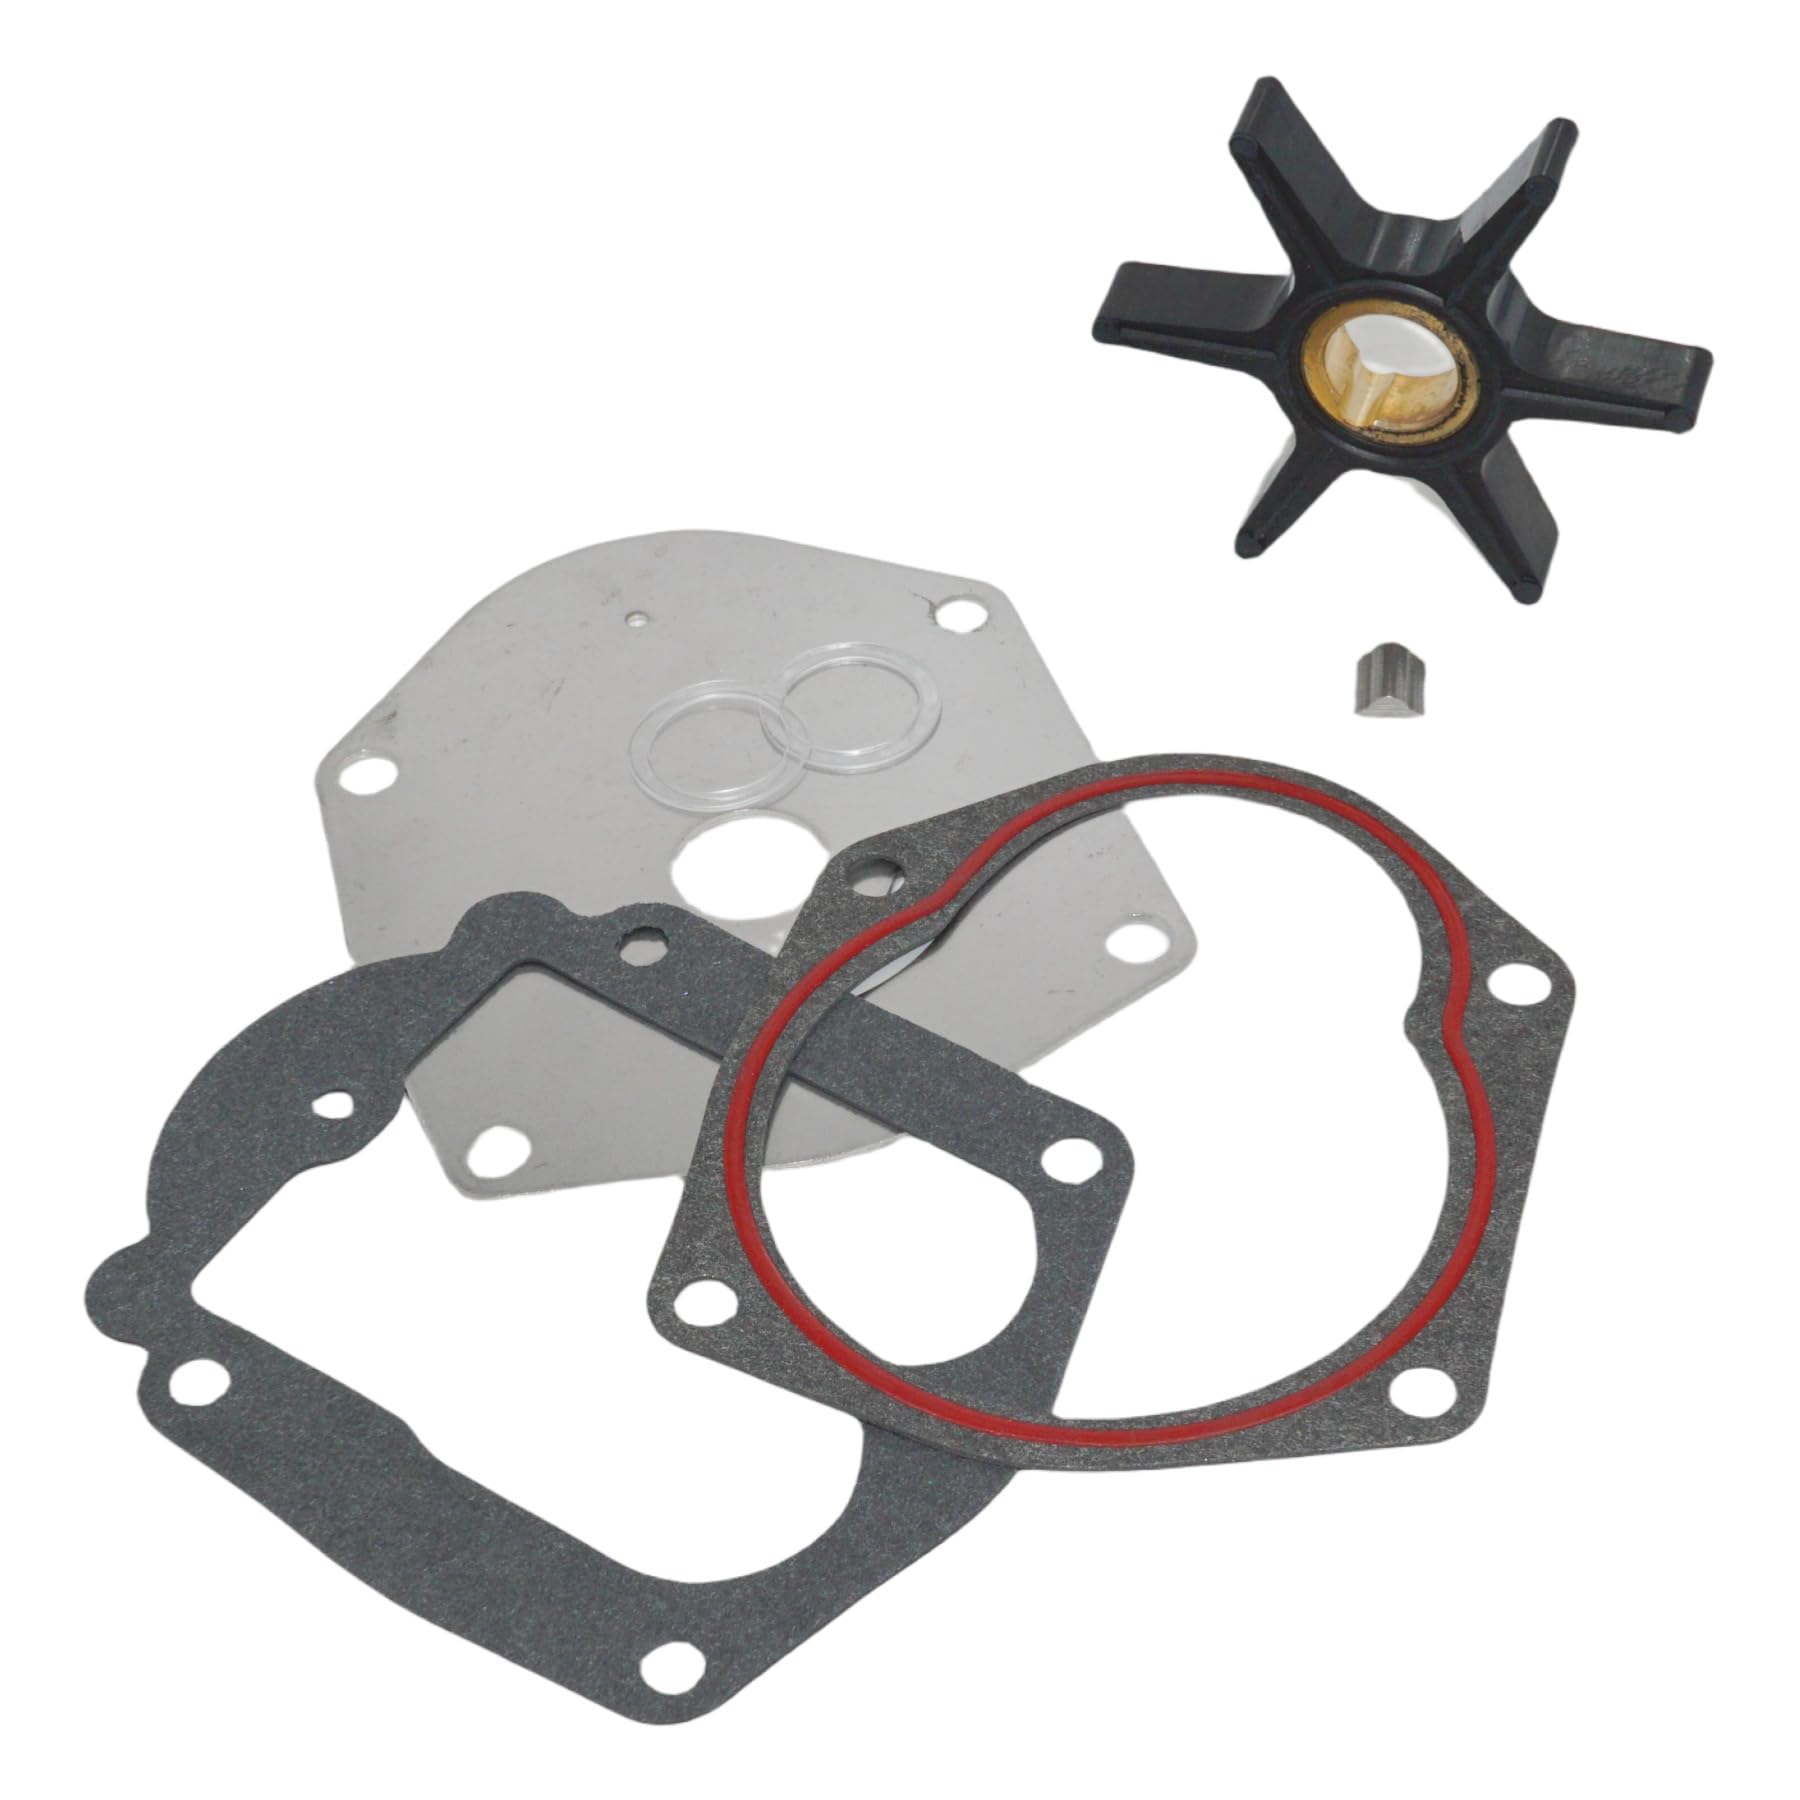
5. Unbolt the pump housing. Four to six screws. The old gasket will be stuck—scrape it clean without gouging the aluminum.
6. Extract the old impeller. If it's stuck, thread two small screws into opposite vanes and pry evenly, or use an impeller puller. Check the keyway or flat spot on the driveshaft—the impeller has to align with this or it won't spin.
7. Inspect everything. Vanes, wear plate, housing. Any scoring deeper than a fingernail scratch, replace the part.
8. Lube and install the new impeller. Coat the vanes with glycerin. Slide it onto the shaft, aligning the keyway. The vanes need to bend in the direction of rotation—usually clockwise when viewed from the top. If you install it backward, you'll get zero flow. For a detailed guide, see How to Replace a Mercury Outboard Water Pump Impeller: A Step-by-Step Guide.
9. Reassemble the housing. New gasket, torque bolts to spec (usually 60-80 in-lbs, but check your manual). Don't overtighten or you'll crack the housing.
10. Reinstall the lower unit. Guide the water tube back into the grommet—this is the second-most common mistake. Seat the shift linkage, torque the bolts.
Post-install test: Run the engine on muffs or a flush adapter. Strong pee stream within 10 seconds means you're good. Weak or no stream? Pull it apart—you missed the water tube alignment or installed the impeller backward.
Fluids to Change Before Summer
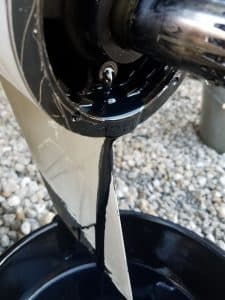
While the lower unit's off, change the gear lube. Milky oil means water intrusion through a bad seal—fix that before you button it up. Check out our collections of Fuel Filters and Fuel Pumps to keep your fuel system clean and efficient.
| Fluid | Interval | Notes |
|---|---|---|
| Engine oil & filter | 100 hours or 6 months | Run the engine warm first so the oil drains completely. Old oil sits in the pan all winter and varnishes up. |
| Lower unit gear lube | 100 hours or annually | Fill from the bottom hole till it overflows at the top. Use SAE 80/90 or whatever your manual specifies. Generic "marine gear oil" isn't always the same viscosity. |
| Fuel filter | 100 hours or yearly | 90% of diesel problems come from contaminated fuel. Gas engines aren't immune—ethanol separates in storage and clogs injectors. |
| Coolant (closed systems only) | Check annually, flush every 3 years | Raw water systems don't use coolant, but if you've got a heat exchanger, top it off and test the freeze protection. |
Hydraulic trim/tilt fluid: Top off the reservoir. If it's low, you've got a leak—find it now, not when you're trimming up to load the boat and the pump quits.
DIY or Professional?
Outboards: You can do this in 30 minutes with basic tools. The lower unit comes off with six bolts, the pump housing is right there.
Sterndrives (Alpha One, Bravo, Volvo SX): More disassembly, heavier components, and the shift cable adjustment is finicky. If you've never done it, budget two hours and expect frustration. Pros knock it out in 45 minutes because they've done a thousand.
Pod drives, IPS, or diesel inboards with heat exchangers: Don't touch it. These systems are too expensive to learn on. A certified tech has the alignment tools and diagnostic software to verify the cooling system is actually working under load.
Warranty boats: Check if DIY maintenance voids coverage. Some manufacturers require dealer service records for the first two years. For more on when to seek help, see When to Seek Professional Help vs DIY Fix.
OEM vs Aftermarket Impeller Kits
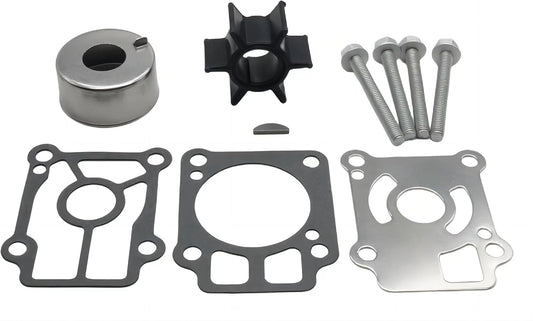
OEM impellers are good quality, but you're paying $80-$120 for a part that costs $12 to manufacture. The dealer markup is brutal.
Cheap no-name kits off auction sites? Trash them. The rubber's too hard (won't seal), the vanes are molded wrong (won't clear the housing), and you'll be tearing the leg off again next weekend when it fails. I've seen guys wreck a $4,000 powerhead trying to save $40 on a garbage impeller.
The smart move is a factory-spec aftermarket kit from a reputable supplier. JLM Marine kits use the same durometer rubber and dimensions as OEM—they fit right, they last, and you're not burning $100 on a brand sticker. We ship these worldwide, and I've installed hundreds without a single comeback. See more about aftermarket options on Are Aftermarket Impellers Reliable? and OEM vs. Aftermarket Outboard Parts: What’s the Difference?.
Some high-end aftermarket manufacturers supply OEM brands during production overruns, then sell the surplus under their own label. You're getting the exact same part for half the price.
What Happens If the Impeller Fails Underway

Your temp gauge spikes, the overheat alarm screams, and you've got maybe 60 seconds before the engine shuts down to protect itself. If you keep running it, the head gasket blows, the exhaust risers melt, and the cylinder walls score. We rebuilt a guy's Yamaha F250 last summer after he ignored the alarm for "just a few more minutes" getting back to the dock. $8,700 in machine work, new pistons, and a head. The impeller cost $35. For further reading on blow head gasket repair, see Replacing a Blown Head Gasket on an Overheated Outboard.
If it fails offshore, you're calling TowBoatUS and spending your weekend at a strange marina instead of fishing.
Cost Breakdown: Prevention vs Repair
| Item | DIY Cost | Shop Cost | Failure Cost |
|---|---|---|---|
| Impeller kit | $30-$50 | $150-$250 (parts + labor) | — |
| Gear lube change | $15 | $80-$120 | $600-$1,200 (new seals if water got in) |
| Engine oil/filter | $40 | $120-$180 | — |
| Total annual maintenance | ~$85 | ~$350-$550 | — |
| Seized engine from failed impeller | — | — | $5,000-$15,000 |
The math isn't complicated.
Regional Considerations for US Boaters
Great Lakes: You're battling six months of winter storage. Impellers sit compressed and dry-rot even if the engine never ran. Replace it every spring, period.
Florida/Gulf Coast: Year-round saltwater. The sand and salt combo shreds impellers faster than anywhere else. Budget for annual replacement, possibly more if you're running skinny water in the backcountry.
Pacific Northwest: Cold saltwater is less abrasive than warm, but barnacles and debris clog intakes. Inspect your screens every trip and flush the system after every outing.
Inland freshwater (TVA lakes, Midwest reservoirs): You can stretch to 200 hours or two years if you're religious about flushing and the boat isn't sitting idle for months. But for the cost of an impeller, why risk it?
The Pre-Summer Maintenance Window

February through April is prime time. Shops are slow, parts are in stock, and you're not scrambling the week before Memorial Day when every other guy realizes his boat's been sitting since October.
Waiting till May? You're competing with a six-week backlog at every decent shop. I've turned away dozens of customers in late spring because the schedule's packed. Do it early, test it on the water in April, and fix any issues before the season actually starts.
After every ride in sandy or silty water, flush your raw water system with a hose and muffs for five minutes. That one habit will double your impeller's lifespan and keep your water pump housing from turning into a sandblasted mess.
For more helpful maintenance tips and quality parts, explore JLM Marine's full catalog, your trusted source for OEM-quality marine parts and supplies.
972582