


Maximizing Outboard Performance: Maintenance Tips from the Pros
- Trim Angle Adjustment for Speed and Fuel Economy
- Propeller Selection: Matching Pitch to Your Engine's RPM Range
- Jack Plate Setup for Reduced Drag
- 100-Hour Maintenance Checklist: Oil, Fuel, and Filters
- Cooling System: Impeller and Thermostat Inspection
- Post-Trip Flushing and Corrosion Prevention
- Anode Inspection Schedule
- Propeller and Skeg Damage Checks
- Fuel System Troubleshooting: Primer Bulb and Idle Circuit
- Off-Season Storage Preparation
- 2-Stroke vs. 4-Stroke Maintenance Differences
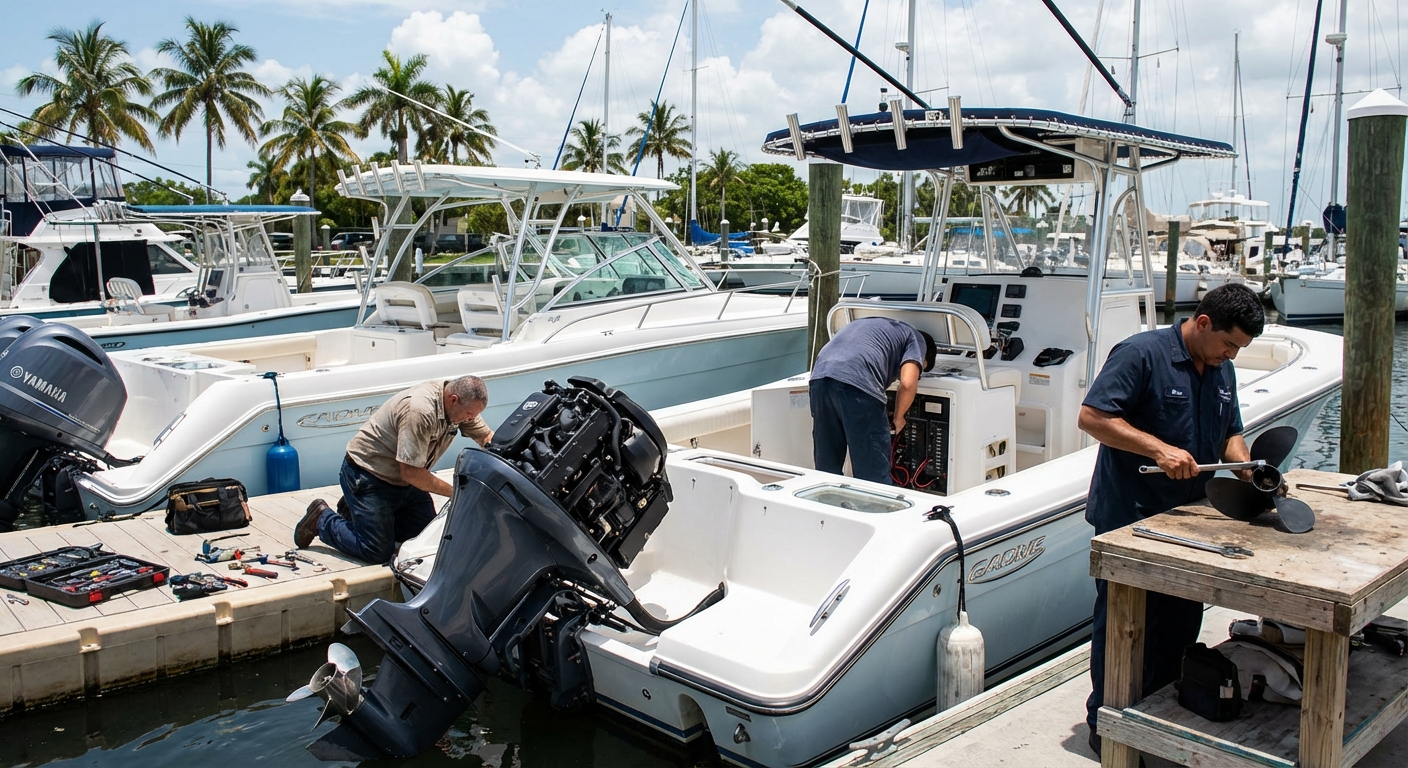
- When to Take It to a Dealer
- Winterization Checklist for Freezing Climates
- Real-World Fuel Economy Case Study
- OEM vs. Aftermarket Parts: What You Need to Know
- Daily Pre-Launch Checklist
- Troubleshooting Low Water Flow from the Telltale
- Fuel Stabilizer Application
- Grease Fittings and Steering Maintenance
- Performance Symptoms and Their Likely Causes
- How to Find the Correct Prop Pitch
- Why You Should Avoid Over-Revving
- How to Spot a Failing Lower Unit Seal
- When to Replace the Fuel Pump
- The Importance of Propeller Cup
- How to Test for Spark
- Compression Testing for Engine Health
After 20 years working on outboards at JLM Marine, we've shipped parts to customers in over 100 countries and seen the same problems repeat: poor performance almost always traces back to skipped maintenance or bad setup, not worn-out engines. You don't need bolt-on upgrades. You need to run your motor right and keep it clean. Here's what actually works. For more essential resources, check out the JLM Marine homepage.
Trim Angle Adjustment for Speed and Fuel Economy
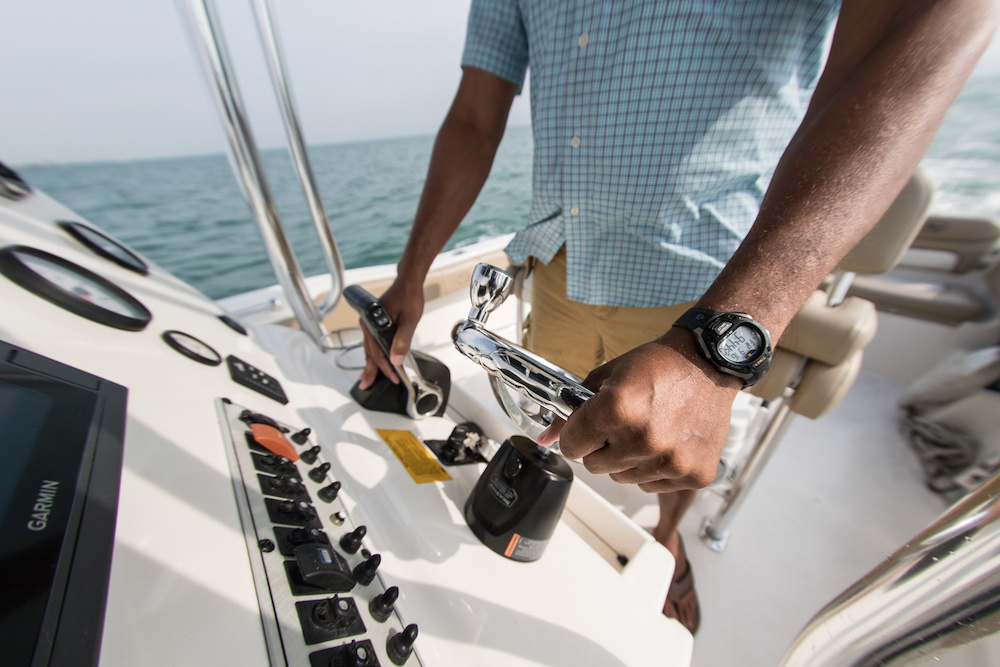
Trim angle controls how your hull rides through water. Too much nose-down and you're pushing a wall. Too much nose-up and the prop ventilates—sucks air instead of biting water—and you lose thrust.
For cruising at higher speeds, aim for less than 3 degrees of positive trim (nose slightly up). Watch the roostertail, that stream of water coming off the motor. A steady, tight stream means you're in the sweet spot. If it starts sputtering or spreads into wide spray, you've trimmed too high and the prop is starting to ventilate.
The physics: keeping the lower unit nose forward-facing minimizes drag on the gearcase, while a slight hull lift reduces wetted surface area. That's where fuel savings come from. We've had customers pick up 2-3 mph and cut fuel burn by 10% just by dialing in trim, no prop change required.
Propeller Selection: Matching Pitch to Your Engine's RPM Range
Your propeller does all the work, so pitch and condition matter. Pitch is the theoretical distance the prop moves forward in one revolution. Too low and your engine over-revs, screaming at 6,500 RPM but going nowhere. Too high and it bogs down, lugging at 4,000 RPM and straining bearings.
Check your manufacturer's recommended wide-open-throttle (WOT) RPM range—usually a 500-600 RPM window. You want to hit the middle of that range with your throttle pinned and the boat loaded as you normally run it. If you're over, increase pitch by 2 inches. Under, drop 2 inches.
A customer in Queensland ran a Yamaha F150 with a 19-inch aluminum prop. Switching to a 23-inch stainless Solas Lexor Plus put him in the correct RPM band and delivered an 18% increase in cruising speed and 133% improvement in fuel efficiency—more than doubled his range. Same boat, same engine, just the right prop.
Inspect your prop after every trip. Even a small ding throws off balance and creates vibration that wears seals and bearings. Grease the shaft during reinstallation with waterproof marine grease to prevent seizing. For high-quality replacement parts, browse the JLM Marine propeller collection.
Understanding Prop Slip
Slip is the difference between the prop's theoretical advance and actual distance traveled. Some slip is normal—10-20%—but excessive slip (over 25%) means the prop is too small or damaged, or you're running in very shallow, aerated water. You're burning fuel to spin the prop without generating thrust. If your engine hits max RPM easily but speed plateaus early, that's a slip problem.
Jack Plate Setup for Reduced Drag
A jack plate lets you raise or lower the motor on the transom. Running the engine higher reduces drag from the lower unit cutting through water, but go too high and the prop sucks surface air.
Start at the manufacturer's recommended height, then raise the motor in half-inch increments while running at cruise speed in calm water. Stop when you notice any loss of bite (prop slip) or the boat starts porpoising—hopping up and down on plane. That's one notch too high. Drop it back down.
Some jack plates also provide setback, moving the motor aft. This extends the distance between the transom and prop, which can smooth out a rough ride by keeping the prop in cleaner, less-aerated water. Hydraulic jack plates let you adjust on the fly, which is useful if you run in varying loads or water conditions. For more on jack plates, see our guide on installing a jack plate for shallow water boating.
100-Hour Maintenance Checklist: Oil, Fuel, and Filters
Outboards run harder than car engines. They sit at 5,000+ RPM for hours, often under full load. Fresh oil is not optional.
Engine Oil and Filter Changes
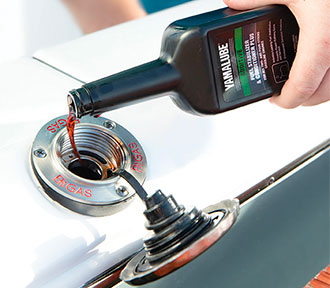
Change your oil and filter every 100 hours or once a year, whichever comes first. Use only oil certified FC-W (Four-Cycle Water-Cooled) by the NMMA. FC-W oils contain extra corrosion inhibitors for marine environments. Car oil does not. Outboards are under constant load at near-max RPM, and using the wrong oil leads to bearing wear and internal corrosion.
For 2-stroke engines, use TC-W3 rated oil and follow the manufacturer's fuel-to-oil ratio exactly—usually 50:1 or 100:1 depending on the model. Too much oil fouls plugs. Too little oil seizes pistons.
Fuel Filters and Water Separators
Replace your fuel filter and water separator every 100 hours. Ethanol fuel attracts moisture, which settles in the filter and separator. When that water gets pulled into the carb or injectors, you get rough idle, hesitation, or a no-start. We've seen fuel go bad in as little as 30 days in hot climates, so use a fuel stabilizer if the boat sits for more than two weeks. Explore the fuel filter collection for replacement parts.
Run high-octane, ethanol-free fuel when possible. If you can't avoid ethanol, keep the tank full to minimize condensation and add stabilizer at every fill-up.
Lower Unit Gear Oil
Change your lower unit oil during the break-in period (first 20 hours), then every 100 hours or annually. During break-in, metal particles from gear mesh settle in the oil; the drain plug has a magnet to catch them. After that, routine changes let you spot water intrusion early—milky or grey oil means a bad seal, and that needs immediate attention before the gears pit and fail.
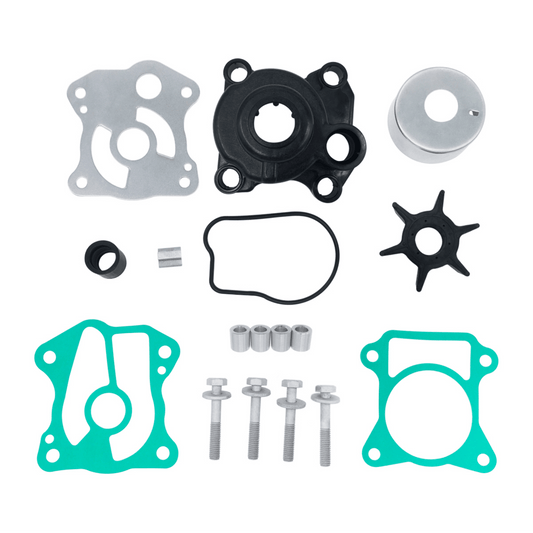
Cooling System: Impeller and Thermostat Inspection

Your water pump impeller is a rubber part that pushes cooling water through the engine. Rubber degrades from heat, salt, and sitting dry. Replace the impeller every 300 hours or every 3 years, whichever comes first. If you run in sandy or silty water, do it annually. You can find quality parts in the cooling system collection at JLM Marine.
Diagnosing Impeller Failure
The telltale—that small stream of water that exits near the top of the motor—tells you if the pump is working. At idle, you should see a steady pee stream. If it dribbles, spits intermittently, or stops entirely, your impeller is shot or your cooling passages are clogged.
A weak stream at idle that improves with throttle usually means the impeller vanes are worn but not fully failed yet. Replace it soon. No stream at any RPM means the impeller is completely gone or the thermostat is stuck shut, and you're overheating. Shut down immediately.
Thermostat Maintenance
The thermostat regulates engine temperature. If it sticks closed, coolant can't flow and the engine overheats. If it sticks open, the engine runs too cool, which causes poor fuel combustion and carbon buildup.
We've pulled thermostats that seized because owners never flushed with fresh water. Salt crystals lock them solid. Test the thermostat by removing it and placing it in a pot of water heated to the rated opening temperature (usually around 140-160°F). It should open fully. If it doesn't, replace it. For a detailed guide on this task, see How to Replace the Thermostat on Your Yamaha F225, F250, or F300.
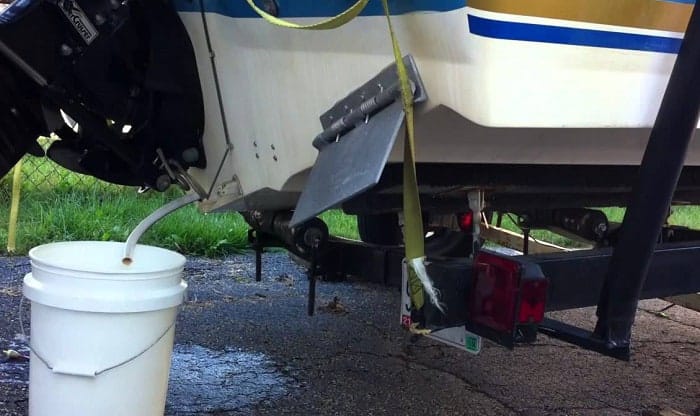
Post-Trip Flushing and Corrosion Prevention

If you've run in saltwater, flush the engine with fresh water immediately after every trip—not the next day, not when you get around to it. Salt crystallizes as it dries and clogs cooling passages, corrodes aluminum, and pits stainless fittings.
Use a flush port if your motor has one, or attach earmuffs (a clamshell-shaped hose fitting) over the water intakes on the lower unit. Make sure both intakes are fully covered and sealed before starting the engine. Run it at idle for 5-10 minutes. Don't rev it—there's no load on the prop, and you risk over-revving.
After flushing, wipe down the exterior with a soft cloth and mild soap. Then spray exposed metal parts—shift linkage, steering brackets, trim rams—with a corrosion inhibitor. We use products like STA-BIL Rust Stopper. It's a thin film that repels water without attracting dirt. For more on cooling system care and flushing, see our Water Pump Repair Kit vs. Impeller Only guide.
Anode Inspection Schedule

Anodes are sacrificial metal chunks (usually zinc or aluminum) bolted to the lower unit and inside the cooling passages. They corrode instead of your engine block.
Chris Bond, owner of Crown Leisure Marine, says anodes need inspection every three months in saltwater or brackish water, and at least twice a year in freshwater. When anodes deteriorate to less than 50% of their original size, they stop protecting the block, and you get water intrusion into the engine. That causes internal corrosion you can't see until it's too late.
Replace anodes when they're pitted or down to half their original thickness. They're cheap. A new powerhead is not.
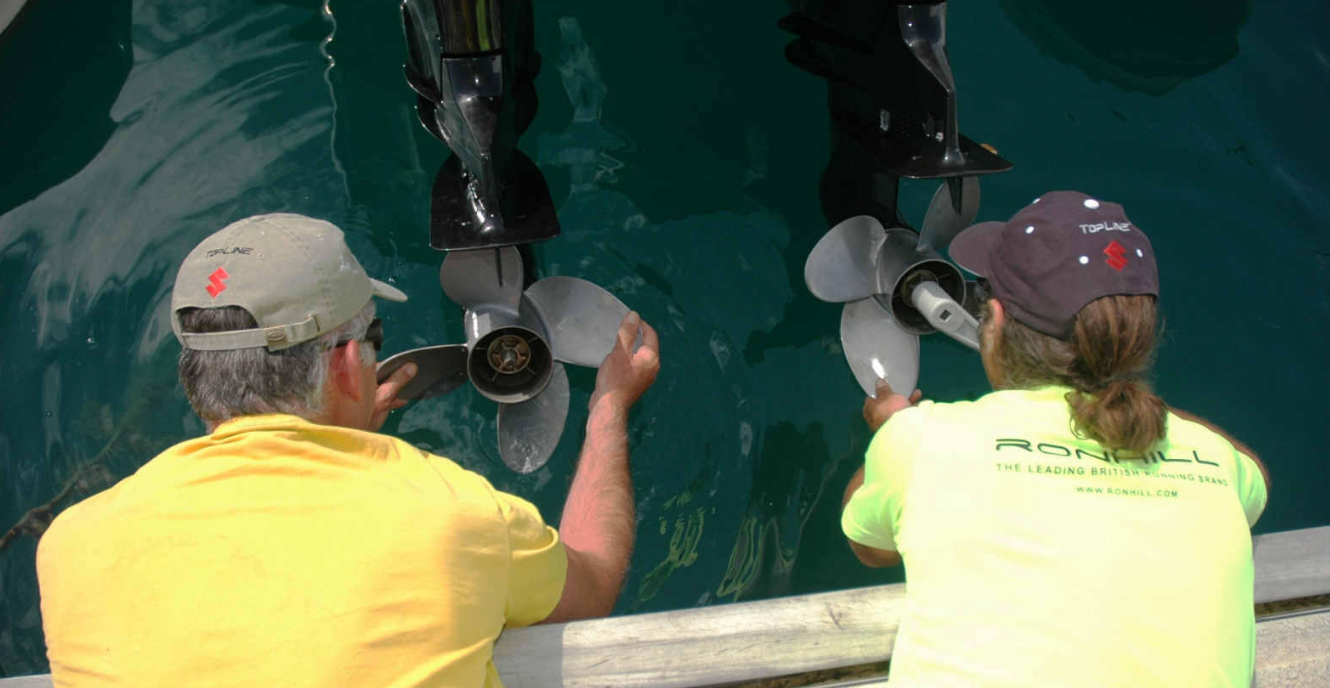
Propeller and Skeg Damage Checks

Your skeg is the vertical fin at the back of the lower unit, behind and below the prop. It stabilizes the boat and protects the prop shaft and gearcase from rocks and debris. If the skeg is bent or broken off, the boat wanders and the lower unit is vulnerable.
Inspect the skeg every time you pull the boat. A small ding is fine. A crack or a big chunk missing means you need a replacement skeg or, if the damage extends into the gearcase, a lower unit rebuild.
For prop removal, a proper prop wrench makes the job faster and safer than using a block of wood and a standard wrench. A dedicated wrench like the Prop Master grips the prop securely without slipping, which prevents hand injuries and rounded-off nuts.
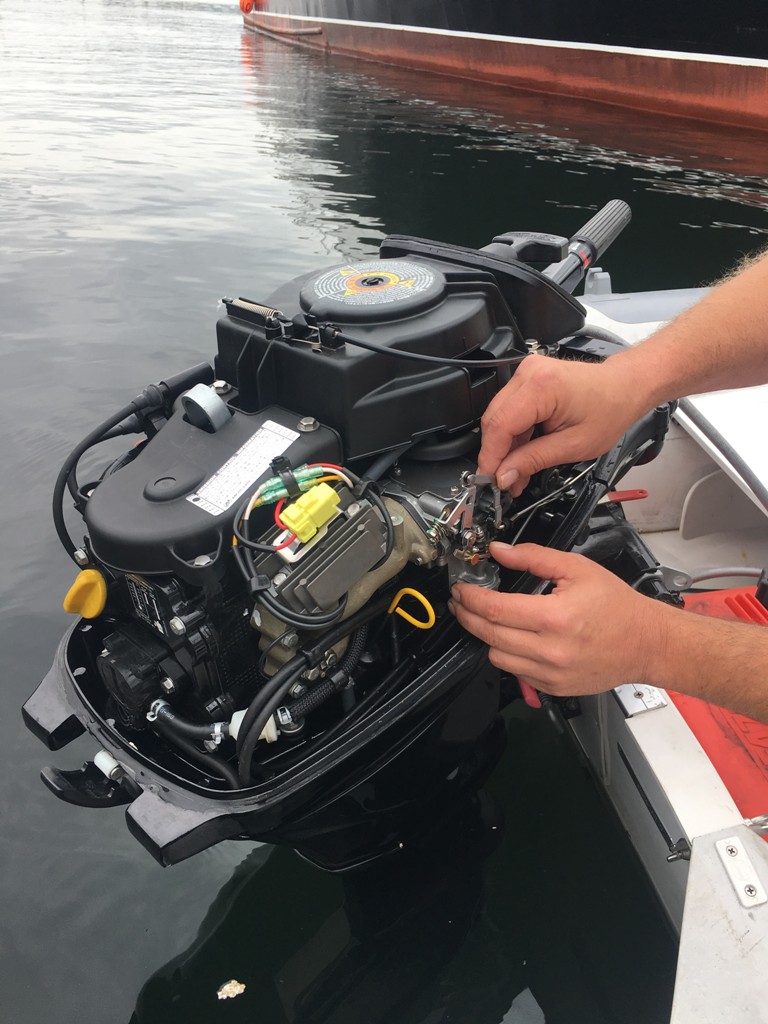
Fuel System Troubleshooting: Primer Bulb and Idle Circuit
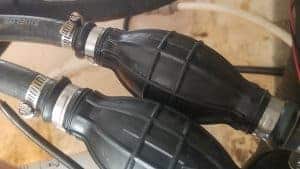
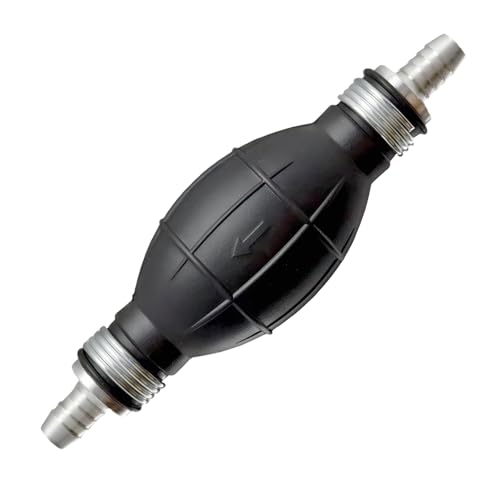
When you squeeze the primer bulb, it should get firm and hold pressure. If it stays mushy or collapses, you've got a fuel delivery problem—either a cracked bulb, a leak in the fuel line, or a clogged filter. Don't ignore this. A weak bulb means the carb or injectors aren't getting consistent fuel, and you'll get hesitation or stalling.
If the engine runs fine at speed but stumbles or dies at idle, check the idle circuit in the carburetor. Ethanol fuel leaves varnish deposits that clog the tiny idle jets. Carburetor cleaner and compressed air usually clear it, but if the problem persists, pull the carb and clean it properly or replace the jets. Find parts in the JLM Marine carburetor repair kit collection to keep your fuel system in top shape.
Reading Spark Plugs for Engine Health
Pull a spark plug after 50-100 hours and look at the electrode and insulator. A light tan or grey color means the engine is running correctly. Black, sooty deposits mean it's running rich—too much fuel, not enough air. Check for clogged air filters or a stuck choke. White or blistered electrodes mean it's running lean—too much air, not enough fuel. That causes overheating and piston damage. Adjust the fuel mixture or check for vacuum leaks.
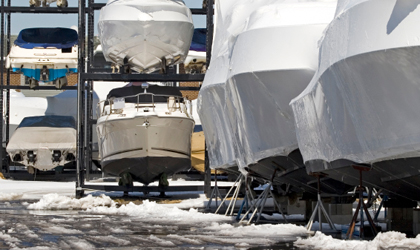
Off-Season Storage Preparation
If you're storing the boat for more than a month, drain the fuel tank completely or fill it to the top with stabilized fuel. A half-full tank allows condensation, which leads to phase separation in ethanol fuel—water settles at the bottom and gets sucked into the engine on the first start of spring.
Fog the engine by spraying fogging oil into the carb or throttle body while the engine is running, then let it stall out. This coats the cylinders and valves with a protective film. Change the lower unit oil before storage so any water contamination doesn't sit in the gearcase all winter. Grease all fittings. Store the boat with the motor tilted fully down or, if it must be tilted up, make sure the lower unit is supported to prevent stress on the tilt rams.
2-Stroke vs. 4-Stroke Maintenance Differences

2-stroke outboards mix oil with fuel, so you don't have a separate engine oil reservoir (except for oil-injected models). Maintenance focuses on the fuel system, spark plugs, and lower unit. Clean or replace spark plugs more frequently—every 50-100 hours—because 2-strokes run dirtier. Check the exhaust ports for carbon buildup, which restricts flow and kills power.
4-stroke outboards have a separate oil system, so oil and filter changes are critical. They also have valves, which means valve clearance checks at intervals specified in the manual (often 300-500 hours). Ignoring valve clearances leads to poor compression and hard starting. 4-strokes are quieter and more fuel-efficient, but they require more routine service than 2-strokes.
Learn more about these differences in our Yamaha 4-Stroke vs. Evinrude 2-Stroke performance and maintenance comparison.
When to Take It to a Dealer

If you're dealing with electronic fuel injection issues—error codes, sensor failures, ECU problems—take it to a dealer. Modern outboards have proprietary diagnostic software, and guessing at sensor replacements gets expensive fast. Same goes for internal engine work like piston replacement or crankshaft issues. That requires specialized tools and experience. We're advocates for DIY maintenance, but know when you're out of your depth. A bad DIY internal repair can void your warranty and cost you more than a factory rebuild.
Winterization Checklist for Freezing Climates
If your storage area drops below 32°F, you need to winterize properly or risk cracked engine blocks and ruptured cooling passages.
- Drain all water from the cooling system by removing drain plugs on the engine block and lower unit (check your manual for locations).
- If you can't fully drain it, run RV antifreeze (non-toxic, propylene glycol) through the cooling system using the flush port or earmuffs.
- Change the lower unit gear oil to remove any water that got in during the season.
- Stabilize fuel or drain it completely.
- Fog the engine.
- Remove the battery, charge it, and store it indoors on a trickle charger.
- Grease all fittings and spray corrosion inhibitor on external metal parts.
If you skip any of these, you risk expensive spring repairs.
Real-World Fuel Economy Case Study
A commercial fishing fleet in Europe applied Propspeed foul-release coating to their running gear and documented a 4.7% reduction in fuel consumption at cruising speed. Andrea Grassi, a fishing boat owner, saw his transit time drop from 1 hour 40 minutes to 1 hour 15 minutes on a 13-nautical-mile run—an extra 2 knots just from keeping the lower unit and prop clean. Another operator cut fuel use from 26.7 to 20 liters per hour and hit ROI in 80 hours of operation.
Clean running gear matters. Even a thin layer of slime or barnacles increases drag. For recreational boaters, that means more frequent cleaning or, for serious use, a foul-release coating.
OEM vs. Aftermarket Parts: What You Need to Know
OEM (Original Equipment Manufacturer) parts are made by or for the engine brand. They're reliable, but you're paying a premium for the logo on the box. A $40 OEM water pump kit is often identical in specs to a $20 aftermarket kit from a reputable supplier.
Cheap no-name aftermarket parts are a different story. We've seen $10 impeller kits with hard, brittle rubber that cracks in six months. The fitment is sloppy, and you end up doing the job twice. It's not worth the savings.
The middle ground—high-quality aftermarket from manufacturers like JLM Marine—offers factory-spec quality without dealership markup. Some of these factories produce OEM parts and use the same tooling and materials for their own-brand aftermarket lines. You get the same durability and fit, and you don't burn unnecessary cash. That's why we stock and recommend JLM kits. Browse our collections of Evinrude fuel pumps and water pump impeller kits.
Daily Pre-Launch Checklist
Before you start the engine, do a quick walk-around:
- Squeeze the primer bulb. It should firm up.
- Check the prop for fishing line, weeds, or damage.
- Look at the lower unit for leaks or new dings.
- Verify the kill switch lanyard is attached and functional.
- Check fuel and oil levels.
After starting, watch the telltale. Water should start flowing within 15 seconds. No water means no cooling—shut down immediately and troubleshoot before you leave the dock.
Troubleshooting Low Water Flow from the Telltale
If your telltale stream is weak or absent, work through these checks in order:
- Check for debris in the intakes. Small stones, plastic bags, or weeds can block the lower unit water intakes. Pull the boat and clear them.
- Inspect the telltale hose. It can crack or get pinched. Disconnect it and blow through it to confirm it's clear.
- Test the impeller. Pull the water pump housing and check the impeller vanes. If they're cracked, missing chunks, or worn flat, replace the impeller.
- Check the thermostat. A stuck-closed thermostat blocks flow. Remove it and test it in hot water.
- Flush the cooling passages. Salt or sediment can clog the small passages. Run a descaling solution or vinegar through the system (consult your manual for the procedure).
If you've checked all of these and still have no flow, you likely have an internal blockage that requires disassembly.
Fuel Stabilizer Application
If your boat sits for more than two weeks between trips, add fuel stabilizer to prevent varnish formation. Pour the stabilizer into the tank, then run the engine for 10 minutes so treated fuel circulates through the fuel system. This prevents gummed-up carb jets and clogged injectors, especially with ethanol fuel that degrades quickly in heat.
For long-term storage (3+ months), either drain the tank and fuel lines completely or fill the tank to the top with stabilized fuel to prevent condensation. A partially full tank is the worst scenario—water vapor condenses on the walls and mixes with ethanol fuel, causing phase separation.
Grease Fittings and Steering Maintenance

Your outboard has grease fittings (Zerks) on the prop shaft, steering tube, tilt mechanism, and sometimes the throttle linkage. Use a grease gun with waterproof marine grease—not regular automotive grease, which washes out in water.
Pump grease into each fitting until you see a small bead of fresh grease squeeze out. That means you've purged the old grease and any water that got in. Do this every 50 hours or at the start and end of each season.
For steering cables, check for stiff or notchy movement. If the wheel doesn't return to center smoothly, the cable might be corroded or kinked inside the jacket. Disconnect it and inspect. If it's dry, you can try lubricating it with cable lube, but if it's corroded, replace it. A seized steering cable is a safety issue.
Performance Symptoms and Their Likely Causes
- Engine revs freely but the boat is slow: Prop is damaged (bent, missing a blade), wrong pitch, or you're running in very shallow water and the prop is ventilating.
- Vibration at all speeds: Prop is bent or out of balance, or the prop shaft is bent. Inspect and replace.
- Rough idle, smooth at speed: Idle circuit in the carb is clogged, or you have a vacuum leak. Clean the carb or check intake gaskets.
- Overheating alarm: Low water flow (bad impeller, clogged intakes), stuck thermostat, or low oil (if it's a 2-stroke with oil injection).
- Loss of power under load: Fuel starvation (clogged filter, weak fuel pump), ignition problem (bad coil, fouled plugs), or wrong prop pitch.
- Hard starting when cold: Choke not engaging, weak battery, or old fuel. Check the choke linkage and fuel freshness first.
- Hard starting when hot: Vapor lock in the fuel system, or the engine is flooded. Let it cool, then try starting with the throttle wide open (clears a flooded engine).
How to Find the Correct Prop Pitch
Run your boat at WOT (wide open throttle) in typical load and sea conditions. Use a tachometer to check the RPM. Compare it to your engine's recommended WOT RPM range, which is in the owner's manual or on a decal on the engine.
- Over the range: Your prop pitch is too low. Increase by 2 inches.
- Under the range: Your prop pitch is too high. Decrease by 2 inches.
- Inside the range: You're good. Aim for the middle to upper part of the range for best longevity.
Each 1-inch change in pitch typically changes RPM by about 150-200, depending on the engine and boat. If you're running a 17-inch prop and hitting 6,200 RPM when the max should be 5,800 RPM, move to a 19-inch prop. That will drop you into the safe zone. For detailed guidance, see Comparing Propeller Pitches: Finding the Best Pitch for Your Boat.
Why You Should Avoid Over-Revving
Running your engine consistently above the maximum rated RPM puts excessive stress on the rod bearings, crankshaft, and piston rings. It also increases fuel consumption without a proportional speed gain, because you're just spinning the prop faster in the same water. Over time, this leads to bearing wear, scored cylinder walls, and eventual failure. Staying within the manufacturer's RPM range ensures the engine lasts its intended service life—often 2,000-3,000+ hours for a 4-stroke if properly maintained.
How to Spot a Failing Lower Unit Seal

When you change your lower unit gear oil, look at what comes out. Fresh gear oil is amber or light brown and translucent. If it's milky, grey, or has visible water droplets, you have a leaking seal. Water in the gearcase accelerates gear wear and causes pitting on the pinion and forward/reverse gears.
Drain the oil into a clear container so you can see it. If there's any doubt, replace the seals immediately. A $30 seal kit now saves a $1,500 lower unit rebuild later. We've seen people ignore milky oil for a season and end up with gears that look like they went through a grinder. For tips on maintaining your lower unit and seals, see Maintaining Your Outboard’s Gearcase: Mercury vs. Yamaha.
When to Replace the Fuel Pump

Outboard fuel pumps are usually pulse-driven by crankcase pressure. Over time, the diaphragm inside cracks or stiffens, reducing fuel flow. Symptoms include hesitation under acceleration, difficulty maintaining high RPM, or a prime bulb that won't stay firm.
If you're chasing a fuel delivery problem and you've already replaced the filter, checked the lines, and cleaned the carb, pull the fuel pump. Inspect the diaphragm for cracks, pinholes, or stiffness. If it doesn't flex easily or if you see any damage, replace the pump. Most rebuild kits are under $20 and include the diaphragm, gaskets, and check valves. Shop fuel pumps in the JLM Fuel Pump collection.
The Importance of Propeller Cup
Propeller cup is a small bend on the trailing edge of each blade. It increases grip on the water and reduces slip, which improves acceleration and top speed. A prop with more cup will also reduce RPM slightly at WOT, similar to increasing pitch by about 1 inch.
If your prop loses its cup from hitting a rock or debris, you'll notice slower acceleration and higher slip. You can have the prop re-cupped by a prop shop, but if the blades are also bent or cracked, it's usually cheaper to replace the prop than to repair it.
How to Test for Spark

If your engine cranks but won't start, you need to confirm you're getting spark to the plugs. Remove a spark plug, reconnect the plug wire, and ground the plug threads against the engine block (not against the plug wire or plastic). Crank the engine and watch for a blue spark at the electrode gap.
No spark means you have an ignition problem—bad coil, faulty CDI (capacitor discharge ignition) box, or a failed stator. Weak yellow or orange spark means the coil or plug wires are failing. Replace them. A strong blue spark means ignition is fine, and your problem is fuel or compression.
Compression Testing for Engine Health
A compression test measures how well the cylinders seal. Low compression means worn rings, scored cylinder walls, or a blown head gasket.
To test, remove all spark plugs, disable the ignition, and screw a compression gauge into each cylinder. Crank the engine for 4-5 seconds and record the reading. Repeat for all cylinders.
Compare the readings. They should all be within 10% of each other and meet the manufacturer's spec (usually 90-150 psi depending on the engine). If one cylinder is significantly low, you have a mechanical problem. A leakdown test (requires a specialized tool) will tell you if the leak is past the rings, valves, or head gasket.
Flush your engine with fresh water after every ride. It's the single most effective thing you can do to prevent corrosion and keep your cooling system clear. It takes five minutes and saves you from a seized thermostat or a rusted-out lower unit next season.
Sources:
- https://www.i69marine.com/About/Our-Blog/Post/125972/Tips-for-Maintaining-Your-Outboard-Motor
- https://vyscocity.com/top-factors-affecting-outboard-performance/
- https://turboswing.com/blog/post/maintaining-your-outboard-engine
- https://www.freedommarinecenter.com/blog/tips-for-maintaining-your-boats-outboard-motor--104202
- https://www.thundermarine.com/blog-detail/7-Tips-for-Peak-Outboard-Performance
- https://www.goldeagle.com/tips-tools/how-maintain-boat-outboard-motor/
- https://onlineoutboards.com/blogs/outboard-motors-basics/extending-your-outboard-motor-s-life-tips-for-long-term-performance
- https://www.beneteau.com/newsroom-actualite/proper-outboard-engine-care-essential-extend-lifespan-your-boat
- https://www.raritaneng.com/blog/macerator-pump-professionals-offer-great-tips-to-maintain-your-own-outboard-motor/
- https://boatingmag.com/ten-tips-to-improve-performance-your-outboards/
- https://www.beneteau.com/en-us/newsroom-actualite/give-your-outboard-engine-proper-maintenance-it-needs-long-life
- https://www.discoverboating.com/ownership/maintenance/outboard
- https://www.migrvmarine.com/blog/how-to-improve-the-fuel-economy-of-an-outboard-motor/
- https://www.huffpowersports.com/blog/outboard-motor-maintenance-tips
- https://www.boatus.com/expert-advice/expert-advice-archive/2025/august/outboard-maintenance
- https://www.propspeed.com/media
- https://www.rjnautical.com/blog/how-to-increase-the-performance-of-outboard-motors/
- https://www.shortsmarine.com/blog/maintenance-tips-for-outboard-motors
- https://caperomainmarine.com/outboard-engine-care-top-maintenance-tips-to-extend-life-and-performance/
- https://keysmarineservice.com/the-importance-of-regular-maintenance-for-your-2-stroke-outboard-motor/
- https://blog.overtons.com/boating/annual-outboard-engine-maintenance-101/