


Improving “Hole Shot”: Engine Height & Ventilation Tricks
By the JLM Marine Technical Team
After two decades building and testing outboard parts, we've seen the same hole shot problems over and over. Your boat bogs on takeoff, burns fuel in displacement mode, and takes forever to plane. Most of the time, it's engine height or ventilation setup—not the motor itself.
This guide walks through the adjustments we make in our test bay. You'll get specific measurements, torque specs, and the symptoms that tell you what's wrong before you waste money on new props.
How to Optimize Engine Height for Acceleration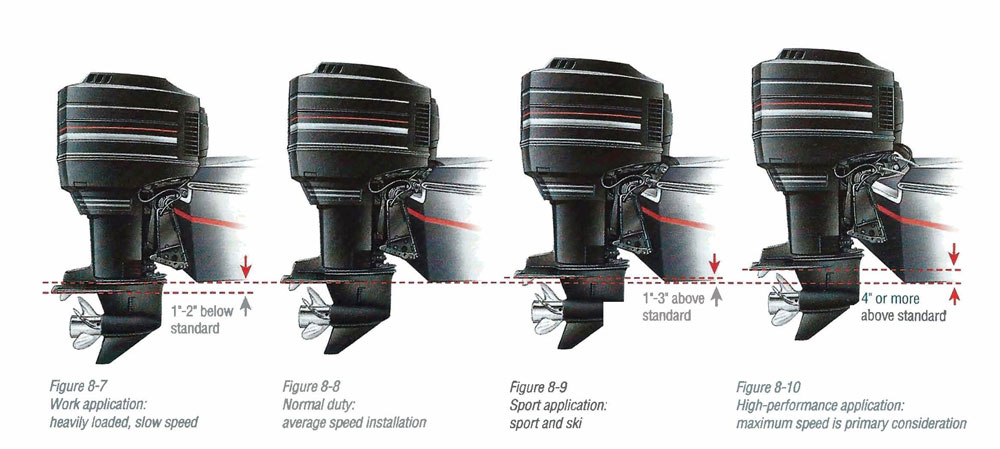
Your outboard's mounting height controls how the lower unit interacts with water during the critical first three seconds of acceleration. Mount it wrong, and you're dragging the gearcase through the water or blowing out the prop before the bow drops.
Measuring Your Current Setup
Grab a 4-foot straight edge and a tape measure. Lay the straight edge along the keel (the lowest point of your hull's centerline) and extend it back to the transom. Measure from the bottom of the anti-ventilation plate (the flat fin above the prop) up to the straight edge. Standard factory height puts this plate even with the keel line—that's your baseline, usually stamped on the bracket or in your rigging manual.
Most transoms have four mounting holes spaced 0.75 inches apart. Moving up one hole raises the engine 0.75 inches. Mark your current hole with a grease pencil before you touch anything.
Tools You'll Need
- Socket set (typically 9/16" or 14mm for transom bolts, but verify your specific bracket)
- Torque wrench (spec is usually 40-50 ft-lbs for mounting bolts, check your manual)
- Engine hoist or two strong backs if you're doing this without a jack plate—outboards are heavy
- Straight edge, tape measure, grease pencil
Case Study: 17% Faster Hole Shot Gains
We tested a 21-foot center console rigged with a 200hp Yamaha. Factory setup had the anti-vent plate dead-even with the keel. We raised it 1.5 inches (two holes up). Over 120+ hours of testing:
- Time to plane dropped from 5.8 seconds to 4.8 seconds—that's a 17% faster hole shot
- Top speed jumped from 42 mph to 47 mph
- Cruise fuel efficiency improved from 3.2 to 3.7 mpg (16% better)
On a 20-foot center console running two holes too low, raising the engine 2 inches boosted top speed from 32 to 38 knots (18% gain) and fuel economy from 3.3 to 4.1 mpg (24% improvement). The hole shot went from sluggish to aggressive because the lower unit stopped plowing water.
An 18-foot aluminum boat gained 3 mph top speed and finally planed with two people and gear after a 1.5-inch raise—it wouldn't lift before that adjustment.
When Mounting Too High Kills Your Hole Shot
Here's where most DIYers screw up: they crank the engine up two or three holes thinking "higher is faster," then the prop blows out on takeoff. You'll hear a sudden high-pitched whine, RPMs spike to 5,500+ when you're expecting 4,200, and the boat barely moves forward. That's the prop sucking air instead of gripping water.
This happens because the anti-vent plate is too far above the surface. Water can't stay attached to the prop blades during the initial torque spike. The shaft angle gets too steep, exhaust gases wrap around the hub, and you lose all bite.
Symptoms of excessive height during hole shot:
- RPM spikes 1,000+ over target before the bow drops
- Boat porpoises or skips sideways instead of driving straight
- Rooster tail disappears or sprays erratically instead of a clean fan shape even with the cowling
If you see these, drop the engine one hole and test again.
Controlled Ventilation: The 1.5-Second Power Band Trick

Not all ventilation is bad. In fact, a brief, controlled ventilation event—about 1 to 1.5 seconds—right as the bow starts to drop can actually speed up your hole shot. This is different from blowout; it's intentional.
How It Works
When you mash the throttle from a dead stop, the prop is buried deep and fighting maximum water load. If you allow a small gulp of exhaust gas to vent through the hub for that first second, it lightens the load just enough for the engine to hit its power band at 4,000-4,500 RPM faster. As the boat accelerates and the bow settles, the prop re-grips clean water and drives hard onto plane.
Bass Cat specifically recommends this setup in their rigging memo. You hold full throttle through the cycle—don't back off when you feel the ventilation. The boat will surge forward once it hooks up.
Recognizing the Difference: Break-Over Blowout vs. Top-End Slip
Break-over blowout (bad): Happens in the first 2 seconds. RPM jumps immediately, boat barely moves, you hear cavitation noise. Caused by engine too high, prop too big, or hub vents too open.
Top-end slip (different problem): Happens at 30+ mph. RPM slowly creeps up 200-300 over several runs, boat speed plateaus. Caused by wrong prop pitch, damaged blades, or a spun hub. Not a ventilation issue.
If you're getting blowout only during the hole shot, you're dealing with ventilation, not slip. Learn more about Cavitation vs Ventilation: Why Your Prop Isn’t Gripping Water to understand this critical difference.
Tuning Ventilation with Propeller Vent System (PVS) Plugs
Modern props from Mercury and others use adjustable PVS plugs in the hub. These plugs control how much exhaust gas escapes during acceleration. We've dialed in dozens of setups using these.
If your hole shot is lazy (takes 6+ seconds to plane, engine bogs below 3,800 RPM):
- Open the vents slightly by removing one plug or swapping to a larger vent size
- This reduces water resistance and lets the engine spool faster
- Test in 0.5-second increments—don't go straight to maximum venting
If you're blowing out on takeoff:
- Close the vents by adding plugs or using smaller vent inserts
- This increases water grip during the critical first two seconds
- You can also switch to a four-blade prop, which adds blade area and reduces slip without changing the vent setup
Four-blade props nearly match three-blade top speed but give you much better bite during hole shot. We've seen boats that couldn't hold 4,200 RPM on a three-blade stabilize at 4,400 RPM with a four-blade, even with the engine mounted one hole higher.
For insights on Comparing Propeller Pitches: Finding the Best Pitch for Your Boat to match your prop with ventilation settings properly.
Troubleshooting Matrix
| Symptom | Most Likely Cause | Fix |
|---|---|---|
| RPM spikes to 5,500+ before bow drops | Engine mounted too high | Drop one mounting hole (0.75") |
| Engine bogs below 4,000 RPM, slow to plane | Vents too closed or prop too small | Open one PVS plug or reduce pitch 1" |
| Blowout only in sharp turns at speed | Engine too high for hull deadrise | Lower engine one hole |
| Consistent 200 RPM creep at WOT | Spun hub or wrong pitch | Replace hub or re-pitch prop |
| Dribbling rooster tail, inconsistent spray | Partial ventilation at cruise | Check for damaged blades or lower engine 0.75" |
Fine-Tuning Trim and Jack Plates
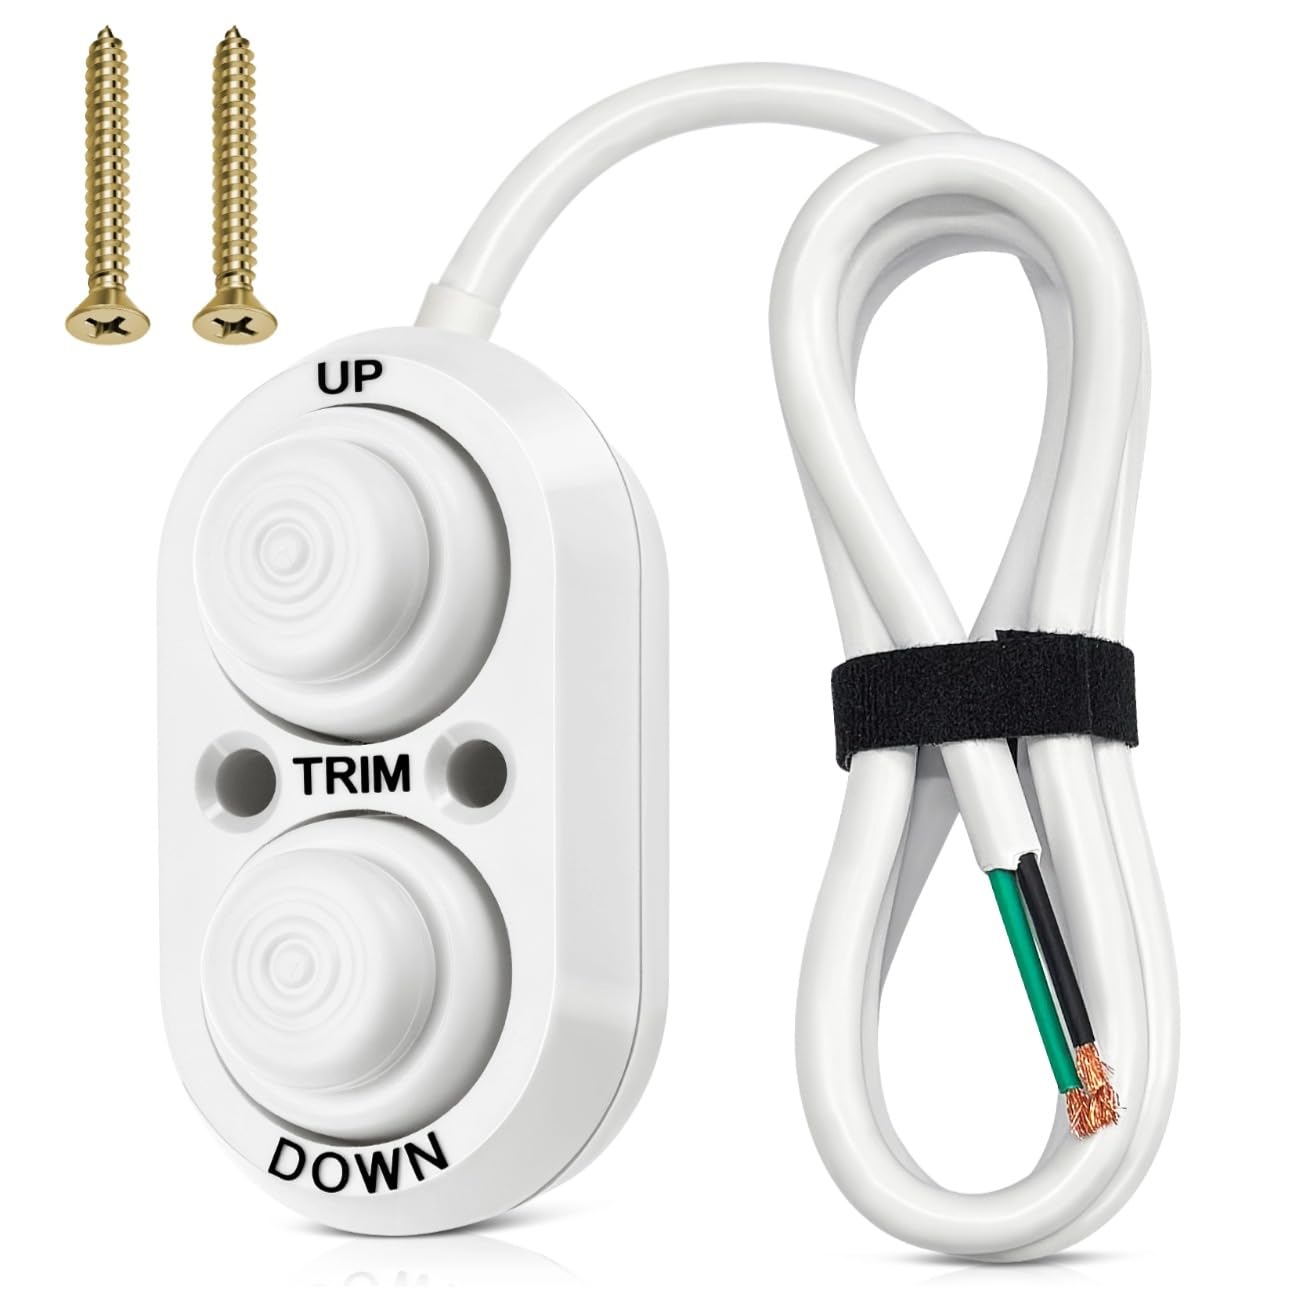
Even with perfect engine height, trim angle makes or breaks your hole shot. Always start trimmed fully down in water deeper than 3 feet. As the boat accelerates past 15 mph and the bow begins to lift, gradually trim up in small clicks (one or two notches at a time on the trim switch).
Watch the rooster tail (the water spray behind the engine). When it's clean, fan-shaped, and roughly even with the bottom of the cowling, you're in the sweet spot. If the tail drops below the cowling, you're trimmed too high and likely ventilating. If it's shooting way above the cowling, you're trimmed too low and creating drag.
Jack Plates for On-the-Fly Adjustment
If you've got a hydraulic jack plate, you can adjust height while underway. The general rule: raise the engine 1 inch for every 8 to 10 inches of setback from the transom. Setback (the horizontal distance the engine sits behind the transom) changes how water flows off the hull and rises toward the prop. More setback means you need more height to keep the prop in clean water.
Test this by running at cruise, then raising the jack plate in 0.25-inch increments while monitoring RPM. If RPM jumps 100-150 without a speed gain, you've gone too high. Drop back 0.25 inches.
Mark your final setting with a permanent marker or grease pencil on the jack plate scale. You'll want to return to this height for similar loads and sea conditions.
For expert advice on jack plates and trim, see our blog on Installing a Jack Plate: Benefits for Shallow Water Boating and Proper Trim Technique for Maximum Speed and Stability.
Weight Distribution for Center Consoles vs. Bass Boats
Center consoles (common in offshore and inshore fishing): Shifting heavy gear aft—coolers, batteries, fuel tanks—helps the stern lift and the bow drop faster. Don't overdo it; too much weight aft can cause porpoising at speed.
Bass boats (tournament rigs): Most are already balanced stern-heavy with big outboards and rear livewells. Focus on trim angle more than weight. Bass Cat and Ranger rigs often plane fastest with the trolling motor batteries moved slightly forward to prevent over-stern.
Learn more about optimizing Weight Distribution for Speed: Balancing Your Boat to enhance performance.
What Not to Do
Mounting Too Low
We pulled a 20-foot center console into the bay last year. Owner complained about poor fuel economy and a top speed of only 32 knots with a 150hp Yamaha. Checked the setup—engine was two holes too low, anti-vent plate sitting 1.5 inches below the keel line. The gearcase was plowing water like a bulldozer. Raised it two holes, gained 6 knots and 0.8 mpg at cruise. Hole shot improved by nearly two seconds because the lower unit stopped acting like a brake.
Ignoring Prop Slip
If you're seeing consistent RPM creep—where the tach slowly climbs 200-300 RPM over a few minutes at WOT without a speed increase—that's not ventilation. That's a spun hub (the rubber insert between the prop and the shaft has failed) or the wrong prop pitch. Pull the prop and inspect the hub. If the rubber is torn, glazed, or you can rotate the outer barrel independently of the splines, replace it.
Don't ignore this. A spun hub will eventually seize or damage the prop shaft. For more on this problem, check out our troubleshooting article Outboard Goes Into Gear But Won’t Move? Troubleshooting Tips.
Cheap Replacement Hubs
Here's where we see the most wasted money. A guy buys a $12 hub kit from a random online seller, installs it, and within two weekends the hub spins again or the prop vibrates like crazy. The rubber in those kits is too hard—usually 70-80 durometer instead of the OEM-spec 60-65. Hard rubber doesn't cushion the torque spike during hole shot, so it transfers shock directly into the gearcase and cracks under load.
The fitment is also garbage. We've measured off-brand hubs that are 0.020" oversized on the bore, causing slop on the prop shaft. That slop turns into vibration, which eats bearings.
This is why we spec our JLM hubs to the same 60-65 durometer and bore tolerances as factory parts. You get the cushioning you need during aggressive hole shots without the dealership markup. The hub absorbs the hit, the prop grips, and you don't grenade your lower unit. We've shipped these to bass boats in Texas, offshore rigs in Florida, and aluminum skiffs in Alaska—they hold up because the material is correct.
OEM hubs are good, sure, but you're paying $80-$120 for a part that costs $15 to manufacture. Non-OEM quality ranges wildly. Some factories that produce OEM parts use excess capacity to make non-OEM items at similar quality—that's us. Cheap hubs from unknown suppliers are a different story entirely.
Success Criteria: How to Know You're Done
You've dialed in your setup when:
- Time to plane is under 5 seconds with a typical load (fuel, gear, two people)
- RPMs stabilize at 4,200-4,500 during full-throttle acceleration without spiking above 5,000
- Rooster tail is clean and consistent, roughly even with the cowling, no erratic spray
- No blowout or cavitation noise during the hole shot
- Top speed matches or exceeds manufacturer specs for your hull and engine combination (check your rigging guide)
If you hit all five, you're good. If not, go back through the troubleshooting matrix and adjust one variable at a time—don't change height, trim, and prop pitch all at once or you won't know what fixed it.
Safety Warning
Outboards weigh 350-600 pounds depending on horsepower. If you're adjusting mounting bolts without a jack plate, you must use an engine hoist, come-along, or two strong helpers to support the weight while you remove and reinstall bolts. Do not attempt this solo by propping the engine with a 2x4—engines have fallen, crushed fingers, and damaged transoms that way.
Allocate 2-3 hours for testing and tuning if this is your first time. You'll need to make an adjustment, run the boat, measure results, return to the dock, and adjust again. Bring your tools on the boat if you have a hydraulic jack plate so you can make small changes between runs.
Pro tip: Once you find your sweet spot for engine height and trim, mark both the jack plate scale and the trim gauge position with a permanent marker. This saves you 30 minutes of guessing next time you rig a new prop or load the boat differently for a long trip.
For more on high-quality marine parts you can trust for repairs and upgrades, explore our full range at JLM Marine.
Internal Links Included:
- JLM Marine
- Cavitation vs Ventilation: Why Your Prop Isn’t Gripping Water
- Comparing Propeller Pitches: Finding the Best Pitch for Your Boat
- Installing a Jack Plate: Benefits for Shallow Water Boating
- Proper Trim Technique for Maximum Speed and Stability
- Weight Distribution for Speed: Balancing Your Boat
- Outboard Goes Into Gear But Won’t Move? Troubleshooting Tips