


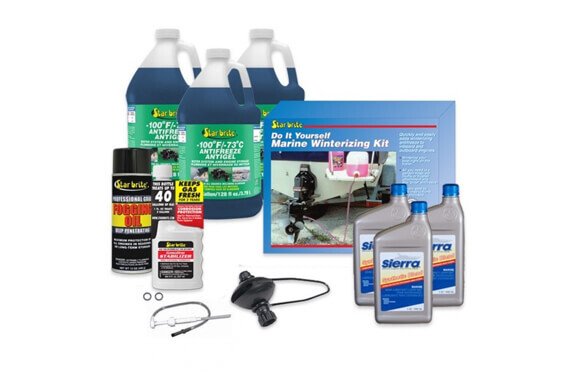
Winterizing Kits vs. DIY Supplies: What Do You Really Need?

I've winterized hundreds of outboards and watched plenty of owners destroy their engines trying to save a few bucks with the wrong approach. The kit-versus-DIY debate isn't about convenience—it's about whether you're actually protecting what you own or just going through the motions.
Pre-made kits run $50–$450 and throw in everything from antifreeze to vent covers, whether you need them or not. DIY lets you buy exactly what your setup requires, usually for $20–$100, but you have to know what you're doing. According to a Hippo survey, 69% of U.S. homes suffer winter damage—frozen pipes, drafts, ice dams—with repairs averaging $500 to $3,000. Boats and RVs face the same risks: burst engine blocks, cracked freshwater tanks, and seized components.
The real solution is understanding your system—engine type, plumbing layout, climate zone—and then deciding whether a kit covers it or you need to build your own list. For most setups, cherry-picking supplies works better because kits either include junk you'll never touch or skip the one critical item that keeps your engine alive.
What You Actually Need to Protect
Skip the generic checklists. Your winterization list depends on what you're storing. For outboards and I/Os, the engine block and cooling system are priority one. For RVs, it's the freshwater plumbing and roof seals. For any property, it's pipes and HVAC.
Angi data shows full home weatherization costs $65–$1,000 DIY or $250 for a pro, but the same principle applies to marine systems: most damage is preventable if you hit the right components. Focus on these, not on buying six gallons of antifreeze when you only need two.
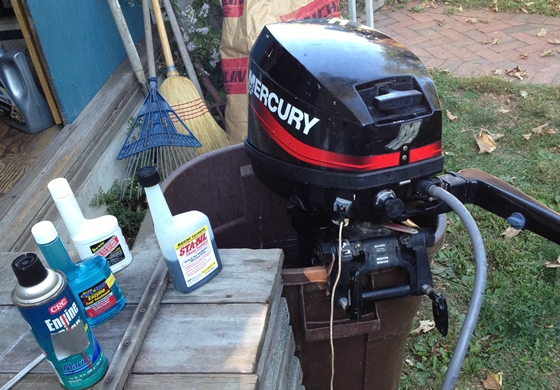
Antifreeze: Propylene Glycol Only
Never use automotive ethylene glycol antifreeze in a potable water system. It's toxic. RV and marine antifreeze is propylene glycol-based and safe for freshwater lines, but don't confuse the two. For a typical RV with one bathroom and galley, you'll burn through 4–6 gallons flushing every line, fixture, and appliance. For boats, multiply that by engine count—figure 5+ gallons per engine, plus another 2–3 for the generator and air conditioning if you have them.
Antifreeze also comes in different burst-protection ratings: -50°F versus -100°F. If you're storing in Minnesota, spend the extra dollar per gallon for -100°F. If you're in coastal Carolina, -50°F is fine. Kits rarely specify this, so you end up with mid-grade protection that might not cut it in a hard freeze.
Buy 10–15% more than you think you need. Running out halfway through a pump-out means restarting the whole process or leaving lines half-protected. Leftover antifreeze stores fine for next season if you keep it sealed and contamination-free. For engine-specific steps including antifreeze and other components, understanding Inboard & Outboard Motor Parts can help you plan better.
Roof Materials and Sealant Matching
RV roofs come in EPDM rubber, TPO, fiberglass, aluminum, and ALFA. Each one requires a specific sealant. Using the wrong product on EPDM causes the rubber to swell or crack. TPO reacts badly to petroleum-based sealants, leading to bubbling and early failure.
Check your RV's documentation or inspect the roof material directly. Once you know what you have, buy a sealant made for it—don't use generic roof caulk from a hardware store. Dicor makes EPDM-specific products; EternaBond tape works on TPO and fiberglass. One tube runs $8–$15 and covers most small repairs, far cheaper than a $400 roof panel replacement next spring.
Kits don't account for this. They include one sealant type and assume it fits everything, which is how you end up with failed seals six months later.
Rodent and Pest Barriers
Mice, squirrels, and spiders love winterized boats and RVs. Wiring harnesses, upholstery, and insulation are all fair game. Poison is a bad call—dead rodents inside your cabin or bilge create a smell problem ten times worse than the original issue, and you'll never find the carcass until it's rotted.
Traps work, but you still have to dispose of the body. We use dryer sheets, cedar chips, and stainless steel wool instead. Dryer sheets stuffed into cabinets, engine bays, and compartments put off a scent rodents avoid. Cedar chips do the same for storage areas. For actual entry points—gaps around plumbing, vents, or hatches—pack stainless steel wool or metal dish scrub pads into the opening. Mice won't chew through it, and it doesn't rust like steel wool, which can leave stains on fiberglass.
A box of dryer sheets costs $4. A bag of cedar chips is $6. A pack of scrub pads is $3. That's $13 total and covers most 30-foot RVs or mid-size boats. Kits don't include this stuff because it's not flashy, but it works.
Roof and Gutter Maintenance
Before you seal anything, clean the roof. Leaves, dirt, pine needles, and bird droppings trap moisture and promote mold. Use a dedicated roof cleaner—something formulated for EPDM or TPO, not household detergent, which can degrade the membrane.
Scrub gently with a soft brush, rinse thoroughly, and let it dry. While you're up there, inspect every seam, vent, skylight, and edge. Look for cracks in the sealant, lifted edges, or discoloration. Small cracks become big leaks once snow piles up and melts. Seal them now with the right product.
For homes and cabins, Lowe's winterization guidelines recommend clearing gutters and cutting back overhanging branches. Same logic applies to RVs: clear the roof, check for damage, seal it up. Don't skip this step assuming a tarp or cover will handle it. It won't.
Battery Maintenance and Storage
Batteries die over winter if you leave them installed and connected. Cold kills battery capacity, and parasitic draws from alarms or electronics finish the job. Pull the battery, clean the terminals with a wire brush, and store it in a climate-controlled space on a trickle charger or battery maintainer.
For boats with multiple batteries—house bank, starting, trolling motor—label each one before you pull them. When you reinstall in spring, you'll know which goes where. A good trickle charger costs $30–$50 and keeps the battery at full charge without overloading it. Cheap chargers cook the battery; skip them.
Kits don't include battery maintenance supplies. You have to handle this separately.
Step-by-Step DIY Winterization
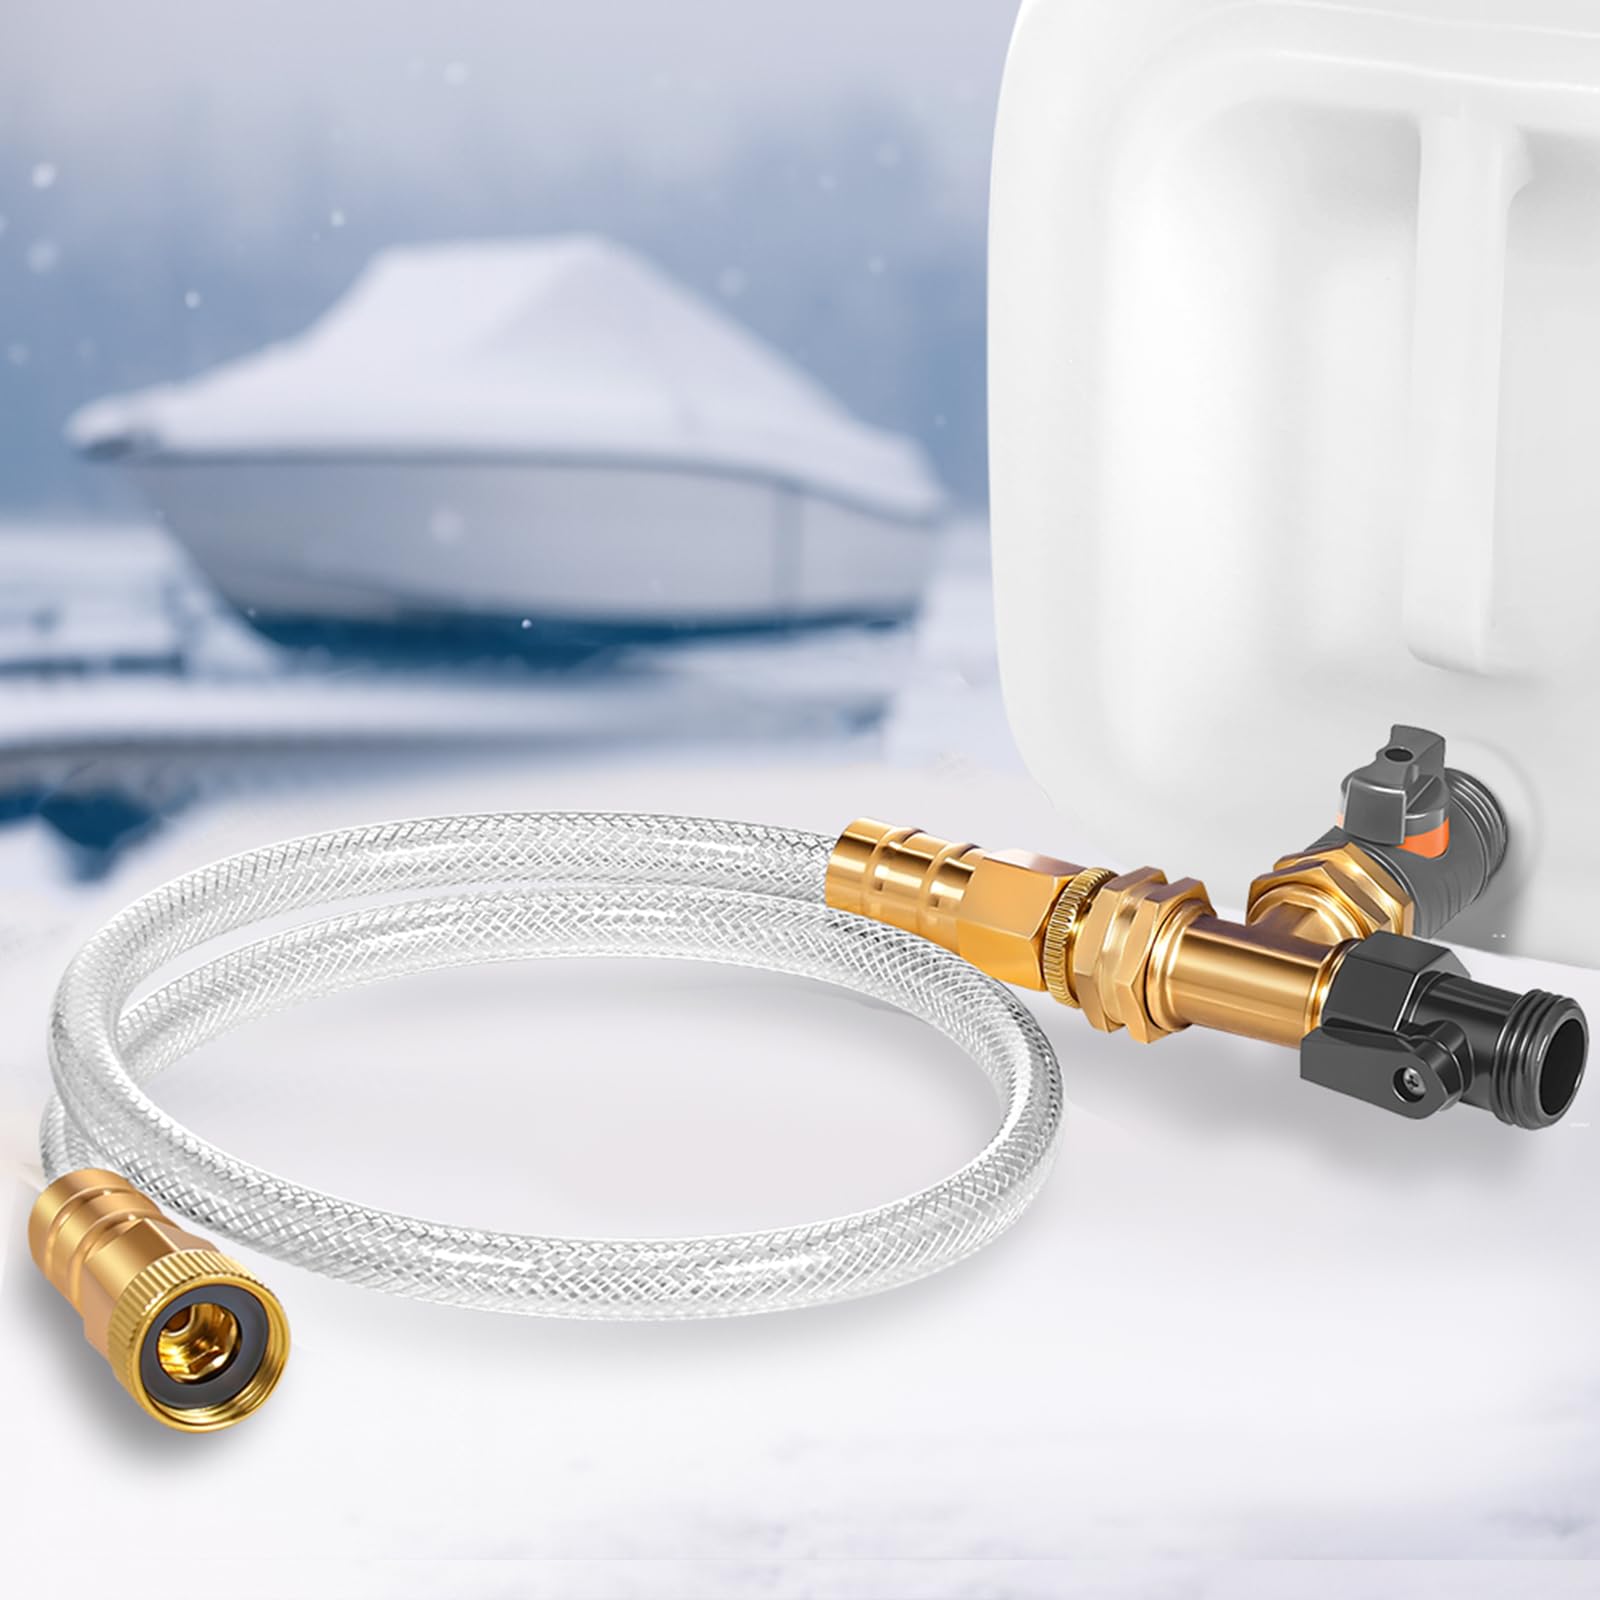
Start with the freshwater system. Drain all tanks—freshwater, gray, black. Open every faucet, flush the toilet, run the shower. If your RV has a water heater, bypass it or drain it completely. Pumping antifreeze into a full 6-gallon water heater wastes product.
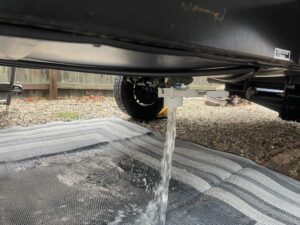
Hook up your antifreeze supply—either a pickup tube in a jug or a direct connection to your water pump intake. Turn on the pump and open each fixture one at a time, starting with the one farthest from the pump. Let antifreeze run until it flows pink and steady, then move to the next. Don't forget the outdoor shower, washer hookup, ice maker, or any other water-fed appliance.
For boats, the process is similar but includes the engine. You'll need a flush muff or a direct hose connection to the raw water intake. Run the engine at idle while pumping antifreeze through the cooling system until pink fluid exits the exhaust. Some engines require fogging oil sprayed into the carburetor or throttle body while running—check your service manual. Lower unit gear lube also needs changing; water intrusion over the season turns the oil milky, and if it freezes, it can crack the gearcase.
Once the plumbing is done, clean and inspect the exterior. Seal any roof cracks or gaps. Install vent covers to allow airflow while keeping rain and snow out. Apply rodent deterrents—dryer sheets, cedar chips, steel wool in openings.
If you need details on specific parts like impellers or carburetors for your outboard, the guides on Johnson/Evinrude Outboard Water Pump Replacement and Yamaha Outboard Carburetor Rebuild are excellent resources.
Storage: Covers, Units, and Snow Management
A climate-controlled storage unit is the best option, but it's expensive and often unavailable. The next best choice is a high-quality, breathable RV or boat cover. Breathability matters. A non-breathable tarp traps condensation underneath, leading to mold and mildew. Look for covers specifically designed for RVs or boats, not cheap blue tarps.
Secure the cover properly. Wind will destroy a poorly tied cover and can rip off antennas, vents, or trim in the process. Use straps with padded buckles to avoid scratching the finish.
If you're storing outdoors in snow country, plan to clear snow regularly. Snow load can collapse roofs or create pressure points that crack seams. Use a plastic shovel, not metal—metal scratches fiberglass and aluminum. Even with a cover, brush off heavy accumulation every few weeks.
Check on your stored unit at least once a month. Look for cover damage, snow buildup, or signs of intrusion. A quick 15-minute inspection prevents major problems.
Cost Breakdown: Kits vs. DIY

| Item | Kit Cost | DIY Cost |
|---|---|---|
| RV antifreeze (6 gal) | Included in $50–$100 kits | $3–$5/gal, $18–$30 total |
| Roof sealant | Often omitted or generic | $8–$15 |
| Rodent deterrents | Not included | $13 (sheets, chips, pads) |
| Battery maintainer | Not included | $30–$50 |
| RV/boat cover | $150–$450 | $150–$450 |
| Total | $200–$550+ | $220–$560 |
Kits look cheap on paper but often include low-grade antifreeze, the wrong sealant, or nothing for rodents and batteries. DIY costs slightly more upfront if you're starting from zero, but you're buying exactly what your setup needs, not what a kit manufacturer assumes you need.
OEM vs. Non-OEM Winterization Supplies

OEM antifreeze, sealants, and maintenance products are reliable but overpriced. You're paying for the brand name and dealer markup, not better performance. Cheap aftermarket junk—$2 sealant tubes, off-brand antifreeze with no temperature rating—fails when you need it most.
The middle ground is high-quality non-OEM from manufacturers like JLM Marine, which often source from the same factories that produce OEM parts. You get factory-spec quality without the dealership price. A $12 tube of proper EPDM sealant works as well as a $20 OEM version. Same with antifreeze: buy a reputable brand with a clear burst-protection rating, not the cheapest jug on the shelf. For trusted parts at factory-direct prices, visit JLM Marine.
Engine-Specific Requirements for Boats
Outboards, I/Os, and inboards each have unique winterization steps. Outboards need fogging oil sprayed into the carburetor or throttle body to coat internal components and prevent corrosion. Two-strokes are especially vulnerable. Run the engine while spraying until it stalls from excess oil.
I/Os and inboards require antifreeze pumped through the raw water cooling system. Use a flush muff or direct hose connection, and make sure antifreeze reaches the exhaust manifolds and heat exchanger. Drain the block if you're in a region where temps drop below your antifreeze rating.
Lower units need fresh gear lube. Pull the drain plug, check for water contamination (milky oil), and refill with the correct viscosity. Yamaha, Mercury, and Suzuki each specify different lubes—don't mix them.
Fuel stabilizer goes in the tank at the manufacturer's recommended ratio, then run the engine for 10 minutes to circulate it through the fuel system. Untreated fuel gums up carburetors and injectors over three months.
Kits don't cover engine-specific steps. You have to research your model and buy the right products separately. For more on water pump maintenance and rebuilding for various outboards, see the Cooling System collection and related service guides.
What Kits Get Wrong

Most winterization kits assume a one-size-fits-all approach. They include generic antifreeze, a basic sealant, and maybe some pipe insulation. They don't account for roof material, engine type, climate zone, or battery storage. You end up with products that might work or that leave critical gaps.
Some kits also include low-quality components to hit a price point. A $50 kit with six gallons of antifreeze sounds like a deal until you realize it's -50°F rated and you're storing in Montana. Or the sealant isn't compatible with TPO roofs. Or there's no fogging oil for your two-stroke.
DIY lets you skip the junk and buy exactly what works. It takes more planning, but the payoff is a system you know is protected, not one you're hoping survives until spring.
Common Mistakes to Avoid
Not bypassing the water heater. If you pump antifreeze into a full 6-gallon tank, you've just wasted six gallons of product. Learn how to use the bypass valve or drain the tank first.
Underestimating antifreeze volume. Running out mid-job means restarting or leaving lines unprotected. Always buy extra.
Ignoring appliances. Ice makers, washers, dishwashers, and water pumps all have lines that need antifreeze. Don't forget them.
Using the wrong sealant. A petroleum-based product on TPO causes chemical reactions and bubbling. Match the sealant to the material.
Skipping the roof inspection. A clean exterior and sealed roof prevent water intrusion and mold. Don't assume a cover handles it.
What You Really Need to Buy
Here's the actual shopping list for a typical RV or mid-size boat:
- 6–10 gallons of propylene glycol RV/marine antifreeze (temperature-rated for your climate)
- Roof sealant (EPDM, TPO, or fiberglass-specific)
- Dryer sheets, cedar chips, stainless steel wool
- Battery maintainer/trickle charger
- Fogging oil (two-strokes and some four-strokes)
- Lower unit gear lube (OEM or high-quality aftermarket)
- Fuel stabilizer
- Breathable RV or boat cover (if storing outdoors)
- Plastic snow shovel (if in snow country)
Skip the kits. Buy these items individually, match them to your setup, and you'll have everything you need without paying for products you'll never use.
If you're not sure what your engine requires, check the service manual or contact a parts supplier with your model details. We've shipped winterization supplies to customers in Alaska, Texas, and everywhere in between—the right products depend on what you're protecting and where you're storing it.
Pro tip: After winterizing, tie a bright tag to the steering wheel or ignition that says "SYSTEM WINTERIZED—DO NOT START." I've seen guys fire up engines full of antifreeze in spring because they forgot what they did six months earlier. That tag saves you from flushing pink fluid through a running engine or, worse, starting a fogged motor without clearing the oil.
For a one-stop source of quality parts and accessories tailored for your boat, explore the Boat Accessories collection at JLM Marine.
Don't forget to visit the JLM Marine homepage for more excellent resources and direct factory parts shipped worldwide.