


Polishing and Touching Up Your Outboard’s Paint
Understanding Paint Damage on Outboards
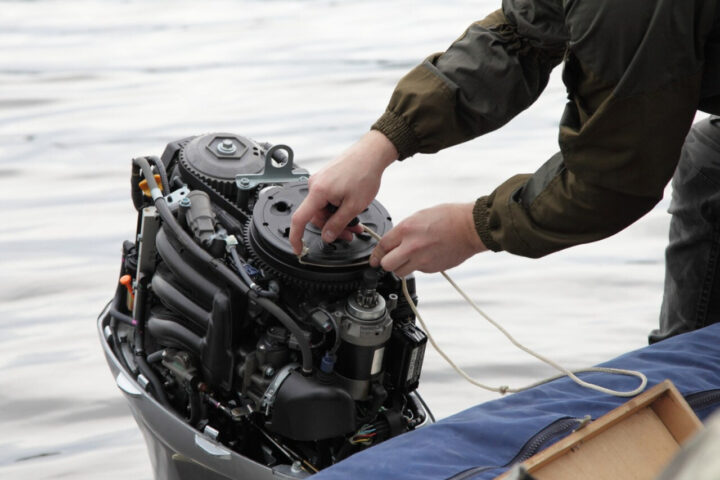
Pull your boat off the trailer and check the outboard paint. Scratches and scuffs on the gear housing, skeg, lower unit, or cowling aren't just cosmetic—they're direct routes for corrosion to start eating into bare metal. We see this daily: exposed aluminum on a gearcase turns into galvanic corrosion pits within weeks in saltwater. Left unchecked, a small chip becomes a structural repair job. Regular inspection stops this cycle before it costs you real money. For tips on proper seasonal care, refer to the Off-Season Outboard Maintenance Checklist to catch problems early.
Tools and Materials for Paint Restoration

Using hardware store Krylon on a marine motor is like trying to cut gelcoat with a butter knife—it won't hold up. You need marine-grade materials engineered for saltwater, UV bombardment, and thermal cycling.
What You Actually Need
ColorRite Refinishing Kits: These come factory color-matched to OEM specs—no guessing if "Yamaha Blue" is actually correct. The kit bundles primer, color, and clear in one package. We shipped one to a customer in Australia for a severely scratched plastic apron on his seven-year-old Suzuki DF 9.9. He wiped it down, wet-sanded with 600-grit, applied three primer coats, three color coats (Suzuki Shadow Black), three clear coats, then final-sanded with 1200-grit and polished. Factory-like finish after 3-5 days. That's what proper materials deliver.
Marine Primer: Self-etching primer for bare aluminum (critical for gearcases), high-build primer for plastic cowlings or filling minor surface irregularities. Don't interchange them—self-etching chemically bonds to metal, high-build smooths plastic.
Marine Clear Coat: This is your UV and salt barrier. Two-part polyurethane clear is tougher than single-stage, but requires mixing and has a short pot life. Aerosol clears work fine for touch-ups if you apply multiple thin coats.
Wet/Dry Sandpaper: 600-grit for initial scuffing and feathering chip edges, 1200-grit for leveling clear coat before polishing. Regular sandpaper loads up and scratches—don't use it.
Specific Chemicals: Acetone cuts oil and old wax faster than generic marine degreasers, but it also flashes off fast—work in sections. For waxy residue, use a dedicated wax remover like DuPont Prep-Sol. We've found acetone alone sometimes leaves a film that causes fisheyes in the paint.
Microfiber Cloths, Masking Tape, Respirator: Non-negotiable. Marine clear coats contain isocyanates—read the safety data sheet and wear a proper organic vapor respirator, not a dust mask.
Surface Cleaning and Degreasing
Wash the area with soap and water first. Then degrease with acetone on a clean cloth, wiping in one direction (not circles) to avoid redepositing contaminants. Any grease, wax, or silicone left behind will cause the paint to crater or peel. We've seen guys skip this and end up with a finish that looks like the surface of the moon.
The Spray-Out Test
Before you spray your cowling, grab scrap cardboard and shoot a test pattern: primer, color, clear, exactly as you'll do on the motor. This shows you three things:
- Color match accuracy next to an unpainted section of the actual motor
- Your spray technique—distance, speed, overlap—so you can dial it in before it matters
- Paint flow and atomization—we once opened a can of Phantom Black stored in a hot shed that sprayed with a greenish tint; the spray-out caught it before it ruined a gearcase
Do this on a warm, windless day if possible. Cold paint atomizes poorly and lays down rough.
Picking the Right Environment
Ideal conditions: 60-75°F, low humidity, no wind. Real-world garages aren't perfect. If you're spraying indoors, wet the floor with a garden hose 20 minutes before painting—this traps dust and keeps it from blowing onto wet paint. High humidity (over 70%) prevents proper solvent evaporation and can cause blushing (a milky haze in the clear). Direct sun makes the surface cure too fast, trapping solvents underneath and causing soft spots. Wind deposits every piece of airborne debris directly into your finish. Plan around the weather or accept a rougher result that you'll need to wet-sand more aggressively.
Step-by-Step Paint Restoration
Disassembly and Protection
Remove the cowling or lower unit if you can—painting on a bench beats painting on the transom. Tape off props, anodes, trim tab, water intakes, and any hydraulic fittings. Use 2-inch automotive masking tape and overlap edges. Don't tape graphics or decals unless you're planning to clear over them later (which requires perfect prep to avoid edge lift).
Surface Sanding and Pitting Repair
Start with 600-grit wet/dry on a sanding block for flat areas. Feather the edges of any chips so there's no hard line between old paint and bare metal. On curves like a cowl, hand-sand without a block to follow the contour.
For deep galvanic corrosion pits in aluminum gearcases: Sanding won't fix these. Clean the pit with acetone, then fill with aluminum-reinforced epoxy filler (like West System with aluminum powder). Let it cure 24 hours, sand it flush with 180-grit, then 320-grit, then proceed with priming. A guy with a 1976 Mercury 500 (50 HP) outboard filled four 3/8-inch holes in the anti-ventilation plate and repainted the skeg using this method—West System epoxy, zinc-phosphate primer, Mercury Phantom Black enamel. Under $30, three days of work, seamless finish. For ongoing care of your gearcase, check out our detailed guide on Maintaining Your Outboard’s Gearcase: Mercury vs. Yamaha.
Wipe the sanded area with a tack rag, then final-wipe with acetone on a clean microfiber cloth.
Primer Application
Self-etching primer on bare aluminum, high-build primer on plastic or over epoxy filler. Hold the can 8-10 inches away. Move at a consistent walking pace, overlapping each pass by 50%. Why 50%? Because the spray pattern atomizes in a bell curve—the densest paint is in the center stripe, the edges are thinner. Overlapping by half ensures even coverage across the whole surface.
Apply two to three light coats, 10-15 minutes drying between coats (read the can—some dry faster). If you see stippling (grainy, rough texture), you're either too far away or not overlapping enough. Move closer or slow down.
Color Coat Application
Three thin coats beats one heavy coat every time. Heavy coats run, sag, and take forever to cure. Thin coats flash off fast and build evenly.
Same technique: 8-10 inches, 50% overlap, consistent speed. On the Suzuki DF 9.9 apron job, the customer applied three color coats with full drying time between each. The result matched the factory plastic perfectly.
Troubleshooting:
- Runs: You're moving too slow or holding too close. If you get a run, let it dry completely (24 hours), sand it flat with 600-grit, and re-spray.
- Dry, grainy finish: You're too far away or spraying in wind. The paint is drying mid-air before hitting the surface.
Wait one hour (or per can instructions) before clear.
Applying Clear Coat
Clear coat is what makes the color "pop" and provides the corrosion barrier. Apply three coats minimum, same technique as color. Don't rush—wait the full recommended time between coats. If you spray clear over color that hasn't fully flashed, the solvents in the clear will wrinkle the color underneath.
The entire paint system—primer, color, clear—needs 24 to 48 hours to fully cure, depending on temperature and humidity. "Dry to touch" isn't the same as "cured." Don't handle it, don't tape over it, don't install it until it's fully hard.
Do not attempt this if the temperature will drop below 50°F overnight. The paint won't cure properly and you'll end up with a soft, easily damaged finish.
Finishing for a Factory-Quality Look
Wet-Sanding the Clear Coat
After 24 hours cure minimum, wet-sand with 1200-grit to knock down dust nibs, orange peel, and any slight texture. Keep the surface wet (spray bottle works), sand in straight lines, light pressure. You're not removing paint—you're leveling the surface. When the sandpaper glides silently and smoothly without catching, you're done. Wipe clean, let it dry.
Polishing to Refine Gloss
Use a light-cut marine polishing compound like Flitz or 3M Perfect-It. By hand: small amount on a microfiber cloth, rub in overlapping circles or back-and-forth, moderate pressure. You'll see the sanded haze disappear and the gloss return. Buff off the residue with a clean, dry cloth.
Dual-Action (DA) polisher vs. rotary buffer: A DA is safer for curved cowlings—it oscillates and rotates, spreading heat and reducing the risk of burning through the clear. A rotary spins in one direction and builds heat fast; it's faster but easier to mess up. If you've never used a polisher, practice on scrap or stick to hand polishing.
Reassembly and Final Inspection
When reinstalling the cowl or lower unit, use painter's tape on the edges where parts meet—this prevents chipping fresh paint during alignment. We've seen guys crack a perfect paint job by forcing a cowl latch.
Check for color mismatch, missed spots, or dust. A proper job will look seamless.
Maintenance and Regular Touch-Ups
Annual Touch-Ups
Hit any new chips or scratches once a year before corrosion starts. Light sand the chip with 220-grit, wipe with acetone, prime, color, clear. Small touch-ups don't need wet-sanding or polishing—just feather the edges and move on. Mercury recommends annual touch-ups for gearcases, especially in saltwater.
Saltwater boaters need more frequent inspections than freshwater—check every month during the season. For a full range of outboard parts and accessories to keep your motor in top shape, browse the factory-direct selection.
UV Protection
UV rays fade and chalk even marine-grade paint over time. After the paint fully cures (one week minimum), apply a quality marine wax or sealant. Reapply every three months in strong sun. This extends the gloss and adds a sacrificial layer.
Factory Color-Matched Marine Paints
OEM touch-up paints from Mercury, Yamaha, Suzuki, or BRP are formulated to match factory colors exactly and resist saltwater, UV, and thermal shock. BRP factory touch-up spray is excellent quality but needs proper curing time—forum users recommend a heat gun on low to speed the process after application.
Generic spray paint from a hardware store isn't formulated for marine immersion or UV exposure. It'll fade in months and offer almost no corrosion protection. The cost difference is minimal compared to repairing corrosion damage later.
Paint lifespan depends on type and environment: epoxy paints last 5-10 years, polyurethane 3-7 years, alkyd 2-5 years. Regular touch-ups and UV protection push those numbers higher.
How Much Paint Do I Need?
One standard aerosol can of color (typically 12 oz) covers a standard outboard lower unit with 2-3 coats. A full cowling might take two cans depending on size. Primer and clear: plan one can of each per major component. Buy an extra can of color for future touch-ups—paint batches vary slightly, and you want an exact match.
Pro tip: Rinse your engine with fresh water after every saltwater run, and the paint—and everything else—will last twice as long. For comprehensive resources on outboard motor maintenance and parts, explore JLM Marine: Direct from Factory Boat Parts | Free Worldwide Shipping.