


Install Fresh Anodes in Spring: Start the Season Right
- Anode Types: Match Your Water
- Surface Prep: Get Down to Bright Metal
- Bolting the Anode: Tight and Insulated
- Pencil Anodes Inside the Engine
- When to Replace: The 50% Rule
- Freshwater and Trailered Boats
- Troubleshooting Installation Problems
- Tools and Materials Checklist
- FAQ: Sacrificial Anode Questions
Spring haul-out is when you swap anodes. Before you drop the boat back in, you need clean surfaces and tight bolts, or you're wasting money on metal that won't protect anything.
Anode Types: Match Your Water
Use zinc anodes for saltwater—they've been the standard along US coastlines for decades. In freshwater like the Great Lakes, zinc won't work; it forms a hard oxide coating and stops protecting. You need magnesium anodes because they're reactive enough for low-conductivity water. For brackish areas like the Chesapeake Bay or if you move between environments, aluminum anodes handle both and last longer than zinc.
Aluminum has gotten better. Modern alloys include indium to prevent passivation—the non-conductive skin that killed older aluminum anodes. Despite myths, these work well now.
Using the wrong type is common. We pulled a boat last spring with zinc on a freshwater lake. The shaft was pitted because the anode just sat there with a gray crust doing nothing.
According to marine corrosion data, galvanic corrosion costs the US economy $276 billion annually. Anodes are cheap insurance.
Surface Prep: Get Down to Bright Metal
This is where most installations fail. The anode needs direct metal-to-metal contact with the shaft, rudder, strut, or trim tab. If there's paint, grease, or oxidation between the anode and the component, electrical flow won't happen, and the anode won't sacrifice itself.
"Bright metal" means shiny, raw metal with no discoloration or gray oxide. Use a wire brush—hand brush or drill attachment—to scrub the mounting surface. For stubborn spots, use 1000-grit wet sandpaper. Coarser grits like 80 or 120 leave deep scratches that can weaken the shaft or trap marine growth.
Don't over-sand. You're not polishing to a mirror finish. Stop when you see clean metal. Over-sanding thins the shaft.
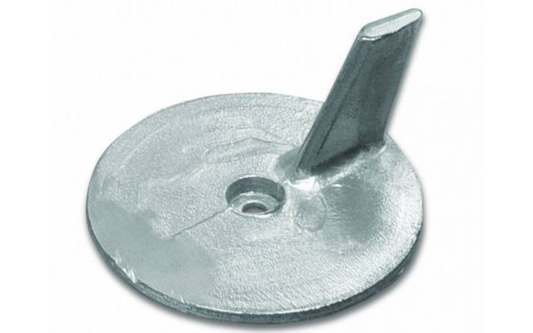
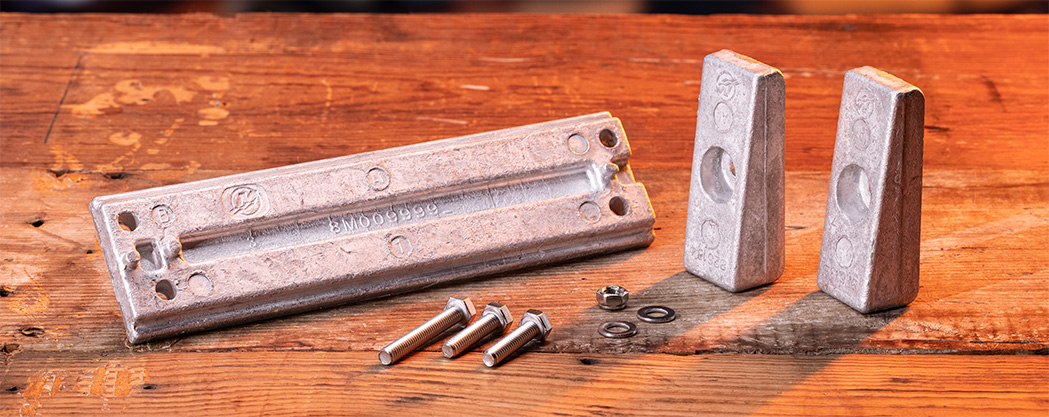
Shaft Anode Surfaces
Remove the old anode with a wrench. You'll find crusty anode residue and oxidation on the shaft where it sat. Wire-brush that area hard until you see bright metal. Clean where the anode base sits and where the bolt heads contact the shaft. Both surfaces matter for electrical continuity.
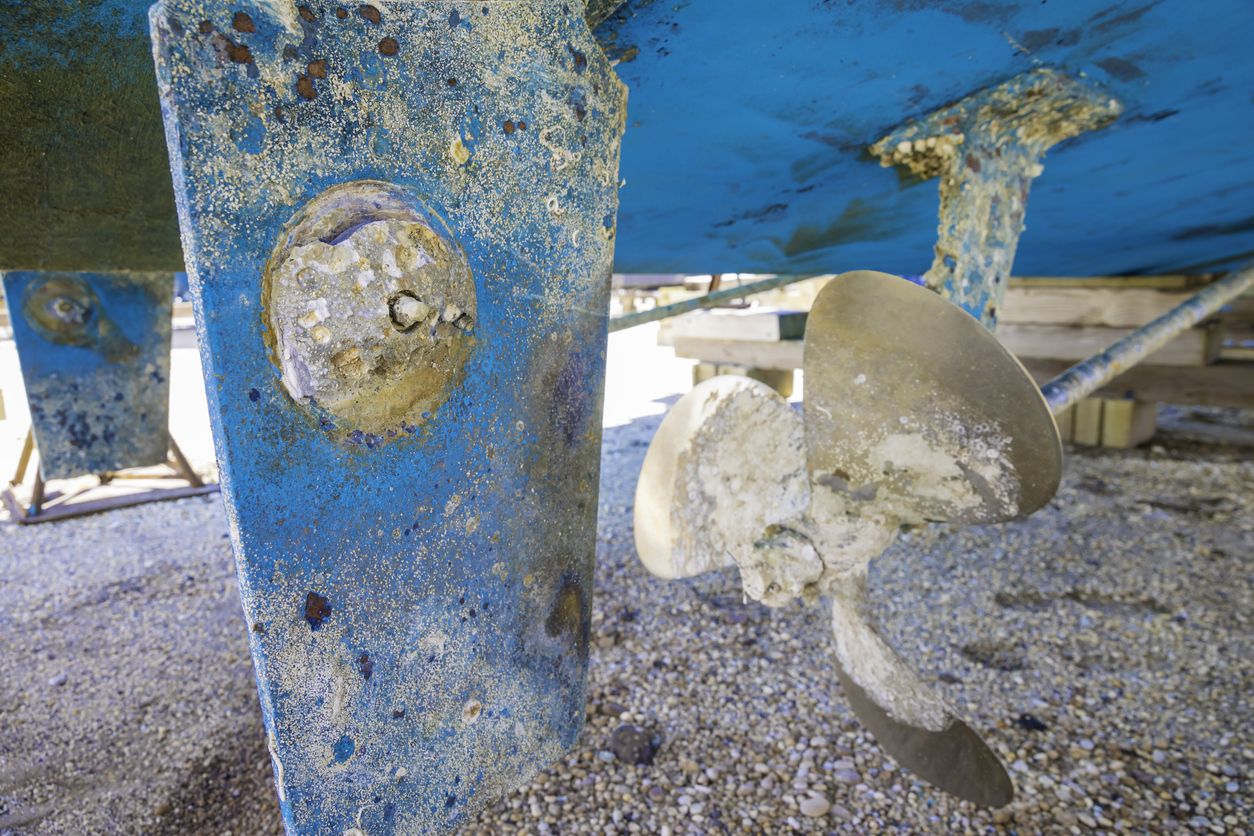
Rudder, Strut, and Trim Tab Surfaces
Same principle, harder access. Use a smaller wire brush or wrap sandpaper around a wood block to get into tight spots. On trim tabs, the anode usually mounts directly to the tab surface—clean that contact area thoroughly.
Warning: Never paint over an anode. Doing so kills it instantly.
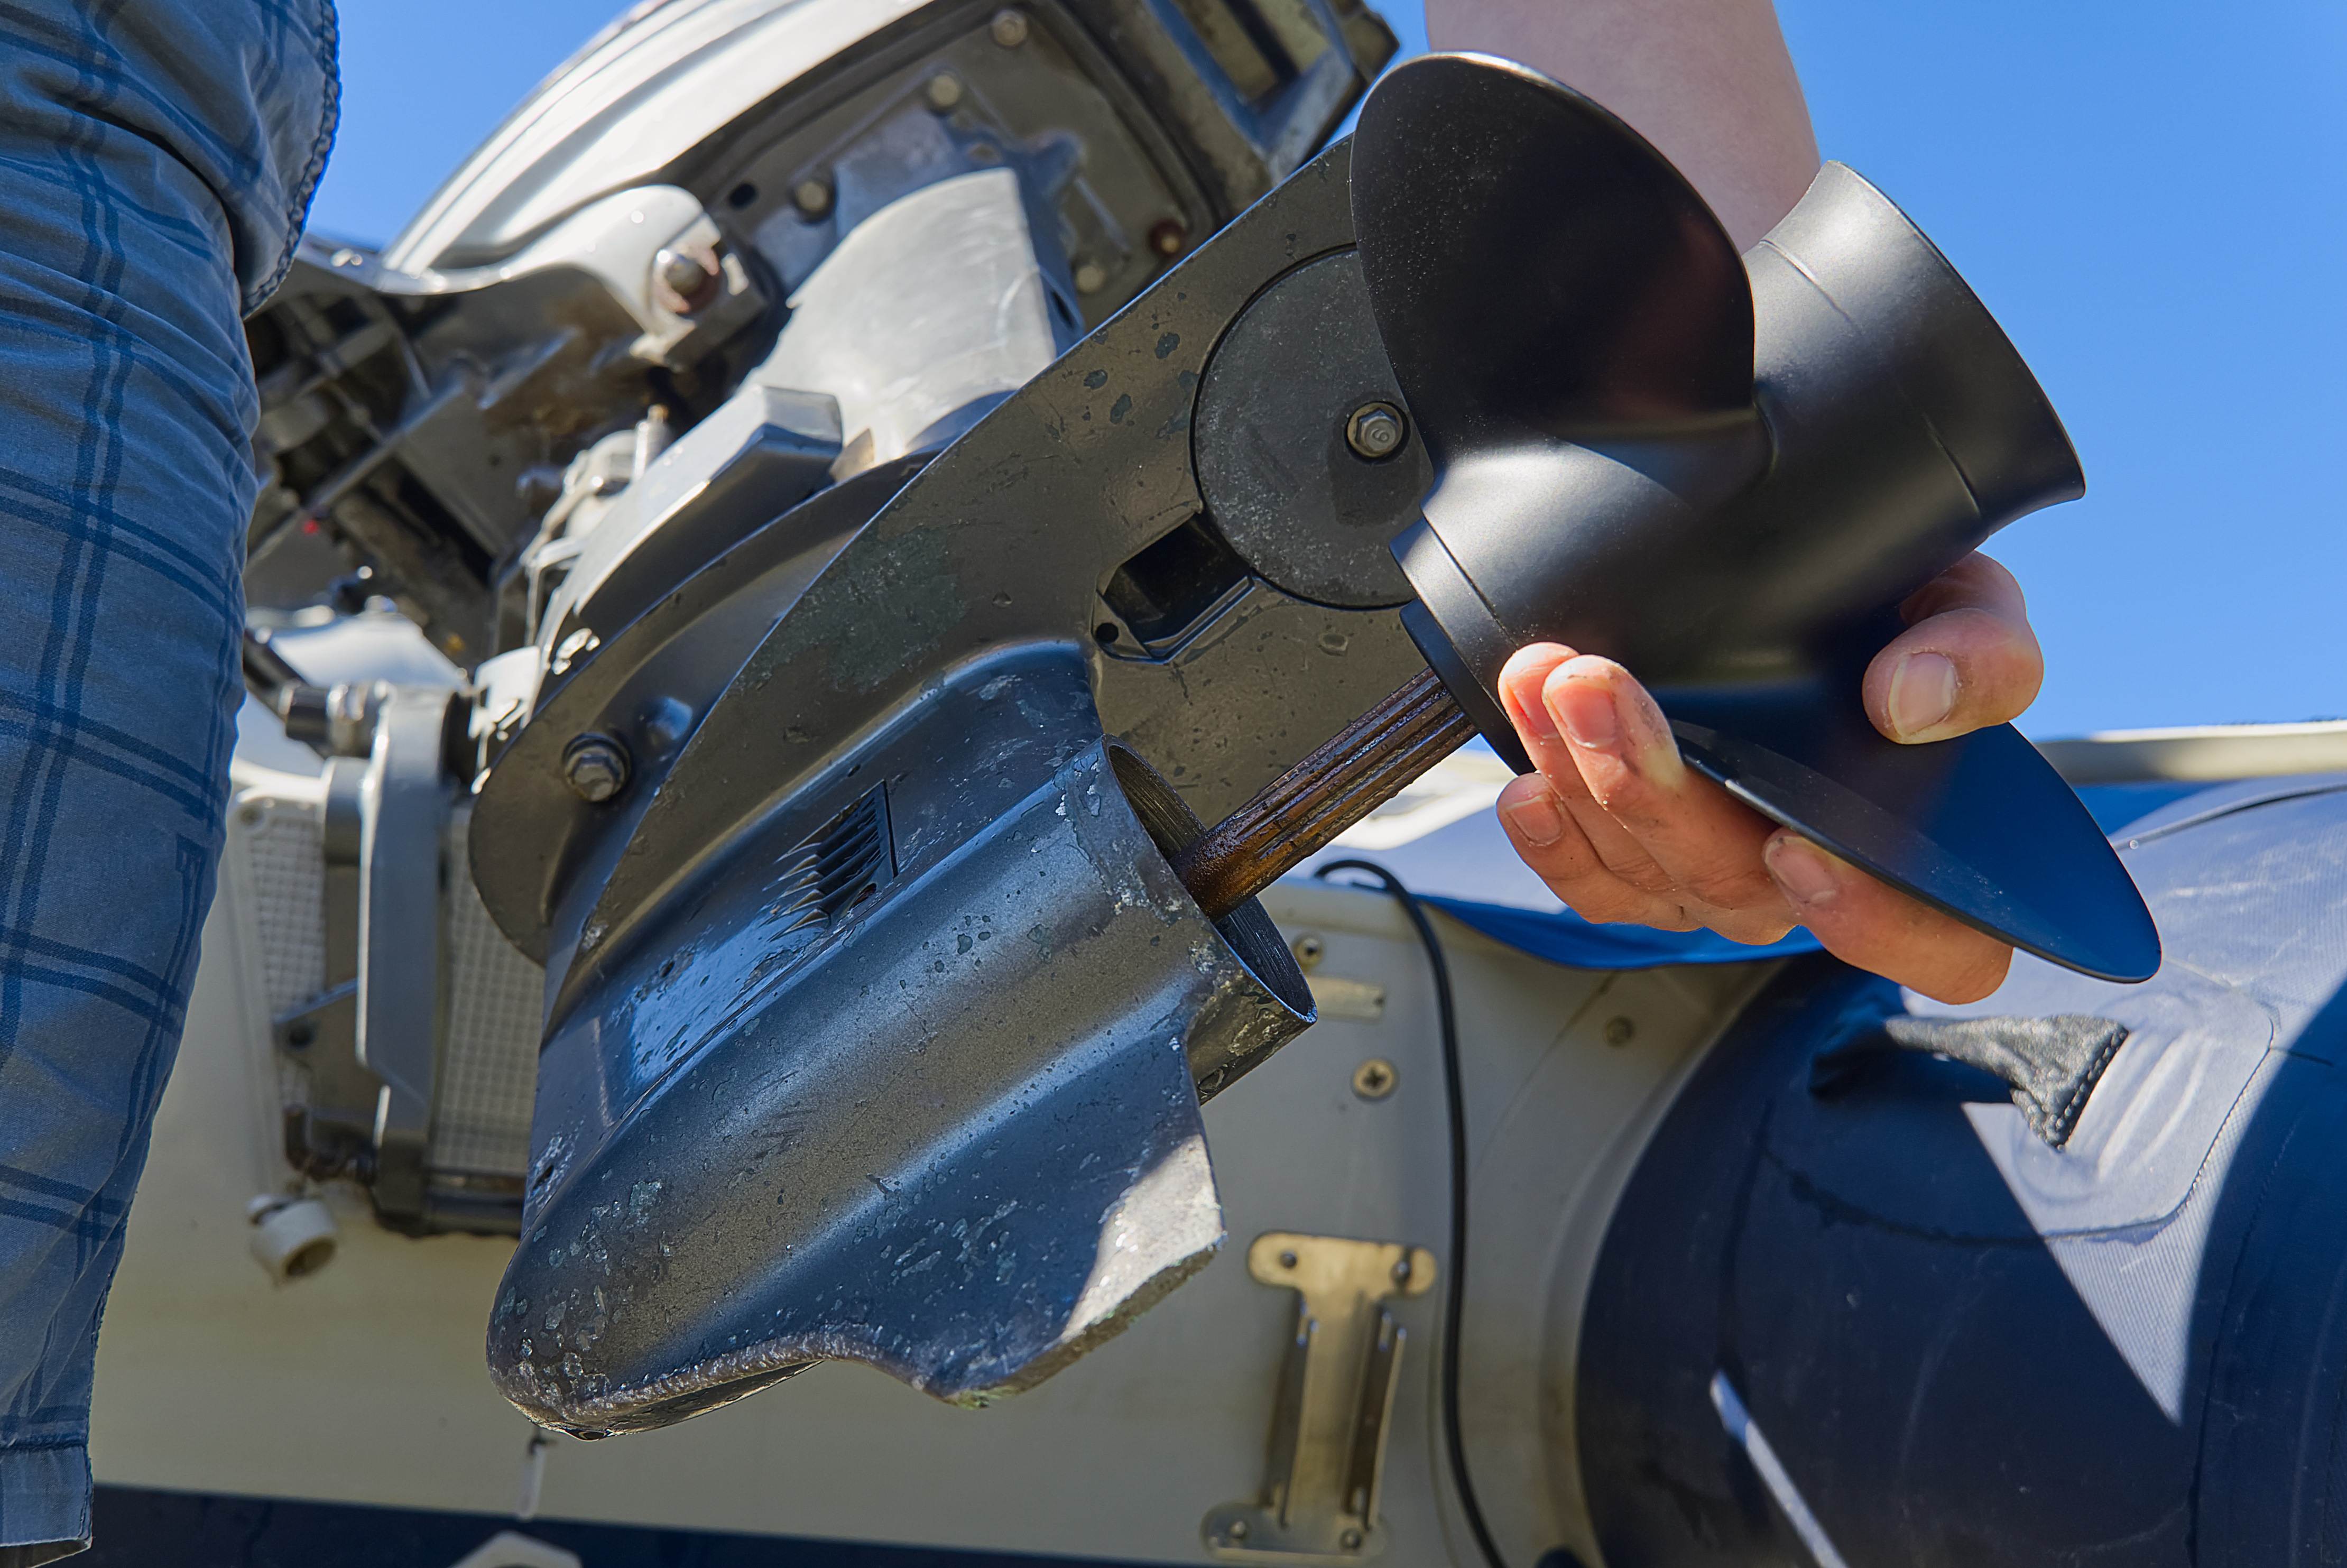
Bolting the Anode: Tight and Insulated
Once surfaces are clean, seat the anode. Tap it lightly with a brass hammer—not steel, which can spark or dent the anode. This eliminates air gaps.
Torque the bolts snug. Loose bolts mean poor contact and potential anode loss from vibration. After the first few hours of engine run time, re-torque if you can access them. Anodes settle in, and bolts can loosen slightly.
Use Tef-Gel on Stainless Fasteners
Here's where people skip a critical step. If you use stainless steel bolts (use 316-grade marine stainless), coat them with Tef-Gel or another PTFE-based paste. Stainless is more noble than zinc or aluminum. Without insulation, the bolt itself can corrode, or it creates localized galvanic cells that pit the protected component instead of letting the anode do its job.
Apply Tef-Gel liberally: on the threads, under the bolt head, under the washer, everywhere dissimilar metals touch. This prevents the fasteners from seizing due to galvanic scale and keeps the anode as the only sacrificial element in the system.
We've seen guys use nail polish. Don't. It flakes off in saltwater. Tef-Gel is designed for this.
Check Electrical Continuity
After installation, use a multimeter set to Ohms. Touch one probe to the anode, the other to the protected metal component (like the prop shaft). Resistance should be near zero. If it reads high, you've got paint or oxidation blocking the connection. Clean it again.
Pencil Anodes Inside the Engine
Don't forget internal anodes. Outboards and inboards with closed cooling systems have pencil anodes inside the heat exchanger or block. These protect against electrolysis in the coolant.
Remove the plug, unscrew the old pencil anode, inspect it. If it's more than 50% gone or covered in white powder (zinc oxide that stops it working), replace it. Thread in a new one, hand-tight plus a quarter turn with a wrench. Check it yearly during spring prep. Proper maintenance of your cooling system, including internal anodes, complements the external protections and can be part of comprehensive cooling system care from source parts.
When to Replace: The 50% Rule

Replace anodes when they've lost 50% of their original mass—not just surface area. A heavily pitted anode might look 90% intact but weigh half what it should. In US saltwater, that's often 6–12 months depending on use. Inspect every 1–3 months during the season, as recommended by UMS Florida marine services.
In freshwater, anodes last longer—12 to 36 months—but still need checks every 2–6 months, per Anode Outlet guidelines.
Signs of trouble:
- Anode shows little to no wear (it's not working; check your bonding system or confirm you're using the right type)
- Pitting or uneven erosion around the bolt holes (poor surface prep or missing Tef-Gel)
- Corrosion on the prop, shaft, or rudder despite a present anode (wrong anode type, or it's not making electrical contact)
Freshwater and Trailered Boats

Freshwater boats still need anodes. Galvanic corrosion happens in lakes and rivers, especially with mixed metals—stainless props, aluminum lower units, bronze through-hulls.
For boats that spend time on trailers or lifts, anodes are still necessary when the drive is submerged. Use magnesium for pure freshwater. If you trailer between saltwater and freshwater, stick with aluminum; it's versatile.
Hanging "guppy" anodes work well for trailered boats. Suspend one near the drive when docked or in a slip. This protects components without permanent hull mounting.
Stray current is a bigger issue in freshwater marinas with shore power. Even a small voltage leak through bad wiring accelerates galvanic corrosion. Proper bonding (green wires connecting all underwater metals to a common ground) works with your anodes. A loose bonding wire makes even a perfect anode useless. For guidance on electrical connections and bonding systems, visit our main marine parts hub.
Troubleshooting Installation Problems

Anode looks fine but components are corroding: The anode isn't making electrical contact. Strip the surfaces again, check for paint or oxide, verify continuity with a multimeter.
Bolt corrosion or seized fasteners: You didn't use Tef-Gel or a similar insulating compound. Stainless bolts touching zinc or aluminum without insulation will corrode or fuse.
Anode disappears in weeks: You used the wrong type. Magnesium in saltwater wastes away too fast. Zinc in freshwater scales over and quits. Aluminum is a safer middle ground, but confirm your water type first.
White powder coating the anode: That's zinc oxide. The anode has passivated and stopped working. Wire-brush it active again, or replace it. This often happens if the anode wasn't seated properly or if voltage is too low to keep it active.
Wiring corrosion near anodes: This points to stray current in your electrical system, not the anode. Have a marine electrician check your shore power isolation and bonding per ABYC standards (American Boat & Yacht Council). Anodes mitigate galvanic issues, but they can't fix bad wiring. For more on marine electrical systems and their maintenance, consider reviewing resources on marine battery care and winterizing tips to avoid wiring degradation.
Tools and Materials Checklist
- Wire brush (hand or drill-mounted)
- 1000-grit wet sandpaper
- Brass hammer
- Wrench set
- Tef-Gel or PTFE paste
- New anodes (zinc, aluminum, or magnesium, matched to water type)
- 316 stainless steel bolts and washers (if not included with anode)
- Multimeter
FAQ: Sacrificial Anode Questions
What type of anode for saltwater vs. freshwater?
Saltwater: zinc or aluminum. Zinc is traditional; aluminum lasts longer and is environmentally friendlier. Freshwater: magnesium only. Zinc doesn't work—it forms a hard oxide and stops protecting. Brackish water: aluminum handles the mix.
How often do I replace anodes?
When they hit 50% of original mass. In saltwater, inspect every 1–3 months, replace every 6–12 months. Freshwater: inspect every 2–6 months, replace every 12–36 months. Captain Brian from My Boat Life swaps his Sea Ray's zincs every couple of years during spring prep on the Chesapeake.
Can I install anodes myself?
Yes, if you have basic tools and can access the hull. Unbolt the old one, clean the surface with a wire brush, bolt on the new one. Use Tef-Gel on stainless fasteners. If the boat is in the water, hire a diver. For complex bonding systems or if you're unsure which anode type, get a marine tech.
Why coat stainless bolts with Tef-Gel?
Stainless steel is more noble than zinc or aluminum. Without insulation, the bolt corrodes or creates localized galvanic cells that pit your shaft instead of letting the anode sacrifice itself. Tef-Gel prevents metal-to-metal contact between dissimilar metals and stops fasteners from seizing.
How do I know the anode is working?
Uniform erosion across the surface. The anode should shrink evenly over time. If it's pitted around the bolts or shows no wear, something's wrong—check surface prep and continuity. A slight "fizz" or white residue after a few days in the water indicates activity. Inspect protected parts like the prop shaft for pitting; if they're clean and the anode is wasting, it's working.
If your shaft, rudder, or trim tabs show corrosion despite a present anode, the installation failed. Ed Sherman, marine surveyor writing for Boats.com, recommends mid-season and pre-launch inspections to catch this early.
After your first trip, pull a sample of cooling water from the tell-tale and check for debris—keeps the impeller from shredding mid-season. For detailed steps on flushing and maintaining cooling system components, see our guide on flushing out fogging oil and old fuel in spring.
Explore more high-quality marine parts and tools for your boat maintenance on our main JLM Marine hub.