


Outboard Won’t Start? 10 Troubleshooting Steps
- Step 1: Secure Your Boat First
- Step 2: Check the Kill Switch and Lanyard
- Step 3: Confirm Gear Shift in Neutral
- Step 4: Verify Fuel in Tank and Vent Open
- Step 5: Inspect Fuel Line and Squeeze Primer Bulb
- Step 6: Prime the Fuel System Correctly—2-Stroke vs. 4-Stroke
- Step 7: Check Battery Voltage and Clean Terminals
- Step 8: Test and Read Spark Plugs
- Step 9: Clear a Flooded Engine
- Step 10: Check Fuel Filters and Diagnose Fuel Hose Issues
- What to Do If the Engine Starts but Dies in Gear
- Electrical Gremlins and When to Call a Mechanic
- Vapor Lock in Hot Weather
- Internal Engine Problems: Compression and Valves
- Saltwater vs. Freshwater Maintenance
- Reader Questions
- OEM vs. Aftermarket Parts: What You Need to Know
- Pro Tip: Flush Your Engine After Every Ride
Your outboard won't crank. Before you call the shop, work through these checks. Most no-starts come down to fuel delivery, electrical connections, or a safety switch you forgot about.
Step 1: Secure Your Boat First
Don't touch anything until your boat is anchored, tied up, or safely beached. A drifting boat is worse than a dead engine. Drop anchor if you're in deep water. Row to shore in a small skiff. Tie to a dock if you're close. Engine failure contributed to 143 accidents in 2024 according to USCG data, and drifting without power causes more problems. Keep a life jacket on, have a horn or whistle, and make sure your VHF or phone works.
Step 2: Check the Kill Switch and Lanyard
The kill switch stops more engines than bad fuel. If the plastic clip isn't seated in the switch housing, the ignition is dead. No power reaches the spark plugs. Check that the lanyard clip is attached firmly. Then confirm the switch lever itself is in "Run," not "Off." Some switches get bumped to "Off" when you're moving around the boat. This kills the engine instantly, and you won't get it started again until you flip it back. Don't bypass the kill switch to test. If you fall overboard, the boat will run you over.
Step 3: Confirm Gear Shift in Neutral
Modern outboards have a neutral safety interlock. If the shift lever is even slightly in forward or reverse, the starter won't engage. Push the lever firmly into neutral. Some engines need you to jiggle the shifter a bit while you turn the key to seat the detent properly. If you have an electric start and you hear absolutely nothing when you turn the key—no click, no hum—the neutral switch is a common culprit.
Step 4: Verify Fuel in Tank and Vent Open

Fuel gauges lie, especially the cheap stick gauges on portable tanks. Shake the tank. You should hear fuel slosh. If it's silent, you're dry.
Check the vent on top of the tank. Portable tanks have a screw vent that needs a quarter or half turn to open. Built-in tanks usually vent through the fill cap or a separate fitting on deck. A closed vent creates a vacuum as the engine tries to suck fuel. The pump can't pull against that vacuum, so you get zero fuel delivery even though the tank is full. If you've been running and the engine quit suddenly, a clogged vent does the same thing as a closed one.
If you have a fuel selector valve for multiple tanks, make sure it's pointing to the tank with fuel in it.
Step 5: Inspect Fuel Line and Squeeze Primer Bulb
Run your hand along the fuel line from tank to motor. Look for cracks, kinks, or wet spots. Any leak means air gets in, and air in the fuel line stops the flow just like a blockage. Check that the fittings are snug at both ends—tank and engine.
Now squeeze the primer bulb. It should firm up after two or three pumps. A firm bulb means fuel is flowing and filling the system. If the bulb stays mushy no matter how many times you pump, you have an air leak, a clog in the line or filter, or a bad check valve inside the bulb itself. If the bulb gets hard but then goes soft quickly, there's a leak downstream, either in the line or inside the engine's fuel pump.
Tip: The arrow on the primer bulb should point toward the engine. If it's backward, the check valves don't work right, and gravity fights you when you prime.
If you smell raw gas around any connection, you have a leak. Fix it before you keep cranking. A fuel leak is a fire hazard.
Fuel line issues and primer bulb leaks are common; for quality replacement parts, consider checking our fuel line collection at JLM Marine.
Step 6: Prime the Fuel System Correctly—2-Stroke vs. 4-Stroke
For 4-stroke engines, you're pumping straight gasoline. A few firm squeezes of the bulb should do it. Don't over-pump. If you pump too much, you flood the carburetor.
For 2-stroke engines, the fuel is pre-mixed with oil (50:1 or similar, depending on your model), or the engine has an oil injection system that meters oil automatically. If you have oil injection, make sure the oil reservoir is full. A low oil alarm on some models will prevent starting to protect the engine. If your 2-stroke uses pre-mix and you accidentally filled it with straight gas, the engine might start but will seize in minutes from lack of lubrication. Always confirm you're using the right fuel.
Old 2-strokes also have reed valves in the intake. If a reed is cracked or stuck, you lose intake vacuum, and the engine won't pull fuel properly. You'll get weak or no suction when you pump the bulb. Reed valve diagnosis requires pulling the intake cover, which is beyond a basic no-start check, but if your 2-stroke has sat for years, consider it.
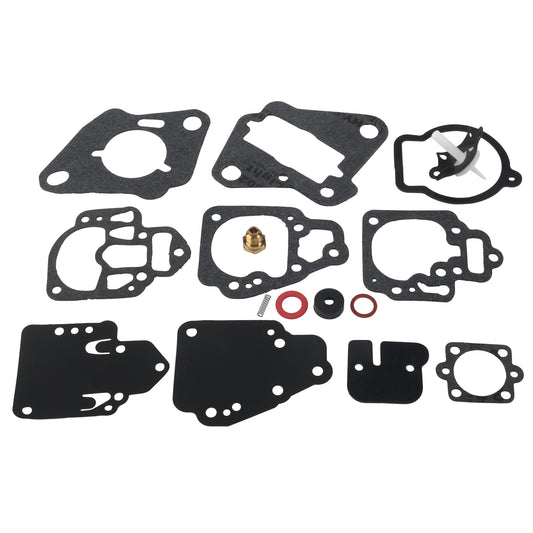
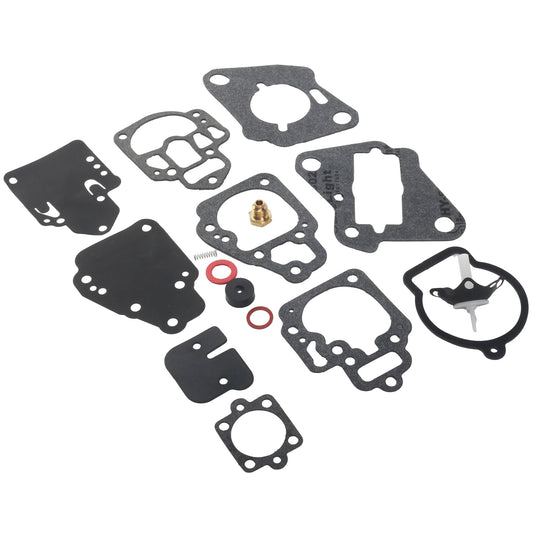
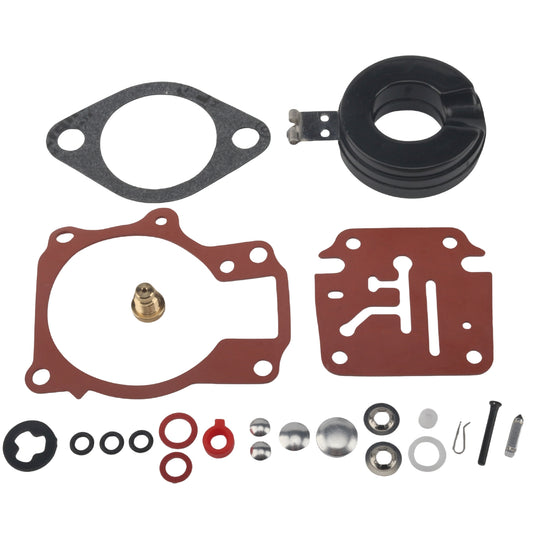
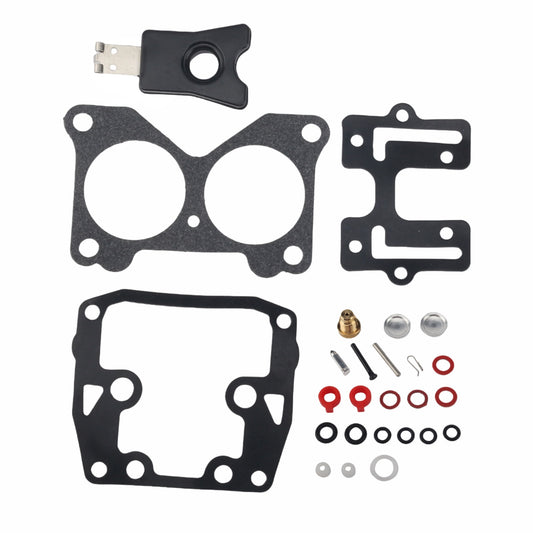
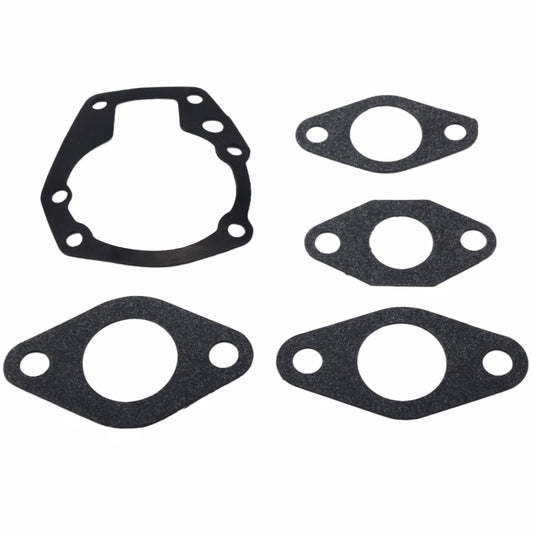
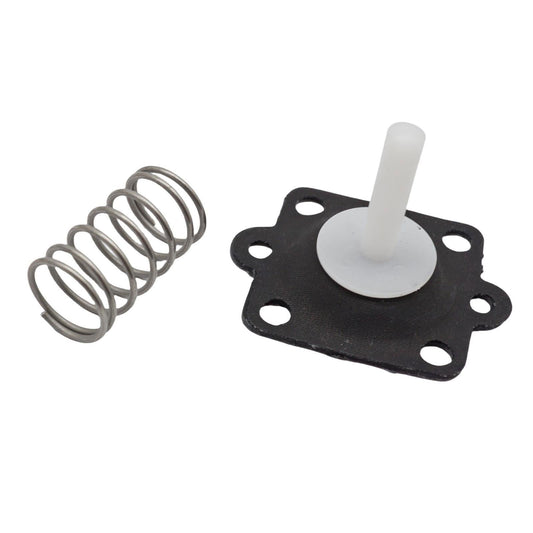
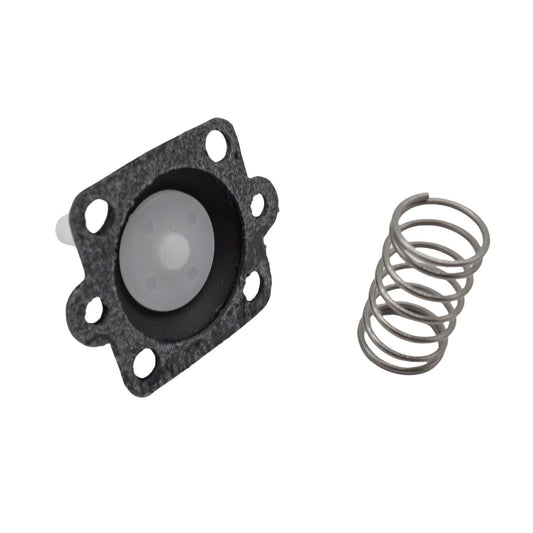
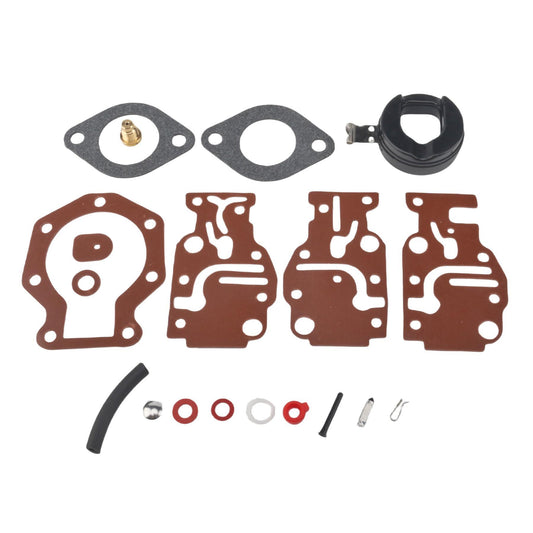
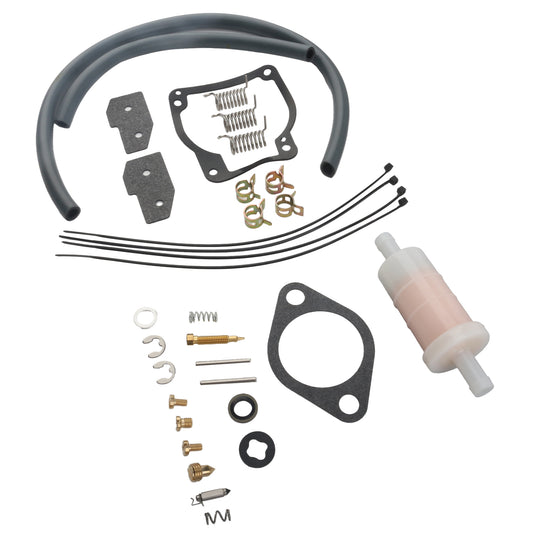
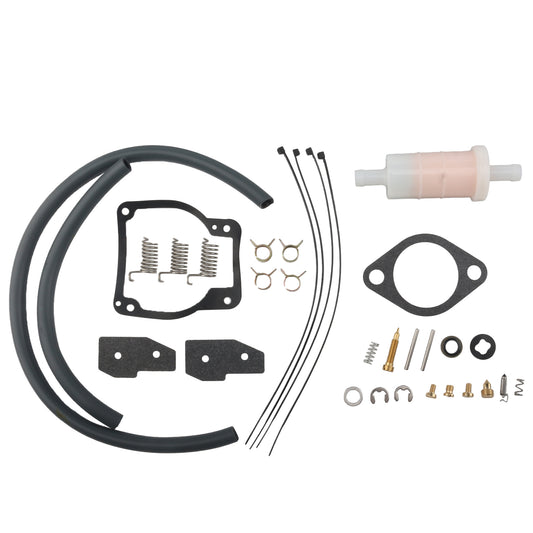
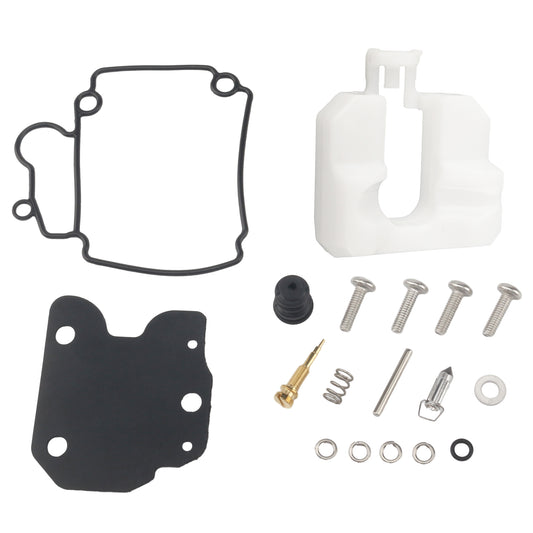
Issues with the carburetor or fuel delivery can cause problems; for repair parts, explore the carburetor repair kits available to help you troubleshoot.
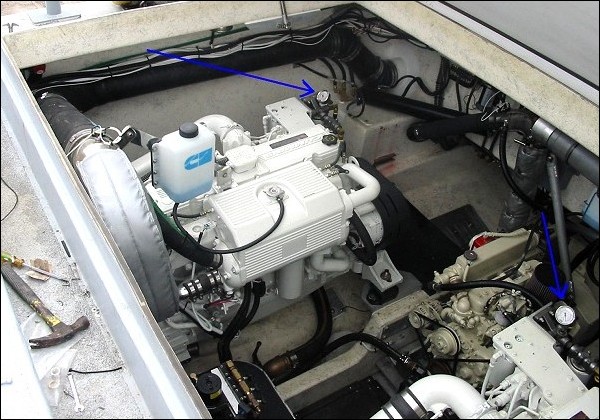
Step 7: Check Battery Voltage and Clean Terminals
For electric-start outboards, a dead or weak battery is the top reason for no crank. The engine might have lights or a beeper, but the starter motor needs 12+ volts and high amperage to turn over.
Use a multimeter if you have one. A fully charged 12V lead-acid battery should read 12.6V or higher at rest. Anything below 12.0V is significantly discharged. If you don't have a meter, think about the last time you charged the battery or how long it's been sitting.
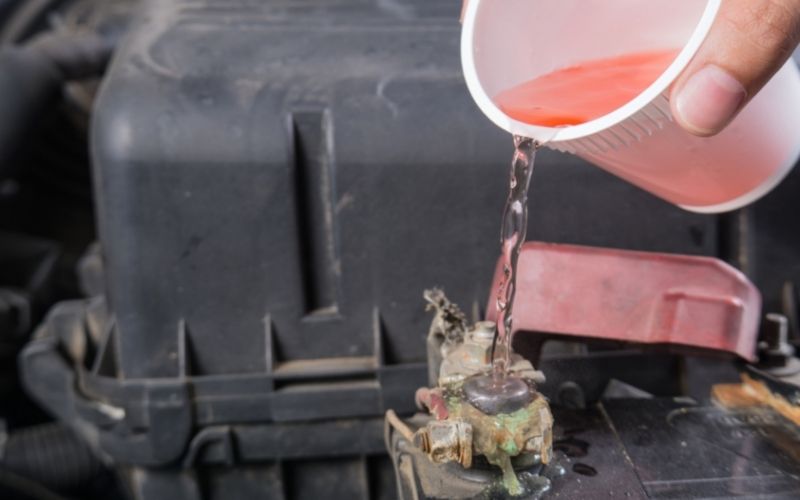
Next, inspect the battery terminals and cable ends. Marine batteries corrode fast, especially in saltwater. Corrosion looks like white, blue, or green powder around the posts and clamps. That stuff is an insulator. It stops current flow. You need a wire brush, baking soda mixed with water (or a dedicated terminal cleaner), and a wrench. Disconnect the negative cable first, then the positive. Scrub both posts and both clamps until they're shiny metal. Reconnect positive first, then negative, and tighten them down hard. Loose connections cause random electrical failures and weak cranking.
Voltage drop test: If your battery reads 12.6V sitting still but drops below 10V when you hit the starter, your cables are corroded internally, or the battery is sulfated and can't deliver current. Static voltage alone doesn't tell the whole story. You need to test under load. If the cables feel warm after a few cranking attempts, replace them.
When you turn the key, listen. A single loud click usually means the starter solenoid is trying to engage but isn't getting enough power, or the solenoid itself is bad. Rapid clicking is almost always a low or dead battery. No sound at all points to the neutral safety switch, a blown fuse, or a bad ignition switch.
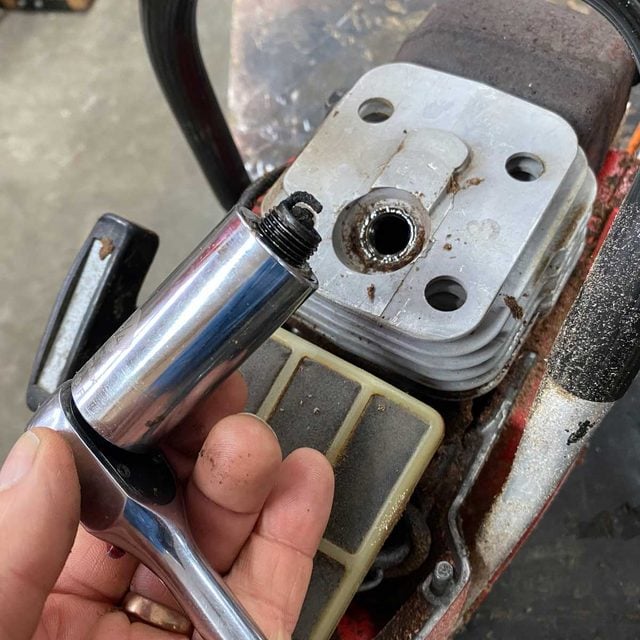
Step 8: Test and Read Spark Plugs

Pull the spark plugs. You need a spark plug socket, usually 5/8" or 13/16" depending on the engine. While they're out, you can check two things: spark and condition.
Spark test: Reconnect the plug wire to the plug. Ground the plug threads against the engine block (use an insulated tool or wear rubber gloves). Have someone crank the engine. You should see a strong blue spark jump the gap. If the spark is weak and orange, or if there's no spark at all, you have an ignition problem—bad coil, bad stator, or a shorted wire. No spark means the engine will never start, no matter how good your fuel system is.
Reading the plug: Look at the insulator (the ceramic center).
- Tan or light brown: Good combustion. The engine is running right.
- Black and sooty: Rich fuel mixture. Too much fuel, not enough air. Check the choke or carburetor settings.
- White or blistered: Lean mixture or overheating. The engine is getting too much air or not enough fuel. This can burn a hole in a piston if you keep running it.
- Wet with fuel: The engine is flooded. See Step 9.
- Oily and wet: Oil is getting into the combustion chamber. On a 4-stroke, this can mean bad valve seals or piston rings. On a 2-stroke, it might just be normal if you've been running rich on oil.
- Milky deposits or water on the plug: You have a head gasket leak, and coolant is getting into the cylinder. You'll also see milky oil on the dipstick or in the lower unit if water is mixing with oil. This is serious. Stop cranking and call a mechanic.
If the plugs are fouled or the gap is wrong, clean them with a wire brush or replace them. The gap spec is in your manual, usually 0.028" to 0.040" depending on the model. Use a feeler gauge to set it. A plug that's too wide won't fire reliably. A plug that's too tight can misfire under load.
In a saltwater environment, check the plug threads and wells for corrosion. If the threads are seized in the head, you can snap the plug or strip the aluminum head trying to remove it. Use penetrating oil and let it soak if they're stuck.
For spark plugs and tools needed, browse our quality spark plugs selection to ensure reliable ignition.
Step 9: Clear a Flooded Engine
If you've been cranking and cranking with the choke on, and now you smell strong gasoline, the engine is flooded. The cylinders are full of liquid fuel, and it won't ignite because there's no room for air. The spark plugs are soaked.
Here's how to clear it:
- Disconnect the fuel line at the engine-side quick-connect.
- Open the throttle to wide-open position. This opens the carburetor butterfly or throttle body and lets maximum air in.
- Remove the spark plugs and ground the plug wires to the engine block (to prevent accidental ignition and to protect the ignition coil from damage).
- Pull the starter cord several times, or crank with the electric starter in short bursts (don't burn out the starter). This pumps the excess fuel out of the cylinders through the plug holes.
- Wait 10 to 15 minutes for residual fuel to evaporate.
- Reinstall the plugs (dry them off first, or install new ones if they're fouled).
- Reconnect the fuel line.
- Try starting without the choke, with the throttle slightly advanced.
Don't keep cranking a flooded engine. You'll just make it worse, kill the battery, and possibly damage the starter motor. Give it time.
Step 10: Check Fuel Filters and Diagnose Fuel Hose Issues
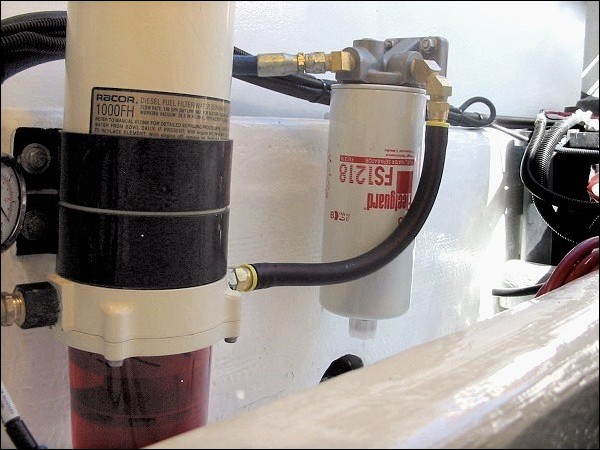
If the bulb won't firm up and you've confirmed no external leaks, check the fuel filter. Most outboards have an inline filter between the tank and the engine, and some have a second filter or water separator on the engine itself.
Unscrew the filter bowl (if it's a clear spin-on or canister type). Look for dirt, rust, or water. Water is heavier than gas, so it settles at the bottom and looks like a clear or cloudy layer under the fuel. If you see water, the fuel is contaminated. Drain the tank, replace the filter, and refill with fresh gas.
A clogged filter chokes off fuel flow. Even if the bulb firms up initially, the engine will starve for fuel under throttle. Replace the filter if it's dirty or if it's been in service for more than a season.
Fuel hose liner delamination is a hidden killer. Older fuel hoses, especially those exposed to ethanol-blended fuel (E10 or E15), can break down internally. The rubber inner liner peels away from the outer layer and creates flaps or chunks that block flow. The hose looks fine from the outside, but inside it's falling apart. Why it happens: Ethanol causes phase separation when it absorbs water. The ethanol-water mix separates from the gasoline and sits in the bottom of the tank or hose, degrading the rubber. If your hose is more than five to seven years old and you're using ethanol fuel, replace it with an ethanol-resistant hose (such as the ones we stock at JLM Marine). We've sent ethanol-proof fuel line kits to customers worldwide who had this exact problem, and it's cheaper than a tow or a ruined weekend.
For fuel replacement parts like filters and pumps, see our fuel filter collection and fuel pump kits to keep your fuel system clean.
What to Do If the Engine Starts but Dies in Gear
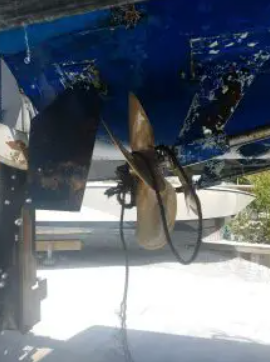
You got it started. You shift into forward or reverse, and it immediately dies. First thing: check the propeller. Fishing line, seaweed, or plastic bags wrapped around the prop shaft create drag. The engine can't handle the load and stalls.
Trim the engine up or tilt it onto the transom bracket. Inspect the prop. Cut away anything wrapped around the shaft. Use a knife or scissors, and work carefully so you don't cut into the prop seal.
If the prop is clear and the engine still dies under load, you might have a fuel delivery problem that only shows up when the engine is working hard. The carburetor might be partially clogged, or the fuel pump diaphragm might be weak. At idle in neutral, fuel demand is low, and the engine runs. Under load, it needs more fuel, and a weak pump can't keep up. This is a carburetor cleaning or fuel pump replacement job.
Electrical Gremlins and When to Call a Mechanic
If you've checked battery, terminals, fuses, and you still have no spark or no crank, you're into the deeper electrical system. Issues with the stator (the stationary part of the alternator that generates voltage for the ignition), the ignition coil, or the ECM (engine control module) need diagnostic tools and expertise. A bad stator won't produce voltage to fire the plugs. You can test stator resistance with a multimeter—check your service manual for the spec, usually in the range of a few hundred ohms between the yellow wires on older engines—but interpreting the results and replacing the stator is not a dockside fix.
A sheared flywheel key is another mechanic-level problem. The flywheel key is a small metal wedge that locks the flywheel to the crankshaft and sets ignition timing. If you hit a submerged log or rock hard enough, the key shears to protect the crankshaft. The engine will have spark and fuel, but the timing is off, so it won't start or runs terribly. To check it, you need to remove the flywheel with a puller. If the TDC (top dead center) timing mark on the flywheel doesn't line up with the mark on the engine when the piston is at the top of its stroke, the key is sheared. This requires removing the flywheel, replacing the key, and reassembling with the correct torque spec.
If you're seeing any of these symptoms, bring it to a shop. We work on these issues daily, and we have the pullers, the timing lights, and the diagnostic software.
Vapor Lock in Hot Weather
On a hot day, especially after the engine has been running and you shut it off for a while, you might experience vapor lock. Heat causes fuel in the lines or carburetor to vaporize. Gas vapor doesn't flow like liquid, so the fuel pump can't move it. The engine cranks but won't start or runs rough.
Quick fix: Pop the engine cowling to let heat escape. Wait a few minutes for things to cool. Pump the primer bulb again to push liquid fuel through and purge the vapor. If you have a portable tank sitting in the sun, move it into the shade or throw a wet towel over it.
This is more common on carbureted 2-strokes than on fuel-injected 4-strokes, but it can happen to any engine in extreme heat.
Internal Engine Problems: Compression and Valves
If you've confirmed fuel, confirmed spark, cleared any floods, and the engine still won't fire, you might have an internal mechanical failure.
Compression test: A healthy outboard should have 90 to 100+ PSI per cylinder, and no more than 10–15% variance between cylinders. Low compression (below 80 PSI) means the rings, cylinder walls, or head gasket are worn or damaged. The engine can't build enough pressure to ignite the fuel-air mixture. You need a compression gauge (screws into the spark plug hole), and you perform the test with the throttle wide open and all plugs removed. If you get low numbers, the engine needs internal work—rings, pistons, possibly a bore job—and that's a teardown.
Head gasket failure shows up as low compression, coolant in the oil (milky dipstick), or water on the spark plugs. If you see steam or white smoke from the exhaust along with rough running, the head gasket is leaking. Don't keep running the engine. Coolant in the cylinders will score the walls and seize the engine.
Valve issues (4-stroke only): If the intake or exhaust valves aren't sealing because of carbon buildup, bent stems, or worn seats, you lose compression and the engine won't start or runs poorly. A valve adjustment or valve job requires removing the cylinder head. Check your service manual for valve clearance specs (usually 0.004" to 0.006" on the intake, 0.006" to 0.008" on the exhaust, but it varies). Too tight and the valves don't close fully; too loose and you get noise and poor performance.
Saltwater vs. Freshwater Maintenance

Saltwater is brutal. It accelerates corrosion on every metal part. If you run in saltwater:
- Flush the engine with freshwater after every use. Connect a hose to the flushing port or use muffs over the lower unit intake. Run the engine for five to ten minutes. This rinses salt out of the cooling passages, exhaust, and lower unit.
- Check anodes regularly. Zinc or aluminum anodes protect the engine from galvanic corrosion. If they're more than 50% eaten away, replace them.
- Grease fittings on the tilt/trim and steering more often. Salt gets into the grease and turns it into a grinding paste.
- Inspect wiring and terminals every month. Use dielectric grease on connections to keep moisture out.
In freshwater, you still need to rinse if you're in silty or weedy water. Debris can clog the water pump intake screens and cause overheating.
For flushing system parts and maintenance, you can find recommended items in our cooling system collection and water pump kits.
Reader Questions
Why won't my outboard start even though there's fuel in the tank?
Fuel in the tank doesn't mean fuel is reaching the engine. The vent might be closed, creating a vacuum. The fuel line could be kinked, cracked, or leaking air. The primer bulb might not firm up, which means fuel isn't flowing. The fuel itself might be stale or contaminated with water, so it won't ignite. You also need spark. If the spark plugs are fouled, wet, or gapped wrong, or if the ignition coil is dead, you get no combustion. Finally, check the kill switch. If it's not engaged, the ignition is cut even if everything else is perfect.
How do I know if my primer bulb is working?
Squeeze it. After two or three pumps, it should feel firm and hold pressure. If it stays soft and mushy, you have an air leak in the fuel line, a clog in the filter or pickup tube, or a bad check valve in the bulb. If the bulb gets hard but then goes soft quickly, fuel is leaking back, either through a bad check valve or a leak in the engine's fuel pump. Also, confirm the arrow on the bulb points toward the engine. If it's backward, the valves don't work right and gravity fights the prime.
What do I do if the engine starts but dies when I shift into gear?
Check the propeller first. Fishing line, weeds, rope, or plastic bags wrapped around the prop shaft put drag on the lower unit. The engine stalls under that load. Tilt the engine up and inspect. Cut away anything wrapped around the shaft. If the prop is clear, you might have a fuel delivery issue that only shows up under load. In neutral, the engine idles on low fuel demand. In gear, it needs more fuel, and a weak fuel pump or partially clogged carburetor can't supply it. That's a carb cleaning or pump replacement job.
Can I fix all outboard starting problems myself?
A lot of them, yes. Kill switch, neutral safety, battery terminals, fuel line leaks, fouled plugs, flooded engine, clogged filters—those are all DIY fixes with basic hand tools. But some problems need a shop. A sheared flywheel key requires a flywheel puller and timing knowledge. Low compression from worn rings or a bad head gasket means an engine teardown. Electrical faults in the stator, ignition coil, or ECM need diagnostic equipment and sometimes factory software. If you've worked through the ten steps here and the engine still won't start, or if you see milky oil or hear grinding noises, call a mechanic. We see those cases daily, and trying to force a fix without the right tools or knowledge can turn a $200 repair into a $2,000 rebuild.
How often should I check or replace spark plugs and fuel lines?
Inspect spark plugs every season or every 100 hours, whichever comes first. In saltwater or if you're having starting issues, check them more often. Pull them, look at the insulator color, check the gap, and clean or replace as needed. Most plugs last 100 to 300 hours depending on the type (standard vs. iridium) and the manufacturer's spec, but cheap plugs or a rich-running engine can foul them faster.
Fuel lines should be inspected annually for cracks, kinks, hardening, or swelling. Ethanol fuel accelerates degradation. Even if the outside looks fine, the inner liner can delaminate after five to seven years. Replace hoses proactively if they're older than that, especially if you run ethanol blends. A $30 hose replacement is cheaper than a tow or a day of troubleshooting a phantom fuel problem. Use ethanol-resistant hose—we stock them at JLM Marine and ship worldwide.
OEM vs. Aftermarket Parts: What You Need to Know
When you're replacing fuel lines, filters, spark plugs, or primer bulbs, you'll see OEM (original equipment manufacturer) parts and aftermarket parts. Here's the reality: OEM parts are good quality, but you pay a markup for the brand sticker. A factory Yamaha fuel line might cost $60 when an aftermarket ethanol-resistant line with the same specs costs $30.
Cheap no-name aftermarket parts are garbage. The rubber is too hard, the fittings don't seal right, and you'll be pulling the lower unit again in six months. Don't buy a $10 fuel pump kit from a random seller. It's not worth the headache.
The sweet spot is quality aftermarket from suppliers that manufacture to OEM specs or even produce parts for the OEM brands using excess factory capacity. JLM Marine fits that category. You get the same material standards and fitment as the original part, but without the dealership price. We've shipped kits to Australia, Europe, and across the US, and customers report the same longevity as OEM for a fraction of the cost.
When you're shopping for parts, check the specs: material (brass vs. plastic fittings, USCG-rated fuel hose, copper-core vs. resistor plugs), country of manufacture, and whether the seller provides a warranty. Quality non-OEM parts exist. Avoid the bottom-tier junk, and don't assume you have to pay OEM prices to get reliability.
Pro Tip: Flush Your Engine After Every Ride

Run fresh water through the cooling system after every outing, especially in saltwater. Use a hose attached to the flushing port or slip muffs over the lower unit intakes. Let the engine idle for five to ten minutes. This rinses salt, sand, and organic material out of the cooling passages and exhaust. Salt buildup causes corrosion, and it makes the thermostat stick. A seized thermostat leads to overheating, which warps heads, blows gaskets, and scores cylinder walls. Flushing is the easiest preventive maintenance you can do, and it keeps the engine starting reliably season after season. For parts and kits, see our water pump repair options.
For more boat parts and expert advice, visit JLM Marine's main site.
Для владельцев подвесных моторов:
Мы надеемся, что следующие ресурсы окажутся полезными для вас в обслуживании и ремонте ваших судовых двигателей:
-
Карбюраторы от JLM Marine
-
Комплекты для восстановления карбюраторов от JLM Marine
- Комплект для ремонта карбюратора
- Комплект для ремонта карбюратора Yamaha
- Комплект для ремонта карбюратора Mercury
- Комплект для ремонта карбюратора Johnson
- Комплект для ремонта карбюратора Evinrude
- Комплект для ремонта карбюратора Suzuki
- Комплект для ремонта карбюратора Honda
- Комплект для ремонта карбюратора Volvo
- Комплект для ремонта карбюратора Tohatsu
О компании JLM Marine
Основанная в 2002 году, компания JLM Marine зарекомендовала себя как специализированный производитель высококачественных морских деталей, базирующийся в Китае. Наша приверженность совершенству в производстве заслужила нам доверие ведущих мировых морских брендов.
Как прямой поставщик, мы обходим посредников, что позволяет нам предлагать конкурентоспособные цены без ущерба качеству. Такой подход не только поддерживает экономическую эффективность, но и гарантирует, что наши клиенты получают наилучшую ценность напрямую от источника.
Мы рады расширить свое присутствие через розничные каналы, предлагая наш опыт и приверженность качеству непосредственно владельцам и любителям лодок по всему миру.
Комплекты для ремонта карбюратора в продаже
- $46.00
$55.00- $46.00
- Unit price
- per
- $18.13
$59.00- $18.13
- Unit price
- per
- $24.99
$29.00- $24.99
- Unit price
- per

- $19.50
$23.00- $19.50
- Unit price
- per
- $17.39
$22.50- $17.39
- Unit price
- per
- $21.19
$32.00- $21.19
- Unit price
- per


- $21.99
$24.00- $21.99
- Unit price
- per
- $15.99
$13.00- $15.99
- Unit price
- per

- $18.99
$15.00- $18.99
- Unit price
- per

- $16.99
$20.00- $16.99
- Unit price
- per

- $21.99
$19.00- $21.99
- Unit price
- per

- $18.79
$15.00- $18.79
- Unit price
- per

- $19.99
$23.00- $19.99
- Unit price
- per

- $19.99
$23.00- $19.99
- Unit price
- per
- $20.72
$18.00- $20.72
- Unit price
- per

- $20.89
$17.00- $20.89
- Unit price
- per

- $17.68
$16.00- $17.68
- Unit price
- per
- $30.50
- $30.50
- Unit price
- per
- $17.58
$23.00- $17.58
- Unit price
- per

- $17.59
$13.00- $17.59
- Unit price
- per