


How to Diagnose a Hard Cold Start on a Yamaha Outboard
- Start With the Basics First
- Crank No-Start: When It Turns But Won't Fire
- No Crank or Buzzing Solenoid
- Carbureted 4-Stroke Cold Start Issues
- Fuel Injected Models: VST and Sensors
- ECU Fault Codes and Sensors
- Compression and Internal Issues
- 2-Stroke vs. 4-Stroke Differences
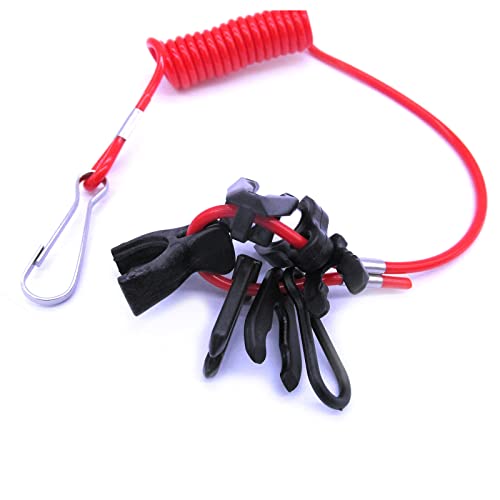
- Tools You Actually Need
- When to Call a Yamaha Technician
- What About Parts Quality
- Preventing Cold Start Problems
- The VST Filter Reality
- Air Leaks Kill Cold Starts
- Real-World Cold Start Test Sequence
- The Hidden Fuel Filter
- Starting Fluid: Yes or No
- Model-Specific Notes
- Temperature Matters
- The Bulb Test for Fuel Pumps

When your Yamaha won't fire on a cold morning, you're looking at one of three things: fuel delivery, spark, or air-fuel mixture.
Start With the Basics First
Before you tear into anything, confirm the kill switch lanyard is fully seated. I've seen guys waste an hour because the lanyard wasn't clicked in right. Make sure you're in neutral—faulty neutral safety switches are common on older Yamahas and will give you a no-crank condition.
Pump the primer bulb until it's rock hard. If it stays soft or collapses, you've got a fuel delivery problem before you even turn the key. Check that your fuel tank vent is open; a closed vent creates a vacuum that starves the engine.
Fresh fuel matters more than most people think. Gasoline starts degrading after six months, losing octane and volatility. In cold conditions, degraded fuel won't ignite reliably. If your boat sat all winter without stabilizer, that's likely your problem right there.
Crank No-Start: When It Turns But Won't Fire

The starter spins, you hear that familiar whirring, but the engine doesn't catch. This points directly at fuel mixture or ignition.
Pull your spark plugs first. On Yamaha F-series motors, use NGK plugs gapped to spec—usually 0.039-0.043 inches depending on your model. Fouled plugs look wet and black or have white crusty deposits. If they're fouled, replace them, but also figure out why. Wet, black plugs mean you're running rich; white crusty deposits indicate lean conditions or bad fuel.
Test for spark using a gap tester, not just by grounding the plug. You need a strong blue spark that jumps a 7mm gap consistently. Weak yellow spark won't cut it when the engine's cold and needs extra fire to ignite a rich mixture.
Check your battery voltage with the engine off—should read above 12.6V. While cranking, watch that it doesn't drop below 9.5V. If it does, your battery can't deliver enough amperage to both spin the starter and fire a strong spark. Cold batteries lose 30-40% of their cranking power, so this is critical in winter.
According to Yamaha's troubleshooting guidelines, improper priming and fuel delivery are among the most common cold start complaints, though specific failure rate data isn't published.
No Crank or Buzzing Solenoid
Turn the key and you get clicking, buzzing, or silence. This is all electrical.
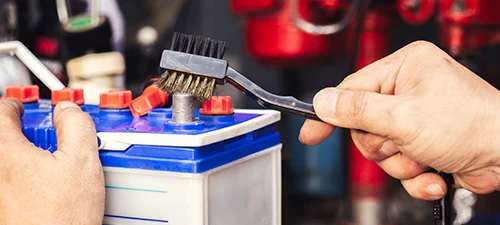
Clean your battery terminals until they shine. Corrosion adds resistance, robbing current from the starter. Even a small amount of white or green crud can prevent proper cranking.
If you hear rapid clicking, the solenoid is trying to engage but isn't getting enough juice. Test the solenoid by jumping power directly to the starter side while someone cranks. If the starter spins strong, replace the solenoid. If it still doesn't crank hard, your starter's shot.
Check all connections in the starter circuit—loose or corroded wiring between the battery, solenoid, and starter motor will cause intermittent no-starts that get worse in cold weather when connections contract.
Carbureted 4-Stroke Cold Start Issues
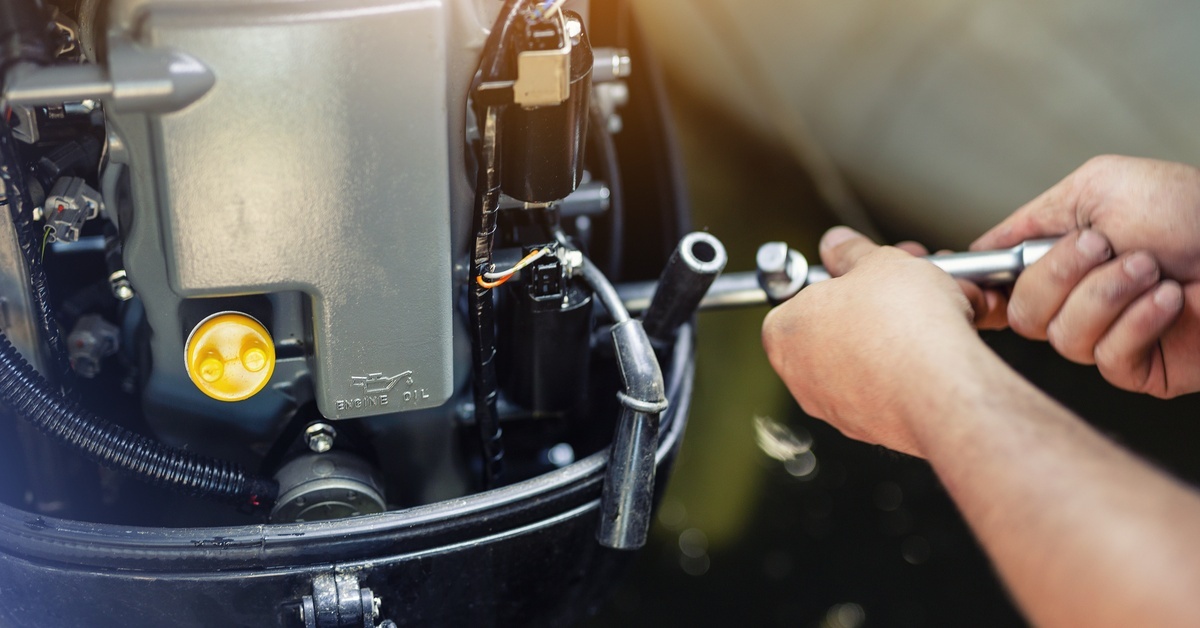
Yamaha's carbureted four-strokes—especially 2001-2004 models with multiple carbs—have a specific weak point: the cold start enrichment valve and its seals.
The enrichment valve uses a thermo-wax pellet that closes air passages when you apply 12V, richening the mixture for cold starts. Test it by pulling the valve and applying 12V directly—you should see the plunger extend about 1.5mm as the wax heats up.
But here's what we see constantly: the O-ring seals on these valves flatten out over time. New O-rings measure around 0.047 inches thick; old compressed ones measure 0.035 inches or less. That tiny difference creates an air leak that leans out your cold-start mixture, and the engine won't catch.
A mechanic documenting a 2002 Yamaha 60HP repair found exactly this—flattened O-rings on both the enrichment valves and the carburetor-to-intake manifold gaskets causing hard cold starts. Replacing just the seals fixed it without touching the valves themselves.
Pull those O-rings and measure them. Also check the seals between your carbs and intake manifold, and the heat insulator gaskets if your model has them. Any air leak here kills your cold start.
Clean your carburetor pilot jets while you're in there. Main jets handle high-speed fuel, but pilot jets control idle and low-speed circuits—exactly where you need fuel during cranking. These tiny passages clog with varnish from old gas and are the #1 cause of cold idle problems on Yamaha carbs. For a thorough restoration, consider the Yamaha Carburetor Repair Kit to get all the essential parts in one package.
Don't just spray carb cleaner through the jets. Pull them out, hold them up to light, and make sure you can see clean through the hole. If you can't, run a fine wire through or soak them in carb cleaner overnight.
Fuel Injected Models: VST and Sensors
Fuel-injected Yamahas—F115, F150, V6 models—have a Vapor Separator Tank (VST) with its own filter that clogs constantly, especially if you run ethanol fuel. The VST filter restricts fuel pressure to the high-pressure pump and injectors.
Pull the VST, drain it, and inspect the filter element. If it's brown or has any debris, replace it. While you're there, check for water in the VST bowl—water settles to the bottom and will freeze in cold weather, completely blocking fuel flow.
Fuel pressure on these engines should be around 3-5 psi at the low-pressure side (varies by model). You need a fuel pressure gauge with the correct Yamaha adapter size to test this properly. If pressure's low, your lift pump diaphragm is torn or your fuel lines have air leaks at the fittings.
Injectors themselves can clog, but it's less common than VST issues. If you've got a persistent lean condition and clean filters, you'll need Yamaha Diagnostic Software (YDS) to test injector pulse width and flow.
ECU Fault Codes and Sensors
Modern Yamahas log Diagnostic Trouble Codes (DTCs) when sensors fail. Connect YDS or an equivalent scan tool and pull codes before you start guessing.
The three most common cold-start related codes we see are:
- Crankshaft position sensor faults (engine won't fire at all)
- Coolant temperature sensor reading incorrectly (ECU thinks engine is warm when it's cold, doesn't enrich mixture)
- MAP sensor faults (incorrect air reading leading to lean mixture)
Oil level sensors can also prevent starting if they're faulty, even when your oil is full. The ECU cuts ignition to protect the engine. Test the sensor according to the service manual resistance specs, or just unplug it temporarily to rule it out.
Check your emergency stop switch and wiring even if the lanyard is attached. We've seen internal switch contacts corrode, giving intermittent connection that's worse in cold, damp conditions. Bypass the switch temporarily to test—if the engine fires, replace the switch.
Compression and Internal Issues
If you've checked fuel, spark, and electronics and still have nothing, test compression. Cold engines need good compression to fire. Yamaha four-strokes should show 170-220 psi depending on the model, with no more than 10% variation between cylinders.
Low compression across all cylinders suggests valve lash out of spec—common on high-hour motors that haven't had valve adjustments. Low compression on one or two cylinders points to stuck valves, broken rings, or head gasket leaks.
Valve lash tightens as the engine wears, reducing effective valve lift and killing compression. Yamaha specifies valve checks every 100 hours or annually. If your motor has 300+ hours and you've never checked them, start there.
2-Stroke vs. 4-Stroke Differences
Two-stroke Yamahas have simpler fuel systems but their own quirks. The choke mechanism is critical—it must fully close to restrict air and richen the mixture. Worn choke cables or sticky choke plates will give you hard cold starts every time.
Two-strokes also depend on proper oil-to-fuel ratio for lubrication and combustion. If your VRO pump (Variable Ratio Oiling) is failing, you'll get inconsistent oil delivery that affects cold starting and can score cylinders. Many mechanics bypass VRO systems entirely and premix fuel manually to eliminate the variable.
Four-strokes need that enrichment system or electronic cold-start assist working perfectly. There's no choke plate like old two-strokes; instead, the ECU adds fuel or the enrichment valve reduces air. If that system fails, the engine gets a normal warm-running mixture that's too lean for cold starts.
Tools You Actually Need
For proper diagnosis, you need:
- Spark gap tester (7mm adjustable gap)
- Fuel pressure gauge with Yamaha fittings
- Multimeter for voltage testing
- Compression tester with Schrader valve to hold pressure
- Small wire set for cleaning carb jets
- YDS software or compatible scan tool for fuel-injected models
Don’t guess on fuel pressure or spark strength. Testing with proper tools saves time and prevents throwing parts at the problem.
When to Call a Yamaha Technician
If you've verified fuel pressure, confirmed strong spark, checked compression, pulled codes, and the motor still won't start cold, you're into internal issues that need dealer-level diagnostics.
Intermittent electrical faults, ECU failures, and internal fuel injection problems require Yamaha's factory diagnostic software and trained eyes. Yamaha releases Technical Service Bulletins (TSBs) for specific model issues that independent mechanics might not know about.
Complex jobs like synchronizing multiple carburetors or diagnosing intermittent sensor faults need someone who works on these engines daily. Trying to troubleshoot an ECU issue without proper software usually ends up costing more in wasted parts and time than just paying a certified tech from the start.
What About Parts Quality
OEM Yamaha parts are good, no question, but you're paying a premium for the logo on the box. A fuel filter is a fuel filter—the housing and element do the same job whether it has Yamaha stamped on it or not.
Cheap no-name aftermarket parts are a different story. We've seen fuel pump kits with rubber so hard it wouldn't seal, and carb rebuild kits with jets drilled to the wrong size. You'll be tearing into the motor again in six months, which isn't worth the $15 you saved.
The middle ground is quality aftermarket from manufacturers who make OEM parts or use the same specs. Parts from reputable suppliers give you factory-spec fitment and materials without the dealer markup. We ship these worldwide and they hold up just as long as OEM in real-world conditions.
For items like O-rings, gaskets, and filters, quality aftermarket works fine. For electronics, sensors, and ECU components, stick with OEM—the tolerances and programming matter more.
Explore our extensive range of Yamaha Outboard Motor Parts to find both OEM and trusted aftermarket options.
Preventing Cold Start Problems

Use marine-grade fuel stabilizer every time you fill up, not just during storage. Stabilizer prevents fuel oxidation and phase separation in ethanol blends, which is the root cause of half the fuel system problems we see.
Replace your fuel filters—both inline and VST—annually, not when they're clogged. By the time a filter restricts flow enough to notice, it's been partially clogging for months, stressing your fuel pump. For replacement parts, browse our inventory of Fuel Filters.
Check spark plugs every 100 hours or at the start of each season. Replace them on Yamaha's schedule regardless of how they look. Plugs are cheap insurance compared to diagnosing a weak spark condition.
Keep your battery on a maintainer during storage. Batteries sulfate when they sit discharged, permanently reducing capacity. A good marine battery will last 4-5 years with proper maintenance, but only 2-3 if you let it drain and sit.
For winter storage, either run the fuel system completely dry or fill the tank and treat it with stabilizer, then run the engine for 10 minutes to circulate treated fuel through the entire system. Partially filled tanks invite condensation, and water in your fuel system is a guaranteed hard start come spring.
Fog the cylinders with storage fogging oil through the spark plug holes before long-term storage—this coats internal parts and prevents corrosion that can affect compression and sealing.
The VST Filter Reality
On fuel-injected Yamahas, that VST filter is the single most overlooked maintenance item. Yamaha doesn't list it in the basic owner's maintenance schedule prominently enough, so people miss it.
The filter sits in the bottom of the VST and catches debris before it reaches the high-pressure pump and injectors. When it clogs, your engine stumbles, bogs, or won't start. We've pulled VST filters that looked like they were packed with brown mud—completely blocked.
Check it every year minimum, every 50 hours if you run in dirty water or use questionable fuel. It's a 20-minute job that prevents a $1,500 fuel system repair.
Air Leaks Kill Cold Starts

Any air leak between the carbs (or throttle body on EFI) and the combustion chamber leans out your mixture. Cold engines need rich mixtures; even a small air leak can prevent starting.
Common leak points:
- Carburetor-to-intake manifold gaskets
- Intake manifold-to-cylinder head gaskets
- Heat insulator O-rings on carbureted models
- Crankcase seals on two-strokes
- Vacuum line connections to fuel pumps or enrichment valves
Spray carb cleaner around these areas while the engine's running (if you can get it started warm). If the idle changes, you've found your leak. Replace every gasket and O-ring in that area—they're cheap, and if one is leaking, the others are close behind.
Consider ordering a Yamaha Carburetor Repair Kit for a convenient set of gaskets and O-rings to ensure a thorough seal.
Real-World Cold Start Test Sequence
Here's the exact order we follow in the shop when diagnosing a Yamaha cold start problem:
- Verify kill switch, neutral safety, and lanyard connection
- Pump primer bulb—must get hard and stay hard
- Check battery voltage: >12.6V off, >9.5V cranking
- Pull and inspect spark plugs; test spark with gap tester
- Confirm fresh fuel; drain and inspect if questionable
- Test fuel pressure at the filter (carb models) or VST (EFI models)
- Inspect/clean/replace fuel filters (inline and VST)
- Check enrichment valve operation (carb) or pull DTCs (EFI)
- Measure O-ring thickness on enrichment valves and manifold seals
- Clean carburetor pilot jets or inspect injectors
- Test compression—all cylinders within 10% of each other
- Check valve lash if compression is low and hours are high
That sequence goes from simplest/most likely to complex/least likely. Most cold start problems get solved in the first six steps.
The Hidden Fuel Filter

A lot of DIYers miss the tiny filter screens inside the high-pressure fuel pump on EFI models, and some models have screens in the fuel injectors themselves. These aren't serviceable items in Yamaha's manual, but they exist and they clog.
If you've replaced every filter, checked fuel pressure, and you're still getting fuel starvation symptoms, those internal screens might be packed. Requires pulling the pump or injectors and inspecting with a magnifying glass—definitely advanced work.
Starting Fluid: Yes or No
Starting fluid will tell you if you've got an ignition problem or a fuel problem. If the engine fires on starting fluid but won't run on its own fuel, you know you're chasing fuel delivery, not spark.
But use it sparingly. Ether burns hotter and faster than gasoline, and too much can damage rings or blow head gaskets, especially on high-compression four-strokes. A one-second shot is plenty for testing.
Never use starting fluid on two-strokes—they need oil in the fuel for lubrication. Straight ether will score the cylinder walls in seconds.
Model-Specific Notes
Yamaha F115 four-strokes (especially 2003-2008) are known for prime start enrichment issues and fuel pump failures, often causing cold start bogging or refusal to start after sitting. Check the enrichment solenoid and pump diaphragm first on these models.
Older carbureted models (late '90s to early 2000s) with four carbs—like the 60HP and 80HP—almost always have flattened O-rings on the enrichment valves or intake manifolds if they're hard to start cold. Replace all the seals in that area as a set.
High-pressure direct injection (HPDI) two-strokes have their own fuel system complexity. The injectors run at extremely high pressure and require Yamaha diagnostic tools to test properly. Don't try to DIY an HPDI fuel system issue unless you've got the training and tools.
V6 four-strokes (F200-F350) have longer, more complex fuel lines and larger VST systems. Air in the fuel lines after sitting is common—prime thoroughly and check for air leaks at every connection and fitting.
Temperature Matters
"Cold start" means different things depending on your climate. In Florida, a cold start is 60°F. In Minnesota, it's 30°F. The colder it gets, the more critical every part of your fuel and ignition system becomes.
Below 40°F, battery capacity drops significantly, oil thickens (increasing cranking resistance), and fuel vaporizes poorly. Your spark needs to be perfect, your mixture needs to be rich, and your battery needs to be fresh.
If you boat in freezing conditions regularly, consider a higher CCA (Cold Cranking Amps) battery than Yamaha's minimum spec. The F150, for example, calls for 410 CCA minimum, but running a 650 CCA battery gives you much better cranking performance in extreme cold.
Ethanol fuel absorbs water and phase-separates in cold weather, leaving you with a layer of alcohol-water mix at the bottom of your tank. In freezing temps, that water can ice up in your fuel lines. Drain your VST and check for water if you're stored outside in winter.
The Bulb Test for Fuel Pumps

Here's a field test we use constantly: pump the primer bulb and watch how it behaves.
A healthy fuel system will let you pump the bulb firm in 3-5 squeezes, and it'll stay firm. If you pump it 15 times and it's still soft, or if it gets firm but collapses after 10 seconds, you've got a problem.
Bulb stays soft: clogged filter, bad lift pump, or kinked fuel line restricting flow. Bulb firms up then collapses: air leak somewhere in the system, or a fuel pump with torn diaphragms that can't hold prime.
This simple test diagnoses half of all fuel delivery problems without any tools.
Pro tip: Flush your engine with fresh water after every use, especially in saltwater. Salt buildup corrodes electrical connections, clogs cooling passages, and gunks up fuel system vents—all of which make cold starts harder and less reliable over time.
For replacement parts and tools to maintain your engine, explore our JLM Marine hub for the best selection of marine components and accessories.
1 comment
Very good information, on my yamaha.
Thank you