


Outboard Engine Over-Fueling: Diagnose & Fix Carburetor Issues & Fuel Line Problems
- Recognizing Over-Fueling Symptoms in Your Outboard
- Root Causes of Carburetor Flooding
- Diagnosing Carburetor Flooding Step-by-Step
- Fuel Line and Fuel Pump Problems That Cause Over-Fueling
- How to Fix Carburetor Flooding
- Fuel Line and Pump Repairs
- Preventing Carburetor Flooding and Fuel Issues
- When to Call a Professional
- Troubleshooting Quick Reference
- Real Case: 90HP Yamaha with Persistent Flooding

Over-fueling means too much fuel is getting into the combustion chamber or crankcase. Your engine can't burn it all, so you end up with black smoke, fouled plugs, rough running, and a boat that smells like a gas station. After 20 years wrenching on outboards, I've seen this issue wreck weekends for too many people. Most of the time, it's carburetor flooding or a fuel delivery problem. Let's fix it.
Recognizing Over-Fueling Symptoms in Your Outboard
You'll know you're over-fueling when you smell raw gas around the engine, especially when it's sitting. That's a fire hazard, not just annoying. Check for visible fuel leaking from the carburetor bowl or overflow tubes. If fuel's dripping out, the carb isn't metering correctly.
Hard starting or a complete no-start is typical. Pull your spark plugs – if they're soaked with fuel (wet plugs), you've flooded the cylinders. The engine might fire up but run like garbage: stalling, surging, hesitating at idle or under load. Black smoke pouring from the exhaust tells you the mixture is way too rich. Those plugs will be fouled with black, sooty carbon deposits from all that unburned fuel.
On EFI engines, you might not see carb leaks, but you'll still get the same symptoms: hard starts, black smoke, rough idle, and that unmistakable fuel smell. If your oil smells like gas or the level's rising on the dipstick, fuel is leaking into the crankcase – usually from a bad Vapor Separator Tank (VST) on fuel-injected motors.
Root Causes of Carburetor Flooding
Carburetor flooding is the number one culprit. Here's what fails:
Float System Failures
The float controls fuel level in the bowl. When it rises, it pushes a needle valve closed to stop fuel flow – just like a toilet tank float.
Saturated or damaged floats: Old brass or plastic floats can crack or absorb fuel over time. A fuel-logged float gets heavy and won't rise enough to shut off the needle valve. I've seen floats that looked perfect but weighed twice what they should. Squeeze the float gently – if it feels heavy or you hear sloshing, it's toast. This is especially common on engines that sit for months between uses.
Incorrect float height: Even a good float won't work if it's set wrong. Float height is a precise measurement, usually specified in millimeters in your service manual. If it's too high, the fuel level in the bowl runs too high, and the carb will flood under certain conditions – especially when the boat pitches or rolls. You measure float height by inverting the carb body (throttle side up) and checking the distance from the gasket surface to the bottom of the float. Don't guess. Get the spec from your manual – it varies by model.
Needle Valve and Seat Issues
The needle valve is what the float physically pushes closed. It has a rubber or viton tip that seals against a brass seat.
Wear: That rubber tip wears out. After years of opening and closing, it won't seal tight anymore. Use a magnifying glass or loupe to inspect the needle tip for a wear ring – a shiny circle where it's been hammered against the seat. If you see that, replace it.
Debris: More common than wear is debris. A tiny flake of rust, a bit of old varnish, or a particle of dirt gets between the needle and seat, and the valve can't close. The fuel just keeps trickling in. I've found stuff as big as a grain of sand wedged in there. Ethanol fuel leaves varnish and gum deposits – that's the #1 cause of carburetor problems today, according to seasoned marine techs. Even a microscopic piece of junk will do it.
Fuel Pump Over-Pressure
Carburetors are designed for a specific fuel pressure range – usually 2 to 5 PSI for mechanical pulse pumps. If your fuel pump is putting out too much pressure (from a stuck regulator or wrong replacement part), it can force fuel past even a good needle valve. Hook up a fuel pressure gauge at the carb inlet and check it against your engine's spec. If it's high, you've got a pump or regulator problem, not a carb problem.
On EFI engines, the VST and fuel pressure regulator control fuel delivery. A leaking VST diaphragm or stuck regulator can send excess fuel into the system or even into the crankcase, thinning your oil. According to mechanics who deal with EFI systems daily, a fuel pressure gauge at the VST is a routine diagnostic tool for tracking down over-fueling on modern outboards.
Stuck Choke Mechanism
The choke restricts airflow to enrich the mixture for cold starts. If it doesn't open after the engine warms up, you're stuck running rich all the time.
Manual chokes: The choke plate can get gummed up with carbon or varnish and stick in the closed position. Spray some carb cleaner in there and work the linkage back and forth. If it frees up, hit it with a light shot of marine grease or silicone spray to keep it moving.
Automatic chokes: These use a wax pellet or electric solenoid. When the mechanism fails, the choke stays engaged. If cleaning doesn't fix it, replace the choke assembly.
Diagnosing Carburetor Flooding Step-by-Step
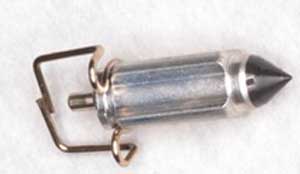
Pull the cowl and look for fuel stains or wet spots around the carb. Smell around – your nose is a good diagnostic tool.
Remove the spark plugs. If they're wet and smell like gas, you've confirmed flooding. Set them aside to dry.
Pull the carburetor bowl. Most carbs have a drain screw at the bottom of the bowl, or you remove a few screws to drop the bowl off. Watch for the gasket – don't tear it if you're reusing it. Empty the fuel into a catch pan.
Inspect the float. Hold it up and feel the weight. Compare it to a new one if you have a rebuild kit handy. Shake it gently next to your ear – if you hear fuel sloshing, it's saturated. Check for cracks, especially on plastic floats. A pinhole leak will let fuel seep in over time, and the float gets heavier and heavier.
Check the needle valve and seat. Pull the needle valve out. Look at the rubber tip under good light or with a loupe. If it's grooved, flattened, or has a shiny wear ring, replace it. Check the brass seat in the carb body for debris or scoring. Spray carb cleaner through it and blow it out with compressed air. Never use wire to clean fuel passages – you'll enlarge them and ruin the calibration.
Measure float height. Flip the carb body upside down so the float hangs down and just touches the needle valve (don't press the needle into the seat – you'll damage the viton tip). Use a small ruler or feeler gauge to measure from the carb body gasket surface to the bottom edge of the float. Compare to your service manual spec. If it's off, gently bend the small metal tang that contacts the needle valve to adjust. A light tap with your fingernail is usually enough. Measure again. Get it exact.
Look for varnish buildup. Old ethanol fuel leaves a sticky, yellowish-brown varnish that smells like old paint thinner instead of gas. If you see varnish in the bowl or on the jets, the whole carb needs a deep clean or rebuild.
Fuel Line and Fuel Pump Problems That Cause Over-Fueling

Fuel lines don't directly cause over-fueling, but they can create conditions that mimic it or contribute to flooding.
Cracked or deteriorated fuel lines: Ethanol fuel degrades rubber. The inner lining of cheap fuel hoses can break free and unravel, sending chunks of rubber downstream into your filter and carb. We've pulled apart carbs and found bits of black hose lining clogging the jets. This doesn't cause flooding directly, but it screws up fuel delivery and makes the engine run inconsistent – sometimes rich, sometimes lean. According to reports from US boaters, gray Attwood-style hoses are notorious for this with E10/E15 fuel. One mechanic I know won't use anything but black USCG Type A1-rated hose or AEROQUIP FC 332 with Oetiker clamps.
Air leaks in the fuel line: If the line is cracked or a fitting is loose, the fuel pump sucks air instead of fuel. You'll see air bubbles in the fuel filter. This usually causes fuel starvation, not over-fueling, but it can make the engine surge and run erratic, which gets misdiagnosed. To check for air leaks, plumb a short piece of clear hose into the fuel line as close to the carb or VST as possible – right after the primary filter is a good spot. Prime the system and run the engine at moderate RPM. If you see a steady stream of bubbles, you've got an air leak. Move the clear hose upstream toward the tank to narrow down where the leak is. This is a standard troubleshooting trick for tracking down mystery running issues.
Primer bulb problems: Squeeze the bulb. It should get hard and stay hard. If it stays mushy, fuel is flowing backward through a failed check valve inside the bulb. If it collapses under load when the engine is running, you've got a vent problem or a restriction on the supply side (tank pickup, anti-siphon valve, or kinked line).
Fuel pump diaphragm leaks: On mechanical pulse pumps (common on smaller two-strokes), a torn diaphragm can allow fuel to leak into the crankcase or pulse line. On EFI engines, a leaking VST can force fuel into the crankcase, thinning the oil. If your oil level is rising or smells like gas, suspect a VST leak. This is a known issue on some Yamaha and Mercury EFI motors.
How to Fix Carburetor Flooding

Immediate Field Repair
If you're on the water and the engine floods, here's how to get home:
Remove and dry the spark plugs. Wipe them down with a clean rag. Ground the spark plug wires to prevent ignition while you're cranking – clip them to a ground point on the engine block or disconnect them entirely. This prevents a spark from igniting fuel mist in the engine bay, which is a real fire risk.
Clear the cylinders. Hold the throttle wide open (this opens the throttle plates in the carb to let in maximum air). Crank the engine for 5 to 10 seconds with the plugs out. This blows the excess fuel out of the cylinders. Let the starter cool for 30 seconds, then crank again if needed. You'll see fuel spray out of the plug holes – that's what you want.
Reinstall the plugs. Make sure they're clean and dry. If they're fouled with carbon, scrub them with a wire brush or replace them if you have spares.
Try starting with reduced throttle. Crack the throttle about 1/4 open and crank. If it fires, let it idle rough for a minute to burn off the excess fuel. Don't keep cranking endlessly – you'll kill the battery and overheat the starter. Give it a break between attempts.
This is a temporary fix. If the carb keeps flooding, you need to repair the root cause.
Carburetor Rebuild for Persistent Flooding
For a permanent fix, you're tearing into the carb.
Tools and parts you need before you start:
- Carburetor rebuild kit (includes gaskets, needle valve, sometimes a new float) from the Carburetor Repair Kit collection
- Carb cleaner spray
- Compressed air source
- Clean rags and a catch pan
- Small screwdrivers (check if your carb uses JIS screws – they look like Phillips but aren't; using a Phillips driver will strip them)
- Ruler or feeler gauge for measuring float height
- Your engine's service manual (for float height spec and torque values)
Step 1: Remove the carburetor. Disconnect the fuel line. Plug the line immediately with a golf tee or a spare bolt to prevent fuel from draining out of the tank and making a mess. Disconnect the throttle and choke linkage. Remove the carb mounting bolts or nuts. Some carbs have a spacer or intake manifold gasket underneath – don't lose it.
Step 2: Disassemble the float bowl. Remove the bowl screws. Gently tap the bowl with a plastic mallet if it's stuck – old gaskets can glue it on. Lift the bowl off carefully. Fuel will spill – have your catch pan ready.
Step 3: Remove the float and needle valve. The float usually slides off a hinge pin. Note which way it goes – take a photo with your phone if you need to. Pull the needle valve out. Some are threaded into the float; others just clip in.
Step 4: Clean everything. Spray carb cleaner into all the passages in the carb body. Blow them out with compressed air. Do not use wire, drill bits, or anything metal to clean the jets or passages – you'll enlarge them and throw off the fuel metering. Use compressed air only. If a passage is really clogged, soak the carb body in a bucket of carb cleaner for a few hours, then blow it out again.
Step 5: Inspect and replace the needle valve and seat. If the needle tip is worn or the seat is scored, replace both. Most rebuild kits include a matched needle and seat. Some seats press into the carb body; others thread in. Follow the kit instructions. When installing the new seat, make sure it's fully seated (no pun intended) and not cross-threaded.
Step 6: Check and replace the float. If the old float is saturated, cracked, or just plain old, replace it. The rebuild kit should include one. If you're reusing the float, double-check that it's not heavy with fuel.
Step 7: Set the float height. This is critical. Invert the carb body (throttle side up) so the float hangs down and just barely touches the needle valve. Do not press down on the float – you'll compress the spring-loaded needle or damage the viton tip, and your measurement will be off. Measure from the gasket surface (where the bowl mounts) to the bottom of the float. Compare to your service manual spec. Adjust by gently bending the tang on the float that contacts the needle. Bend it up to lower the float level (less fuel in the bowl); bend it down to raise the float level (more fuel). Measure again. Get it within 0.5mm of spec if possible.
I've found that after installing the needle valve, a very light tap on the float tang with your fingernail helps seat the needle properly, so your measurement is accurate.
Step 8: Reassemble. Install a new bowl gasket from the rebuild kit. Don't reuse the old one – it'll leak. Torque the bowl screws to spec if your manual lists it, or just snug them evenly in a cross pattern. Don't overtighten – you'll crack the bowl or strip the threads.
Step 9: Reinstall the carb. Use a new intake gasket. Torque the mounting bolts to spec. Reconnect the fuel line, throttle, and choke linkage.
Step 10: Leak test before starting. Pump the primer bulb to fill the carb bowl. Check for fuel leaks at the bowl gasket, overflow tube, and fuel line connections. If it's dry, you're good to start the engine.
For specific carburetor parts, consider browsing the Carburetor collection to find OEM parts that fit your outboard for repairs or replacements.
Choke Repair
If the choke is stuck, pull the air cleaner off and look at the choke plate. Spray carb cleaner on the shaft and work the choke lever back and forth. If it frees up, lubricate the shaft with a tiny bit of marine grease or silicone spray – not WD-40, which gums up.
If the automatic choke mechanism is bad (wax pellet or solenoid), replace the whole choke assembly. It's usually a few screws.
Fuel Line and Pump Repairs
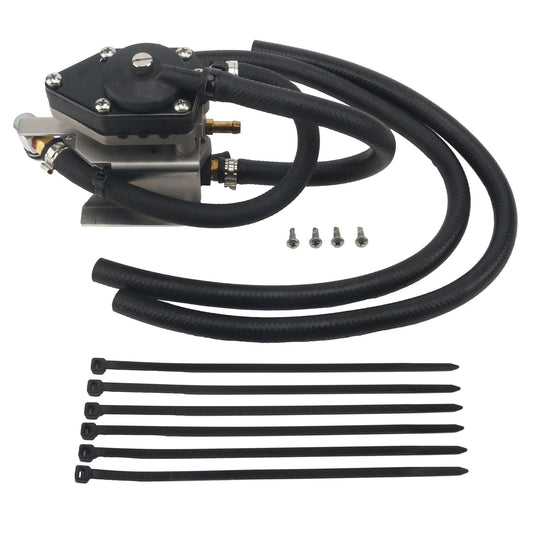
Replace deteriorated fuel lines. If your hose is cracked, stiff, or delaminating, replace it with marine-grade, ethanol-resistant fuel hose. Look for USCG Type A1 or A2 rating. The hose should say "USCG Type A1-15" or similar on the side. Use proper marine fuel hose clamps – stainless steel worm-gear clamps or Oetiker pinch clamps. Position clamps so the screw isn't at the bottom where it can corrode from sitting in bilge water.
Replace the fuel filter. Do this every season, minimum. If you suspect bad fuel or see debris, replace it immediately. Inline filters are cheap – there's no reason to run a dirty one. For quality parts, see the Fuel Filter collection.
Fuel pump replacement. If the pump diaphragm is leaking or the pressure is wrong, replace the pump. Mechanical pulse pumps are usually two or four screws. Electric pumps (on EFI engines) have a fuel supply line, return line, and electrical connector. Before you disconnect anything:
- Relieve fuel pressure by loosening the fuel line at the carb or rail (have a rag ready).
- Disconnect the battery ground to kill power.
- Label the fuel lines so you don't hook them up backward.
- Remove the old pump.
- Install the new pump in the same orientation. Some pumps have an arrow showing flow direction – pay attention.
- Tighten all fuel line connections. Double-check them.
- Reconnect the battery.
- Cycle the key to "On" a few times without starting to prime the system and check for leaks.
Find OEM fuel pumps or kits from the Fuel Pump collection or Fuel Pump Kit collection for your outboard model.
Test fuel pressure. If you have a fuel pressure gauge, hook it up at the carb or VST and check the reading with the engine running. Compare to spec. For mechanical pulse pumps, you're looking for 2-5 PSI typically. EFI systems run much higher – 30-40 PSI on most outboards. If pressure is out of range, recheck your pump installation or look for a clogged filter or kinked line.
Preventing Carburetor Flooding and Fuel Issues
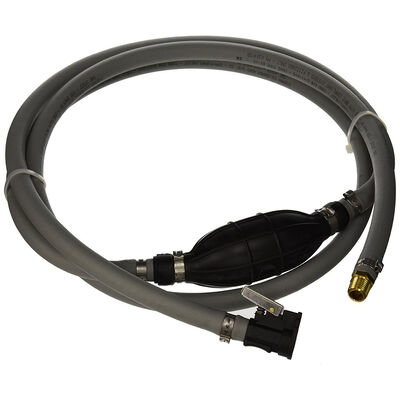
An ounce of prevention beats a gallon of carb cleaner.
Use fresh fuel and stabilizers. Ethanol fuel degrades fast – often in 30 to 60 days, according to Mercury Marine and other OEMs. If your fuel sits for more than a month, use a quality marine fuel stabilizer like STA-BIL Marine or PRI-G. Better yet, use ethanol-free gas (REC-90) if it's available at your marina. It costs more, but it won't varnish up your carb.
Phase separation: Here's why ethanol is a problem. Ethanol is hygroscopic – it absorbs water from the air. When enough water gets into the fuel, the ethanol separates out and sinks to the bottom of your tank, taking the water with it. You end up with a layer of watery ethanol-slush at the bottom and weak gasoline on top. That water-ethanol mix will flood your carb and trash your engine. A good stabilizer with water dispersion additives helps prevent this. So does keeping your tank full to minimize the air space where condensation can form.
Run the carburetor dry before storage. If you're putting the boat away for more than a week, turn off the fuel supply (if you have a shutoff valve) and let the engine run until it stalls. This empties the carb bowl so fuel can't sit in there and varnish up. Some engines don't have a fuel shutoff – in that case, consider installing an inline valve.
Replace the fuel filter annually. More often if you're in a harsh environment (saltwater, lots of debris in the water). A clogged filter starves the engine and can make the fuel pump work too hard.
Inspect fuel lines every season. Squeeze the hose. If it feels hard or cracks, replace it. Look inside the tank filler neck with a flashlight and check the pickup tube for cracks. Check all the hose clamps for corrosion or looseness.
Clean or rebuild the carb annually. On four-stroke outboards, which have more intricate carburetors with smaller passages, consider cleaning the carb every 100 hours or annually, whichever comes first. This prevents buildup before it becomes a problem.
Proper starting and shutdown procedures. When starting a cold engine, use the choke as intended – full choke for the first few cranks, then back it off as soon as the engine fires. Don't leave it on longer than needed. When shutting down after a run, let the engine idle for 30 seconds to cool down before you kill the key. If you're storing the boat, run it with stabilizer in the fuel for 5-10 minutes to get treated fuel throughout the whole system, including the carb.
Winter storage for US climates. If you're in a freeze zone, winterization is critical. Drain the fuel tank if you can (or add stabilizer and fill it to the top to prevent condensation). Fog the engine (spray fogging oil into the carb while it's running, then kill it). This coats the internal parts and prevents corrosion. Drain the carb bowl if possible. Some engines have a drain screw on the bottom of the bowl – crack it open and catch the fuel. This prevents varnish from forming over the winter.
For more on proper outboard engine care, check the JLM Marine HUB, where you can explore a wide range of resources and boat parts collections.
When to Call a Professional
Some jobs are beyond the DIY scope, and there's no shame in handing it off.
Persistent flooding after you've rebuilt the carb. If you've replaced the float, needle, and gaskets, set the float height perfectly, and it still floods, there might be an internal issue with the carb body – a crack, a warped surface, or a damaged throttle shaft letting in air. A good mechanic can diagnose it with carb body pressure testing or tell you if you need a new carb.
Multiple carburetor synchronization. Engines with two or more carbs (common on 50HP+ outboards) need to be synchronized so they all open at the same throttle position. This requires a sync tool or manometer setup that most DIYers don't own. Getting sync wrong causes rough running, poor acceleration, and uneven cylinder temps. Let a pro handle it.
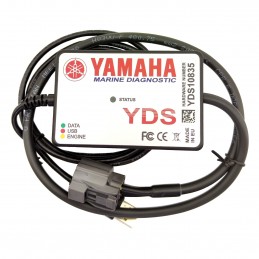
Specialized diagnostic tools. EFI systems require a fuel pressure gauge, sometimes a scan tool to read engine codes, and knowledge of the specific system (Yamaha EFI vs. Mercury OptiMax vs. Suzuki DF). If you don't have the tools or the wiring diagrams, a certified tech will save you time and prevent costly mistakes.
Warranty considerations. If your engine is under warranty, DIY repairs can void it. Check your warranty status before you tear into anything. If you're covered, use an authorized dealer for repairs.
Hydrolock or internal damage. If the engine hydrolocked (a cylinder filled with so much fuel that the piston can't move), you might have bent a connecting rod or damaged the crank. That's an internal engine teardown, not a carb job. A mechanic will need to pull the head and inspect the internals.
For guidance on when to seek expert help, see When to Seek Professional Help vs DIY Fix.
Troubleshooting Quick Reference

Symptom: Strong fuel smell, visible fuel leaks, wet spark plugs, hard starting. Likely Cause: Carburetor flooding – saturated float, stuck needle valve, or debris in the seat. Fix: Remove and dry plugs, clear cylinders, inspect and clean or replace float and needle valve, check float height.
Symptom: Black smoke, rough idle, poor acceleration, engine running rich. Likely Cause: Carburetor flooding, stuck choke, or incorrect float adjustment. Fix: Check choke operation, verify float height is set to spec, inspect carb for varnish, replace old fuel.
Symptom: Fuel dripping from carburetor overflow tube. Likely Cause: Float not rising to close needle valve – needle stuck open, worn, or float set too high. Fix: Disassemble carb bowl, clean or replace needle valve and seat, adjust float height to manual spec.
Symptom: Engine surges, stalls, or hesitates; air bubbles in fuel filter. Likely Cause: Air leak in fuel line, cracked hose, or loose fitting. Fix: Inspect all fuel lines for cracks, replace deteriorated hoses with marine-grade line, tighten fittings, test with clear hose.
Symptom: Oil level rising on dipstick, oil smells like gas. Likely Cause: Fuel leaking into crankcase – bad VST diaphragm on EFI, or leaking carb flooding the crankcase on some two-strokes. Fix: Change oil immediately, diagnose and repair VST or carb flooding issue, recheck oil level after fix.
Symptom: Primer bulb stays soft or collapses under load. Likely Cause: Failed check valve in primer bulb, or restriction/vent issue in fuel supply. Fix: Replace primer bulb, check tank vent, inspect pickup tube and anti-siphon valve for clogs.
Real Case: 90HP Yamaha with Persistent Flooding

Customer brought in a 90HP Yamaha that flooded every time it sat for a few weeks, especially over winter. Black smoke on startup, rough idle, constant fuel smell. He'd already replaced the needle valve himself, but the problem kept coming back.
We pulled the plugs – soaked. Drained the old fuel, which had a varnish smell. Replaced it with fresh gas and STA-BIL Marine. Fired it up, and it still flooded within 10 minutes of idling.
Tore the carb down. The needle valve he'd installed was fine – new, seated properly. But when we pulled the float, it felt too heavy. Held it up and inspected closely – found a tiny pinhole in the brass. The float had absorbed fuel over months of storage. Because it was heavier than spec, it wasn't rising high enough to push the needle valve closed when the bowl filled. The fuel just kept pouring in.
We replaced the entire float and needle valve assembly from a rebuild kit. Set the float height to exactly 16.0mm per the Yamaha manual (the old one measured 18.2mm – way off). Reassembled the carb, checked for leaks, and ran the engine. Smooth as glass. No smoke, no flooding.
Lessons from this case:
-
Check float weight, not just appearance. A visual inspection isn't enough – feel the weight. Compare it to a new float if you have one. If it feels heavier than it should or you hear liquid sloshing, it's saturated.
-
Fuel stabilizers matter. This engine sat for months with untreated E10 fuel. That varnish and the pinhole in the float were both caused by fuel degradation. Treating the fuel before storage would have prevented both issues.
-
Float height must be exact. We measured the old setup at 18.2mm when spec was 16.0mm. That 2.2mm difference was enough to keep the carb flooding under certain conditions. Precision counts.
We also advised the customer to drain his carb before long-term storage in the future and to keep using stabilizer year-round. He hasn't had a problem since.
Daily tip: After every outing, especially in salt water, flush your engine with fresh water for 5-10 minutes using muffs or a flush port. This prevents salt and corrosion buildup in the cooling system and fuel system components, which can lead to stuck parts, leaks, and premature failure. For related maintenance, see our guide on Outboard Engine Pre-Run Inspection.