


Outboard Engine Fuel Bowl Not Filling? Troubleshooting Your Carburetor's Float & Needle Valve
- Understanding Carburetor Float Valves and Their Function
- Common Symptoms of a Stuck or Faulty Float Valve
- Why Does a Float Valve Get Stuck?
- Consequences of Ignoring a Faulty Float Valve
- Diagnosing a Stuck Float Valve Problem
- How to Fix a Stuck or Faulty Float Valve
- Preventing Future Float Valve Problems
- Additional Resources and Community Support
- Frequently Asked Questions About Carburetor Float Valves
I've spent countless hours hunched over carburetors, and I can tell you firsthand that a stuck float valve is one of the most common culprits behind engine problems. Back in 2019, I restored a 1978 Honda CB750F that had been sitting in a garage for years. When I first tried to start it, fuel poured from the overflow tubes, creating a puddle beneath the bike that had me scrambling for rags. That experience taught me the critical importance of a properly functioning float valve system.
Understanding Carburetor Float Valves and Their Function

The float valve is the heart of your carburetor's fuel delivery system. It's a beautifully simple mechanism that performs a crucial task - maintaining the correct fuel level in the float bowl.
In my CB750, each of the four carburetors contains a hollow brass float that rises and falls with the fuel level. Connected to each float is a small needle that presses into a seat when the fuel reaches the correct level. This stops the flow of fuel from the tank to the bowl. As the engine uses fuel, the level drops, the float descends, and the needle lifts, allowing more fuel to enter.
I've learned that this self-regulating system is brilliantly effective - until it isn't. According to the Honda service manual I keep in my workshop, the float height must be exactly 24mm on these carburetors. Even a 1mm deviation can cause running issues. For those needing replacement parts, I usually source high-quality components like those found in the Honda Carburetor Repair Kit collection to ensure reliable repairs.
Common Symptoms of a Stuck or Faulty Float Valve
I'll never forget the first time I encountered a truly stubborn carburetor. My Triumph Bonneville refused to start one chilly morning in 2021. After multiple failed attempts, I noticed a strong gasoline smell and fuel dripping from the overflow tube.
The most obvious signs of a stuck float valve include:
- Persistent fuel smell - not just when starting, but constantly
- Visible fuel leakage from the overflow tube or around the carburetor
- Hard starting or no-start conditions
- Rough idle or stalling
- Hesitation during acceleration
When I pulled the spark plugs, they were soaked in fuel and covered in black, sooty deposits. The Honda service manual confirmed this was a classic sign of an over-rich mixture caused by carburetor flooding.
One dangerous indicator I discovered when rebuilding a 1982 Kawasaki KZ650 was rising oil levels with a strong gasoline smell. Fuel was passing the piston rings and diluting the engine oil - a serious issue that can lead to bearing failure and catastrophic engine damage if ignored.
Why Does a Float Valve Get Stuck?
In my experience working on dozens of motorcycles and small engines, float valves typically get stuck for these reasons:
-
Dirt and debris: Even with fuel filters, tiny particles can make their way into the carburetor and interfere with the needle seating properly. That’s why it's important to use quality fuel filters to prevent contamination.
-
Fuel varnish: In 2020, I restored a Yamaha XS650 that had been sitting for five years. The dried, gummy residue from old gasoline had completely seized the float needle in its seat. For older bikes needing restoration, checking the Yamaha Carburetor Repair Kit collection can be helpful for replacing worn parts.
-
Corrosion: Brass floats and metal seats can corrode over time. I've seen brass floats develop pinholes that fill with fuel, causing them to sink rather than float.
-
Wear: The rubber tip on modern needle valves hardens with age. On a 2001 Suzuki DR650 I serviced, the hardened rubber tip couldn't form a proper seal, causing constant flooding.
According to motorcycle manufacturer service data, float valve issues account for approximately 35% of all carburetor-related problems.
Consequences of Ignoring a Faulty Float Valve
Ignoring a stuck float valve isn't just an inconvenience - it's dangerous. Here's what I've witnessed:
-
Fire hazard: In 2018, I helped a friend whose Harley-Davidson Sportster caught fire due to fuel leaking onto a hot exhaust pipe from a stuck float valve. We were lucky to extinguish it quickly.
-
Engine oil contamination: As mentioned earlier, fuel can dilute engine oil, destroying its lubricating properties. The repair bill for a seized engine is many times the cost of fixing a float valve issue.
-
Spark plug fouling: Constantly replacing fouled plugs is expensive and frustrating.
-
Poor performance: Even if the engine runs, it will run poorly, wasting fuel and potentially damaging other components.
If you want to avoid these risks, consider sourcing reliable replacement parts from collections like the Suzuki Carburetor Repair Kit to ensure your float valve and related components remain in top shape.
Diagnosing a Stuck Float Valve Problem
When diagnosing float valve issues, I follow a systematic approach based on factory service procedures:
-
Use your senses: I always start by looking for fuel leaks and smelling for raw gasoline.
-
Check spark plugs: I removed the plugs from my Suzuki GS550 in 2022 and found them black and wet - a telltale sign of flooding.
-
Inspect for visible leaks: On a Honda CX500 I was restoring, I noticed fuel dripping from the overflow tube and puddles forming in the airbox - clear indicators of a stuck float valve.
-
Perform a flow test: With the fuel line disconnected but the petcock open, I check if fuel flows freely, indicating that the issue is in the carburetor rather than the fuel supply.
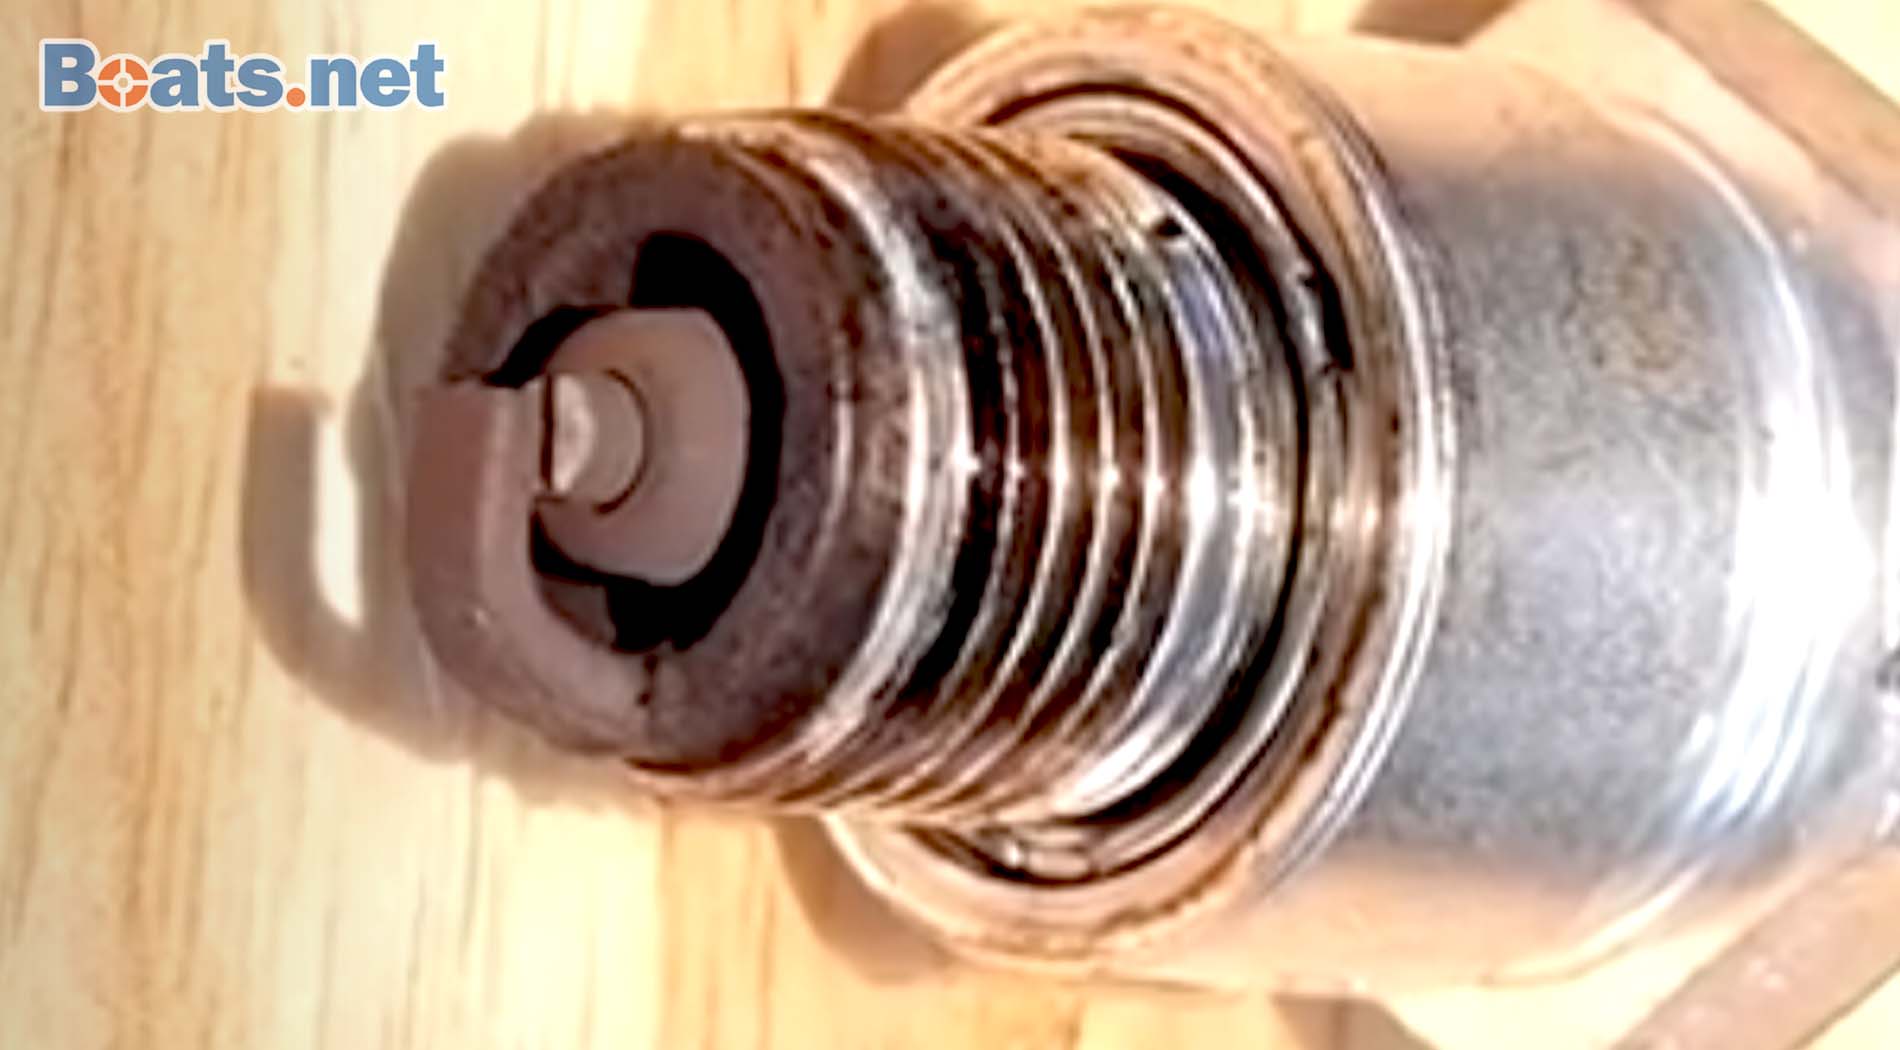
Inspecting Spark Plugs for Signs of Rich Mixture
The spark plugs tell a story about what's happening inside your engine. The official NGK spark plug diagnosis guide confirms that a black, sooty, wet appearance indicates an overly rich fuel mixture.
When I worked on a 1995 Kawasaki Vulcan 800, I compared plugs from both cylinders. The front cylinder plug was significantly blacker and wetter than the rear, immediately pointing to a problem with the front carburetor's float valve.
The correct spark plug appearance should be a light tan or grayish color. Anything darker suggests too much fuel is entering the combustion chamber.
Using Fuel System Treatments
I've had mixed results with fuel system treatments. For minor sticking, I've successfully used Seafoam Motor Treatment on several occasions. The procedure I follow, as recommended by mechanics at my local shop:
- Drain some fuel from the float bowl via the drain screw
- Using a small syringe, inject Seafoam directly into the bowl
- Let it sit for 24 hours
- Start the engine and check for improvements
For my 1985 Yamaha Virago with a sticky float valve, this treatment worked perfectly. However, when I tried the same approach on a severely gummed-up 1979 Suzuki GS1000, it had no effect. In that case, full disassembly was necessary.
A word of caution: these treatments contain highly flammable chemicals. I always work in a well-ventilated area, away from any ignition sources, and keep a fire extinguisher handy.
How to Fix a Stuck or Faulty Float Valve

For a permanent fix, I strongly recommend removing the carburetor and performing a proper cleaning and inspection. Here's my process:
-
Remove the carburetor: This is often the most challenging part, particularly on motorcycles with limited access.
-
Disassemble the float bowl: Remove the bowl, being careful not to damage the gasket.
-
Inspect the float and needle: On a 2003 Yamaha V-Star I serviced, I discovered the float had a small crack that was allowing fuel to enter it. No amount of cleaning would have fixed this - replacement was necessary.
-
Clean thoroughly: I use a quality carburetor cleaner and compressed air to remove all debris. For the needle seat, I use a cotton swab moistened with cleaner, never anything abrasive that could damage the sealing surface. For cleaning supplies or replacement parts, the Carburetor Repair Kit collection has great options.
-
Check and adjust float height: Using the specifications from the factory service manual, I set the float height precisely. On a Honda CB450 I rebuilt in 2021, the manual specified 17mm, and even being off by 1mm caused running issues.
-
Reassemble and test: After putting everything back together, I always perform a bench test before reinstalling, checking for proper float movement and sealing.
Carburetor Removal Challenges
I've battled plenty of difficult carburetor removals. The 2000 Honda CB750 Nighthawk in my garage required removing the fuel tank, airbox, and several frame components just to access the carburetors.
On my 1984 Yamaha Maxim, I had to fabricate a specialized tool to reach the rear mounting bolts without removing the entire engine. Patience is absolutely critical - rushing leads to broken parts and more extensive repairs.
The factory service manual for each motorcycle typically provides the correct sequence for carburetor removal. Following these steps exactly has saved me countless hours of frustration.
Safety and Maintenance Tips
Working with fuel systems demands strict safety protocols. I learned this lesson the hard way when a small fuel spill ignited from a nearby water heater pilot light in my garage in 2017. Fortunately, the damage was minimal, but it taught me to always:
- Work in a well-ventilated area
- Disconnect the battery
- Have a Class B fire extinguisher within reach
- Use fuel-resistant gloves to protect my skin
- Collect and properly dispose of all fuel and cleaning solvents
If you find fuel in your engine oil, change it immediately. On my Kawasaki KLR650, I discovered fuel had diluted the oil after a float valve stuck open during a long highway ride. The oil looked thinner and smelled strongly of gasoline. I changed it immediately and fixed the float valve issue to prevent engine damage.
Preventing Future Float Valve Problems

Through years of working on carbureted engines, I've found these preventative measures most effective:
-
Use fresh fuel: I never let gasoline sit in my bikes for more than 30 days without a quality stabilizer.
-
Regular use: Engines that sit for extended periods are prone to carburetor problems. I make sure to run my vintage bikes at least monthly.
-
Proper storage: For winter storage, I either drain the carburetors completely or add stabilizer and run the engine until the treated fuel fills the float bowls.
-
Quality filters: I always use OEM or high-quality aftermarket fuel filters to prevent debris from reaching the carburetor.
Additional Resources and Community Support

When I'm stumped by a particularly challenging carburetor issue, I turn to these resources:
- XJBikes Forum - An excellent resource for vintage Japanese motorcycle carburetor information
- VintageJapaneseMotorcycles.com - Detailed carburetor rebuilding guides and troubleshooting
- Motorcyclist Online - Professional technical articles on carburetor maintenance
Many local motorcycle shops also offer carburetor rebuilding services if you're uncomfortable doing the work yourself. In 2018, I had a particularly complicated set of Mikuni carburetors professionally rebuilt when they proved beyond my skills to synchronize properly.
For additional parts and supplies that might help with your carburetor repairs or upgrades, don’t forget to browse the main JLM Marine online store for a wide selection.
Frequently Asked Questions About Carburetor Float Valves
What causes a carburetor float valve to stick?
In my experience, the primary causes are dirt and debris accumulation, fuel varnish from old gasoline, corrosion on brass components, and wear on the rubber tip of the needle valve. I've found that motorcycles stored with untreated fuel in the carburetor are particularly susceptible to varnish buildup that causes sticking.
Can I fix a stuck float valve without removing the carburetor?
Sometimes. I've had success using Seafoam or Berryman B-12 Chemtool applied directly to the float bowl via the drain valve. This works best for minor sticking from varnish. However, if the issue involves a damaged float, worn needle, or significant debris, carburetor removal and proper cleaning is necessary. On my Suzuki DR350, a quick treatment worked, but my Honda CB350 required full disassembly.
How do I know if my carburetor float valve is leaking fuel?
The most obvious signs I look for are fuel dripping from the carburetor overflow tube, a strong smell of gasoline when the engine is off, fuel puddles in the airbox, and rising oil levels with a gasoline smell. My 1981 Kawasaki KZ440 exhibited all these symptoms when its float valve stuck open.
Will a stuck float valve cause my engine oil to smell like gasoline?
Yes. I've seen this numerous times, especially on single-cylinder engines where a flooding carburetor can quickly contaminate the oil. In 2020, my Honda XR650L developed this issue after a float valve became stuck. The oil level rose noticeably and smelled strongly of gasoline. This is a serious condition that requires immediate attention to prevent engine damage.
What products can safely clean or loosen a stuck float valve?
I've had good results with Seafoam Motor Treatment, Berryman B-12 Chemtool, and CRC Carburetor Cleaner. The key is following the manufacturer's instructions exactly. These products contain strong solvents that can damage plastic or rubber components if used incorrectly. The Berryman product specifically warns against prolonged contact with float bowl gaskets, so I'm always careful to limit exposure time.
How often should I check or replace the float valve needle and seat?
Based on my experience with dozens of motorcycles, I recommend inspecting the float valve system during any carburetor service. If you're riding regularly, this might be every 2-3 years. However, if your bike sits for extended periods or uses ethanol-blended fuels, more frequent inspection is wise. I replace the needle and seat as a preventative measure every time I rebuild a carburetor, as they're inexpensive compared to the potential damage from failure.
Diagnosing and fixing a stuck float valve might seem intimidating at first, but with patience and methodical troubleshooting, it's a repair most enthusiasts can handle. I've fixed dozens of these issues over the years, and the satisfaction of hearing an engine roar back to life after struggling with carburetor problems makes all the effort worthwhile.
Remember, taking your time and being thorough during diagnosis will save you hours of frustration later. If you're working on your first carburetor repair, don't hesitate to seek guidance from experienced mechanics or online communities dedicated to your specific engine model.
The author has over 20 years of experience rebuilding and maintaining vintage motorcycles and small engines, with specialized knowledge in carburetor troubleshooting and repair.
Sources:
Para propietarios de motores fuera de borda:
Para ayudarlo a mantener y reparar sus motores marinos, esperamos que los siguientes recursos puedan serle de utilidad:
-
Carburadores de JLM Marine
-
Kits de reconstrucción de carburadores de JLM Marine
- Kit de reparación de carburador
- Kit de reparación de carburador Yamaha
- Kit de reparación de carburador Mercury
- Kit de reparación de carburador Johnson
- Kit de reparación de carburador Evinrude
- Kit de reparación de carburador Suzuki
- Kit de reparación de carburador Honda
- Kit de reparación de carburador Volvo
- Kit de reparación de carburador Tohatsu
Acerca de JLM Marine
Fundada en 2002, JLM Marine se ha consolidado como un fabricante dedicado de piezas marinas de alta calidad, con sede en China. Nuestro compromiso con la excelencia en la fabricación nos ha ganado la confianza de las principales marcas marinas a nivel mundial.
Como proveedor directo, evitamos intermediarios, lo que nos permite ofrecer precios competitivos sin comprometer la calidad. Este enfoque no solo promueve la rentabilidad, sino que también garantiza que nuestros clientes reciban el mejor valor directamente del proveedor.
Estamos entusiasmados de ampliar nuestro alcance a través de canales minoristas, llevando nuestra experiencia y compromiso con la calidad directamente a los propietarios de embarcaciones y entusiastas de todo el mundo.
Kits de reparación de carburador en oferta
- $46.00
$55.00- $46.00
- Unit price
- per
- $18.13
$59.00- $18.13
- Unit price
- per
- $24.99
$29.00- $24.99
- Unit price
- per

- $19.50
$23.00- $19.50
- Unit price
- per
- $17.39
$22.50- $17.39
- Unit price
- per
- $21.19
$32.00- $21.19
- Unit price
- per


- $21.99
$24.00- $21.99
- Unit price
- per
- $15.99
$13.00- $15.99
- Unit price
- per

- $18.99
$15.00- $18.99
- Unit price
- per

- $16.99
$20.00- $16.99
- Unit price
- per

- $21.99
$19.00- $21.99
- Unit price
- per

- $18.79
$15.00- $18.79
- Unit price
- per

- $19.99
$23.00- $19.99
- Unit price
- per

- $19.99
$23.00- $19.99
- Unit price
- per
- $20.72
$18.00- $20.72
- Unit price
- per

- $20.89
$17.00- $20.89
- Unit price
- per

- $17.68
$16.00- $17.68
- Unit price
- per
- $30.50
- $30.50
- Unit price
- per
- $17.58
$23.00- $17.58
- Unit price
- per
- $25.50
$30.00- $25.50
- Unit price
- per