


Why Your Outboard Backfires & Won't Start (After Fuel System Maintenance)
- Air Leaks: The Most Common Post-Maintenance Problem
- Fuel Starvation and Clogged Passages
- Carburetor Reassembly Errors
- Ignition Timing and Spark Problems Exposed by Fuel Work
- Why a Lean Mixture Causes Backfires
- Step-by-Step Diagnostic Guide (Most Likely to Least Likely)
- The Linkage Sync: A Commonly Overlooked Post-Maintenance Issue
- Safety Precautions Before You Start Diagnostics
- OEM vs. Aftermarket Parts: What You Need to Know
- FAQ: Post-Maintenance Outboard Problems
- Quick-Check Summary for Immediate Troubleshooting
- When to Call a Professional
- Applicability: Which Engines Does This Apply To?
You just finished working on your outboard's fuel system—cleaned the carbs, swapped a filter, replaced fuel lines—and now it backfires or won't fire up at all. This is one of the most common problems I see after twenty years wrenching on outboards.
The issue is almost never catastrophic. It's usually a direct consequence of the work you just did: a loose fitting you missed, a jet you didn't seat right, or old debris you knocked loose that's now blocking something downstream. Fuel system failures are the number one reason boats break down in the US, and that gets worse right after maintenance when you've been poking around in there.
Here's what causes backfires and no-starts after fuel work, how to diagnose them fast, and how to avoid doing it again.
Air Leaks: The Most Common Post-Maintenance Problem

This is the top cause, no contest. When you disconnect fuel lines, swap filters, or pull a carburetor apart, it's easy to leave a fitting slightly loose, forget a hose clamp, or damage a gasket. These openings let air into the fuel system. Too much air means not enough fuel reaches the cylinders—a lean condition—which shows up as hesitation, stumbling, and backfires through the intake.
A mechanic in Fort Lauderdale said it clearly: "The engines aren't the problem. The owners are… they were never told what actually matters," referring to things like unaddressed air leaks after service. If your primer bulb feels soft or collapses when you squeeze it after cranking, you've got an air leak between the tank and the fuel pump.
How to Find Air Leaks
Go back over every connection you touched. Check fuel line clamps—make sure they're tight. Look at the fuel lines for cracks, kinks, or signs the inner liner is delaminating, especially if they're old. Pay attention to fuel pump and carburetor mounting gaskets. Were they seated flat when you bolted things back together?
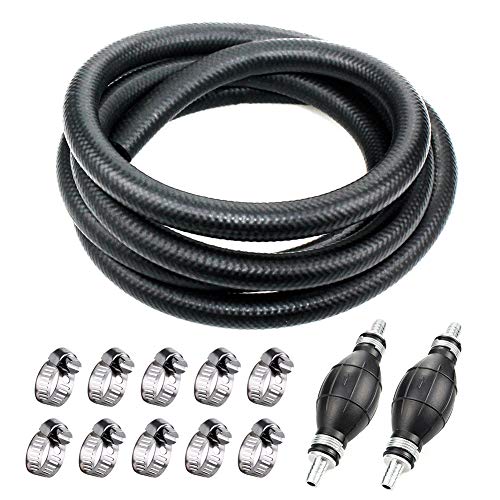
Use a clear section of fuel hose somewhere in the line if you have one. If you see bubbles flowing through while cranking, you're pulling in air. For engines running ethanol fuel (E10 or E15), fuel hose liner delamination is a hidden killer. Older hoses can break down internally. If your hose is more than five to seven years old and you're using ethanol fuel, replace it. When you disturb these hoses during maintenance, delaminated chunks break off and cause blockages downstream or create gaps that suck in air.
Another trick: spray a small amount of carb cleaner around fittings and gaskets while the engine is running (if it runs at all). If the idle speed changes, you found your leak.
Fuel Starvation and Clogged Passages

This ties into air leaks but focuses on fuel not getting there in the right amount. When you clean a carburetor, you dislodge old varnish or tiny bits of debris that were sitting dormant. These particles move downstream and lodge in the tiny jets or passages inside the carb, blocking fuel flow.
This is worse with ethanol fuels. A Tampa mechanic described pulling injectors from a 2-year-old engine that "looked like they had been dipped in acid" after ethanol-contaminated fuel caused corrosion. When you work on the fuel system and disturb degraded lines, you expose chunks that block flow, causing lean backfires and fuel starvation right after maintenance.
On the SailboatOwners forum, a user cleaned their carburetor with Sea Foam and combustion chamber cleaner, and the engine ran briefly with the choke on but died after ten minutes. It wouldn't restart without constant priming. Pushing the choke in caused immediate stalling. This pointed to a float bowl or linkage issue preventing fuel from flowing from the carb to the cylinders. Fouled plugs from flooding and suspected debris in the main jet persisted despite new fuel lines and fresh gas—a classic case of incomplete carb reassembly or a vacuum leak introduced during the work.
Clearing a Clogged Jet
If you suspect a clogged jet, pull the carburetor back apart. Remove each jet individually. Use compressed air to blow back through the jet from the outlet side. Hold it up to a light—you should see clear light through the hole. If you don't, soak it in carb cleaner for fifteen minutes, then try compressed air again. Never use a wire or drill bit to poke through jets; you'll enlarge the opening and ruin the fuel mixture.
Check the float bowl for sediment. Wipe it clean. Inspect the float needle and seat for debris or damage. If the needle doesn't seal properly, fuel floods the carb, leading to a no-start from an overly rich condition.
Carburetor Reassembly Errors
Carburetors are precision instruments. Every jet, gasket, and O-ring has a specific place. Reassembling incorrectly—a jet installed crooked, a diaphragm seated wrong, a stray piece of debris left inside from cleaning—creates the wrong air-fuel mixture. A lean mixture causes backfiring; a rich mixture leads to flooding and a no-start.
According to service data and mechanic videos, up to 90% of outboard starting failures after fuel maintenance tie to preventable issues like stale gas, bad primer bulbs, or clogged jets. Many of those jet problems come from incorrect reassembly.
Here's a reassembly checklist based on shop data for the top three parts that get installed wrong:
- The float needle clip: This tiny spring clip holds the float needle in place. If it's not fully seated in its groove, the needle sits at the wrong height, and your fuel level in the bowl will be off. Too high floods the engine; too low starves it.
- The pilot jet O-ring: If this O-ring is pinched, torn, or missing, air bypasses the jet, leaning out the idle mixture. The engine may backfire at low RPM or refuse to idle.
- The diaphragm orientation: Fuel pump diaphragms and carb diaphragms have a specific side that faces the fuel chamber. Install it backward, and the pump won't pull fuel, or the carb won't meter it correctly. Check your service manual for the correct orientation—usually there's a mark or a specific texture on one side.
Use your service manual. Don't guess. Every carb model is slightly different. For more guidance on carburetor troubleshooting, see our detailed Outboard Carburetor Troubleshooting Guide.
Ignition Timing and Spark Problems Exposed by Fuel Work

You may not have touched the ignition system, but fuel system maintenance can expose or worsen existing ignition issues. If debris from cleaning gets into the combustion chamber, it affects compression. If you stressed wiring while pulling the carb or fuel pump, you might have a loose connection now. A change in the air-fuel mixture can highlight a weak spark or bad timing that the engine was compensating for before.
Checking Spark Quality
Pull a spark plug. Reconnect the wire. Ground the plug body against the engine block (use an insulated tool or pliers to hold it). Crank the engine. You should see a strong, consistent blue spark jumping the gap. If the spark is weak, orange, or intermittent, you've got an ignition problem: bad plug, weak coil, faulty power pack, or corroded plug wire.
If the plugs are wet or black with carbon, the engine is flooded or running too rich. If they're dry and white, you're running lean—back to a fuel starvation or air leak issue.
Checking Ignition Timing
A sheared flywheel key is a common cause of timing problems, especially after an impact or if something was forced during maintenance. The flywheel key is a small metal piece that aligns the flywheel to the crankshaft, ensuring the magnets pass the coil at the correct moment for spark.
To inspect it, you need to remove the flywheel. You'll need a flywheel puller specific to your engine brand (Yamaha, Mercury, Johnson/Evinrude—don't use a universal puller; you'll crack the flywheel). Once the flywheel is off, look at the keyway slots on both the crankshaft and the inside of the flywheel. They should align perfectly. The key itself should be intact, not sheared or partially missing. If the key is damaged, the timing is off. The spark fires too early or too late, causing backfires and preventing the engine from starting or running properly. Replace the key (they're cheap) and reassemble carefully, torquing the flywheel nut to spec.
For more on ignition issues, check Johnson 70HP No Spark? Diagnosing Stator & Flywheel Rubbing on Outboard Motors.
Why a Lean Mixture Causes Backfires
A backfire happens when unburnt fuel ignites outside the combustion chamber. In a lean condition (too much air, not enough fuel), the fuel burns slower. The flame front is still burning when the intake valve opens for the next cycle. That flame travels back up the intake manifold and ignites the fresh air-fuel charge sitting in the carburetor or intake plenum. You hear a sharp "poof" or "sneeze" from the intake. This is different from an exhaust backfire (which sounds like a gunshot and indicates a rich condition or an exhaust leak).
If you hear a high-pitched, short "poof" from the carb side, you're lean. If you hear a deep "bang" from the exhaust side, you're likely rich or have an exhaust valve/port issue. Timing problems can cause either, but combined with fuel work, backfires through the intake almost always mean air leaks or clogged jets.
Step-by-Step Diagnostic Guide (Most Likely to Least Likely)
This process takes about twenty minutes if you're systematic. Have these tools ready: screwdrivers (flat and Phillips), 3/8" socket set, spark plug socket, pliers, carb cleaner spray, and a clear section of fuel hose if possible.
1. Primer Bulb and Fuel Flow Check
Squeeze the primer bulb. Does it firm up quickly and hold pressure? It should feel as hard as a tennis ball when primed. If it stays mushy, softens again quickly, or collapses while cranking, you have an air leak or a blockage upstream of the bulb. This is a primary indicator of fuel system problems after maintenance. Check the bulb itself for a bad check valve. Check all connections between the tank and the bulb.
If the bulb firms up, try starting the engine. Does it fire briefly then die as soon as you push the choke in? This points to a problem inside the carburetor—likely a clogged jet or a float bowl that isn't filling. The engine can only run on the choke (which richens the mixture) because it's not getting enough fuel otherwise.
2. Inspect Every Connection You Touched
Go back to your fuel filter. Did you fill the new filter with fresh fuel before installing it? Air trapped in an empty filter will prevent fuel from reaching the carb. Are the fittings on both sides of the filter tight? Check the fuel line clamps at the tank, the bulb, the engine connection, and the carburetor inlet. Wiggle each connection gently. If it moves, tighten it.
Look for kinked fuel lines. A kinked line restricts flow and mimics a clogged filter.
If you need replacement parts after maintenance, consider our Fuel & Induction collection for high-quality components to ensure lasting reliability.
3. Visual Carburetor Inspection and Re-Clean if Necessary
If you just cleaned the carb and now have a problem, pull it again. I know it's annoying, but it's faster than guessing. Remove the float bowl. Is there sediment in the bottom? Wipe it clean. Remove the main jet and pilot jet. Blow compressed air back through them. Shine a flashlight through the jet opening—you should see clear light. If not, soak and repeat.
Check the float height with a caliper or the specific tool your manual calls for. If the float is set too low, the fuel level in the bowl is too low, starving the engine. If it's too high, the engine floods.
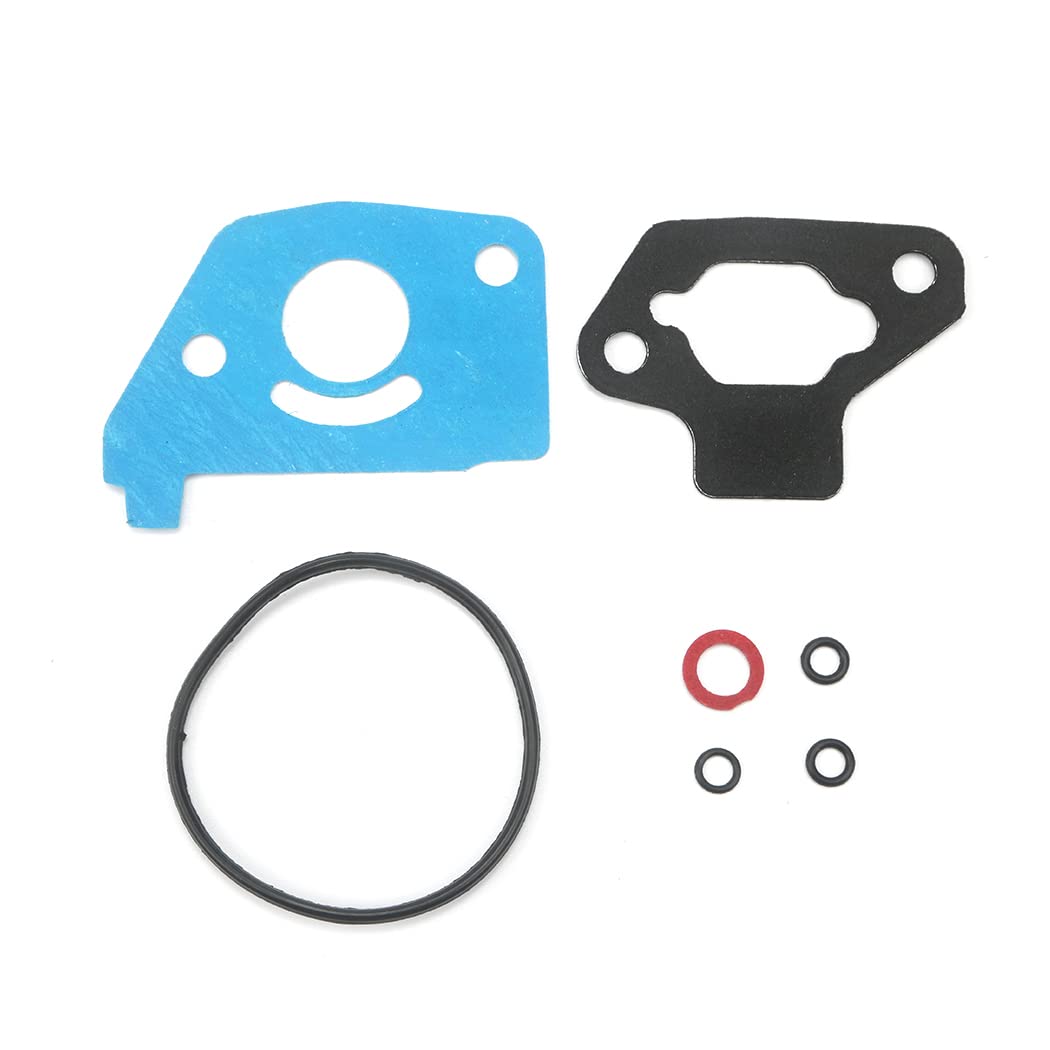
Inspect all gaskets and O-rings you reinstalled. Are any pinched, torn, or out of position? Replace any that look questionable. Gaskets are cheap; your time is not.
For parts and repair kits, check our extensive Carburetor Repair Kit collection to find OEM-quality components that fit your model perfectly.
4. Check Spark Plugs and Ignition
Pull the plugs. What do they look like? Wet and black means flooding or a rich condition—check for a stuck float or a clogged air intake. Dry and white means lean—go back to air leaks and clogged jets. Normal is light tan or gray.
If the plugs are fouled, clean them or install new ones. Then do the spark test: ground the plug, crank the engine, and watch for a strong blue spark. Weak or no spark means ignition system trouble: coil, power pack, stator, or plug wires.
5. Compression Test (If All Else Fails)
If you've checked fuel, spark, and timing and still have a no-start, do a compression test. You need a compression gauge that threads into the spark plug hole. Crank the engine with the throttle wide open and the choke off. Record the PSI for each cylinder. Readings should be above 90 PSI and within 10-15% of each other. If one cylinder is significantly lower, you likely have a damaged reed valve (on 2-strokes), a bad piston ring, or a blown head gasket. Backfires can shear or crack reed valves, especially if you've been cranking the engine repeatedly trying to start it.
Low compression across all cylinders after fuel work is rare but can happen if debris got past the rings or if the engine ingested something during reassembly.
For more on compression testing and engine lifespan, see Outboard Engine Lifespan – Fatal Damage Causes.
The Linkage Sync: A Commonly Overlooked Post-Maintenance Issue
When you remove and reinstall a carburetor, it's easy to bump or bend the throttle linkage. If the linkage is out of sync, the throttle plate might not open fully, or it might be slightly open when it should be closed. This affects the starting mixture and idle quality.
With the carburetor installed and the engine off, manually move the throttle lever. Watch the throttle plate inside the carb throat (you can usually see it with a flashlight). It should open smoothly and fully, then return to a nearly closed position at idle (a tiny crack open is normal for idle air). If it sticks, binds, or doesn't close, adjust the linkage per your service manual. An improperly adjusted throttle can cause a lean condition at idle (backfire) or a rich condition (flooding).
Safety Precautions Before You Start Diagnostics
You're working with gasoline and electrical sparks. Do this outdoors or in a well-ventilated area. No smoking, no open flames. Keep a fire extinguisher nearby. Disconnect the battery if you're pulling the flywheel or working near the starter. When doing a spark test, hold the plug with insulated pliers—don't touch the metal. Wipe up any spilled fuel immediately. Gasoline vapors are heavier than air and collect in the bilge or low spots, creating an explosion risk.
OEM vs. Aftermarket Parts: What You Need to Know

When you're replacing fuel lines, carb kits, gaskets, or filters after a failure, parts quality matters. OEM parts from Yamaha, Mercury, or Johnson/Evinrude are reliable, but you're paying a premium for the brand name on the box. The actual parts often come from the same factories that supply the aftermarket.
Cheap aftermarket parts—the $10 carb kit from a random online seller—are a gamble. The rubber diaphragms are often too hard, the gaskets don't seal right, and the jets might not be drilled to spec. You'll be tearing the engine apart again next weekend.
High-quality aftermarket parts, like those from reputable suppliers such as JLM Marine, are manufactured to meet or exceed OEM specifications. Some factories that produce OEM components use their excess capacity to make non-OEM parts under different labels. These parts use the same materials—like Viton rubber gaskets that resist ethanol breakdown—and the same tolerances. You get factory-spec quality without the dealership markup. For example, JLM's carburetor kits use ethanol-resistant components and precise jet sizing, ensuring proper fitment and longevity. We've shipped kits to mechanics in Australia who had this exact post-maintenance backfire issue, and they reported the engines ran perfectly after install because the parts fit right the first time.
When choosing parts, check reviews and verify the supplier's reputation. Look for specifics: Does the kit include all necessary gaskets and O-rings? Are the jets made of brass (not aluminum, which wears fast)? Are the diaphragms made of fuel-resistant material? Explore our Carburetor collection and Fuel Filter collection for quality parts you can trust.
FAQ: Post-Maintenance Outboard Problems
Q: Why does my outboard backfire through the carburetor after I cleaned it?
A: This almost always means a lean condition. Either you have a clogged jet or passage you didn't fully clear during cleaning, or you introduced an air leak somewhere in the fuel system. Not enough fuel is mixing with the air. The slow-burning lean mixture ignites while the intake valve is still open, causing the backfire. Recheck your jets with compressed air and inspect all fuel line connections for leaks.
Q: My engine starts but dies immediately when I push the choke in. What's wrong?
A: The engine is only running on the enriched choke mixture because it's not getting enough fuel otherwise. This points to a fuel delivery problem beyond the primer bulb. Check for a clogged main jet, a float bowl that isn't filling (stuck float or blocked inlet), or an internal vacuum leak in the carburetor. The SailboatOwners forum user had this exact symptom after carb cleaning and found debris in the float bowl and main jet.
Q: I replaced my fuel filter and now the engine won't start. What did I miss?
A: Did you fill the new filter with fresh fuel before installing it? An empty filter traps air, preventing fuel from reaching the carburetor. Also, double-check that the inlet and outlet sides of the filter are connected correctly (they're usually marked with arrows). Make sure all clamps are tight on both sides of the filter to prevent air leaks.
Q: My primer bulb stays soft after fuel system maintenance. Is the fuel pump bad?
A: Not necessarily. A soft bulb usually means an air leak between the tank and the bulb, or a bad check valve inside the bulb itself. The bulb can't draw fuel effectively from the tank, or air is leaking back into the line. Inspect all connections and hoses in that section first. Replace the bulb if the check valves are faulty (you can usually feel them click when you squeeze). Only check the fuel pump if the bulb firms up but the engine still won't run.
Q: The engine runs rough for a few minutes after fuel work, then smooths out. Is that normal?
A: It can happen if there's a small amount of air in the lines or residual debris working its way through. However, if you hear backfiring or the roughness lasts more than two or three minutes, it's not normal. Don't wait for it to "clear itself." Backfiring indicates a significant problem—likely a lean mixture from an air leak or a clogged jet—that needs immediate attention to prevent damage.
Q: How do I clear a flooded engine if I over-primed it?
A: Remove the spark plugs. Crank the engine several times with the plugs out and the throttle wide open. This blows the excess fuel out of the cylinders. Wipe or dry the spark plugs (or install new ones if they're badly fouled). Reinstall the plugs. Try starting the engine with the choke off and throttle slightly open. Do not pump the primer bulb again until the engine fires.
Quick-Check Summary for Immediate Troubleshooting

If you're at the dock or on the water and need answers fast, follow this sequence:
- Bulb soft? → Fix air leaks or blockages between tank and bulb.
- Bulb firm, engine won't start? → Check spark plugs (wet = flooded; dry = starved). Test for spark.
- Spark good, plugs dry, won't start? → Recheck carb jets and passages for clogs. Verify float bowl is filling.
- Backfiring through intake? → Lean mixture. Inspect for air leaks at all fuel connections and clogged jets.
- Starts on choke, dies off choke? → Fuel delivery problem inside carb (jets, float, inlet).
This process identifies the problem in most cases within fifteen minutes.
When to Call a Professional
If you've systematically checked fuel delivery, confirmed strong spark, verified compression, and the engine still won't start or continues backfiring, it's time to consult a certified marine mechanic. You may have a more complex issue like a damaged stator, a failing power pack, an internal carburetor passage that's corroded or warped, or even a crankshaft seal leak creating a vacuum problem. These require specialized tools and experience to diagnose and repair safely.
For advice on when to get professional help, see our blog post on When to Seek Professional Help vs DIY Fix.
Applicability: Which Engines Does This Apply To?
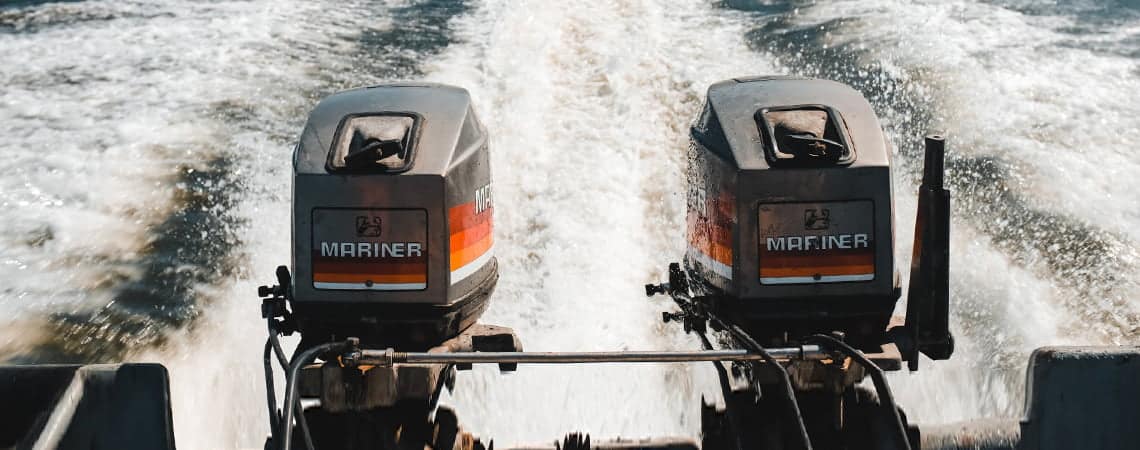
The troubleshooting steps in this guide apply to both 2-stroke and 4-stroke carbureted outboards from major brands: Yamaha, Mercury, Johnson, Evinrude, Suzuki, Honda, and Tohatsu. The principles of air leaks, fuel starvation, and ignition issues are the same across these engines.
EFI (Electronic Fuel Injection) outboards have different fuel delivery systems. If your engine has EFI, some of these steps (like checking carb jets) don't apply. However, air leaks, fuel line issues, spark plug checks, and primer bulb diagnostics are still relevant. EFI systems add electronic sensors and injectors, which require different diagnostic tools (like an OBD scanner) to troubleshoot fuel delivery problems.
If you're unsure whether your engine is carbureted or EFI, check for a carburetor body on the side of the engine (usually a round or oval metal housing with fuel lines and linkage). EFI engines have a fuel rail with individual injectors at each cylinder and no carburetor.
After you've fixed the issue and the engine is running smoothly, run a bottle of fuel system cleaner (like Sea Foam or Yamaha Ring Free) through a full tank of fresh, ethanol-free fuel to help dissolve any remaining varnish and prevent future clogs. For tips on fuel additives, check our Fuel Additives Showdown.
Sources:
- JLM Marine: Outboard Won't Start – 10 Troubleshooting Steps
- Ark Marine Co.: Fuel System Failures – The #1 Reason Boats Break Down
- YouTube: Mechanic Interview on Common Outboard Failures
- SailboatOwners Forum: Outboard Issues Part II
- YouTube: 90% of Outboard Starting Failures
- YouTube: Carburetor Troubleshooting Guide
- JLM Marine: Outboard Carburetor Troubleshooting Guide
- X Factors Motorsport: Troubleshoot Common Outboard Fuel Problems
- OB Parts: Fixing Outboard Motors
- YouTube: Reed Valve Damage from Backfires
- iBoats Forum: Outboard Won't Run After Sitting for Winter
- First Choice Marine: Outboard Motor Maintenance 2026
- JLM Marine: Outboard Engine Lifespan – Fatal Damage Causes
For a full range of quality marine parts, visit the JLM Marine HUB.