


Spotting Outboard Fuel Leaks and Fixing Them Safely

If you smell gas around your outboard, stop the engine and find the source. Don't run it until you know what's going on. Over 20 years working on boats, I've seen too many people ignore a fuel smell until it turns into a bilge fire or a dead engine halfway across the bay.
Identifying Fuel Leaks on Outboards
Your nose is the first tool. A constant gasoline odor—not the brief whiff you get after topping off the tank—means fuel is escaping somewhere. On outboards, the usual suspects are fuel hoses, primer bulbs, quick-connect fittings, and portable tank connections. If you've got an integrated tank, check around the fill neck, vent line, and sending unit access.
Visual Signs of Leaks
Wet spots or stains around hose connections, fuel filters, or the tank itself are dead giveaways. Check under the cowling; fuel can drip from a cracked hose onto the mounting bracket and pool there before you see it on deck. Look for that rainbow sheen on the water around your transom—that's fuel hitting the surface, and it's reportable to the Coast Guard.
Fuel stains dry darker than water marks. If you see discoloration around a fitting or clamp, wipe it down and watch for it to reappear while the engine's running.
Smell and Touch Checks
Crack the cowling after a run and sniff around the fuel pump, fuel filter, and where the hose enters the engine. Gasoline vapors are heavier than air, so they settle low. On boats with bilges, the smell concentrates down there—another reason to run your bilge blower for at least four minutes before poking around.
Run your hand along fuel hoses while the engine's off. A hose that's gone stiff and cracked or feels spongy and soft is on its way out. Ethanol-blended fuel accelerates rubber degradation, so even if a hose looks okay on the outside, it might be breaking down inside.
Common Leak Points on Outboards
Primer bulbs: A bulb that won't stay firm or collapses after the engine runs for a bit usually means air is entering the system. That can be from a pinhole in the bulb itself or a loose fitting on either side. Squeeze it a few times and listen for a hiss.
Quick-connect fittings: The O-rings in these dry out and crack, especially on portable tanks left sitting in the sun. Pop the connection off and inspect the rubber seal—if it's flattened, hard, or split, replace it. We stock those O-rings at JLM Marine because they fail constantly.
Fuel line clamps: Single-wire spring clamps lose tension over time. If you can rotate a hose inside its clamp by hand, it's too loose. Switch to stainless worm-drive clamps and torque them down so the hose compresses slightly but doesn't collapse.
Fuel filters and water separators: The clear bowl on a fuel/water separator can crack from over-tightening or UV exposure. Check the threads and the gasket seat. If fuel weeps from the seam when the engine's running, the gasket is shot or the bowl is cross-threaded.
Portable tank vents: A clogged vent won't cause a leak, but it'll collapse the tank or blow a seal. Make sure the vent cap opens freely and isn't gummed up with old fuel residue.
Corrosion and Material Failure
Aluminum tanks corrode from the inside out, especially in saltwater or if you store them with ethanol fuel sitting in them over winter. Galvanic corrosion accelerates when dissimilar metals touch—aluminum tank, stainless fitting, no isolating washer. You'll see white powdery deposits on the outside before the pinhole leaks show up.
Plastic tanks don't corrode, but they get brittle with age and UV exposure. Flex an old polyethylene tank and you might see stress cracks around the molded-in fittings. Once plastic starts to crack, it's done—no repair will hold long-term.
Ethanol-Related Hose Degradation
Ethanol fuel is hygroscopic; it absorbs water from the air. When enough water saturates the fuel, phase separation occurs—the ethanol and water drop out and settle at the bottom of the tank. That mix is corrosive and eats away at fuel hoses, O-rings, and internal carburetor components before you ever see a drip on the outside.
If your engine starts fine cold but stumbles after warming up, and you smell gas, suspect internal hose breakdown. The rubber lining flakes off in chunks and clogs jets or filters, while the weakened hose wall develops pinhole leaks under pressure.
Safe Handling of Fuel Leaks
Once you've confirmed a leak, safety is non-negotiable. Gasoline vapor is explosive, and outboard compartments or bilges are confined spaces where fumes concentrate.
Immediate Actions
Shut off the engine. Close the fuel valve on portable tanks or turn the selector to "off" on integrated systems. Don't restart the engine or operate any electrical switches until you've vented the area and stopped the leak.
Get everyone off the boat if the leak is significant or if fuel has pooled in the bilge. Gasoline on water spreads fast, and any spark—from a bilge pump, a battery short, even static from nylon clothing—can ignite it.
Ventilating the Boat
Open every hatch, port, and compartment. If you have an ignition-protected bilge blower, turn it on and let it run for at least four full minutes before you lean in to inspect. Four minutes sounds long, but it's the minimum to clear vapor buildup in a typical outboard bilge.
No blower? Remove the cowling, open the fuel compartment, and let it air out naturally for ten to fifteen minutes. Don't rush this step.
Eliminating Ignition Sources
No smoking, no lighters, no phones near the leak. Don't use power tools or a drop light with an incandescent bulb. If you need to see into a dark bilge, use a plastic LED flashlight, not a metal one that can spark if dropped.
Pull the battery disconnect or remove the negative terminal if you're working near the bilge or fuel tank. A stray wire rubbing on a grounded surface can arc and ignite fumes even with the key off.
Containing Spilled Fuel
If fuel has dripped onto the deck or into the bilge, soak it up with absorbent pads—not paper towels, which disintegrate and clog pumps. We keep oil-absorbent pads on every boat we work on. Drop them on the spill, let them saturate, then bag them in a sealed plastic container for disposal.
Never pump fuel-contaminated bilge water overboard. It's illegal under the Clean Water Act, and you're personally liable for cleanup costs and fines if you create a sheen on the water. If fuel reaches the water, call the Coast Guard National Response Center immediately: 1-800-424-8802. Document everything—photos of the spill, the leak source, and your containment efforts—because you'll need it for the report and possibly for insurance.
Draining the Fuel System Safely
To fix most leaks, you'll need to drain the tank or at least drop the fuel level below the leak point. Use a manual siphon pump with a hose that fits snugly into the tank filler. Pump the fuel into an approved metal fuel can, not a plastic jug. Static discharge from fuel flowing into plastic can ignite vapors.
Never start a siphon with your mouth. Use a hand-operated or squeeze-bulb siphon pump.
If you're disconnecting a fuel line at the engine or filter, crack the fitting slowly and catch the residual fuel in a metal pan. Even a "drained" line holds a few ounces that'll spill when you pull the hose off.
Repairing Fuel Leaks: Field Fixes vs. Shop Repairs
What you can fix yourself depends on the component, the severity, and your skill level. Some repairs are safe to do on the water or at the dock to get you home; others require a shop with proper ventilation and tools.
Temporary Fixes to Get You Home
Fuel-resistant epoxy putty can plug a pinhole leak in a plastic or metal tank long enough to limp back to the ramp, but it's not a permanent fix. Clean and dry the area around the leak, rough it up with sandpaper, and press the putty over the hole. Let it cure per the instructions—usually 15 to 20 minutes. The JLM techs have used this trick on portable tanks with cracks at the molded-in fittings; it'll hold for a few hours under low fuel pressure, but don't rely on it for more than one trip.
Tape—even "fuel-resistant" tape—won't hold under pressure or heat. We've seen guys wrap a leaking hose with duct tape or electrical tape and then wonder why fuel is still dripping five minutes later. Tape might slow a drip on a vent line, but it's not a solution for a pressurized fuel line.
Safe DIY Repairs: Hoses, Clamps, and Filters
Replacing an external fuel hose or tightening loose clamps is straightforward and safe if you follow the steps.
Replacing a fuel hose:
- Drain the system or close the valve to stop fuel flow.
- Cut off the old hose. Use a sharp utility knife and cut as close to the fitting as possible.
- Inspect the barbed fitting. If it's corroded or damaged, replace it too.
- Measure and cut new USCG Type A1 or B1 marine fuel hose—not automotive fuel line. Automotive hose isn't rated for marine ethanol blends and will degrade fast.
- Slide two stainless worm-drive clamps onto the hose before you push it onto the fitting.
- Push the hose fully onto the barb until it bottoms out. It should be tight; warm the hose end with a heat gun (carefully, away from fumes) if it won't slide on.
- Position the clamps about 1/4 inch from the hose end and 1/4 inch apart if the fitting is long enough for two. Tighten until the hose compresses slightly—don't crush it.
- Check for direction-of-flow arrows on the hose if it's reinforced; install it so the arrow points toward the engine.
Replacing a primer bulb:
Pop the old bulb out of the line, noting which end has the arrow pointing toward the engine (inlet vs. outlet). Cut the hose on both sides of the bulb, install the new bulb with the arrow pointing toward the engine, and secure with clamps. Squeeze it a few times to confirm it holds pressure and doesn't collapse.
Replacing a fuel filter or water separator:
Shut off the fuel. Place a metal pan under the filter. Unscrew the bowl slowly to release pressure, then remove it fully. Pull out the old filter element, wipe the inside of the bowl clean, and check the gasket or O-ring—replace it if it's hard or deformed. Install the new filter, apply a thin film of clean fuel to the gasket, and hand-tighten the bowl. Don't use a wrench or you'll crack the plastic threads. Open the fuel valve and check for leaks while squeezing the primer bulb to pressurize the system.
Repairs That Require a Professional
Welding or patching a metal fuel tank: This is dangerous. Residual fuel vapor in an empty tank can explode when you apply a torch or welder. A qualified shop will steam-clean or purge the tank with inert gas before any welding. Don't attempt this yourself.
Replacing an integrated fuel tank: Access is often blocked by deck structure, stringers, or the engine mount. Pulling a built-in tank usually means cutting access hatches or removing major components. Leave it to a shop with the tools and space.
Fuel injection system leaks: If fuel is leaking from a high-pressure injector line or rail on a modern outboard, the system is under 40+ PSI. That's not a hose-clamp repair; it requires OEM or high-quality aftermarket parts and precise torque specs. A trained marine mechanic checks the entire fuel system when they fix one leak, because if one component failed, others are likely close behind.
Corroded fittings or sending units on a tank: Drilling out a corroded fitting or replacing a fuel sender often involves removing the tank. If you strip threads or crack a boss trying to remove it yourself, you've just turned a $50 part into a $500 tank replacement.
Real repairs don't cut corners, because cutting corners on a fuel system is how boats catch fire.
Preventing Fuel Leaks Through Maintenance
Most leaks we see at JLM Marine are preventable. A little attention twice a year keeps you off the side of the lake with a dead engine or a fire extinguisher in your hand.
Annual Fuel System Inspection
Once a year—before you splash the boat in spring—inspect every inch of the fuel system. The ABYC H-24 standard recommends annual inspections, and it's good advice even if you're not required to comply.
Inspection checklist:
- Check all fuel hoses for cracks, stiffness, or soft spots. Bend them gently; if the rubber doesn't flex or if it feels spongy, replace it.
- Inspect hose clamps for rust or stripped threads. Replace any that show corrosion.
- Test the primer bulb by squeezing it and holding pressure for 30 seconds. It should stay firm. If it slowly deflates, there's an air leak.
- Pull quick-connect fittings apart and examine the O-rings. If they're flat, hard, or cracked, swap them out. We stock O-ring kits for most Yamaha, Mercury, and Suzuki connections.
- Check the fuel filter bowl for cracks and the gasket for compression set. Replace the filter element even if it looks clean; they're cheap insurance.
- Inspect the fuel tank for corrosion, dents, or weeping at seams and fittings. On aluminum tanks, look for white powder around welds or rivets.
- Open the vent cap and make sure it moves freely. Blow through it gently to confirm it's not clogged.
Ethanol Fuel Stabilization
If you run E10 (10% ethanol) fuel, add a quality fuel stabilizer at every fill-up, not just for winter storage. Ethanol attracts moisture, and phase separation can start in as little as 30 days in a vented tank. We've pulled carburetors apart that looked like they'd been soaking in battery acid because the owner left untreated E10 sitting in the tank all summer.
Use a stabilizer that specifically mentions ethanol treatment. Follow the dosage on the bottle—more isn't better, and too much can gum up jets.
Avoiding Overfilling the Tank
Don't top off the tank to the brim. Fuel expands when it heats up; if the tank is 100% full and it sits in the sun, that expansion has to go somewhere. It'll either pressurize the tank and blow a seal, or it'll push fuel out through the vent line, creating a spill and a fire hazard.
Fill to 90-95% and stop. On most portable tanks, that's about an inch below the filler neck. On integrated tanks, stop when the nozzle clicks off the first time.
Preventing Corrosion in Saltwater
Saltwater accelerates every form of corrosion. After every saltwater trip, flush your engine with fresh water per the manufacturer's procedure—most outboards have a flush port or muffs you clamp over the lower-unit intakes. Run the engine on the hose for 10 minutes to cycle fresh water through the cooling system, which also rinses salt spray off internal fuel and electrical components.
For fuel system components, rinse the exterior of the engine, the fuel filter, and any exposed hoses and fittings with fresh water. Don't spray directly into the cowling vents, but wipe down the outside to remove salt residue before it dries.
If you have an aluminum fuel tank, use sacrificial zincs or an isolation kit to prevent galvanic corrosion between the aluminum tank and stainless or brass fittings. Replace zincs annually or whenever they've eroded more than 50%.
Replacing Wear Parts on a Schedule
Fuel system hoses don't last forever. USCG Type A1 hose is good for about 10 years; Type B1 lasts longer but still degrades. If your hoses are original and the boat is more than 10 years old, replace them even if they look okay. Same goes for primer bulbs and O-rings—they're consumables.
Keep spares on the boat: an extra primer bulb, a set of hose clamps, a few feet of the correct marine fuel hose, and O-rings for your quick-connects. That way, if something fails on the water, you can swap it out and get home under your own power.
Quality Parts: OEM vs. Aftermarket
OEM parts are reliable, but you're paying a premium for the logo on the package. A Yamaha fuel hose or Mercury primer bulb from the dealer works great, but it costs three times what a quality aftermarket part does.
Cheap no-name aftermarket stuff is a different story. The rubber is too hard, the clamps strip, and the fittings don't seal. You'll tear the motor apart twice to fix the same leak.
The middle ground—manufacturers like JLM Marine—produce parts to the same spec as OEM but without the dealer markup. We're shipping replacement fuel line kits worldwide that meet or exceed USCG and ABYC standards, at half the dealer price. The hose is the same USCG Type B1-15, the clamps are stainless, and they fit right the first time. You get factory-spec quality without burning cash unnecessarily. Check our fuel & induction parts collection and fuel filter collection for quality marine-grade components.
FAQ
How do I know if my outboard fuel tank is leaking?
Persistent gasoline smell, visible wet spots or stains around the tank or fittings, fuel sheen on the water near your transom, or an unexplained drop in fuel level without running the engine. On portable tanks, check the vent cap, the connection to the hose, and any seams or molded fittings for cracks.
What should I do immediately if I find a fuel leak on my outboard?
Shut off the engine and close the fuel valve. Ventilate by opening hatches and running the bilge blower for at least four minutes. Eliminate all ignition sources—no smoking, no power tools, no phone near the leak. Contain any spilled fuel with absorbent pads and do not pump it overboard. If fuel reaches the water, report it to the Coast Guard National Response Center at 1-800-424-8802.
Can I use automotive fuel hose on my outboard?
No. Automotive fuel hose is not rated for marine use and will degrade rapidly when exposed to ethanol-blended fuel and constant flexing in a marine environment. Use only USCG Type A1 or B1 marine fuel hose, which meets fire-resistance and permeability standards required by federal regulations. We recommend shopping our marine fuel hose selection for guaranteed quality.
How do I safely drain fuel from my outboard to fix a leak?
Use a manual siphon pump with a hose that fits the tank filler. Pump the fuel into an approved metal fuel container, not plastic. Never start a siphon with your mouth. If disconnecting a fuel line, crack the fitting slowly over a metal pan to catch residual fuel. Work in a well-ventilated area with no ignition sources.
When should I call a professional mechanic instead of fixing the leak myself?
Call a pro if the leak is from a corroded or damaged tank, a high-pressure fuel injection component, or if you're not confident in the repair. Welding or cutting into a fuel tank requires purging and specialized equipment. If the leak persists after tightening clamps or replacing a hose, a mechanic can trace the root cause—loose fittings, a faulty fuel pump, or internal hose breakdown—that might not be obvious. Learn more about quick fixes vs. real repairs for marine fuel line leaks.
How often should I inspect my outboard fuel system?
At least once per year, ideally before the start of the season. If you boat in saltwater or use ethanol fuel, inspect hoses, clamps, primer bulbs, and fittings twice a year. After any work on the fuel system or if you notice performance issues like stalling or rough idle, do an immediate check.
What are the legal requirements if I spill fuel on the water?
Any spill that creates a visible sheen on the water must be reported to the U.S. Coast Guard National Response Center at 1-800-424-8802. You are legally and financially responsible for cleanup under the Clean Water Act and Oil Pollution Act. Document the spill, your containment efforts, and dispose of contaminated absorbents as hazardous waste at an authorized facility.
Pro tip: After every trip, especially in saltwater, flush your engine with fresh water for 10 minutes and wipe down all external fuel components to remove salt residue before it dries and starts the corrosion cycle. For more tips on protection and maintenance, visit our JLM Marine home page.
Hi—I’m Jim Walker
I grew up in a Florida boatyard, earning pocket money (and a few scars) by rebuilding outboard carbs before I could drive. That hands-on habit carried me through a Ph.D. in mechanical engineering, where I studied how salt water quietly murders metal.
I spent ten years designing cooling systems for high-horsepower outboards, then joined JLM Marine as CTO. We bench-test every new part in the lab, but I still bolt early prototypes onto my own 23-foot skiff for a weekend shake-down— nothing beats real wake and spray for finding weak spots.
Here on the blog I share the fixes and shortcuts I’ve learned so your engine—and your day on the water—run smooth.

For Outboard Owners:
To assist you in maintaining and repairing your marine engines, we hope the following resources may be of use:
-
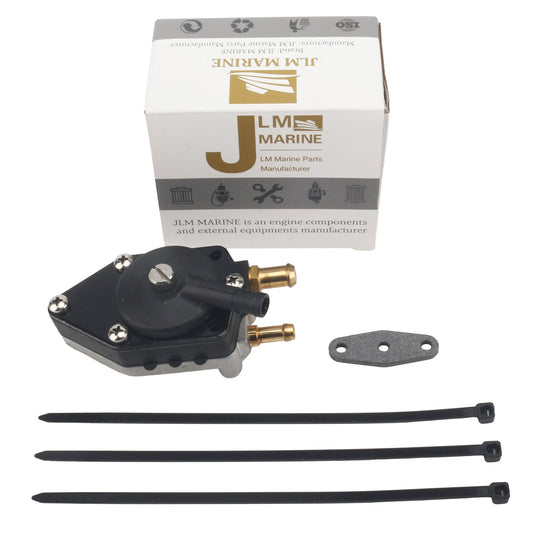
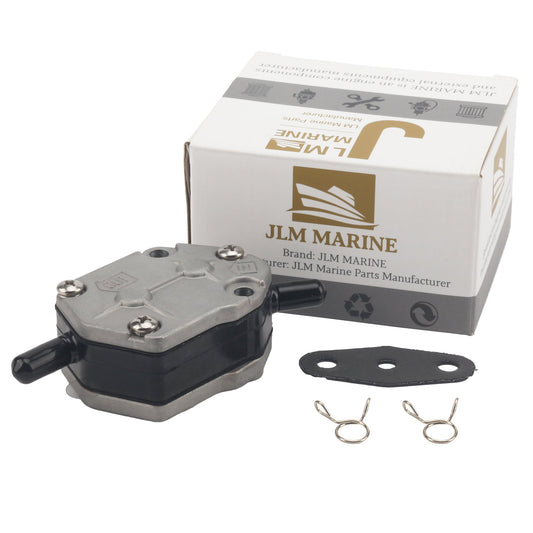
Fuel Pumps from JLM Marine
-
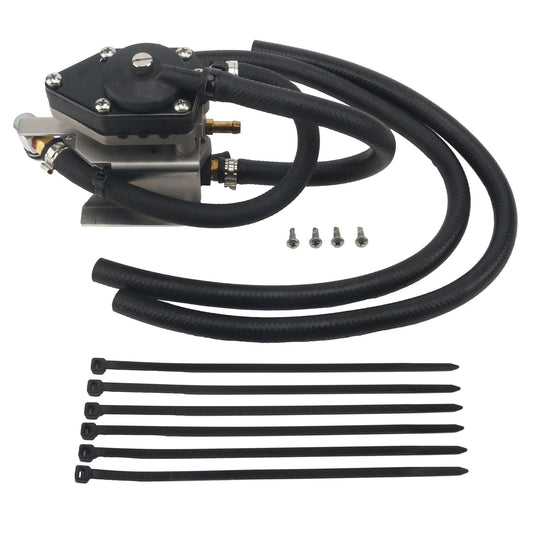
Fuel Pump Kits from JLM Marine
About JLM Marine
Founded in 2002, JLM Marine has established itself as a dedicated manufacturer of high-quality marine parts, based in China. Our commitment to excellence in manufacturing has earned us the trust of top marine brands globally.
As a direct supplier, we bypass intermediaries, which allows us to offer competitive prices without compromising on quality. This approach not only supports cost-efficiency but also ensures that our customers receive the best value directly from the source.
We are excited to expand our reach through retail channels, bringing our expertise and commitment to quality directly to boat owners and enthusiasts worldwide.
Fuel Pump on Sale
- $21.99
$19.00- $21.99
- Unit price
- per
- $16.00
$0.00- $16.00
- Unit price
- per
- $17.99
$21.00- $17.99
- Unit price
- per

- $73.50
$88.00- $73.50
- Unit price
- per
- $46.50
$60.00- $46.50
- Unit price
- per

- $45.99
$55.00- $45.99
- Unit price
- per

- $18.99
$15.00- $18.99
- Unit price
- per

- $28.99
$34.00- $28.99
- Unit price
- per

- $26.80
- $26.80
- Unit price
- per

- $23.59
$28.00- $23.59
- Unit price
- per
- $24.80
- $24.80
- Unit price
- per
- $28.90
- $28.90
- Unit price
- per

- $27.77
$22.00- $27.77
- Unit price
- per

- $138.00
- $138.00
- Unit price
- per

- $56.99
- $56.99
- Unit price
- per
- $24.80
$45.00- $24.80
- Unit price
- per

- $31.20
$37.00- $31.20
- Unit price
- per

- $129.95
$155.00- $129.95
- Unit price
- per

- $21.99
$19.00- $21.99
- Unit price
- per

- $129.95
$155.00- $129.95
- Unit price
- per