


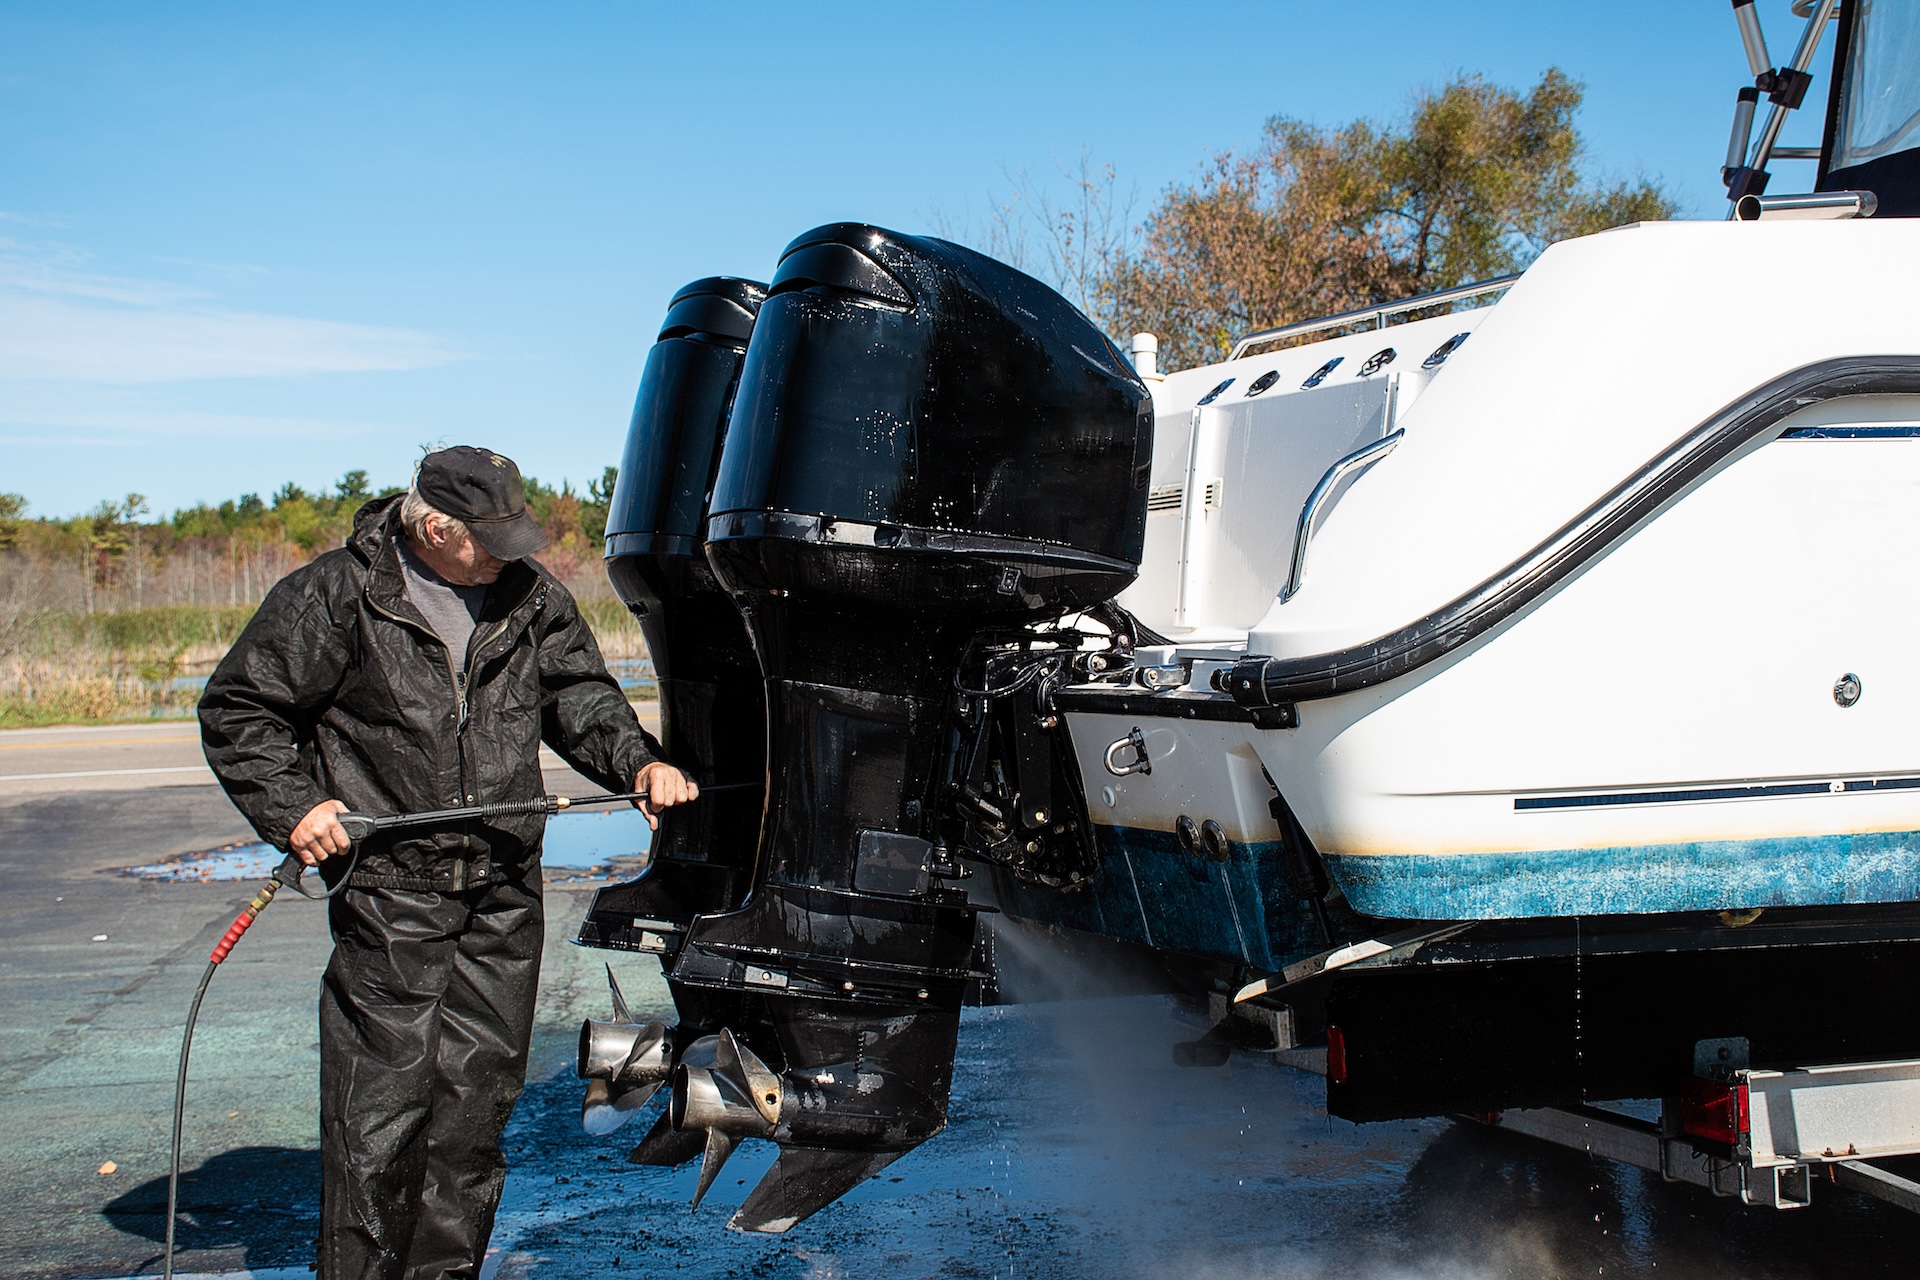
Preparing Your Outboard for Winter: Fall To-Do List
- Tools and Supplies You Need
- Crankcase Oil and Filter Changes
- Lower Unit Gear Lube Service
- Fuel System Prep and Stabilization
- Engine Fogging for Internal Protection
- Cooling System Flushing and Antifreeze
- Propeller and Shaft Maintenance
- Battery Storage and Maintenance
- Thermostat Considerations for Cold Water Use
- Corrosion Protection and External Care
- Storage Position and Covering
- Pre-Season Cold Weather Operating Checklist
- On-Water Cold Weather Safety
- Post-Trip Drainage and Cleaning
- Two-Stroke vs Four-Stroke Differences
- Supplies Breakdown by Task
- Maintenance Tip

Get your outboard ready for cold weather now, or you'll pay for it in spring. Storage damage causes more outboard failures in the US than actual on-water use.1 Service centers report that over 60% of winter repairs come from guys who thought they winterized correctly but missed critical steps.1
Richard from Milwaukee learned this the hard way. He bought a boat with a 300HP four-stroke for $52,000, covered it with a tarp for winter, and ended up with a cracked powerhead and $9,400 in repairs because water froze in the wrong places.1 He sold at a $17,000 loss instead of fixing it.
Here's what actually needs to happen before the temperature drops.
Tools and Supplies You Need
Round up everything before you start:
- Marine fuel stabilizer (Mercury Quickstor or equivalent)
- Fresh engine oil and filter for your specific motor
- Lower unit gear lube with pump
- Fogging oil
- Marine grease and grease gun
- Flushing muffs
- Rust inhibitor spray
- Socket set (specific sizes depend on your motor—check your manual)
- Spark plug socket
- Oil drain pan and funnel
- Propylene glycol antifrein (-50°F rated minimum)
- Battery charger or maintainer
- Wire brush for battery terminals
Crankcase Oil and Filter Changes
Change your oil before storage, not after. Old oil holds acids, combustion byproducts, and sometimes water that'll corrode internal parts while the motor sits.
For four-strokes, drain the old oil completely. Check it as it comes out—if it looks milky or has water droplets, you've got a bigger problem that needs attention now, not in spring. Install a new filter, fill with fresh marine oil to the correct level, then run the engine briefly to circulate it.
Cold-weather operation changes oil requirements. If you're running the boat through winter instead of storing it, consider switching to a lower viscosity oil. A 25W-50 that works fine in summer turns into molasses at 20°F. A 10W-30 flows immediately on cold starts, getting oil to the bearings and cam before metal grinds on metal. Check your owner's manual for the manufacturer's cold-weather viscosity recommendations—they're in there for a reason.
Two-strokes using oil injection systems need a different approach. The oil reservoir should be topped off with fresh two-stroke oil rated for your motor. If you're storing the motor, some mechanics drain the reservoir completely to prevent old oil from sitting and separating, but verify this with your specific engine's service manual first.
Lower Unit Gear Lube Service
The lower unit takes abuse all season—now's when you find out how much. You need to drain and inspect the gear lube every fall, no exceptions.
Position the outboard vertical. Remove the bottom drain screw first, then crack the top vent screw. Lube will drain from the bottom. Watch what comes out. If it's clean amber or dark brown, you're good. If it's milky gray or looks like a chocolate milkshake, water got past the seals.
Water in the lower unit is serious. It means a compromised seal—propshaft seal, shift shaft seal, or the drain/vent screw washers. Water freezes, expands, and cracks housings. Tommy from Vic's Sports Center warns that lower unit replacements can hit $12,000.14
If you see water contamination, don't just refill and hope. Track down the leak. Pull the prop first—fishing line wrapped behind it destroys propshaft seals. We've pulled props with 40 feet of monofilament wound tight around the shaft. Clear it all.
To refill, use marine-specific gear lube and pump it in from the bottom drain hole. The oil pushes air out the top vent. When clean lube flows from the vent screw with no bubbles, you're full. Snug the vent screw first, then the drain. Replace the washers on both screws every time. Reusing old copper or aluminum washers guarantees a leak. New washers cost pennies; a cracked gearcase costs thousands. For top-quality parts, consider browsing the Inboard & Outboard Motor Parts collection at JLM Marine for all your maintenance needs.
Fuel System Prep and Stabilization
Ethanol fuel is hygroscopic—it pulls moisture straight out of the air. Over weeks and months, water accumulates, separates from the gas, and sinks to the tank bottom. When temperatures drop, that water freezes in fuel lines, filters, or injectors.
Fill the tank to 95% full with fresh fuel before storage. A nearly empty tank has airspace that condenses moisture. A full tank minimizes this. Add marine fuel stabilizer at the recommended dose—don't guess or use old automotive stuff.
After adding stabilizer, run the engine for 10-15 minutes. This circulates treated fuel through the entire system: fuel lines, vapor separator, high-pressure pump, injectors or carbs, and return lines. If you skip this step, untreated fuel sits in those components and gums them up. We've seen fuel injectors on four-strokes clog solid from stale E10.
Wayne The Boat Guy got lucky. He left his 2004 Mercury 2.5HP two-stroke sitting all winter with untreated E10, no fogging, no draining. It fired up in spring anyway.4 That's not normal. For every Wayne, there are ten guys facing a carburetor rebuild or injector replacement because they rolled the dice and lost.
Inspect your fuel-water separator filter. Unscrew the bowl, dump any water or sediment, check the filter element. If it's discolored or clogged, replace it. Check fuel lines for cracks, especially where they connect to fittings—cold makes old rubber brittle. For quality replacement parts, check out the Fuel & Induction collection at JLM Marine to ensure your fuel system stays reliable.
Engine Fogging for Internal Protectio
Fogging coats cylinder walls, piston rings, and valves with a protective oil film that prevents rust during storage. Skipping this is one of the most common mistakes.1
Two-strokes: Remove the air intake cover or flame arrestor. With the engine running at idle, spray fogging oil directly into the carburetor throat in short bursts. The engine will smoke heavily—that's normal. Keep spraying until the motor begins to die from oil saturation, then let it stall. Pull the kill switch.
Four-strokes (spark plug method): Remove all spark plugs. Spray fogging oil into each cylinder through the plug holes for 3-5 seconds per cylinder. Reinstall the plugs finger-tight—don't torque them down yet. Turn the engine over by hand or with the starter (ignition disabled) for a few revolutions to distribute the oil across the cylinder walls. When you fire it up in spring, expect massive white smoke for the first 30 seconds as the fogging oil burns off. That's normal.
Some four-strokes allow fogging through the intake, similar to two-strokes. Check your service manual. If your engine has a fogging port or valve, use it per the manufacturer's instructions. For detailed winterizing steps, see our comprehensive How to Winterize Your Outboard Engine (Step-by-Step) guide.
Cooling System Flushing and Antifreeze
Freshwater rinses salt, silt, and debris out of the cooling passages. Even if you only run in freshwater, this step matters—it clears any blockages before you add antifreeze.
Hook up flushing muffs to the lower unit water intakes. Start the engine and let it run until it reaches normal operating temperature (check the tell-tale stream). Shut it down.
Swap the garden hose for a winterizing kit filled with propylene glycol antifreeze rated to at least -50°F. Restart the engine. When pink antifreeze flows steadily from the tell-tale, the cooling system is fully protected. Shut down immediately—don't run it dry. Antifreeze prevents freeze damage in any water trapped in the block, exhaust passages, or powerhead.
Some guys skip antifreeze and just drain everything by tilting the motor down for a few hours. This works if you're thorough, but antifreeze is cheap insurance. Water hides in pockets you can't see. For high-quality cooling system components, explore the Cooling System collection at JLM Marine to keep your engine protected year-round.
Propeller and Shaft Maintenance

Pull the prop. You'll find fishing line—everyone does. Monofilament or braid winds around the propshaft behind the prop and works its way into the propshaft seal. This destroys the seal, letting water into the lower unit.
Cut away all line. If it's packed tight behind the prop hub, use a pick or small screwdriver to dig it out. Once clear, coat the propshaft splines with marine grease. This prevents corrosion and makes removal easier next time. Reinstall the prop with a new cotter pin (if applicable) or torque the prop nut to spec. Some guys store the prop off the motor to prevent theft—your call.
Grease all fittings on the motor. Tilt tube, steering pivot points, throttle linkage—hit everything with a grease gun. If you don't know where the fittings are, consult your service manual. Missing even one lets water and salt sit on bare metal all winter. For marine-grade grease and supplies, consider the Boat Accessories collection at JLM Marine.
Battery Storage and Maintenance
Cold kills batteries. A fully charged battery can handle freezing temperatures, but a discharged battery will freeze, crack, and die.
Remove the battery from the boat. Clean the terminals and cable ends with a wire brush to remove corrosion. Spray terminal protectant or coat with dielectric grease. Store the battery in a cool, dry location—not directly on concrete (old advice, but a wooden shelf is still better). A basement or heated garage works.
Charge the battery fully before storage. Then connect a battery maintainer or trickle charger designed for marine batteries. These keep the charge topped off without overcharging. Check the battery monthly. If voltage drops below 12.4V, it's discharging—either the maintainer failed or there's a parasitic draw. Learn more about battery care in our Battery Care During the Off-Season: Keep It Charged article.
Thermostat Considerations for Cold Water Use
Standard outboard thermostats open around 50°C (122°F). That's fine for normal operation, but if you're trolling for hours in 40°F water, the engine never reaches full operating temperature. It runs cold.
Cold running causes incomplete combustion. Carbon builds up on piston crowns and exhaust valves. Worse, fuel blow-by on cold cylinders washes oil off the cylinder walls and dilutes the crankcase oil. Gasoline and combustion acids mix with your oil, accelerating wear and corrosion.
Switching to a higher-temperature thermostat—71°C (160°F) is common—keeps the engine hotter during low-speed operation. This promotes complete combustion, reduces carbon fouling, and keeps the oil clean. At high RPM, the engine generates enough heat that the thermostat opens fully regardless of its rating, and the water pump flow keeps everything cool. The higher-temp thermostat only affects idle and trolling performance.
If you spend significant time trolling in cold water (below 50°F), the higher thermostat is worth it. If you mostly run at speed, the stock thermostat is fine. For replacement instructions, see our guide on How to Replace the Thermostat on Your Yamaha F225, F250, or F300 4.2L V6 Outboard Motor.
Corrosion Protection and External Care
Spray all external metal components with a corrosion inhibitor or marine-grade rust preventative. Focus on electrical connections, metal brackets, and fasteners. Saltwater guys, this step is critical—salt doesn't stop corroding just because it's winter.
Inspect sacrificial anodes on the lower unit and trim tabs. If they're more than 50% eroded, replace them now. Anodes protect expensive metal parts by corroding first. A worn-out anode means your lower unit housing or trim components are taking the hit.
Touch up any paint chips or scratches on the lower unit with matching touch-up paint. Bare aluminum oxidizes fast, especially in saltwater. For parts replacements and anode options, visit the JLM Marine Home page to find top-quality components.
Storage Position and Covering

Trim the engine full down (running position) for storage. Outboards are designed to drain water from the cooling passages when positioned this way. If you tilt it up, water pools in the exhaust manifolds or cylinder jackets. When it freezes, it cracks the block.7
Store the motor in a dry, covered area if possible. If you're storing outside, use a vented motor cover—not a plastic tarp. Tarps trap moisture and condensation, creating a corrosion chamber. A breathable canvas or synthetic cover allows airflow while blocking rain and snow.
If you're storing the motor off the boat, keep it upright. Laying it on its side can let oil or water migrate into places it shouldn't be.
Pre-Season Cold Weather Operating Checklist
If you're running the boat through fall and winter instead of storing it, you need a pre-launch routine.
Battery: Confirm full charge the day before. Cold cranking amps drop significantly below 32°F. A weak battery won't spin a cold engine fast enough to fire.
Fluid Levels: Check crankcase oil level. If you switched to winter-weight oil, verify it's at the correct level. Cold oil doesn't expand like hot oil, so level readings are accurate when cold.
Controls and Cables: Inspect throttle and shift cables. Moisture in cable housings can freeze, locking up controls. Cycle the controls a few times before launch to confirm smooth operation. If anything binds, don't launch—investigate.
Driveway Test: Before trailering to the ramp, hook up flushing muffs and start the engine at home. Let it run for 5 minutes. Listen for abnormal sounds—knocking, grinding, misfires. Check the tell-tale stream. Water should flow steadily. If it dribbles or doesn't flow, you've got a water pump or blockage issue. Fix it now, not at the launch ramp.
Trailer Inspection: Check tire pressure—sitting tires lose air, especially in cold. Inspect wheel bearings for play. Test trailer lights. Confirm tie-downs are tight.
On-Water Cold Weather Safety

Dress for immersion, not air temperature. If you fall in, hypothermia hits fast. Layered synthetic or wool base layers, waterproof outer shell, neoprene gloves, and a PFD rated for cold water are non-negotiable. Cotton kills when wet.
Pack a dry bag with extra clothes, emergency blanket, fire-starting kit, and high-calorie snacks. Cold burns energy.
Inform someone of your plan. File a float plan with a friend or family member: where you're launching, your intended route, and expected return time. If you don't check in, they know to call for help.
Carry a VHF radio and know how to use it. Cell phones are fine until you drop them overboard or the battery dies. A handheld VHF on channel 16 reaches the Coast Guard and nearby boaters. Consider a PLB (personal locator beacon) for offshore or remote trips.
Assume something will go wrong. That mindset keeps you prepared. An engine can quit, weather can turn, or you can break down far from the ramp. If you're ready for it, it's an inconvenience. If you're not, it's life-threatening.
Post-Trip Drainage and Cleaning
You're back at the dock, cold and tired. Don't skip this.
Clean everything. Remove all aquatic vegetation, mud, and debris from the hull, trailer, and lower unit. This isn't just cosmetic—it prevents the spread of invasive species. The Virginia Department of Wildlife Resources stresses the Clean, Drain, Dry protocol to protect waterways.
Drain all water. Bilge, livewell, bait tank, any compartment that holds water. Tip the boat on the trailer to get every drop out. Water left sitting can freeze overnight, cracking plumbing or pumps.
Position the engine correctly. Trim the motor fully down (running position) immediately after shutdown. Let it sit this way for at least an hour, longer if possible. This allows water to drain from the cooling passages, exhaust manifolds, and powerhead by gravity. If you tilt it up too soon, water stays trapped. When it freezes, it expands and cracks internal passages.
For trailering home, leave it down or tilt it only slightly. For overnight or multi-day storage, fully down is safest.
If you're in saltwater, flush the cooling system with freshwater as soon as possible. Salt accelerates corrosion exponentially, especially if it dries in the cooling passages.
Two-Stroke vs Four-Stroke Differences
Two-strokes: Oil injection systems should be full of fresh two-stroke oil. If storing long-term, some techs drain the reservoir to prevent separation, but verify with your manual. Fogging is simpler—spray directly into the carb throat while running. Two-strokes have simpler crankcase designs (no sump oil), so oil changes don't apply, but lower unit service is identical.
Four-strokes: Full crankcase oil service is mandatory. Change oil and filter before storage. Fogging is done through spark plug holes or dedicated fogging ports. Four-strokes have more complex valve trains that benefit from higher-temp thermostats during cold trolling to prevent carbon buildup on valves.
Both types need fuel stabilization, lower unit service, and proper drainage. The differences are in lubrication and fogging methods. Our detailed comparison in Winterizing a 2-Stroke vs. 4-Stroke Outboard: Key Differences explains these nuances.
Supplies Breakdown by Task
Fuel System:
- Fuel stabilizer (brand-specific or Mercury Quickstor)
- Funnel
Oil Change:
- Engine oil (check manual for viscosity and capacity—typically 3-6 quarts for mid-size four-strokes)
- Oil filter
- Drain pan
- Filter wrench
- Funnel
Lower Unit:
- Marine gear lube (capacity varies—check manual, usually 10-20 oz)
- Gear lube pump
- New drain and vent screw washers (crush washers, copper or aluminum)
- Rags
Fogging:
- Fogging oil (aerosol)
- Spark plug socket (if doing plug-hole fogging)
Cooling System:
- Flushing muffs
- Garden hose
- Propylene glycol antifreeze, -50°F rated (1-2 gallons)
- Winterizing kit/hose adapter
Prop and Grease:
- Marine grease
- Grease gun
- Prop wrench or socket
- New cotter pins (if applicable)
Battery:
- Wire brush
- Terminal cleaner spray
- Battery maintainer/trickle charger
Corrosion:
- Corrosion inhibitor spray (CRC, Boeshield, etc.)
- Touch-up paint (color-matched to lower unit)
Gather it all before you start. Nothing kills momentum like a missing washer or empty grease gun. For all these high-quality parts, explore the JLM Marine product collections for direct factory-sourced marine supplies.
Maintenance Tip
Flush your engine with freshwater after every trip, even in freshwater lakes. It clears silt, prevents salt buildup, and keeps your water pump impeller from seizing. Learn more about the importance of cooling system care in our Outboard Overheating 101: Quick Checks to Prevent Damage post.
Sources:
- https://www.youtube.com/watch?v=ifWmE8vT7Xk
- https://www.mercurymarine.com/us/en/lifestyle/dockline/how-to-winterize-your-outboard
- https://dwr.virginia.gov/blog/prepare-your-outboard-for-operation-in-cold-weather/
- https://www.youtube.com/watch?v=GFrW0qxKH6k
- https://seatow.com/how-to-winterize-outboard-motor/
- https://dwr.virginia.gov/boating/invasive-species/
- https://seatow.com/how-to-winterize-a-boat/
Hi—I’m Jim Walker
I grew up in a Florida boatyard, earning pocket money (and a few scars) by rebuilding outboard carbs before I could drive. That hands-on habit carried me through a Ph.D. in mechanical engineering, where I studied how salt water quietly murders metal.
I spent ten years designing cooling systems for high-horsepower outboards, then joined JLM Marine as CTO. We bench-test every new part in the lab, but I still bolt early prototypes onto my own 23-foot skiff for a weekend shake-down— nothing beats real wake and spray for finding weak spots.
Here on the blog I share the fixes and shortcuts I’ve learned so your engine—and your day on the water—run smooth.

For Boat Owners:
To assist you in maintaining and repairing your marine engines, we hope the following resources may be of use:
- Mercury Serial Number Guide
- Owner's Manuals from Mercury
- Official Model Number Reference Guide PDF from BRP
- Johnson Serial Number Guide
-
Boat Accessories from JLM Marine
About JLM Marine
Founded in 2002, JLM Marine has established itself as a dedicated manufacturer of high-quality marine parts, based in China. Our commitment to excellence in manufacturing has earned us the trust of top marine brands globally.
As a direct supplier, we bypass intermediaries, which allows us to offer competitive prices without compromising on quality. This approach not only supports cost-efficiency but also ensures that our customers receive the best value directly from the source.
We are excited to expand our reach through retail channels, bringing our expertise and commitment to quality directly to boat owners and enthusiasts worldwide.
Boat Accessories on Sale
- $54.00
- $54.00
- Unit price
- per
- $38.50
- $38.50
- Unit price
- per
- From $54.00
- From $54.00
- Unit price
- per

- $53.50
- $53.50
- Unit price
- per

- From $39.13
$45.50- From $39.13
- Unit price
- per
- $45.00
- $45.00
- Unit price
- per

- $34.50
- $34.50
- Unit price
- per
- $54.00
- $54.00
- Unit price
- per
- $32.00
- $32.00
- Unit price
- per


- $34.50
- $34.50
- Unit price
- per
- $23.50
- $23.50
- Unit price
- per
-
Red
-
Blue

- $54.00
- $54.00
- Unit price
- per
- $22.80
- $22.80
- Unit price
- per
-
Red
-
Blue
- $40.00
- $40.00
- Unit price
- per

- $22.80
$27.00- $22.80
- Unit price
- per

- $32.00
- $32.00
- Unit price
- per
- $22.80
$28.50- $22.80
- Unit price
- per
- $22.80
- $22.80
- Unit price
- per
-
Red
-
Blue

- $31.50
- $31.50
- Unit price
- per

- $31.50
- $31.50
- Unit price
- per