


Common Mercury Outboard Problems (and Simple Fixes)
- Fuel System Problems
- Overheating Issues
- Electrical System Failures
- Starting Failures
- Mercury-Specific Shift Shaft Corrosion
- Power Loss and Performance Issues
- Understanding Mercury Alarm Beeps
- Tools and Spare Parts to Carry
- Maintenance That Prevents Breakdowns
- When to Stop and Call for Help
- Keeping an Engine Log
- OEM vs Aftermarket Parts


I've been wrenching on Mercury outboards for two decades now, and the same issues keep showing up. Most of them you can fix yourself if you know what to look for and carry the right parts. Here's what breaks and how to handle it.
Fuel System Problems
Contaminated Fuel and Clogged Filters
Ethanol fuel is the worst thing to happen to outboards. When you leave fuel sitting over winter, the ethanol separates and turns into what basically looks like sand. A Mercury Master Tech I know puts it this way: "when you get contamination you have to replace pretty much the entire system in its entirety… when somebody leaves it over winter full of fuel they get the ethanol that separates and then turns to sand and then the moment you start it all that sand runs through the injectors" 1.
Symptoms: Engine sputters at idle, hesitates on acceleration, or dies completely when you throttle up. On DFI models (Direct Fuel Injection), you'll get rough running that gets worse under load.
The fix: Replace your inline fuel filter first—it's the easiest check. Carry spares rated for your engine's fuel system pressure. If the filter looks clean but you're still having issues, check the fuel/water separator if you have one. For winter storage, drain the tank completely or run it dry, don't just add stabilizer to old fuel.
Fuel Line Air Leaks
Symptoms: Primer bulb won't get firm no matter how much you squeeze it. Engine runs fine at speed but dies at idle.
The fix: Check every connection between your tank and engine. The most common leak points are the tank fitting and the engine-side quick-connect. Tighten all fuel line clamps—I use a 7mm or 5/16" nut driver for most Mercury clamps. If a line looks cracked or feels stiff, replace it. A $15 fuel line beats a tow bill.
Overheating Issues
Water Pump Impeller Failure
The impeller is a wear item, not a permanent part. The rubber vanes crack, break off, or lose their flexibility. We replace them every 100-200 hours or every other season, whichever comes first. In sandy or debris-filled water, they wear faster.
Symptoms: Weak or no water stream from the pee hole at idle, but it might look fine at speed. Temperature gauge climbing. Three short beeps from your alarm system 2.
The fix: If you're mechanically inclined, you can swap an impeller on the water with basic tools—usually a 1/2" socket set and a large flathead screwdriver for older models. The kit includes the impeller, plate, and gaskets. When you pull the old one, check the vanes—if they're flat instead of standing up, or if pieces are missing, that's your smoking gun. Coat the new impeller with dish soap or glycerin before installation so it doesn't tear on startup. Check out our detailed guide on how to replace a Mercury outboard water pump impeller for more help and instructions.
Clogged Water Intakes
Symptoms: Overheating that starts suddenly, usually after running through weeds or shallow water.
The fix: Shut down immediately. Check the intake screens on your lower unit—they're the rectangular or round grilles near the bullet. Pull off any plastic bags, weeds, or mud. A piece of heavy wire or a small screwdriver works to poke debris out. After saltwater use, flush for 15-20 minutes minimum using the flush port or muffs. This isn't optional if you want your engine to last 3. See our blog on unclogging a blocked outboard cooling water intake for additional tips.
Stuck Thermostat
Symptoms: Overheating that happens gradually, not suddenly. Temperature creeps up over 10-15 minutes of running.
The fix: The thermostat on most Mercurys is under a housing on the cylinder head—usually held by two or three bolts. On Verado models, check it every 100 hours per the service schedule. If it's stuck closed, the engine can't regulate temperature. Replace it with an OEM-spec thermostat—the cheap ones don't last. When you reinstall the housing, use a new gasket and don't overtorque the bolts (usually 10-15 ft-lbs depending on model). For detailed thermostat maintenance, you may also find helpful information in our related article on thermostat maintenance and keeping your outboard running cool.
Electrical System Failures
Corroded Battery Connections
This is the number one cause of no-start calls I get. Saltwater accelerates it, but even freshwater boats get corrosion from battery off-gassing.
Symptoms: Engine cranks slowly or not at all. Clicking sound when you turn the key. Gauges flicker or die.
The fix: Pull both terminals and scrub them with a wire brush until you see clean metal. Mix baking soda and water to neutralize acid corrosion—it'll fizz when it hits the white/green crud. Dry everything completely. Reinstall the terminals and tighten with a 10mm wrench. A little dielectric grease on top prevents future corrosion. Your battery should read 12.6V or higher with the engine off if it's healthy.
Blown Fuses
Symptoms: Complete electrical failure on one circuit—fuel pump won't prime, gauges dead, no crank, or trim/tilt doesn't work.
The fix: Find your fuse panel—it's usually under the cowl or near the battery. Pull each fuse and hold it up to light. If the metal strip inside is broken, it's blown. Use your multimeter on continuity mode (the beeping setting) if you're not sure—touch the probes to each end of the fuse. No beep means it's dead. Replace only with the exact same amperage listed on the fuse or in your manual. A 20-amp circuit with a 30-amp fuse is a fire waiting to happen.
Ignition System Problems
Symptoms: Engine cranks but won't fire. Rough running that doesn't improve when you replace fuel filters. Misfires under load.
The fix: Pull a spark plug. If it's black and sooty (carbon fouled) or wet with fuel, the ignition isn't strong enough or the fuel mix is too rich. If it's dry and tan-colored, you're not getting fuel. Clean the plug with a wire brush and carb cleaner if you're in a pinch, but fresh plugs are better—NGK or Champion for most Mercurys, gapped to spec (usually 0.035"-0.040").
For ignition testing, pull a plug wire (with the plug grounded to the block) and crank the engine. You should see a strong blue spark. Weak orange spark or no spark means coil or CDI problems. On older models, check the stator resistance with your multimeter—specs are in the service manual, but you're usually looking for 200-500 ohms on the charge coil.
Starting Failures
Kill Switch Issues
I've towed boats that had nothing wrong except the kill switch lanyard wasn't seated. Check it first before you tear into anything else.
Symptoms: No crank, no click, nothing. All electrical works but the starter doesn't engage.
The fix: Make sure the lanyard is fully inserted. The metal contacts inside the switch corrode—especially in saltwater. Pull the switch housing apart (usually two small screws) and spray electrical contact cleaner inside. If the switch is shot, you can temporarily bypass it by bridging the two wires behind it with a jumper wire to get home, but replace it immediately. Never run without a functioning kill switch. For a complete understanding of kill switch issues, see our article on understanding the kill switch and why your engine won’t start.
Neutral Safety Switch Problems
Symptoms: Engine won't crank unless you jiggle the shifter.
The fix: The switch is usually on the side of the engine or in the lower cowl. Wiggle the shift linkage while someone tries to start the engine. If it suddenly works, the switch needs adjustment or replacement. You can test it with a multimeter—it should show continuity in neutral and open in forward/reverse. Don't bypass this permanently; it's a safety device.
Mercury-Specific Shift Shaft Corrosion
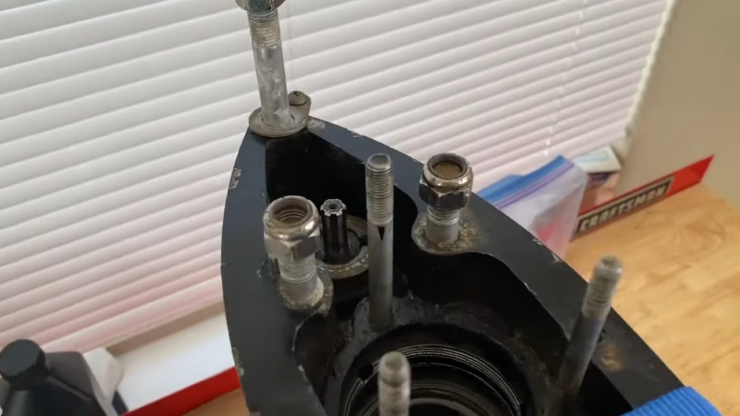
This is a big one on Verado, Mariner L6, and the V6/V8 models from 2011 onward, especially the 175-300hp four-strokes. Saltwater eats the shift bell crank and upper shift shaft, causing stress cracks. You lose forward or reverse—sometimes both—at the worst possible time, like docking in a crosswind.
Symptoms: Hard shifting, grinding when you shift, or complete loss of gear engagement. You'll see visible corrosion on the shift components if you pull the lower cowl.
The fix: Mercury issued recall bulletins (Service Bulletin 2025-11 and others) to replace the affected parts with corrosion-resistant alloys and add retainer brackets 4. If you have an affected serial number (1B812047 and below for Verados), get it done. For prevention, grease the shift linkage every 100 hours with Mercury 2-4-C Marine Lubricant and flush for 15+ minutes after every saltwater trip 5.
Power Loss and Performance Issues
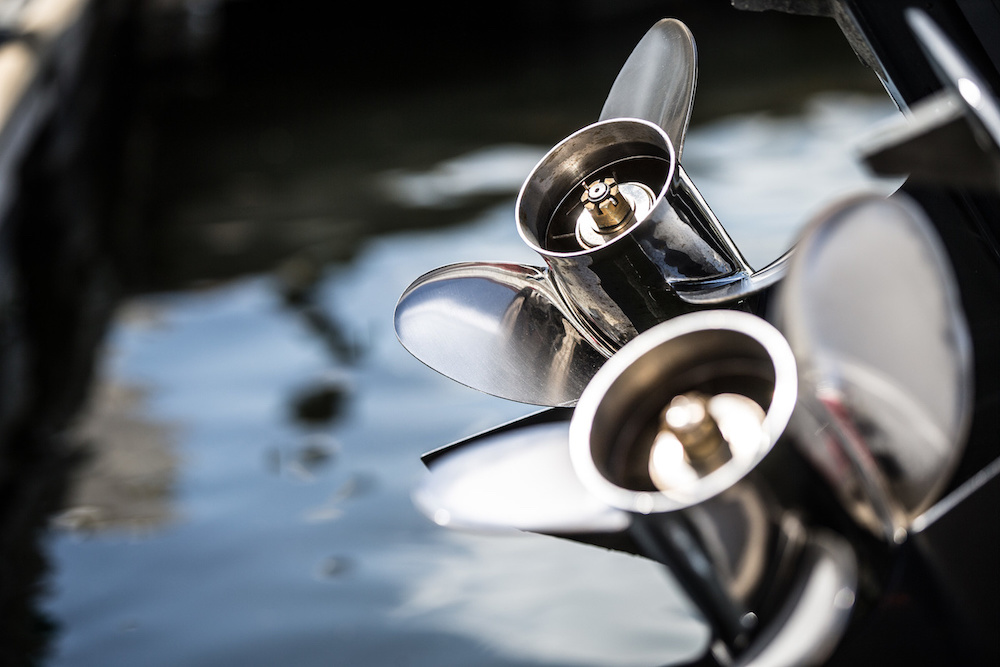
Spun Propeller Hub
Symptoms: Engine revs normally but the boat doesn't accelerate. RPMs climb but speed doesn't match. You might feel a slight shudder.
The fix: This happens when the rubber hub inside the prop spins independently of the outer prop. Pull the prop (you'll need the prop wrench for your model—usually a big socket or special tool). Inspect the hub—if it looks chewed up or you see rubber dust, it's spun. Replace the prop or have the hub pressed out and replaced. After any prop strike, check this even if the blades look fine.
Fouled Lower Unit
Symptoms: Vibration that gets worse with speed. Loss of top-end speed.
The fix: Check the prop for fishing line wrapped around the shaft—it happens more often than you'd think. A pocket knife or line cutter gets it off. Also look for barnacles or growth on the lower unit if the boat's been sitting in the water. A plastic scraper removes most of it; don't use metal tools that'll gouge the paint and invite more corrosion.
Understanding Mercury Alarm Beeps
Mercury uses specific beep patterns. Your owner's manual has the full chart, but here are the common ones:
- One long continuous beep: Low oil pressure. Shut down immediately. Check your oil level and look for leaks or milky oil (water contamination).
- Three short beeps repeating: Overheating. Check water flow, impeller, and thermostat.
- Four beeps: Low voltage or charging system problem. Test your battery and check the stator output.
- Five beeps: Engine RPM limit exceeded (usually from wrong prop pitch).
On SmartCraft-equipped engines (most Verados and newer four-strokes), the VesselView screen or gauge will show an actual error code. Write it down before you shut off the key—the code clears when you cycle power.
Tools and Spare Parts to Carry
Must-Have Tools
- Multimeter: A cheap digital one works fine. Harbor Freight or any auto parts store. You're testing voltage (12V battery), continuity (fuses, wires), and resistance (coils).
- Socket set: 3/8" drive with metric and SAE sockets, 8mm through 19mm covers most Mercury fasteners.
- Screwdrivers: Phillips #2 and a large flathead.
- Spark plug socket: 5/8" or 13/16" depending on your engine model.
- Needle-nose pliers and regular pliers: For hose clamps and wire work.
- Wire brush: The cheap brass ones are fine for cleaning terminals.
Critical Spare Parts
- Spark plugs: A full set for your engine. NGK or Champion to OEM spec.
- Fuel filter: Inline filter for your fuel system—Quicksilver or Mercury Precision Parts available in the fuel filter collection.
- Fuses: A set of each amperage your boat uses (usually 5A, 10A, 15A, 20A, 25A).
- Water pump impeller kit: For your specific model. This includes impeller, gaskets, and wear plate. Check out the Mercury water pump impeller kits for OEM-quality parts.
- Hose clamps: Assorted stainless steel clamps in common sizes (1/4", 5/16", 3/8").
At JLM Marine, we sell pre-assembled maintenance kits with these parts for specific Mercury models. You get factory-spec quality without paying dealership markup—the parts fit right and last. A lot of the "bargain" aftermarket stuff uses rubber that's too hard or gaskets that don't seal, and you'll be tearing it apart again in six months. See our full JLM Marine product hub for all parts and kits.
Maintenance That Prevents Breakdowns
Pre-Launch Checks
Before you leave the dock:
- Squeeze the primer bulb until firm. If it stays soft, you have a leak or blockage.
- Check battery terminals for tightness and corrosion.
- Verify the kill switch clicks properly and the lanyard is in good shape.
- Look at the prop for visible damage or wrapped line.
- Open the cowl and sniff for fuel smell—if you smell gas, find the leak before you start the engine.
Post-Trip Maintenance
After saltwater use, flush the engine every single time. Connect a hose to the flush port (engine OFF) and run freshwater for 15-20 minutes minimum. This removes salt from the cooling passages and exhaust. We see engines that skip this step, and the internal corrosion cuts their lifespan in half.
For all boats, check your oil level after every few trips. Mercury four-strokes use 25W-40 or 25W-50 FC-W certified marine oil—don't use automotive oil; it doesn't have the anti-corrosion additives. Change oil every 100 hours or annually.
Impeller Replacement Schedule
Replace the impeller every 1-2 seasons or every 100-200 hours, whichever comes first. It's cheap insurance—a $40 kit versus a $3,000 powerhead repair from overheating. If you run in sandy or silty water, do it yearly. The impeller is a consumable, like brake pads on a car. For more detail see our article on how often should you replace your outboard’s impeller.
Grease and Lubrication
Every 100 hours, grease:
- Shift linkage (Mercury 2-4-C Marine Lube)
- Steering tube and tilt tube (Mercury Premium Grease)
- Prop shaft splines (Mercury Hi-Performance Gear Lube)
Don't skip the prop shaft—if the splines corrode and seize, you'll need a puller and possibly a new prop shaft.
When to Stop and Call for Help
Some problems you don't fix on the water. If you hear any of these, shut down and get towed:
- Loud knocking or hammering noise: This is internal engine damage—spun bearing, thrown rod, or broken crankshaft. Running it will grenade the block.
- Metal-on-metal grinding from the lower unit: Gear failure. You'll destroy the gearcase if you keep running.
- Heavy smoke: Blue smoke (burning oil) or black smoke (too much fuel) from the exhaust points to serious internal problems.
- Milky oil: If you check the dipstick and the oil looks like a chocolate milkshake, you've got water in the crankcase. A blown head gasket or cracked block. Shut it down.
- No oil pressure: If the alarm sounds and the gauge shows zero pressure, the engine is about to seize. Stop immediately.
For these situations, have a VHF radio and a charged cell phone. We also recommend joining a towing service like BoatUS or SeaTow if you run offshore or in remote areas.
Keeping an Engine Log
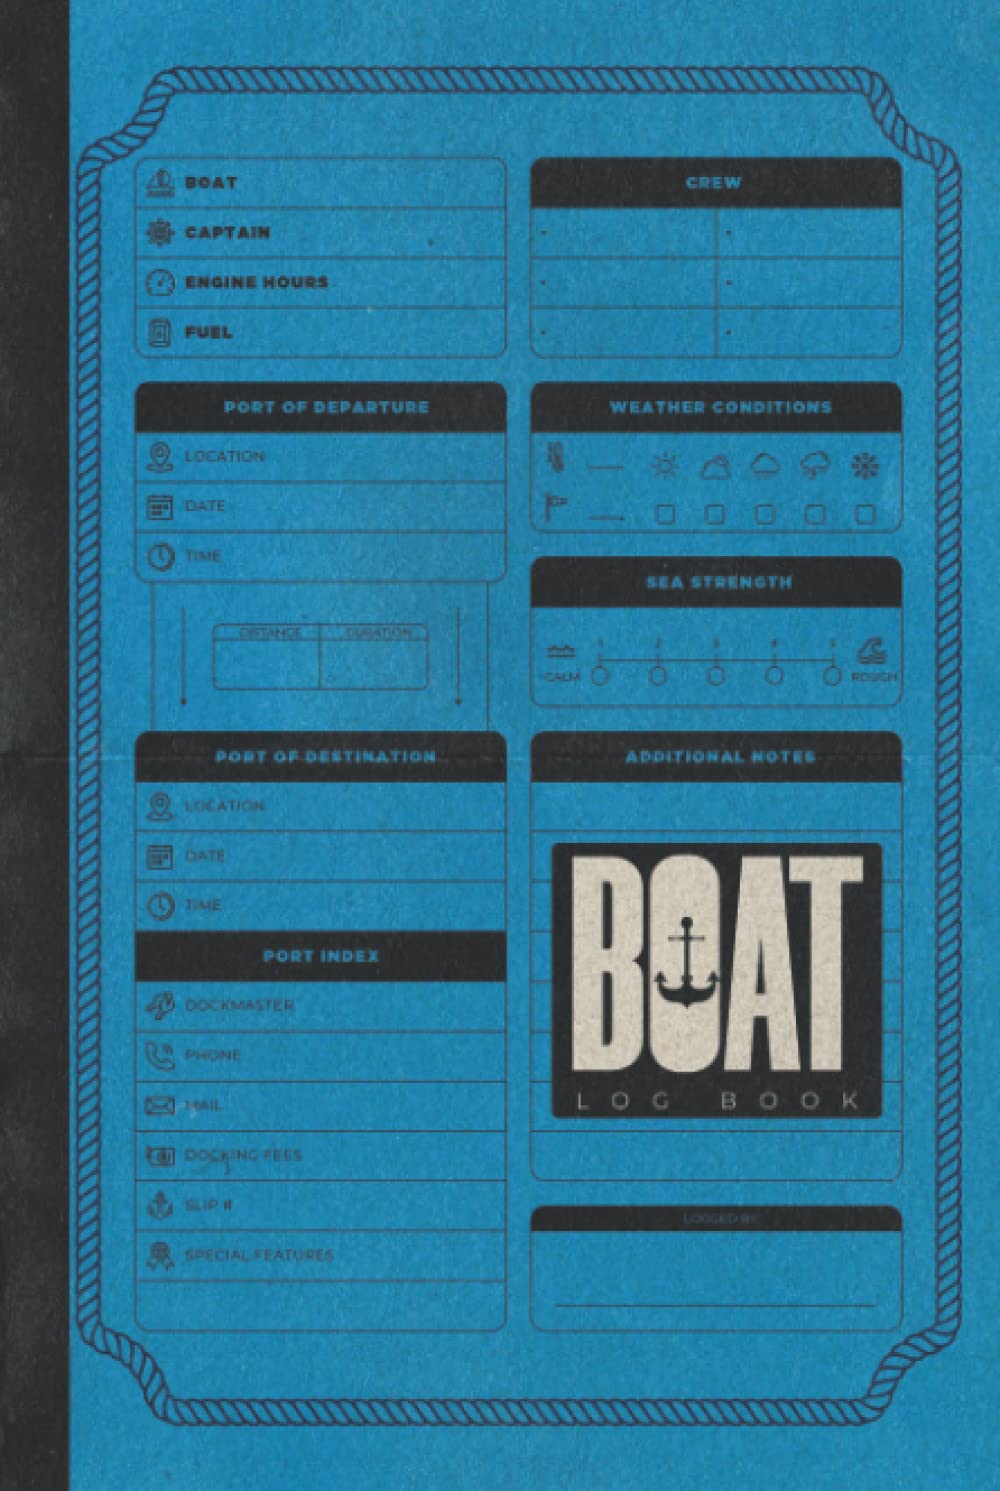
Write down your maintenance and any issues in a notebook or phone app:
- Date, hours, and what you did (oil change, impeller swap, etc.)
- Any symptoms you noticed and what fixed them
- Water conditions (saltwater, freshwater, debris level)
- Fuel source and age
When you bring your engine to a shop, this log saves the mechanic hours of guesswork. It also helps you spot patterns—if you're replacing fuel filters every 20 hours, you've got a tank contamination problem.
OEM vs Aftermarket Parts

Mercury OEM parts (Quicksilver, Mercury Precision Parts) are good quality, but you're paying extra for the logo. A dealer will charge $80 for an impeller kit that costs them $30.
Cheap no-name aftermarket parts are trash. We see it constantly—the wrong rubber compound, incorrect tolerances, gaskets that don't seal. You'll save $15 now and spend $500 in labor when you have to redo the job.
The middle ground is reputable aftermarket from manufacturers who make parts to OEM specs, sometimes in the same factories that produce the branded stuff. JLM Marine sources from these factories—you get the quality without the dealer markup, and it actually fits and lasts.
Pro tip: Grease your shift linkage every 100 hours with Mercury 2-4-C, and those shift shaft corrosion problems won't eat your season. For convenient ordering, check out the full range of Mercury parts available at JLM Marine.
For more expert tips, parts, and guides, visit the JLM Marine website.