


Safe Boating in Storm Season: Engine Prep & Checks
- Why Weather Stress Causes Engine Failure
- Critical Maintenance Strategy for Storm Readiness
- Preparing Your Engine Before Storm Season Hits
- Running the Engine: Confirming Readiness
- Storm-Specific Preparations for Engine Protection
- Carrying Spares and Tools: Your Emergency Kit
- OEM vs. Aftermarket Parts in Severe Conditions
- Post-Storm Recovery and Checks
- Go/No-Go Decision Guide
- Resources for Further Training and Information
- Trailer Boaters: Additional Storm Prep
- Cold-Weather Storm Prep
- Quick Storm Prep Checklist
- Pro Tip for Engine Longevity
By Lead Mechanic, JLM Marine
Storm season—whether it's summer squalls or full-blown hurricanes from June through November—puts real stress on your engine. I've worked on outboards for 20 years, and I can tell you that most failures I see after a storm were preventable. This guide covers the mechanical checks you need to do before the weather turns and what to look for when you're running the engine under storm-season conditions.
Why Weather Stress Causes Engine Failure
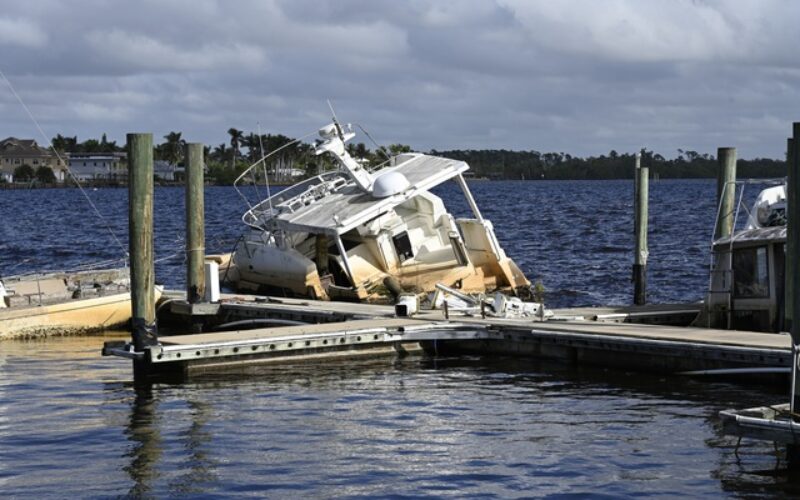
Machinery failure ranked fourth among causes of recreational boating accidents in the US in 2024, according to the US Coast Guard's 2024 Recreational Boating Statistics. That year saw 3,887 incidents, 556 fatalities, and $88 million in damage. Engine problems don't just strand you—they turn dangerous fast when waves are building and the sky's gone black. Lightning strikes hit boats at a rate of 1 in 1,000 per BoatUS claims, especially in places like southern Florida, frying wiring and electronics.
These numbers represent real breakdowns in real conditions. A sputtering engine or a dead battery when a squall rolls in is how people end up calling for rescue.
Critical Maintenance Strategy for Storm Readiness
At JLM Marine, we engineer parts specifically for safety-critical applications like storm prep. Our goal is to ensure no boater is stranded due to preventable mechanical failure. We source factory-spec components and ship them globally, factory-direct to your dock, so you get OEM-level reliability without the dealership markup.
This guide walks through the checks that matter:
- Pre-storm inspections separated by engine type
- Running diagnostics to catch hidden problems
- Storm-specific protection steps
- Spares and tools you actually need
Preparing Your Engine Before Storm Season Hits

Start your prep at least a few weeks before the forecast season kicks off. Don't wait for the first gale warning. If you're in a hurricane zone, begin serious checks once the Atlantic season officially opens in June.
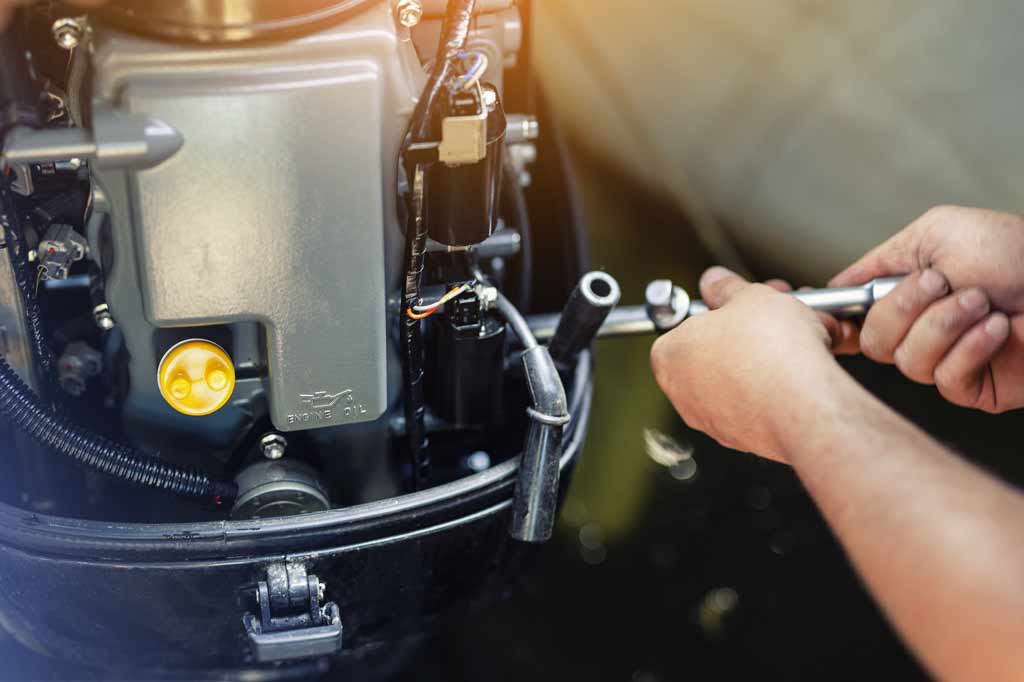
Pre-Start Checks for Outboard Engines
These steps apply to portable and permanent-mount outboards. Do them cold, before you fire up the motor.
Fuel Levels and Stabilizers
Top off your main and reserve tanks. If the boat will sit through part of storm season, add a quality fuel stabilizer within one week of filling. Stabilizers prevent oxidation and phase separation—when ethanol-blended fuel absorbs moisture and splits into layers. You'll know phase-separated fuel by how the engine acts: it might idle fine but sputter hard when you open the throttle, or it may refuse to start at all because the carburetor is pulling straight water. For advice on fuel stabilization and additives, see our guide on Fuel Quality Matters: Choosing the Right Octane for Your Outboard.
Battery Condition
Check voltage with a multimeter. A fully charged 12-volt battery should read 12.6V or higher. Anything below 12.4V means it's only partially charged and will struggle under load. If a hurricane is forecast and you're securing the boat for days, pull the battery and store it above potential flood levels. A dead battery kills your bilge pumps, and that's how boats sink at the dock. For battery maintenance tips, consult our Battery Care During the Off-Season: Keep It Charged article.
Leak Detection
Wipe the area under the engine and the lower cowling completely dry. Come back in a few hours. Oil, fuel, or water? If you see fresh fluid, trace it now. Oil leaks from the lower unit's prop shaft seal are common and will only get worse when the prop is taking wave hits in rough water.
Fluid Levels
Check engine oil and gearbox (lower unit) oil about a week before a storm or heavy-use period. This gives any leaks time to show up. For two-stroke outboards, verify your oil injection reservoir is full; for four-strokes, pull the dipstick and top off with the manufacturer's spec oil. If you need help with oil injection systems, refer to our Two-Stroke Oil Injection Troubleshooting Guide.
Belts, Hoses, and Impellers
On larger outboards with belt-driven components (like power-steering pumps), check belt tension. Press down in the center of the belt span—if it deflects more than 1/2 inch, tighten the tensioner. Inspect all fuel and cooling hoses for cracks or soft spots. The impeller is critical: pull the lower unit pump housing cover and look at the rubber vanes. If they have a permanent curve or missing tips, replace the impeller. A worn impeller won't move enough water, and you'll overheat within minutes. For detailed impeller replacement, see Signs Your Outboard Impeller Needs Replacement and the Johnson/Evinrude Outboard Water Pump Replacement Guide.
Filters and Intake Screens
Remove the inline fuel filter. Look for dirt or water contamination at the bottom of the filter bowl. If you see water, do not leave the dock until you've drained the tank and refilled with fresh fuel. On outboards, check the water intake screens on the lower unit for biological growth, sand, or plastic debris. Run a small brush or pick through the slots. For ordering parts like fuel filters, explore our Fuel Filter collection for OEM quality replacements.
Pre-Start Checks for Inboard and Sterndrive Engines
Inboards and sterndrives share many outboard checks but have unique systems.
Seacocks and Strainers
Verify that your raw-water intake seacock is open before starting. Close it only during storage or if securing the boat for a hurricane. Check the seawater strainer basket for debris—seaweed, shells, and small fish clog these fast. If the basket is dirty, your cooling flow will be weak even if the impeller is fine.
Heat Exchanger and Hoses
Inspect the heat exchanger end caps for signs of corrosion or weeping coolant. On the raw-water side, look for salt buildup around hose clamps, which indicates a slow leak. Replace any hose that feels spongy or shows cracks when you bend it.
Coolant System
For freshwater-cooled engines, check coolant level in the expansion tank. It should be between the min and max marks when cold. Low coolant usually means a leak in the heat exchanger or a bad hose connection.
Running the Engine: Confirming Readiness
Once pre-start checks are done, run the engine and monitor its behavior. Do this at the dock or on a hose, not underway, so you can shut down fast if something's wrong.
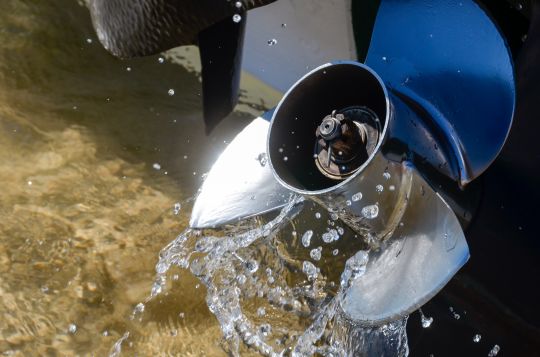
Cooling System Function
Watch the tell-tale (pee hole) on an outboard. You should see a strong, steady stream within 10–15 seconds of startup. If the stream is weak or intermittent, stop the engine. Run a piece of heavy monofilament fishing line (30–50 lb test) up the tell-tale tube to clear any insect nests or debris. If that doesn't fix it, you've got an impeller or intake problem. Learn more about dealing with cooling system issues in our Outboard Overheating 101: Quick Checks to Prevent Damage guide.
On inboards, feel the raw-water discharge hose (usually exits through the exhaust). It should be warm but not scalding within a few minutes. If it stays cool, you're not moving water.
Listen for Anomalies
Pay attention to specific sounds:
- High-pitched squeal: Usually a loose belt. Tighten or replace it before the belt snaps.
- Rhythmic knocking: Internal bearing wear or a loose flywheel. Shut down and get a mechanic.
- Grinding or rattling: Could be a failing water pump or a piece of debris in the impeller housing.
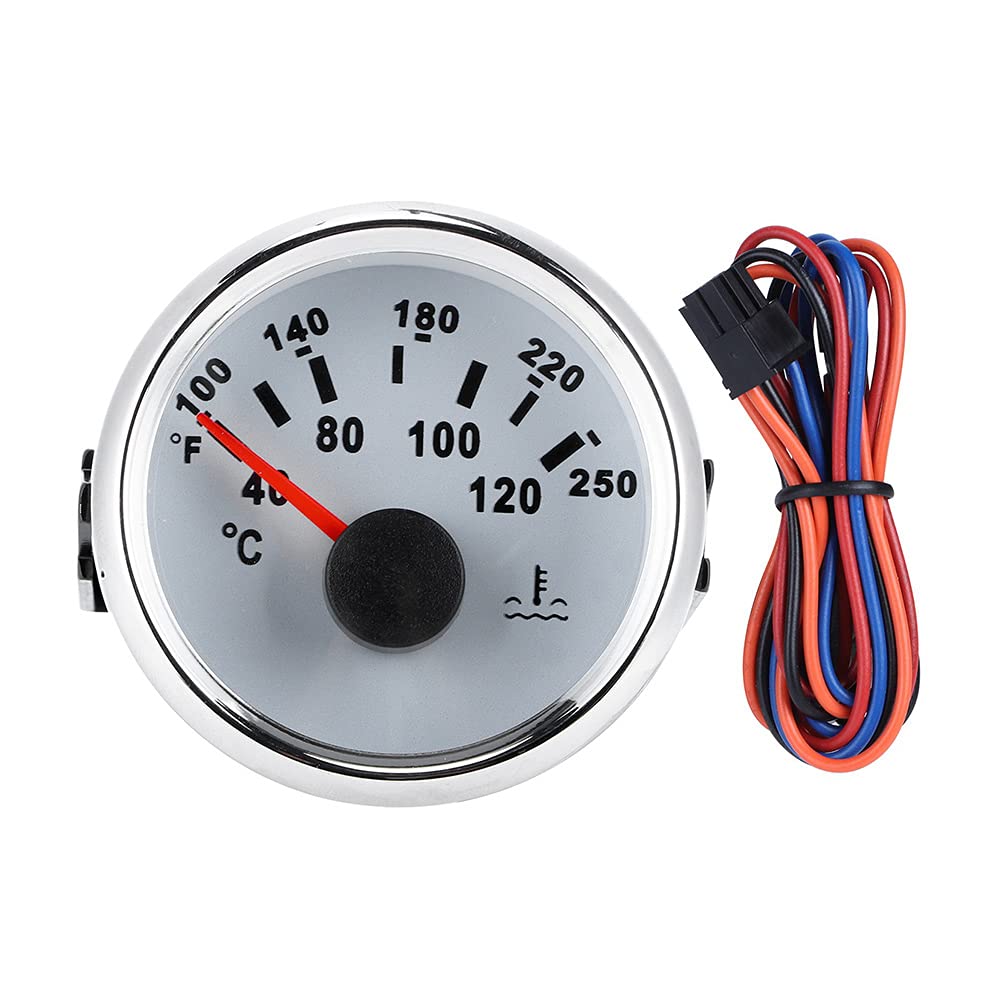
If the engine sounds stressed, overheats (temp gauge in the red, steam from the block), or makes any noise that wasn't there last time, stop immediately. Trying to push through a mechanical issue in a storm is how you end up adrift.
Battery Charging and Bilge Pumps
With the engine running, check that the voltage climbs to around 13.8–14.4V, which means your alternator is charging. Test your bilge pumps—flip the manual switch and make sure water discharges overboard. If the pump struggles or won't prime, clean the float switch and intake screen.
Storm-Specific Preparations for Engine Protection

When a hurricane warning is posted or you're securing the boat for extended rough weather, take these additional steps.
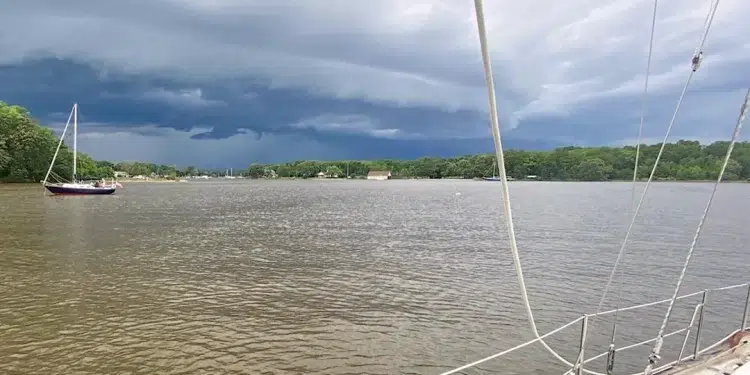
Immediate Squalls vs. Long-Term Hurricane Prep
For immediate squalls (pop-up thunderstorms with 20–40 knot gusts), your running checks are enough if the engine is sound. Make sure you've got fuel, the battery is charged, and the bilge is dry.
For long-term hurricane warnings (named storms, 60+ knot winds, surge risk), you're going into storage mode:
Preventing Water Ingress
The US Coast Guard's hurricane preparation guidance recommends sealing all engine vents and openings. Use duct tape or cut plywood squares to cover small engine vents. Plug exhaust outlets with rubber expansion bungs or inflatable balls—this prevents backflow if the boat is swamped. Close the raw-water intake seacock. Tape over fuel and water tank vents to keep surge water out of your tanks.
Fill the fuel tank completely. A full tank is heavier and adds stability; it also prevents moisture condensation inside the tank during the storm's pressure swings.
Seacocks and Through-Hulls
Close every seacock except the one feeding your automatic bilge pump (if it's hardwired and you're leaving shore power connected). If you're pulling shore power—and you should if storm surge could flood the dock—then close all seacocks. The reason: a siphon effect can pull water into the boat through an open seacock if the hull is partially submerged or if a hose fails under surge pressure.
Disconnect Shore Power
Unplug from shore power. A direct lightning strike to the dock can fry every electrical component on your boat. If you're storing the boat on a trailer, plug the lower-unit drain holes with tapered rubber plugs to keep rain out of the gearbox.
If Submerged
If your engine is submerged—even partially—in saltwater, do not attempt to start it. Cranking a flooded engine hydro-locks the cylinders and bends connecting rods. You need a professional to flush the block, replace all fluids, pull the plugs, and fog the cylinders before it can safely run again. Our guide on Flooded Engine Recovery: How to Restart Your Outboard covers the safe way to handle this situation.
Carrying Spares and Tools: Your Emergency Kit

I always carry a basic spares kit, and I tell every boat owner to do the same. You're not trying to rebuild the engine on the water, but you need enough to handle common failures.
What to Pack
- Spare fuel filter elements (at least two)
- Spare engine oil (1 quart for four-strokes)
- Spare impeller kit with the gasket and o-rings
- Assorted stainless hose clamps (sizes to fit your fuel and water hoses)
- 6-inch and 10-inch adjustable wrenches
- Phillips and flathead screwdrivers (multiple sizes)
- Needle-nose pliers and standard pliers
- Socket set covering 8mm–19mm (or 5/16" to 3/4" SAE)
- Spare fuses for your electrical panel
- Waterproof flashlight and a headlamp
- Roll of electrical tape and a roll of self-fusing silicone tape
Consult Your Manual
Your engine's service manual will list recommended spare parts for offshore or extended cruising. For example, Yamaha and Mercury both publish specific spares lists in the back of their manuals. If you don't have the manual, buy it. It's the single most useful troubleshooting tool you can own. For help choosing reliable parts, visit our JLM Marine main site that provides direct factory-quality components and guidance.
OEM vs. Aftermarket Parts in Severe Conditions

I've seen cheap aftermarket parts fail mid-season more times than I can count. A $10 impeller kit from a random online seller might look identical to the OEM part, but the rubber is too hard, the vane thickness is off by a millimeter, and it won't seal properly. You'll be pulling the lower unit again in two weeks.
OEM parts are reliable, sure, but you're paying a premium for the logo on the box. The parts themselves often come from the same contract manufacturers that supply the aftermarket.
That's where JLM Marine sits. We source components that meet or exceed OEM specifications—same materials, same tolerances, tested in real saltwater conditions—and we ship them factory-direct. You're not paying for dealer overhead or brand markup. When I say "factory-spec quality," I mean we've tested these parts in US waters and confirmed fitment on the actual engines. For critical storm prep jobs like replacing impellers, hoses, or fuel filters, using a reliable non-OEM source saves money without gambling on your safety. Browse our Water Pump Impeller collection and Fuel Pump Kit collection for high-quality options.
Post-Storm Recovery and Checks
Once the storm passes and it's safe to return to the boat, don't just fire up the engine and head out.
Inspect for Damage
Walk the boat and look for:
- Structural cracks in the hull or deck
- Water in the bilge (beyond what the pumps handled)
- New leaks in the engine compartment
- Loose or missing components (cowlings, hatch covers, fuel caps)
Pull the engine cover and check for salt residue, which means water got in. Wipe down electrical connections and spray them with a corrosion inhibitor.
Secure and Assess Equipment
Make sure all deck gear is still fastened. Check that your navigation lights, VHF radio, and GPS chartplotter power on. Test your bilge pumps again—they've been working overtime, and the float switches can jam with debris.
When to Call for Help
If you find water in the engine oil (the oil on the dipstick looks milky), fuel contamination (water in the fuel filter after the storm), or any electrical burning smell, do not start the engine. Call a marine mechanic or contact the Coast Guard if you're in immediate danger (flooding, fire, or sinking).
For non-emergency mechanical issues, consult a certified technician. The USCG Boating Safety Division offers free Vessel Safety Checks, which can catch problems you might miss.
Go/No-Go Decision Guide
Use these checks to decide if it's safe to leave the dock:
- Water in the fuel filter: Do not leave until the tank is drained and refilled.
- Battery below 12.4V: Charge it fully or replace it.
- No tell-tale stream or weak stream: Fix the impeller or intake blockage.
- Belt deflection over 1/2 inch: Tighten or replace the belt.
- Any fluid leak that wasn't there before: Trace and repair the leak.
- Unusual engine noise during test run: Diagnose the noise before heading out.
If any of these fail, cancel or delay the trip until the repair is done.
Resources for Further Training and Information
Engine prep is just one piece of storm-season readiness. You also need to know how to navigate in heavy weather, secure the boat at the dock, and handle emergency communications.
Boating Safety Courses
Take a NASBLA-approved boating safety course. Organizations like Boat-Ed and Drive A Boat USA offer online and in-person training that covers navigation, storm-avoidance strategies, and emergency procedures. These courses are often required for licensing in many states and are a legal requirement for operators born after certain dates.
Weather and Navigation Apps
Download Wavve Boating or a similar marine weather app that provides real-time radar, wave height forecasts, and NOAA alerts. A dedicated GPS chartplotter with offline maps is better than relying on your phone, especially if cell service drops during a storm.
US Coast Guard and NASBLA
The US Coast Guard Boating Safety Division is the primary authority on US boating regulations and safety standards. The National Association of State Boating Law Administrators (NASBLA) works with the Coast Guard to promote consistent boating laws across states, focusing on operator education and enforcement. For official information on legal requirements—such as life jacket use, which is federally mandated—check the USCG and NASBLA websites.
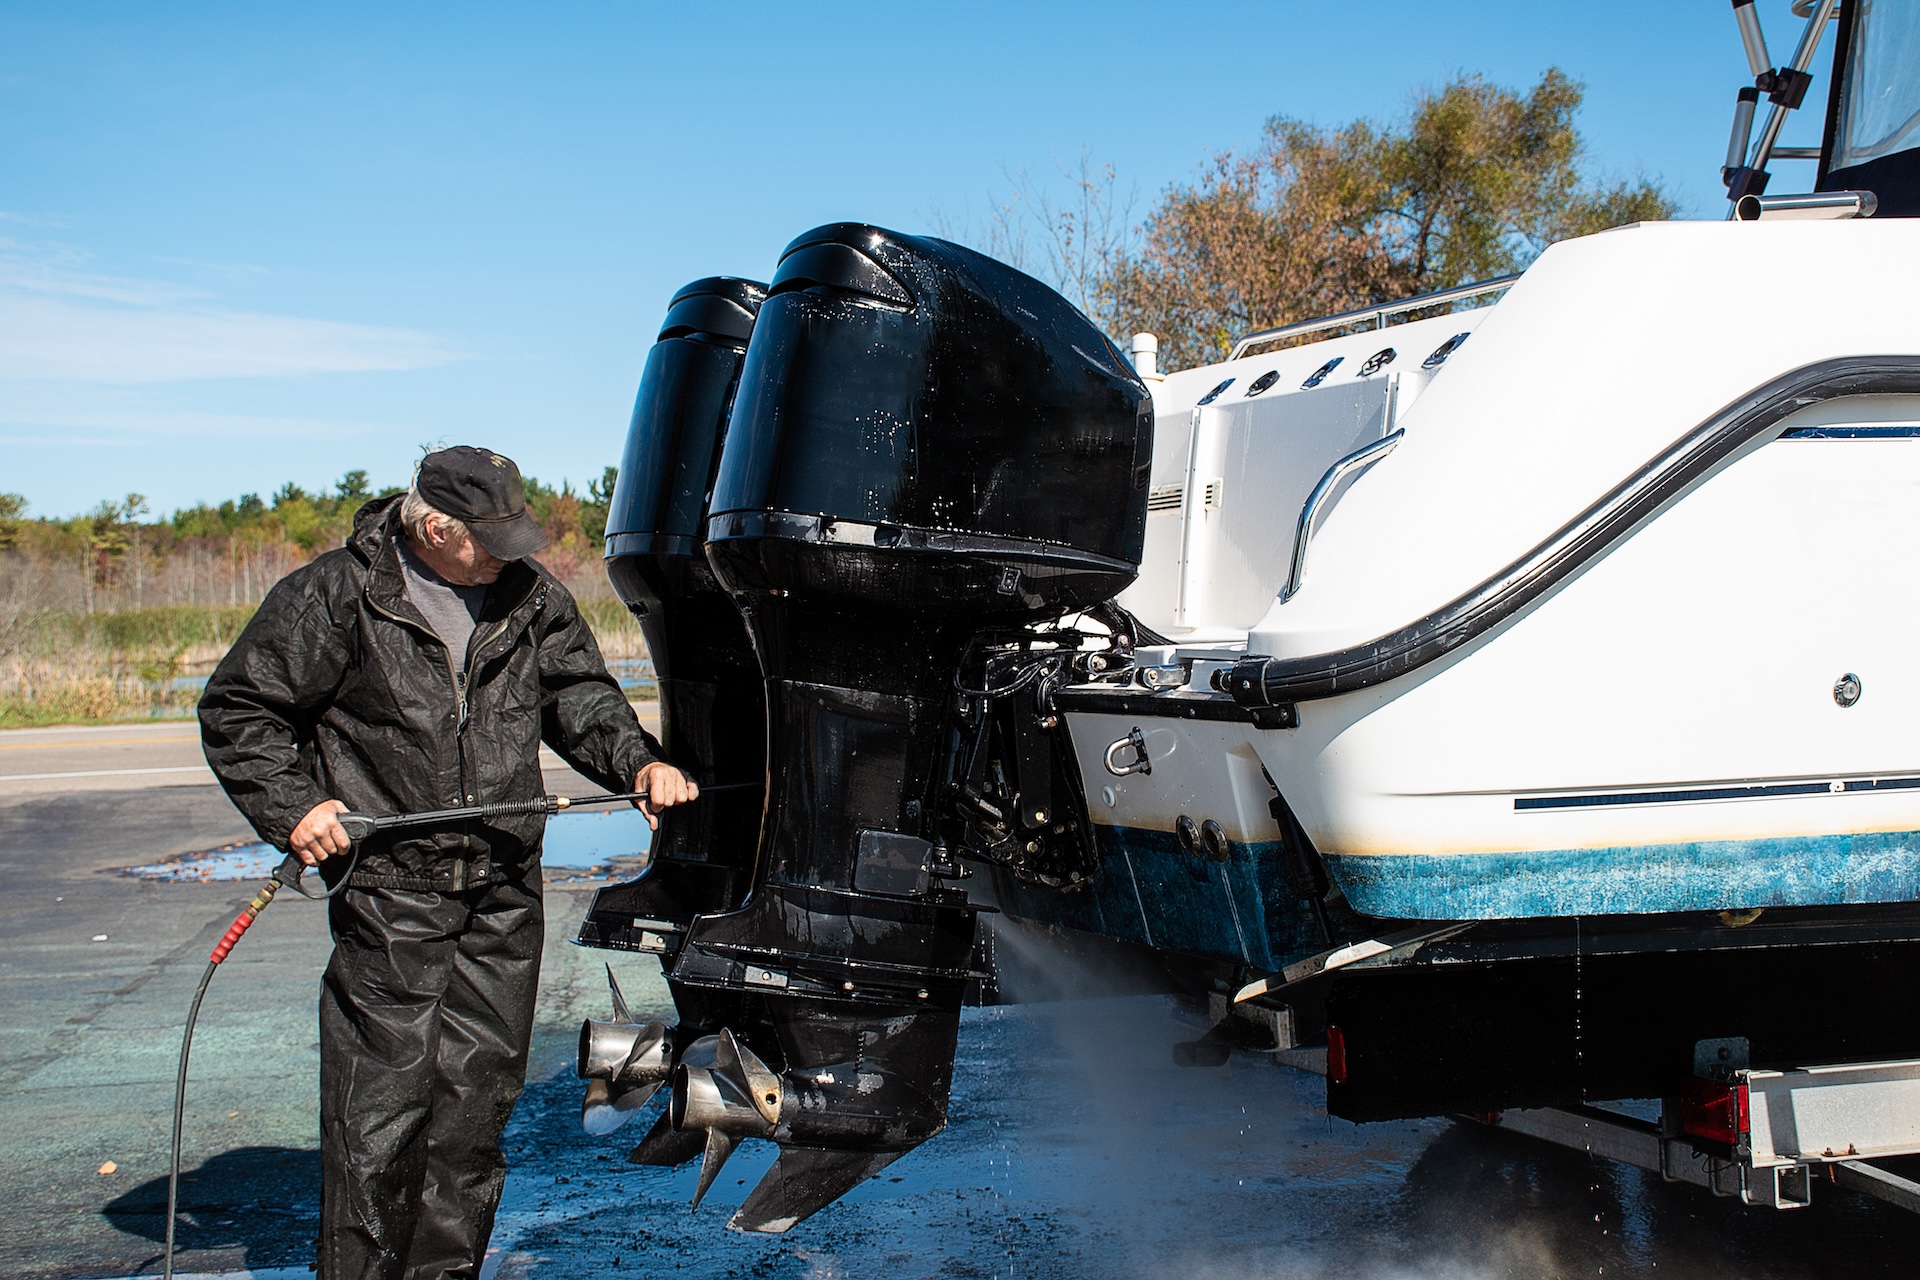
Trailer Boaters: Additional Storm Prep

If you pull your boat out of the water for storage during storm season, take these extra steps:
- Remove the lower-unit drain plug and let all water drain from the gearbox.
- Strap the boat down to the trailer frame using ratchet straps, not just the winch.
- Disconnect the battery and store it indoors or in a weatherproof box.
- Cover the engine with a breathable tarp or engine cover—don't use plastic, which traps moisture and promotes rust. For more on engine covers and winter care, see our Engine Covers and Why They Matter in Winter article.
Cold-Weather Storm Prep
If you're in northern waters and prepping for fall or winter storms (nor'easters, early freezing), add antifreeze considerations:
- Drain or winterize the freshwater cooling system per your engine manual.
- Run non-toxic marine antifreeze through the raw-water system if the boat will sit in sub-freezing temps.
- Pull the battery and store it in a heated space; cold batteries lose 30–50% of their cranking power.
Check our Using Antifreeze for Outboard Winterization: Necessary or Not? for detailed guidance.
Quick Storm Prep Checklist

Outboard Engines:
- Fuel stabilizer added
- Battery 12.6V or higher
- No leaks (oil, fuel, water)
- Oil and gearbox fluid topped off
- Impeller vanes intact
- Fuel filter clean, no water
- Intake screens clear
- Strong tell-tale stream at startup
- Alternator charging (13.8–14.4V)
- Bilge pumps working
Inboard/Sterndrive Engines:
- All of the above, plus:
- Seawater strainer basket clean
- Raw-water intake seacock open (for running) or closed (for storage)
- Heat exchanger end caps dry, no corrosion
- Coolant level correct (freshwater systems)
- Exhaust outlets plugged if trailering or in surge zone
Storm Storage Mode:
- Fuel tank full
- Engine vents sealed
- Exhaust outlets plugged
- All seacocks closed (except bilge pump feed if hardwired)
- Shore power disconnected
- Battery removed or fully charged
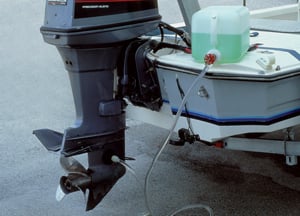
Pro Tip for Engine Longevity
Flush your engine with fresh water after every single saltwater run. Connect a flushing muff to the lower-unit intakes on an outboard, or use the raw-water flush port on an inboard, and run the engine for 5–10 minutes. This dissolves salt crystals before they build up in the cooling passages and prevents your thermostat from seizing. It's the simplest maintenance task that prevents the most failures. For more on flushing and thermostat maintenance, visit Thermostat Maintenance: Keeping Your Outboard Running Cool.
Sources: