


Evinrude E-TEC Engine Codes: Understanding Fault Indicators
- EMM LED Indicators and What They Actually Mean
- Diagnostic Software and Cable Setup
- Static Testing – Engine Off Diagnostics
- Dynamic Testing – Engine Running Diagnostics
- Critical Sensors and Fault Ranges
- Decoding Specific Fault Codes
- Clearing Codes and Lockouts
- Advanced EMM Functions
- SystemCheck Gauges and NMEA 2000 Integration
- Tools and Equipment Checklist
- Quick Reference: LED to Fault Code Cross-Check
- OEM vs. Non-OEM Sensors and Parts

When your E-TEC starts throwing codes or the EMM LEDs light up, you need to know what the engine's trying to tell you. I've been wrenching on these for 20 years, and the first thing people get wrong is treating fault codes like some magic answer key. They're not. The EMM reports what a sensor sees, not why it's seeing it. Code 51 says injector #1 circuit is open—could be a corroded connector, a chewed wire from a rat, or the injector itself. The code just points you to the circuit.
EMM LED Indicators and What They Actually Mean
Your E-TEC's Engine Management Module has four LEDs. They're your first diagnostic tool, and you don't need a laptop to read them. Here's what each one monitors:
LED 1 – Charging System: This watches the 55V alternator output and 12V battery circuit. If it's lit, check the stator, rectifier, or battery connections. We see corroded battery terminals trigger Code 26 (low voltage) constantly—voltage drop from a bad crimp will fool the EMM into thinking the charging system's dead. Before digging into complex electrical diagnosis, consider cleaning battery terminals as explained in our guide on Troubleshooting Low Voltage & Power Loss on Pontoon Boats.
LED 2 – Injector and Ignition Circuits: Covers fuel injectors, ignition coils, and fuel pump. A steady light here usually means an injector circuit fault (Codes 51-56 for open, 61-66 for shorted) or ignition primary circuit issue (Codes 81-86). If the engine's running rough and LED 2 is on, you've likely lost a cylinder.
LED 3 – Sensor Circuits: This is the catch-all for the 5V reference circuits feeding most sensors. Throttle position sensor (TPS) faults live here—Codes 12, 13, 14. Also barometric pressure, air temp, and EMM internal temp sensors. If LED 3 flashes during startup and stays on, pull codes immediately.
LED 4 – Overheat and Oil System: The critical one. This monitors engine temperature sensors, oil pressure switch, and oil injection pump. Code 31 (engine temp over range) shuts the engine down hard at 248°F. Code 33 (no oil detected for 5 hours cumulative) does the same. If this light's flashing and you're still running, shut down. We've torn apart powerheads that ignored this warning. If you're dealing with overheating, you might want to read related advice on Unclogging a Blocked Outboard Cooling Water Intake to ensure cooling water flow is optimal.
Diagnostic Software and Cable Setup
You need three things to pull codes: a Windows laptop (7, 10, or 11—avoid Vista), Evinrude Diagnostics software version 4.0 or later, and a diagnostic cable with an FTDI chipset. The cheap knock-off cables with generic chipsets won't communicate reliably. You'll fight driver issues and random disconnects.
The diagnostic port is a 4-pin connector, usually zip-tied to the wiring harness near the EMM or tucked under the engine cowling. On newer G2 engines, it's more accessible. Plug the cable into the port, connect USB to your laptop, and launch the software. It'll auto-detect the EMM if the connection's solid. If it doesn't, check the cable—most "won't connect" issues are bad cables, not bad EMMs.
Once connected, the software displays program info, stored faults, hard faults (currently active), and persistent faults (history log). The Help section inside the software is worth reading—it breaks down each code and lists voltage/resistance specs for sensors. Use it.
Critical Detail: When buying a used boat, pull the persistent faults log. Sellers clear active codes all the time. Persistent faults show you if the engine's been repeatedly overheated or run with oil system faults. We caught a guy selling a "low-hour" rig with 47 instances of Code 31 in the history. That powerhead had been cooked.
Static Testing – Engine Off Diagnostics
Static tests check circuits with the engine off. You're verifying electrical integrity—resistance, continuity, shorts to ground. The software walks you through each test.
Fuel Injector Static Test: Measures injector coil resistance. Should be in spec per the service manual (typically 10-15Ω depending on model). An open circuit (infinite resistance) or dead short (near 0Ω) means the injector's toast. This won't tell you if it's clogged, just if the coil's electrically functional.
Ignition Circuit Test: Checks continuity in the primary ignition wiring to each coil. A break here means no spark to that cylinder.
Oil Injection Pump Test: Tests pump motor resistance (usually 2-3Ω). If it's open, the pump won't run. Code 34 logs this.
Fuel Pump Static Test: Verifies the lift pump motor circuit. It won't tell you if the pump's delivering pressure, just if the electrical circuit's intact. You need a fuel pressure gauge for flow testing. For further understanding of fuel pump symptoms and testing, see our guide on Identifying a Bad Fuel Pump: Symptoms to Watch For.
Dynamic Testing – Engine Running Diagnostics
![]()
Dynamic tests run with the engine on. This is where you see real-world performance issues.
Injector Disabling Test: The software can kill individual injectors while the engine idles. If you disable injector #3 and the RPM barely drops, that injector wasn't doing much. Either it's clogged, starved of fuel pressure, or the cylinder has a compression problem. A healthy cylinder should cause a noticeable RPM drop (roughly 100-150 RPM at idle) when its injector is disabled.
Ignition Disabling Test: Same principle—disable ignition to one cylinder at a time. If killing the spark to cylinder #2 doesn't affect idle quality, that cylinder wasn't firing anyway. Points you toward coil, plug, or fuel delivery to that cylinder.
Oil Prime Test: Forces the oil injection pump to run at a high rate temporarily. Use this after replacing the pump or oil lines to purge air. The E-TEC oil system is self-bleeding, but priming speeds it up. For XD100 oil, you need to program the specific oil ratio into the EMM—it's different from the TC-W3 default. Running XD100 on a TC-W3 setting dumps too much oil and fouls plugs. Running TC-W3 on an XD100 setting starves the engine of oil—we've seen scored cylinder walls from this. For a full troubleshooting guide on two-stroke oil systems, see our Two-Stroke Oil Injection Troubleshooting Guide to maintain reliable lubrication.
Critical Sensors and Fault Ranges
Crankshaft Position Sensor (CPS): The big one. If this fails, the engine won't start or will die immediately. The CPS tells the EMM crankshaft position and RPM—without it, there's no timing reference. Air gap spec is 0.036" to 0.110". Too tight and it drags on the flywheel; too loose and the signal's weak. Check the air gap with feeler gauges if you're getting intermittent no-starts.
Throttle Position Sensor (TPS): Mounted on the throttle body. Voltage range is 0.15V to 4.925V. Code 12 is a circuit fault (broken wire, bad ground). Code 13 is below range (stuck closed or bad sensor). Code 14 is above range (stuck open). TPS calibration is critical—if it's off, the EMM won't know actual throttle position. You calibrate it through the software under "Service Functions." Symptoms of a bad TPS: erratic idle, poor throttle response, or the engine thinking it's at WOT when it's at idle (triggers Code 57).
EMM Temperature Sensor (Internal): Monitors EMM case temp. Code 29 is EMM over-temp (above 212°F). The EMM won't restart until it cools. Usually caused by poor ventilation around the EMM mounting location or running in extremely hot engine compartments. We've seen this on center console boats where the EMM's mounted inside a tiny splashwell box with zero airflow.
Engine Temperature Sensors: Port and starboard sensors (dual sensor setup on V4/V6 engines). Normal operating range is roughly 122°F minimum to 248°F max. Code 31 (over-temp) triggers shutdown at 248°F to protect the powerhead. Code 58/59 are below-range codes—engine didn't warm up in 10 minutes. Usually means a stuck-open thermostat or a blocked tell-tale (pee stream). One guy had a pebble lodged in his tell-tale discharge tube—water pressure was fine, but the blockage caused a back-pressure spike that confused the temp sensor. If you need tips on thermostat inspection and replacement, our guide on How to Replace the Thermostat on Your Yamaha F225, F250, or F300 is helpful despite different motor models.
55V and 12V Circuits: Code 17 is 55V below range (weak stator output). Code 18 is above range (failed rectifier). Codes 26/27 are 12V battery circuit faults. Code 26 (below range) triggers at roughly 11.5V—check battery connections and charge state before condemning the stator. We've replaced perfectly good stators because someone didn't clean the battery terminals first.
Oil Pressure Switch: The E-TEC uses a low-pressure oil feedback signal to confirm the oil pump is running. Code 38 is "oil pressure feedback not detected." Code 71 is a circuit fault. This isn't a high-pressure switch like in a four-stroke—it's just confirming oil is circulating. If you get persistent Code 33 (no oil fault after 5 hours), the pump's either not running or the feedback switch failed.
Decoding Specific Fault Codes
Here are the codes we see most often and what they actually mean in the field:
Code 11: General system check failure. This is vague on purpose—it usually means the EMM detected something outside normal parameters during the self-test, but it doesn't fit a specific code category. Check all sensor readings in the software's live data screen.
Code 12, 13, 14 (TPS Faults): Code 12 is a wiring issue—broken wire or bad ground. Codes 13 and 14 are sensor out-of-range. Test TPS resistance: should be 3000-7000Ω depending on throttle position. If it's bouncing or open, replace the sensor. If resistance is steady but voltage is wrong, recalibrate through the software.
Code 16 (General Alternator Code): Not in the standard chart, but we've seen it logged as a charging-related fault on some software versions. Cross-reference with Codes 17/18.
Code 17/18 (55V Circuit Faults): The 55V system powers the injectors and EMM. Code 17 is low voltage—check stator output with a multimeter (AC voltage test). Should be at least 50V AC at idle. Code 18 is overvoltage—usually a failed rectifier allowing AC spikes through.
Code 23, 24, 25 (EMM Temp Sensor): Code 23 is circuit fault (sensor disconnected or shorted). Codes 24/25 are out-of-range. EMM temp sensor resistance at 77°F should be 9000-11000Ω (verify exact spec in your service manual). If the sensor's reading correctly but the EMM's still overheating, improve ventilation.
Code 26/27 (Battery Voltage): Code 26 is low battery (below ~12V sustained). Code 27 is high (above 15.5V). Don't start replacing parts until you've tested voltage at the EMM connector under load. Voltage drop in a corroded battery cable will cause false Code 26s constantly.
Code 31 (Engine Over-Temp): Shutdown code. Engine hits 248°F, EMM cuts fuel. Check cooling water intake screens, impeller (if equipped—most E-TECs are jet-pump cooled via the lower unit), and thermostat. Also check the temp sensor resistance: 9000-11000Ω at 77°F.
Code 33 (Excessive No-Oil Faults): Logs after 5 hours cumulative runtime with no oil pressure feedback. Check oil tank level first (obviously), then test oil pump circuit resistance (2-3Ω). If the pump's good, check the oil pressure switch feedback signal.
Code 34 (Oil Pump Circuit Open): Oil pump motor winding is open. Replace the pump.
Code 38 (Oil Pressure Feedback Not Detected): Pump's running, but EMM isn't seeing the feedback signal. Check the oil pressure switch and wiring.
Code 41, 43 (Port Temp Sensor Faults): Code 41 is circuit fault. Code 43 is over-range (sensor reading too hot). These are the engine block temp sensors on V4/V6 models. Similar resistance specs to Code 31 sensor.
Code 51-56 (Injector Circuits Open): Individual injector coil open circuit. Replace the injector. We've seen salt corrosion eat through injector connectors on coastal boats—clean and seal the connectors before assuming the injector itself is bad. For OEM quality injectors and replacement parts, consider browsing our Evinrude Outboard Motor Parts collection.
Code 57 (High RPM / Low TPS): This is a safety lockout. EMM detected the engine revving high (usually above 3000 RPM) with the TPS reporting low throttle position (like idle). This prevents a stuck-throttle runaway. The engine won't restart until you cycle EMM power (key off, wait 10 seconds, key on) and fix the underlying issue. Usually a misadjusted or failed TPS. Recalibrate TPS first.
Code 61-66 (Injector Circuits Shorted): Injector coil shorted to ground. Replace injector.
Code 67, 69 (Starboard Temp Sensor Faults): Same as Codes 41/43, but for the starboard cylinder bank.
Code 81-86 (Ignition Primary Circuits Open): No continuity in the ignition primary wiring to cylinders 1-6. Check wiring and coil connections.
Code 87, 88, 89 (Exhaust Pressure Sensor Faults): Some E-TEC models monitor exhaust backpressure to detect a clogged exhaust or restricted catalyst (if equipped). Code 87 is circuit fault. Code 88 is below range (possible exhaust leak). Code 89 is above range (clogged exhaust or failed sensor).
Clearing Codes and Lockouts
You clear codes through the diagnostic software. After you've noted which codes are logged, select "Clear Faults" or "Erase Stored Codes" (wording varies by software version). This wipes stored, hard, and soft faults. Persistent faults usually stay logged unless you specifically clear the persistent history—some software versions don't allow this.
Important: Clearing Code 57 (or any hard shutdown code) requires cycling EMM power. Turn the key off, wait 10 seconds, turn it back on. The code clears from immediate memory, but if the problem's still there (like a bad TPS), the code will come right back as soon as you try to start the engine. Fix the problem first.
Advanced EMM Functions
TPS Calibration: Under "Service Functions" in the software, select "Calibrate TPS." Follow the on-screen prompts—usually involves setting throttle to idle, then WOT, then back to idle. The EMM learns the voltage range. Do this after replacing a TPS or if you're getting erratic throttle response.
Timing Verification: You need a timing light and a piston stop tool. This isn't a DIY job unless you're comfortable with precision mechanical measurements. The EMM controls ignition timing electronically, but verifying it against spec (usually 20-25° BTDC at a specific RPM) ensures the EMM and sensors are communicating correctly.
Injector Flow Compensation Programming: When you replace an injector, it comes with a printed flow code (usually stamped on the injector body or on a label in the box). You enter this code into the EMM under "Injector Programming" so the EMM adjusts fuel delivery to match that specific injector's flow rate. Skip this step and you'll get uneven cylinder performance.
Powerhead Break-In Program: New or rebuilt powerhead? Activate the break-in oil program through the software. It increases oil injection ratio for the first 10 hours to ensure extra lubrication during piston ring seating. After 10 hours, disable it or the engine will load up with oil smoke.
EMM Software Updates via Bootstrap Tool: This is dealer-level work. The Bootstrap tool is a separate hardware interface that reflashes the EMM firmware. You need stable 12V power during the update—if voltage drops or you lose connection mid-flash, the EMM bricks. We've recovered a few with secondary bootstrap procedures, but it's a nightmare. Don't attempt this unless you have a battery maintainer connected and know the exact procedure for your EMM version.
EMM Replacement and Data Transfer: Replacing an EMM isn't plug-and-play. You need to transfer engine configuration data (injector codes, TPS calibration, oil type setting, engine serial number, etc.) from the old EMM to the new one using the software's "EMM Transfer" function. If the old EMM is completely dead, you'll need to manually re-enter all data—have your injector flow codes and engine specs ready.
SystemCheck Gauges and NMEA 2000 Integration
The SystemCheck system translates EMM fault codes into gauge warnings. Basic SystemCheck gauges show warning lights: CHECK ENGINE, NO OIL, WATER TEMP/HOT, SENSOR FAULT, etc. Digital I-Command gauges display the actual fault code number on-screen.
The E-TEC communicates via the Modular Wiring System (MWS) harness. For advanced integration, it outputs data over NMEA 2000 (CANbus). Specific Parameter Group Numbers (PGNs) include:
- PGN 127488 (Engine Parameters, Rapid Update): RPM, boost pressure (turbocharged models), tilt/trim position.
- PGN 127489 (Engine Parameters, Dynamic): Oil pressure, temperature, alternator voltage.
- PGN 127505 (Fluid Level): Fuel level, oil tank level (if equipped with sending unit).
Modern chartplotters and MFDs that support NMEA 2000 can display this data. If you're wiring into an NMEA 2000 backbone, use a proper terminator resistor (120Ω) at each end of the network. We've seen weird gauge behavior from improper CAN termination—flickering data, intermittent communication loss, phantom fault codes. Follow NMEA 2000 wiring specs exactly.
Tools and Equipment Checklist
Before you start diagnosing codes, here's what you actually need:
- Laptop: Windows 7, 10, or 11. 4GB RAM minimum. USB port.
- Diagnostic Cable: FTDI-chipset USB-to-4-pin Evinrude adapter. Avoid generic cables.
- Evinrude Diagnostics Software: Version 4.0 or later. Licensed software—some features locked without dealer-level access.
- Digital Multimeter: Fluke or equivalent. Auto-ranging, min 10MΩ input impedance for accurate sensor voltage readings.
- Feeler Gauges: 0.001"-0.050" range for CPS air gap checks.
- Battery Maintainer: For EMM software updates—prevents voltage sag during reflash.
- Service Manual: Specific to your engine model and HP. Lists resistance/voltage specs for every sensor. For service manuals and OEM guides, check the comprehensive Outboard Service Manuals collection available at JLM Marine.
Quick Reference: LED to Fault Code Cross-Check
If you're on the water and see an LED, here's the fastest path to diagnosis:
LED 1 On: Check battery voltage first (should be 12.5V+ at rest, 14V+ running). If low, check battery terminals for corrosion. If voltage is good, check stator output (50V+ AC at idle). Likely codes: 17, 26.
LED 2 On: Engine running rough or down on power. Count cylinders firing by ear or disable injectors via software. Likely codes: 51-56 (injector open), 61-66 (injector short), 81-86 (ignition open).
LED 3 On: Sensor fault. Pull codes immediately—could be TPS (12, 13, 14), temp sensor (23-25, 41, 43, 67, 69), or barometric pressure. Check wiring for chafing or water intrusion first.
LED 4 Flashing: Overheat or oil fault. Shut down the engine. Check tell-tale stream (should be strong steady stream). Check oil tank level. Likely codes: 31 (overheat), 33/34 (oil system).
No LEDs, Won't Start: Check 10A EMM fuse (usually near the starter solenoid or in the main fuse block). If fuse is good, check power and ground to EMM connector.
OEM vs. Non-OEM Sensors and Parts
The parts market for E-TEC sensors ranges from junk to factory-spec quality. OEM Evinrude sensors are reliable but expensive—you're paying for the BRP logo on the box. Budget aftermarket sensors (the $15 TPS or $20 temp sensor from random sellers) fail fast. The potting compound cracks, moisture gets in, and they short out within months, especially in saltwater.
Quality non-OEM exists. Some manufacturers produce E-TEC sensors in the same factories that supply BRP, using identical specs but without the branding markup. JLM Marine sensors, for example, are factory-spec parts at a fraction of OEM cost. You get the same resistance curves, the same temperature coefficients, the same connector quality—just without paying dealership pricing. We've installed hundreds of them with zero comebacks.
The key is knowing the source. If a sensor listing doesn't specify resistance values, operating temp range, and connector type, skip it. Cheap sensors cause more diagnostic headaches than they're worth—you'll spend more time chasing phantom codes than you saved on the part.
Check your oil tank level once a week. The E-TEC's oil system is reliable, but if the tank runs dry, the pump runs dry, and you'll score cylinder walls before Code 33 even logs. Top off the tank before it hits the "Add Oil" mark. For reliable oil injection pump parts, see the Evinrude Fuel Pump Kit collection.
For more detailed troubleshooting tips and genuine parts to keep your Evinrude motor running in top shape, explore the full range of offerings at JLM Marine.
Для владельцев Johnson:
Мы надеемся, что следующие ресурсы окажутся полезными для вас в обслуживании и ремонте ваших судовых двигателей:
- Руководство по серийным номерам Johnson
- Официальное руководство по номерам моделей в формате PDF от BRP
-
Детали подвесных лодок Johnson от JLM Marine
- Термостат Джонсона
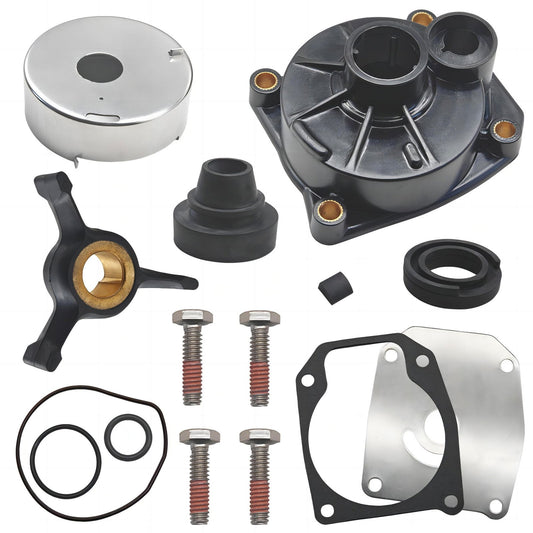
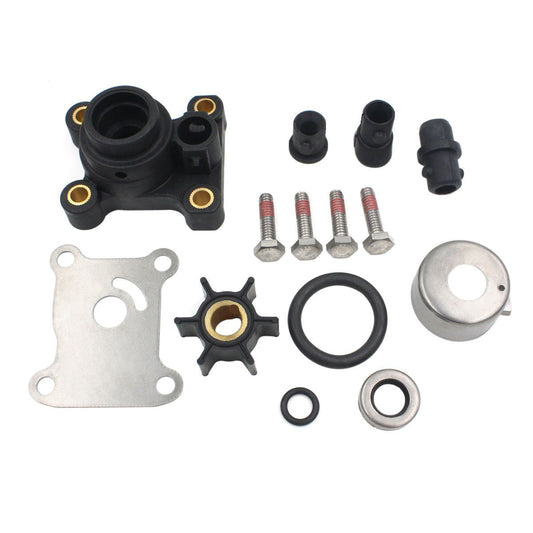
- Водяной насос Джонсона
- Рабочее колесо насоса Johnson Water
- Комплект крыльчатки для водяного насоса Johnson
- Джонсон Карбюратор
- Комплект для ремонта карбюратора Johnson
- Соединитель топливопровода Джонсона
- Топливный фильтр Джонсона
- Джонсон Топливный Насос
- Комплект топливного насоса Johnson
- Фильтр масла Джонсона
- Сальник Джонсона
- Джонсон Гаскет
- Джонсон Релей
- Джонсон Трим Отправитель
- Провод свечи зажигания Джонсона
- Джонсон Аксессуары
О компании JLM Marine
Основанная в 2002 году, компания JLM Marine зарекомендовала себя как специализированный производитель высококачественных морских деталей, базирующийся в Китае. Наша приверженность совершенству в производстве заслужила нам доверие ведущих мировых морских брендов.
Как прямой поставщик, мы обходим посредников, что позволяет нам предлагать конкурентоспособные цены без ущерба качеству. Такой подход не только поддерживает экономическую эффективность, но и гарантирует, что наши клиенты получают наилучшую ценность напрямую от источника.
Мы рады расширить свое присутствие через розничные каналы, предлагая наш опыт и приверженность качеству непосредственно владельцам и любителям лодок по всему миру.
Распродажа деталей Johnson
- $50.99
$59.00- $50.99
- Unit price
- per
- $26.80
- $26.80
- Unit price
- per
- $17.39
$22.50- $17.39
- Unit price
- per
- $39.98
$45.00- $39.98
- Unit price
- per
- $26.90
- $26.90
- Unit price
- per


- $21.99
$24.00- $21.99
- Unit price
- per
- $24.80
- $24.80
- Unit price
- per
- $15.99
$13.00- $15.99
- Unit price
- per

- $18.99
$15.00- $18.99
- Unit price
- per

- $43.00
- $43.00
- Unit price
- per

- $138.00
- $138.00
- Unit price
- per
- $24.80
$45.00- $24.80
- Unit price
- per
- $32.00
$38.00- $32.00
- Unit price
- per
- $42.00
$42.00- $42.00
- Unit price
- per

- $32.50
- $32.50
- Unit price
- per
- $64.80
$82.00- $64.80
- Unit price
- per
- $41.85
$44.00- $41.85
- Unit price
- per

- $39.99
$46.00- $39.99
- Unit price
- per

- $134.40
$145.00- $134.40
- Unit price
- per
- $42.00
$39.00- $42.00
- Unit price
- per