


Choosing the Right Fuel Filter Element for Your Yamaha Outboard
- Understanding Yamaha Outboard Fuel Filters and Their Importance
- The Real-World Impact of Filter Negligence: A Cautionary Tale
- Types of Yamaha Fuel Filters and Their Locations for F-Series 40-300hp Outboards
- Yamaha Filter Maintenance Comparison Across Popular Models
- How to Replace Yamaha Outboard Fuel Filters: Step-by-Step Instructions
- Best Practices for Yamaha Fuel System Maintenance in Various Climates
- Printable Yamaha Outboard Fuel Filter Maintenance Checklist
- Where to Buy Genuine Yamaha Fuel Filters and Parts
- What To Do If Filter Replacement Doesn't Solve Your Problem
- Frequently Asked Questions About Yamaha Fuel Filters
- Conclusion: The Long-Term Value of Proper Fuel Filtration
- References and Resources

It's a beautiful day out on the water, the engine is humming along, and then suddenly, with a cough and a splutter, that perfect day takes a nosedive. For many of us, the culprit behind such a disheartening experience is often overlooked: a clogged fuel filter. I've personally been stranded more times than I care to admit in my younger days, convinced it was some complex mechanical failure, only to discover the simple, fixable issue of fuel starvation caused by a dirty filter. It's a harsh but valuable lesson that investing a little time and money into preventative maintenance can save you a world of trouble, and a hefty repair bill.
The sad reality is that marine fuel systems are constantly battling contaminants. From rust flakes in fuel tanks to water ingress and the ever-present concern of ethanol sludge breaking down older components, your Yamaha outboard's fuel system is a battlefield. Without robust filtration, these unwelcome guests can wreak havoc, directly impacting engine performance, efficiency, and ultimately, its longevity. This is where understanding and maintaining your fuel filters becomes not just a suggestion, but a necessity.
That's why this guide is designed to be your go-to resource for everything related to Yamaha outboard fuel filters. We'll dive deep into why these components are critical, break down the different types and their specific jobs, provide clear, step-by-step instructions for replacement, and equip you with the best practices to keep your engine running like a dream for years to come. By the end, you'll have the knowledge to confidently choose the right filters, perform essential maintenance, and understand precisely what's involved in keeping your Yamaha's fuel system pristine.
Here's what we'll cover:
- The crucial roles of fuel filters in protecting your Yamaha outboard from common contaminants.
- An in-depth look at the various types of Yamaha fuel filters and where to find them.
- Detailed, step-by-step instructions for replacing your fuel filters.
- Essential best practices for maintaining your Yamaha's fuel system.
- Guidance on purchasing genuine Yamaha fuel filters and why it matters.
By understanding and implementing these insights, you're not just maintaining an engine; you're safeguarding your investment and ensuring countless more enjoyable days on the water. For a deeper dive into maintaining your Yamaha outboard system comprehensively, you can explore the JLM Marine HUB.
Understanding Yamaha Outboard Fuel Filters and Their Importance

Let me tell you, the sheer amount of gunk that can find its way into marine fuel is astounding. I remember one time helping a friend troubleshoot his sputtering Yamaha. We opened up the fuel separator bowl, and it looked like a mud puddle had formed in there – a mix of rust, what looked like tiny bits of decaying rubber, and a slick film that could only be water. It was a stark reminder that fuel doesn't just magically appear clean and pure in your engine's combustion chamber.
Fuel filter roles in Yamaha outboards: Why multiple filters are necessary to protect your engine
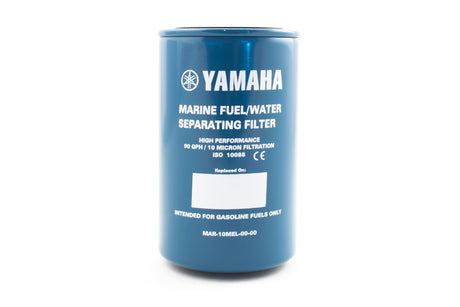
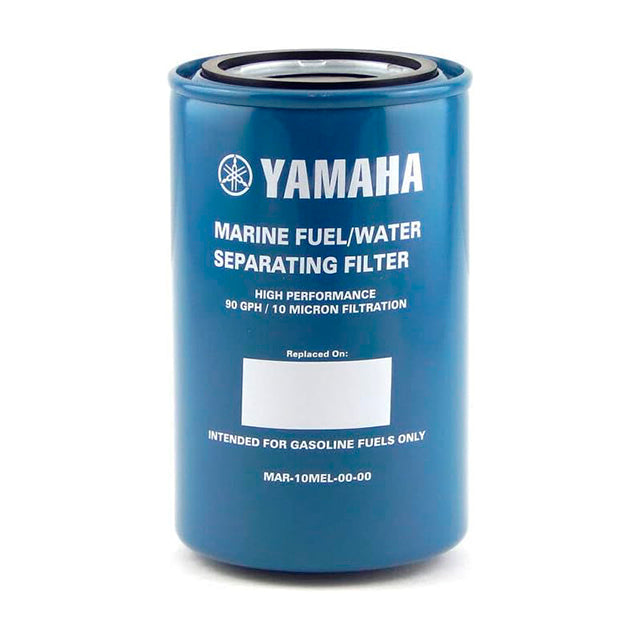
Your Yamaha outboard doesn't rely on just one filter; it employs a sophisticated multi-stage filtration system. This layered approach is designed to progressively remove increasingly finer contaminants, ensuring the cleanest possible fuel reaches the critical components. I see it like a series of security checkpoints for your engine. The first line of defense is the robust 10-micron fuel/water separating filter, which is typically installed before the fuel even reaches the engine. Its primary job is to capture larger debris like rust, sediment, and, crucially, water. Water in your fuel system is a nightmare, leading to corrosion and poor combustion.
Following this initial barrier, you have primary on-engine fuel filters, often accompanied by a small water trap. These act as a secondary line of defense, catching anything that might have slipped past the first filter, and providing a visual indicator of water presence. If water shows up here, it's a strong signal that the upstream filter needs attention. Then there are the often-overlooked Vapor Separator Tank (VST) filters and fuel injector screens. These are the final guardians, protecting the ultra-fine tolerances of fuel injectors and the VST itself from the smallest particles and any residual moisture. Neglecting any stage in this filtration journey can have significant consequences. For maintenance procedures involving fuel system components, including filters, check out the Yamaha Fuel Filter collection at JLM Marine.
Common contaminants in marine fuel: Rust, water, ethanol sludge and their effects
Honestly, the cocktail of contaminants found in marine fuel can be quite unsettling. I've seen firsthand how rust flakes from aging fuel tanks or fuel lines can clog filters in mere hours. Then there's water. Whether passively absorbed from humid air or intentionally introduced, water is a major adversary. It doesn't burn, it causes corrosion, and it can freeze in colder temperatures, blocking fuel flow entirely.
Perhaps one of the most insidious problems we face today is ethanol. While it can help with some types of contamination, ethanol-blended fuels can also act as a solvent, breaking down older fiberglass or rubber fuel tanks and lines, creating more particulate matter. It also does a poor job of repelling water; instead, it absorbs it. This moisture-laden ethanol mixture can then stratify, leaving you with water in the bottom of your tank, ready to be sucked into your fuel system. When this contaminated fuel hits your Yamaha outboard, the effects can range from rough idling and reduced power to catastrophic damage to fuel pumps, injectors, and the VST.
How fuel filters improve engine performance and longevity
It's simple, really: clean fuel equals a happy engine. When your Yamaha fuel filters are doing their job, they ensure a consistent, uninhibited flow of clean fuel to the engine. This translates directly to optimal performance – smooth acceleration, consistent idle speeds, and the full power you expect from your outboard. More importantly, by trapping debris and water, these filters prevent microscopic particles from reaching and damaging the delicate components of your fuel injection system, like the precision-engineered fuel injectors and the internal workings of the Vapor Separator Tank (VST). Think of it as preventing sand from getting into a finely tuned watch mechanism. A Yamaha outboard operating on clean fuel will be more fuel-efficient, run cooler, and, most critically, last significantly longer, avoiding costly repairs down the line. For a related tutorial on maintaining your carburetor to complement clean fuel delivery, see the Yamaha Outboard Carburetor Rebuild Tutorial.
The Real-World Impact of Filter Negligence: A Cautionary Tale
I want to share a specific experience that really drove home the importance of fuel filter maintenance for me. Two summers ago, my neighbor Mike called me in a panic. He was stranded about five miles offshore with his family aboard his 24-foot center console, powered by a Yamaha F200. What started as perfect day of fishing quickly turned into a nightmare when his engine began sputtering, losing power, and eventually refused to run above idle speed.
After arranging a tow (to the tune of $450), we investigated the problem back at the dock. Mike swore he'd been diligent with his maintenance, but when we checked his service log, we discovered his 10-micron separator hadn't been changed in over 18 months and roughly 120 engine hours—well beyond the recommended 50-hour interval.
When we removed the filter, the story became crystal clear. The separator bowl contained nearly an inch of water, and the filter element itself was so clogged with a brown sludge that it's a miracle any fuel was getting through at all. Upon further inspection, we found that the ethanol in his fuel had broken down some of the older rubber components in his fuel system, creating a perfect storm of contamination.
The total cost of this oversight? $450 for the tow, a ruined day on the water with disappointed kids, and about $75 in replacement filters (we changed all of them as a precaution). Had the primary filter been maintained properly, this entire situation would have been avoided with a simple $25 filter change during regular maintenance.
What's worse, had Mike continued to run the engine with this level of contamination, he could have faced fuel injector damage costing upwards of $1,500 to repair. This real-world example shows how a small maintenance item can have massive financial and experiential consequences when neglected.
Types of Yamaha Fuel Filters and Their Locations for F-Series 40-300hp Outboards

10-micron fuel/water separating filter: Your first defense against contamination
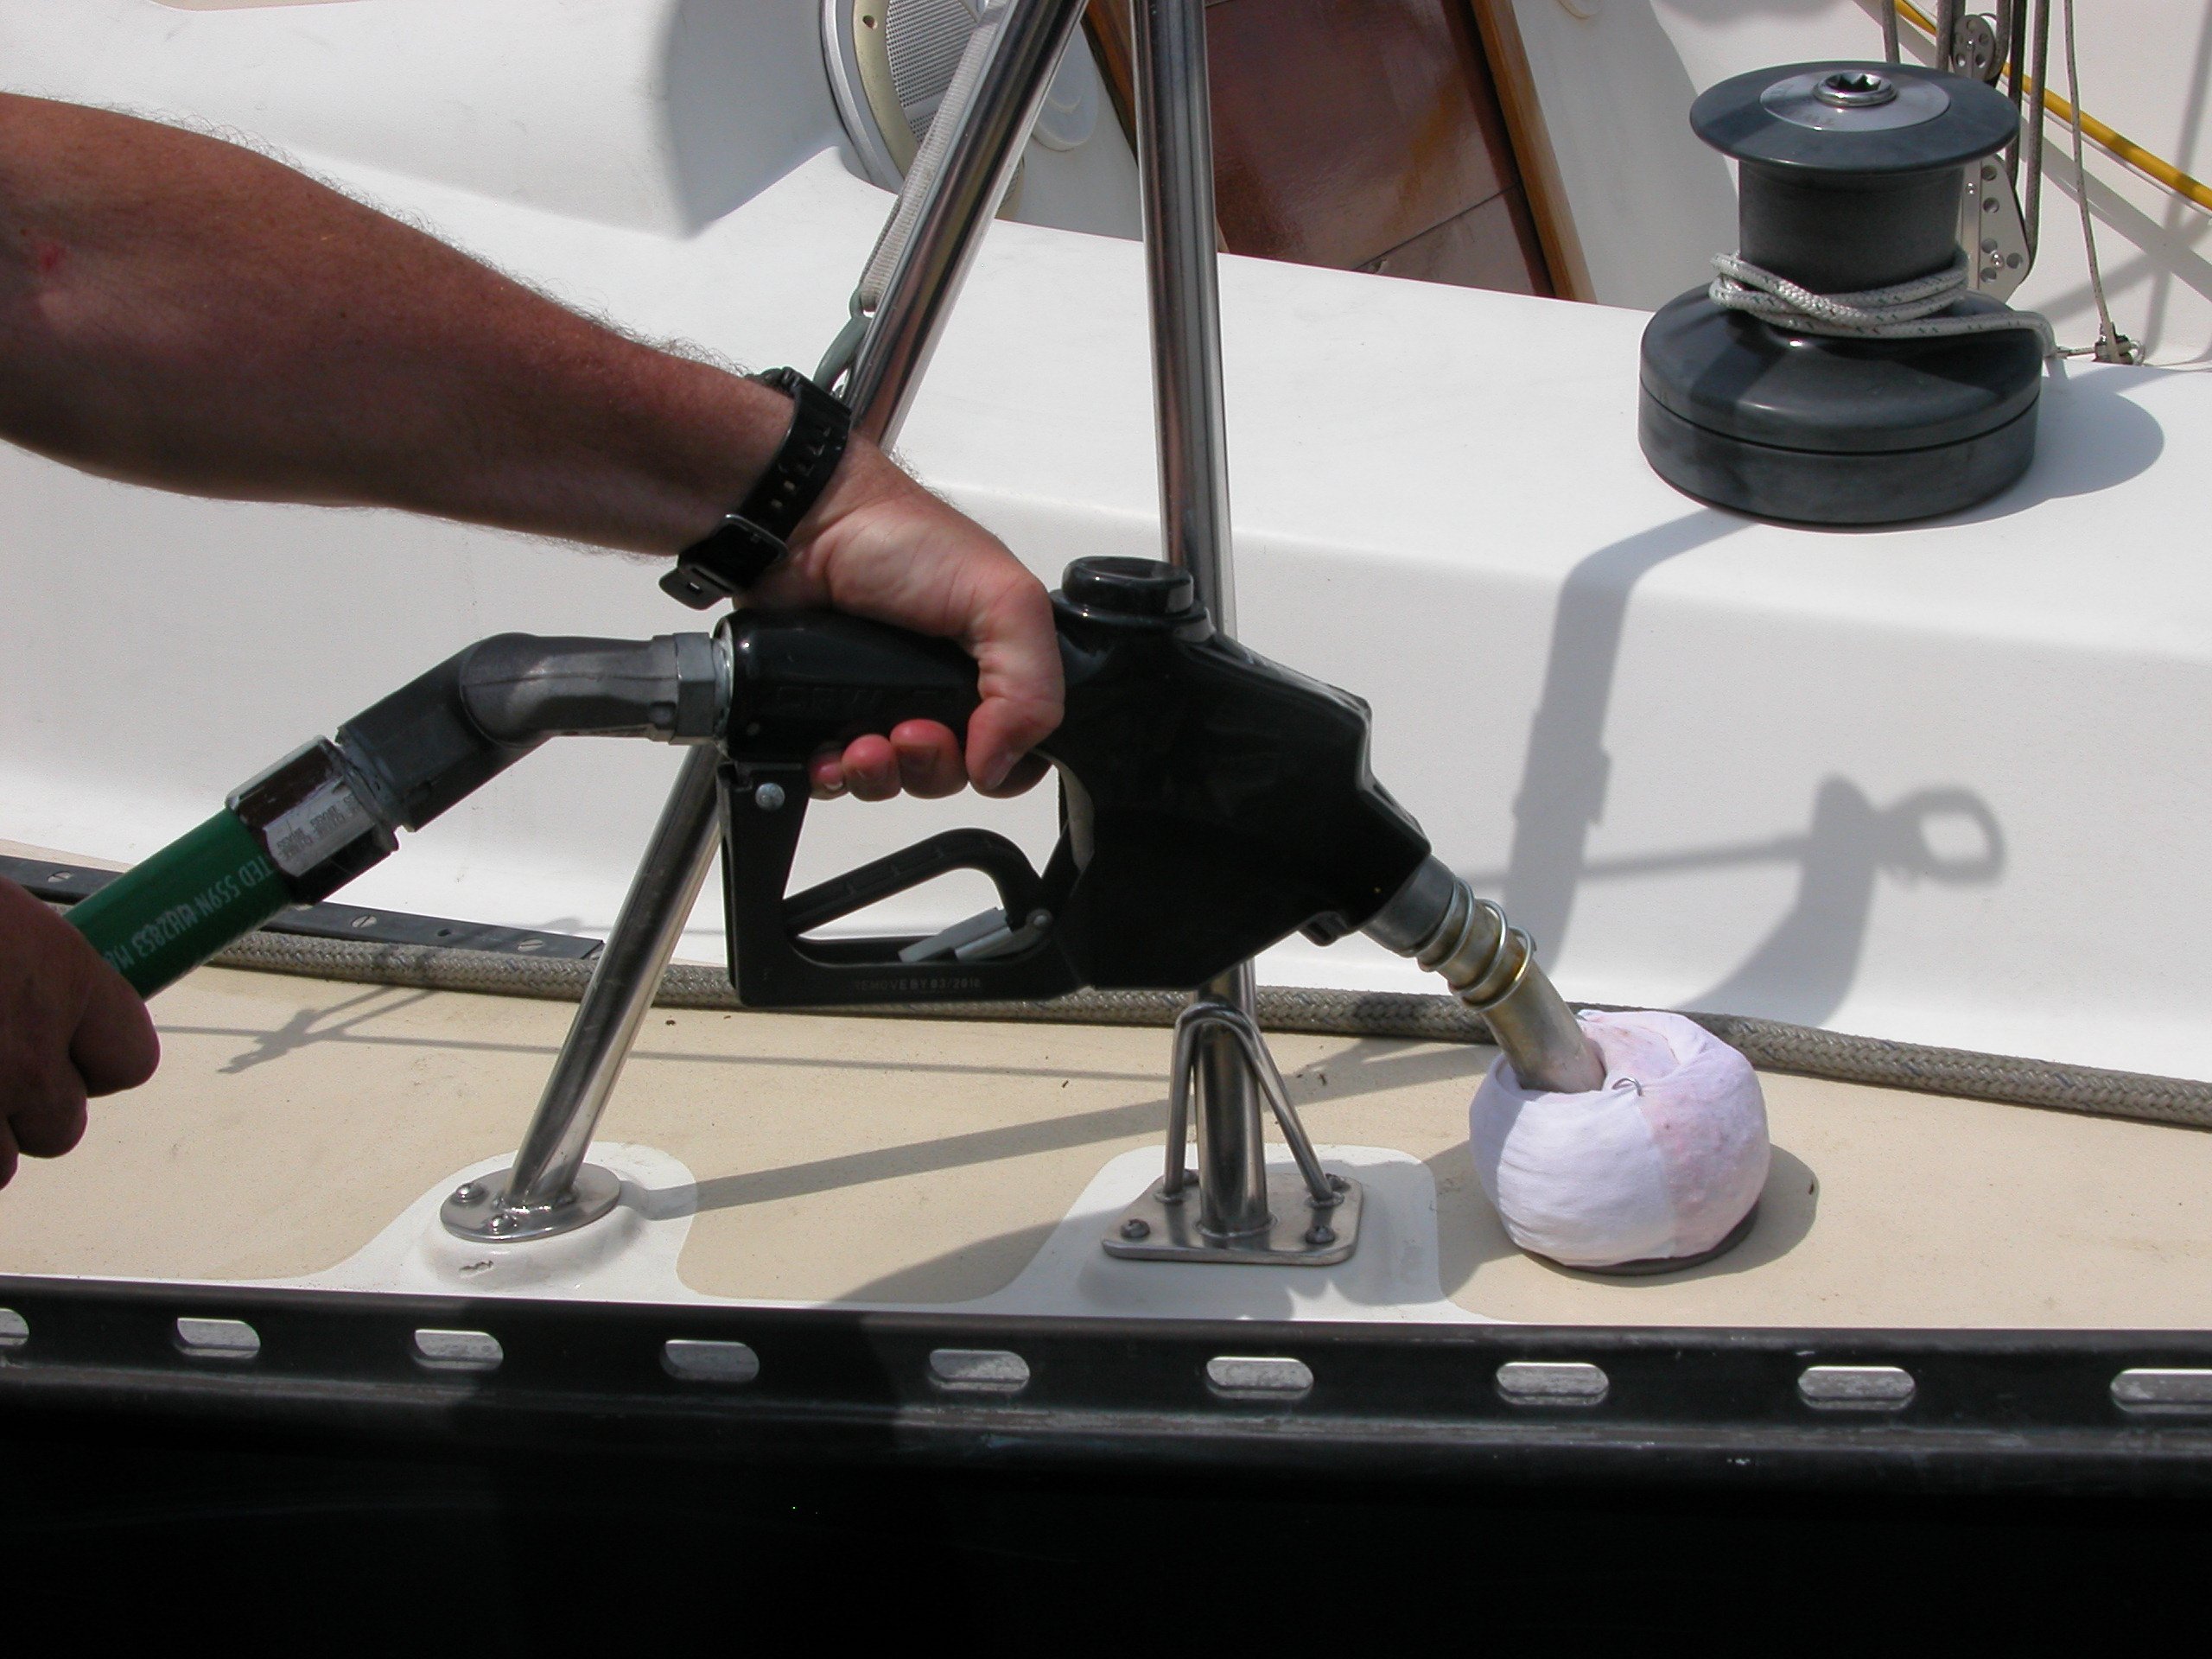
This is the workhorse of your Yamaha's fuel filtration system, and it's critical for protecting your engine, especially when dealing with the complexities of ethanol-laced fuels we often find at the pump. I always opt for these robust filters first. They are typically located between your boat's fuel tank and the outboard itself, often mounted on the port side of the engine or on the main fuel line before it enters the engine. The "10-micron" designation means it can trap particles as small as ten-millionths of a meter, which is incredibly fine. This is your first, most vital defense against rust, sediment, and water.
I've learned that the replacement schedule for this filter is usually around every 50 hours of operation or annually at the start of the boating season, whichever comes first. However, if you ever suspect you've taken on contaminated fuel, or if you notice water in the drainable reservoir at the bottom of the filter, you should replace it immediately. A tell-tale sign it's struggling is a noticeable drop in engine performance, especially under load – sputtering, hesitation, or loss of power.
Primary on-engine fuel filter with water trap: Catching what gets past the first filter
This filter acts as your second line of defense, sitting on the powerhead itself, ensuring that any residue that might have slipped past the main separator gets caught. Its placement is usually quite accessible, often on the front, side, or rear of the engine block. What makes this filter stand out is its built-in water trap, typically at the bottom of a clear or semi-clear housing. Many Yamaha models feature a visible red floating ring within this trap.
I make it a point to check this little red ring diligently. If it's floating, it's a clear indication that water has accumulated in the trap. When you see this, it's not just time to drain the water; it's a strong signal that your 10-micron fuel/water separating filter is either saturated or there's a more significant water contamination issue you need to address. Otherwise, these primary filters are generally recommended for replacement every 100 hours or annually. If you notice any signs of damage or degradation to the housing or the internal components, replacement is also wise.
In-line fuel filters (optional models): Extra protection for suspect fuel
While not all Yamaha outboards come standard with them, some boaters choose to install additional in-line fuel filters. These are small, cylindrical filters that can be plumbed into the fuel line, usually between the primary fuel/water separator and the engine itself, offering another layer of filtration. I've seen them used on older boats or in areas where fuel quality is particularly suspect. Their purpose is to catch any remaining medium-sized debris, offering an extra safeguard for the engine's sensitive fuel system components. If you have one, consult its specific service recommendations, but typically, they follow similar replacement intervals to the primary on-engine filter – around 100 hours or annually.
Vapor Separator Tank (VST) filter: Protecting your fuel injectors
Ah, the VST. This is a critical component in your Yamaha's fuel delivery system, acting as a small reservoir that stabilizes fuel pressure before it's injected into the engine. Inside the VST, there's a fine mesh filter responsible for screening out any remaining tiny particles that could clog your precious fuel injectors. I've heard grim tales from mechanics about entire VSTs being ruined by contaminated fuel, leading to very expensive repairs.
The OEM replacement interval for the VST filter is often cited around 300 hours, but honestly, given the prevalence of fuel contaminants, especially water and ethanol sludge, I'm a firm believer in monitoring this more closely. If you're experiencing fuel delivery issues or notice any anomalies in engine performance, the VST filter is a prime suspect. Neglecting this filter means you're risking not only the VST itself but also the very expensive fuel injectors. I strongly recommend consulting your specific Yamaha outboard's service manual for the exact location and recommended service interval for your model.
Fuel injector screens: The final frontier of filtration
These are really the final frontier in fuel filtration, sitting right at the tip of each fuel injector. They are incredibly fine mesh screens designed to catch the absolute tiniest of contaminants that could potentially clog or distort the spray pattern of the injector. While they are designed to be durable, they are also extremely delicate. I would never attempt to clean these myself; the risk of damaging the injector is just too high, and the cost of replacing damaged injectors far outweighs the cost of professional service.
If your engine is experiencing misfires, rough idle, or a significant loss of power despite addressing the other filters, chances are your fuel injector screens are compromised. The only real option here is typically professional service, where specialized tools and techniques are used to either clean or replace these tiny screens. It's a testament to how crucial the entire filtration chain is, all the way down to these minuscule components.
Yamaha Filter Maintenance Comparison Across Popular Models

Different Yamaha outboard models have slightly different maintenance requirements. Here's a comparison of filter maintenance intervals and locations across several popular Yamaha outboard models:
| Model | 10-Micron Separator Interval | Primary Filter Interval | VST Filter Interval | Special Notes |
|---|---|---|---|---|
| F50–F60 (4-stroke) | 50 hours/annually | 100 hours/annually | 300 hours | Primary filter located on starboard side |
| F75–F90 (4-stroke) | 50 hours/annually | 100 hours/annually | 300 hours | Red floating ring indicator in primary filter |
| F115–F150 (4-stroke) | 50 hours/annually | 100 hours/annually | 300 hours | Higher fuel pressure - filter quality critical |
| F200–F250 (4-stroke) | 50 hours/annually | 100 hours/annually | 300 hours | Multiple VST filters on some models |
| F300–F350 (4-stroke) | 50 hours/annually | 100 hours/annually | 300 hours | Most complex fuel system - professional VST service recommended |
Note that these intervals are general guidelines based on normal recreational use. If you operate in harsh environments (saltwater, high humidity, tropical climates) or use your boat commercially, you should consider more frequent replacements. For more detailed parts information and to source genuine components tailored for your Yamaha model, visit JLM Marine's Yamaha Outboard Motor Parts.
How to Replace Yamaha Outboard Fuel Filters: Step-by-Step Instructions
For me, performing regular maintenance tasks like changing fuel filters is part of the satisfaction of owning a boat. It's empowering to know you can keep your Yamaha running smoothly. While some steps are straightforward, others, like dealing with the VST, might be better left to a professional if you're not comfortable. Always prioritize safety and refer to your specific engine's manual.
Signs it's time to replace your fuel filters
The most obvious indicator that your Yamaha's fuel filters need attention is a tangible degradation in engine performance. I often notice it first as a subtle hesitation when I throttle up, or the engine might just not feel as responsive as it used to. You might experience engine stalls or misfires, particularly at lower RPMs or when trying to accelerate. A noticeable reduction in fuel efficiency is another common symptom. If you see water detected in the filter's trap or that red indicator ring is floating, that's an immediate red flag. In essence, any deviation from its normal, smooth operation is a cue to investigate your fuel system, starting with the filters. Even if you don't notice immediate symptoms, adhering to the recommended maintenance interval breaches – like missing an annual replacement or going well over the recommended hours – is a proactive way to prevent issues.
Tools and materials needed for replacement
Before you start, make sure you have everything ready. For the common 10-micron and primary on-engine filters, you'll typically need:
- Replacement Yamaha OEM fuel filters (or high-quality aftermarket equivalents)
- New O-rings or gaskets (often come with the filters, but check)
- Filter wrench or strap wrench (to loosen stubborn filters)
- Screwdriver or socket set (for any securing clamps or housings)
- Catch pan or rags (to manage spilled fuel)
- New fuel line clamps (if you need to disconnect lines)
- Gloves and eye protection (fuel is flammable and can irritate skin)
- Shop towels or absorbent cloths
- Fuel stabilizer (to apply to new O-rings/threads)
- Small amount of XD30 or similar motor oil (for lubricating O-rings)
When installing new filters, I always lubricate the O-rings with just a bit of clean motor oil or fuel stabilizer. This helps create a good seal and prevents the O-ring from getting pinched or torn during installation. Using stabilized fuel in the system during priming is also a good practice if possible.
Step-by-step guide for replacing the 10-micron fuel/water separating filter
This is usually the most accessible filter you'll tackle.
- Prep: Ensure your engine is off and cool. Place a catch pan beneath the filter assembly to collect any spilled fuel.
- Disconnect: If there's a water sensor or fuel line attached directly to the filter housing, disconnect them carefully. You might need a specific tool or just a small screwdriver to release a clip.
- Remove Filter: Use a filter wrench, if necessary, to unscrew the old filter element. Slowly twist it counter-clockwise. Be prepared for some residual fuel to drip out.
- Drain and Clean: If the old filter has a drainable bowl, empty any accumulated water or fuel into your catch pan. Inspect the bowl for debris. Wipe down the filter mounting surface to ensure it's clean for the new seal.
- Install New Filter: Take your new Yamaha 10 micron fuel filter (or equivalent). Apply a thin film of clean XD30 oil or fuel stabilizer to the rubber gasket on the new filter. This is crucial. Then, thread the new filter onto the mounting head clockwise.
- Tighten: Hand-tighten the filter until the gasket makes contact with the mounting surface, then give it an additional three-quarters to a full turn. Do not overtighten, as this can damage the gasket or filter housing.
- Reconnect: Reconnect any lines or sensors you disconnected.
- Priming: After replacement, you'll need to prime the fuel system. This usually involves turning the ignition key to the "ON" position (without starting the engine) for a few seconds to run the fuel pump and fill the new filter. Cycle this a couple of times until the fuel bulb (if you have one) feels firm. Then, start the engine and let it run for a few minutes, checking for any leaks around the new filter.
Replacing the primary on-engine fuel filter
This process is similar to the main separator, but you're working directly on the powerhead, so be mindful of your surroundings.
- Locate and Prep: Find the primary filter, usually on the engine block. Place a catch pan underneath it to catch any fuel spills.
- Disconnect Lines/Sensors: You might have fuel lines and, as mentioned, a water sensor attached. Carefully disconnect these, noting which line goes where. If there's a water sensor, you'll typically unbolt the filter assembly to access it, or it might be a separate component.
- Remove Old Filter: Unscrew the filter housing or body, usually with a wrench. If it has a water trap, drain it carefully into your catch pan. Many mechanics advise replacing the entire unit or at least the cartridge and seal.
- Inspect and Replace: Clean the housing and mounting area. If it screws into the engine block, ensure the threads are clean. For cartridge-style filters, replace the cartridge and the seal. For standalone units, follow the same installation tips as the 10-micron filter.
- Reassemble: Reattach any sensors or lines you removed.
- Prime and Check: Prime the fuel system again, as described above. Start the engine and check meticulously for any fuel leaks or issues.
Replacing the VST filter and other inline filters
Replacing the VST filter is a more involved process. Because it is internal to the Vapor Separator Tank, it often requires disassembling the tank itself. This can be tricky, and the risk of damaging seals or components is higher if you're not experienced. My recommendation here, based on countless hours of observing mechanics and my own limited experience with VSTs, is: for VST filters and any complex inline systems, it's often best to entrust this job to a certified marine technician. They have the specialized knowledge, tools, and experience to handle these components correctly. Intervals for VST filter replacement are typically around 300 hours, but always refer to your specific Yamaha service manual.
When to seek professional help for fuel injector and screen cleaning
As I mentioned earlier, fuel injector screens are incredibly delicate. If you suspect they are clogged, or if you're experiencing persistent running issues that you can't resolve with fuel filter changes, it's time to call a professional. They have ultrasonic cleaning equipment and specialized cleaning fluids that can effectively remove stubborn deposits without damaging the injectors. Attempting to clean them yourself with generic cleaners or by trying to poke at them is a recipe for disaster. The cost of professional injector cleaning is significantly less than replacing a set of injectors, so it's a wise investment when symptoms point in that direction.
Troubleshooting Yamaha Fuel Filter Issues: Diagnosis Flowchart
When experiencing engine issues that might be fuel-filter related, follow this diagnostic path:
- Engine struggles to start or maintain idle:
- Check primary on-engine filter first
- If water is visible in trap, drain immediately
- Replace filter if more than 100 hours old
- If problem persists → Step 2
- Engine loses power under load or at high RPM:
- Check 10-micron separator for clogging
- Inspect separator bowl for water
- Replace filter element even if it looks clean
- If problem persists → Step 3
- Engine runs rough after filter replacement:
- Check for air in fuel system (soft primer bulb)
- Ensure all filters are properly tightened
- Verify fuel lines are properly connected
- If problem persists → Step 4
- Persistent performance issues despite new filters:
- Consider VST filter replacement (300+ hours)
- Check for fuel tank contamination
- Consider professional fuel injector cleaning
- If all else fails, seek professional diagnosis
This systematic approach helps isolate whether your issue is filter-related or points to a deeper fuel system problem requiring professional attention.
Best Practices for Yamaha Fuel System Maintenance in Various Climates
Beyond just swapping out filters, keeping your Yamaha outboard's fuel system in tip-top shape involves a holistic approach. I've found that focusing on preventative measures is always more rewarding than dealing with the aftermath of neglect.
Regular maintenance schedule and recommendations
Sticking to a schedule is paramount. As a general rule of thumb, I follow these intervals religiously:
- 10-micron fuel/water separating filter: Replace every 50 hours of engine operation.
- Primary on-engine fuel filter: Replace every 100 hours of engine operation.
- VST filter: This is typically recommended for replacement every 300 hours, but I lean towards checking it more frequently, especially if I suspect fuel quality issues.
However, these are just guidelines. If you boat in areas known for poor fuel quality, or if you frequently encounter water, you might need to replace filters more often. Also, using Yamaha recommended fuel additives like Ring Free PLUS is something I strongly endorse. It's designed to keep the fuel system clean, including injectors, and prevent carbon buildup. I've seen a noticeable difference in how smoothly my engine runs when I use it consistently.
Climate-Specific Maintenance Considerations
Your operating environment dramatically impacts your fuel system maintenance needs. Here's how I adjust my approach based on climate:
Saltwater/Coastal Environments (e.g., Florida, Gulf Coast):
- Replace 10-micron filters every 25-30 hours instead of 50
- Check for water in primary filter weekly during humid months
- Use double the recommended amount of fuel stabilizer
- Consider adding an extra inline filter for additional protection
Cold Weather/Northern Climates (e.g., Great Lakes, Northeast):
- Add fuel stabilizer before winter storage without fail
- Replace all filters at the beginning of each season, regardless of hours
- Watch for condensation during temperature swings in spring/fall
- Use fuel water separator additives year-round, but especially during storage
Tropical/High Humidity Environments:
- Invest in a higher-quality 10-micron filter (I prefer metal housings over plastic)
- Check for water in the system after every rainfall if boat is stored outdoors
- Consider a fuel tank ventilation system to reduce moisture intrusion
- Replace filters at 75% of their recommended interval
Brackish Water Environments:
- Check all filters and water traps twice as frequently
- Be vigilant about keeping fuel tanks full to minimize condensation space
- Consider professional fuel system cleaning annually
- Use higher-grade filtration if available for your model
By adapting your maintenance schedule to your specific environment, you'll dramatically reduce the risk of contamination-related issues and extend your engine's life.
Detecting and preventing water contamination
Water is the arch-nemesis of any fuel system. I've become very vigilant about preventing water in marine fuel. Regularly checking the drainable bowl on your 10-micron filter is essential. If you see any accumulation of water, drain it immediately and consider replacing the filter. Keep an eye on that red ring in your primary filter's water trap – if it's floating, it's a clear sign water has entered that stage.
Using a good quality fuel stabilizer that also acts as a water dispersant can be a lifesaver, especially during periods of storage or when you're unsure about the fuel source. Brands like Yamalube offer excellent options for this. Also, when filling up, try to fill your tank at the end of the boating day, leaving minimal air space where condensation can form overnight.
Fuel quality tips
The adage "garbage in, garbage out" is absolutely true for your fuel. I always strive to buy marine-grade fuel from reputable stations. While it might cost a little more, it's often better treated. I also make a concerted effort to avoid storing fuel for long periods, as it degrades over time. If you have fuel left over from last season, it's often best to test it or dispose of it properly. Adding fuel stabilizers to any fuel you store, whether in the boat's tank or in portable cans, is critical. These additives help prevent the fuel from breaking down and absorbing moisture. I also try to avoid ethanol blends when possible, though I know this isn't always an option in some regions.
The Truth About OEM vs. Non-OEM Fuel Filters
I feel strongly about using quality parts, but I also believe in giving you the complete picture about OEM versus non-OEM options. While Yamaha OEM filters are specifically designed for your outboard, there are high-quality aftermarket alternatives worth considering.
In my experience, quality varies tremendously among non-OEM manufacturers. Some aftermarket filters are made in the same factories that produce OEM components, using similar or identical materials and specifications. For example, companies like JLM Marine often manufacture filters that meet or exceed OEM standards, sometimes at a lower price point.
What I've found is that the key factors in filter quality are:
- Material quality (especially gaskets and sealing surfaces)
- Filtration media consistency
- Housing durability
- Precision fit to prevent leaks
I personally prefer OEM for my primary engine filter but have successfully used high-quality aftermarket options for my 10-micron separator with no issues. The most important thing is to avoid bargain-basement, no-name filters that compromise on materials or quality control.
When choosing non-OEM, research the manufacturer, read reviews from other Yamaha owners, and perhaps most importantly, physically compare the aftermarket filter to an OEM one before installation to ensure proper fit and similar construction. To explore a wide selection of quality fuel filters, both OEM and aftermarket, visit the JLM Marine Fuel Filter collection.
Tracking maintenance digitally
In today's world, we have some fantastic tools at our disposal to keep track of maintenance. I've started using the Siren Connected Boat app on my phone, and it's incredibly helpful for logging service intervals. It reminds me when it's time to change filters, perform routine checks, and keeps a digital history of all maintenance performed. Alternatively, keeping a Yamaha maintenance log book, accurately recording hours and dates of service, is equally valuable. This not only helps you stay on schedule but also provides a clear service history, which is great for resale value.
Printable Yamaha Outboard Fuel Filter Maintenance Checklist

Use this simple checklist for regular fuel system maintenance:
Pre-Season Maintenance:
- [ ] Replace 10-micron fuel/water separator filter
- [ ] Replace primary on-engine fuel filter
- [ ] Check VST filter if over 200 hours since last replacement
- [ ] Inspect all fuel lines for cracks or degradation
- [ ] Check primer bulb for proper operation
- [ ] Add fuel stabilizer to tank
- [ ] Run engine to circulate treated fuel
During Season (Every 50 Hours):
- [ ] Inspect 10-micron filter for signs of water or contamination
- [ ] Drain water separator if any water is visible
- [ ] Check primary filter's water trap indicator
- [ ] Replace 10-micron filter
- [ ] Inspect fuel tank vent for proper operation
- [ ] Check all connections for leaks
End of Season/Storage:
- [ ] Replace all external filters regardless of hours
- [ ] Fill fuel tank to 95% capacity
- [ ] Add double dose of fuel stabilizer
- [ ] Run engine 15 minutes to distribute treated fuel
- [ ] Note filter replacement in maintenance log
- [ ] Record engine hours for next season's reference
Keep this checklist in your boat or with your maintenance supplies for quick reference.
Where to Buy Genuine Yamaha Fuel Filters and Parts

I've learned the hard way that not all filters are created equal, especially when it comes to the intricate systems of modern outboards. When I'm looking for parts for my Yamaha, I always prioritize getting the genuine article.
Importance of OEM filters for warranty and durability
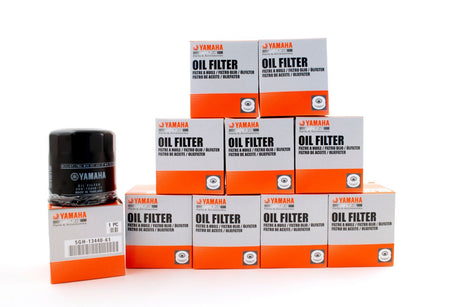
This is a point I can't stress enough. Opting for Yamaha OEM fuel filters isn't just about brand loyalty; it's about ensuring your engine performs as the engineers at Yamaha intended. These filters are designed and tested specifically for your outboard. They undergo rigorous testing to meet stringent marine-grade durability standards and are guaranteed to fit perfectly, preventing leaks or other installation issues. Using aftermarket filters, especially those not from reputable brands, can potentially void your engine's warranty. Even if they seem to fit and function initially, their filtration capabilities or longevity might not measure up, leading to premature wear on your engine's fuel system. It's a small price to pay for peace of mind and engine protection.
Online and dealer purchasing options
You have a couple of reliable avenues for sourcing your Yamaha parts. Authorized Yamaha dealers are always a safe bet. They have knowledgeable staff who can help you match the correct part number to your specific engine model and serial number. If you're like me and prefer the convenience of online shopping, there are excellent online retailers that specialize in Yamaha parts. I've had great experiences finding exactly what I need and getting it shipped quickly. Just ensure you're buying from a reputable source that clearly lists compatibility and offers genuine OEM parts. Sometimes, using manufacturer-provided resources like Yamaha's proprietary parts diagrams can help you identify the exact item you need before you even start browsing. For trusted OEM parts and accessories, check out the JLM Marine Yamaha Fuel Filter collection and related parts inventories.
Carrying spares for emergency replacement onboard
I've made it a habit to always have a spare 10-micron fuel/water separating filter and the necessary primary on-engine filter stowed away in my boat's storage. There's nothing worse than being miles offshore with a clogged filter and having no way to replace it. Having spares onboard can be a literal lifesaver, allowing you to get back to the dock safely or at least continue your journey if the issue is just a clogged filter. It's a simple measure that provides a critical backup for emergency fuel filter replacement.
What To Do If Filter Replacement Doesn't Solve Your Problem
Sometimes, even after replacing all accessible filters, engine problems persist. If you find yourself in this situation, consider these next steps:
- Check for air leaks in the fuel system
- Inspect all connections for looseness
- Look for cracked primer bulbs or fuel lines
- Test with pressurized system to locate hidden leaks
- Consider fuel quality issues
- Have fuel tested for water content and contamination
- If suspect, pump out old fuel and replace with fresh
- Add fuel system cleaner designed for marine applications
- Examine the fuel tank
- Check for debris or water in the tank itself
- Inspect the pickup tube for blockage
- Consider professional tank cleaning
- Seek professional diagnostics
- Find a Yamaha-certified technician
- Request computer diagnostics for fuel pressure and delivery
- Ask about VST testing and internal filter examination
Remember that while filter maintenance is critical, it's part of a larger fuel system that may have other issues requiring professional attention.
Frequently Asked Questions About Yamaha Fuel Filters
Based on my years of experience and the questions I'm most commonly asked by fellow boaters, here are answers to some key concerns:
Q: How often should I really change my Yamaha fuel filters?
A: For recreational use, I recommend changing the 10-micron separator every 50 hours or annually, whichever comes first. The primary filter should be changed every 100 hours or annually. However, if you use your boat commercially or in harsh environments, cut these intervals in half.
Q: Can I clean and reuse my fuel filters?
A: No, I strongly advise against this. Modern fuel filters contain specialized media that can't be effectively cleaned without damage. The risk of reintroducing contaminants or compromising filtration quality far outweighs the small cost savings.
Q: Will using non-ethanol fuel eliminate my filter problems?
A: While non-ethanol fuel reduces many concerns, it doesn't eliminate the need for regular filter maintenance. You'll still encounter water from condensation and potential contaminants from storage tanks. That said, I've personally experienced much longer filter life with non-ethanol fuel.
Q: What's the difference between the red and blue Yamaha filters?
A: The color coding typically indicates different applications. Red filters are generally for higher-horsepower engines with greater fuel flow requirements, while blue filters are for smaller engines. Always check your specific model's requirements rather than going by color alone.
Q: Can I replace just the filter element or do I need the whole assembly?
A: For 10-micron separators, you typically replace just the element (cartridge). For primary on-engine filters, you usually replace the entire unit. VST filters often require special tools and may involve replacing multiple components.
Q: What happens if water gets past all my filters?
A: Water that reaches your engine can cause misfiring, power loss, and potentially serious damage to fuel injectors and internal components. If you suspect water has entered your engine, stop operating immediately and seek professional assistance.
Conclusion: The Long-Term Value of Proper Fuel Filtration

When it comes to keeping your Yamaha outboard running at its best, the humble fuel filter plays an outsized role. We've walked through the critical importance of these components, understanding how they act as the first line of defense against the harsh realities of marine fuel. From the robust 10-micron water separators to the fine-mesh screens protecting your injectors, each filter has a vital job. I've seen firsthand how neglecting them can lead to sputtering engines, reduced performance, and, in the worst cases, costly damage to sensitive fuel system parts.
My final takeaway is this: treat your fuel filters not as disposable parts, but as essential guardians of your engine's health. Regular replacement, using genuine Yamaha OEM parts whenever possible, and paying attention to fuel quality are simple yet incredibly effective strategies. They're a small investment in time and money that pays massive dividends in reliability, performance, and the overall lifespan of your Yamaha outboard.
Don't let a clogged filter turn a perfect day on the water into a mechanical nightmare. Be proactive, be informed, and keep that fuel flowing clean. For an extensive range of parts and expert guidance on maintenance, visit the JLM Marine Homepage.