


Unclogging a Blocked Outboard Cooling Water Intake
- Required Tools & Safety Checklist
- Types of Outboard Clogs: Cooling vs. Fuel
- Symptom vs. Solution: Diagnosing Your Blockage
- Step-by-Step: Clearing External Intake Blockages
- Back-Flushing for Internal Blockages
- When Internal Debris Requires Lower-Unit Removal
- Checking and Replacing the Water Pump Impeller
- Propeller and Fishing-Line Damage to Seals
- Case Study: Clearing an Ant Nest Blockage
- Fuel and Oil Filter Restrictions (Not "Clogs" but Close)
- Step-by-Step: Removing Internal Carburetor Clogs
- When to Call a Qualified Marine Technician
- Preventative Maintenance: Stop Clogs Before They Happen

Time: 30 minutes–2 hours | Difficulty: Beginner to Intermediate
Required Tools & Safety Checklist
Before you touch anything:
- Tools: Flat-head screwdriver, pliers, stiff wire (coat hanger or trimmer line), garden hose, earmuff-style flush adapters, socket set, shop manual for your engine
- Safety: Disconnect the battery or remove the kill-switch lanyard. Never work near the prop with the battery connected. Confirm the engine is cool to the touch.
- Skill check: If you're not comfortable removing hoses or lower units, stop here and call a qualified marine tech.
Types of Outboard Clogs: Cooling vs. Fuel

Most clogs fall into two categories: cooling-system blockages and fuel restrictions. Cooling clogs are the most common reason an outboard stops "peeing" or overheats. Fuel restrictions cause sputtering or rough running. This guide focuses on cooling-water intake blockages, which can strand you faster than almost anything else.
We've pulled everything from mud wasp nests to plastic bags out of intake screens. According to the U.S. Coast Guard's 2024 recreational boating statistics, machinery failure ranks as the fourth leading primary contributing factor in boating accidents, with 289 incidents and 13 deaths. While that number includes all mechanical issues, cooling-system failures account for about 56 percent of non-electrical engine fires on boats, making intake blockages a serious, not just inconvenient, problem.
Symptom vs. Solution: Diagnosing Your Blockage

| Symptom | Most Likely Cause | First Check |
|---|---|---|
| No telltale stream at all | Clogged intake screen or telltale hose | Intake grates on lower unit |
| Weak stream at idle, improves with throttle | Partial blockage or weak impeller | Flush with earmuffs, check impeller |
| Overheat alarm sounds | Internal passage blockage or thermostat | Thermostat housing, back-flush system |
| Water spits intermittently | Debris moving in and out of intake | Remove lower unit, inspect intake tube |
| Strong stream but engine still overheats | Thermostat stuck closed or internal scale | Thermostat, possibly descale passages |
Start with the easiest and most common fix. If your boat was sitting in shallow, weedy water or mud, that's your clue—check the external intake first.
2-stroke vs. 4-stroke note: This advice applies to both, but 4-strokes often have more complex internal cooling passages and additional components like fuel coolers that can trap debris.
Step-by-Step: Clearing External Intake Blockages

Inspect the lower unit intake screens
Tilt or trim your outboard so you can see the lower unit. The raw-water intake grates are usually on the sides of the gearcase, just above the prop. Look for:
- Weed wrapped around the grates
- Plastic bags or leaves pressed against the openings
- Mud, sand, or small shells packed into the screen
Pull off anything you can reach by hand. If debris is jammed in tight, use needlenose pliers.
Flush with earmuffs
Slide earmuff-style flush adapters over the intake grates and connect your garden hose. Start the water flow before you start the engine—never run an outboard dry, even for a second. Fire up the motor and let it idle for a few minutes. Watch the telltale stream. If it's weak or absent, move to the next step.
Clear the telltale (pee hole)
The telltale outlet can clog independently of the intake. While water is flowing (engine running or hose pressure on), take a length of nylon trimmer line or a single strand of stiff wire and gently insert it into the telltale port. Don't force it—these hoses are small and can puncture. Wiggle it in and out a few times. You'll often feel debris give way, and the stream will suddenly strengthen.
Do's and Don'ts:
- Do use flexible trimmer line or soft wire
- Do work gently and stop if you hit solid resistance
- Don't use sharp objects like drill bits or stiff coat-hanger wire that can puncture the hose
- Don't apply force—if it won't clear easily, the blockage is internal
Differentiate intake-screen vs. internal blockages
If flushing and clearing the telltale restore a strong, steady stream, you're done. If the stream is still weak or absent:
- Intake-screen blockage: You'll see or feel debris at the grates, and water flow improves immediately when you remove it.
- Internal blockage: The intake screens are clear, the telltale hose is clear, but the stream is still weak. This means debris (broken impeller pieces, sand, shell fragments, or salt deposits) is stuck in the cooling passages, thermostat housing, or fuel cooler.
Back-Flushing for Internal Blockages
When external checks fail, back-flushing pushes water backward through the cooling system to dislodge debris trapped inside.
Disconnect and reverse flow
- Remove the lower unit per your shop manual (usually four to six bolts).
- Locate the main water tube that connects the lower unit to the mid-section. Disconnect the hose at the water pump.
- Insert a garden hose (without high pressure) into the top of the cooling passage or directly into the head's flush port if your engine has one.
- Let water flow backward, out through the lower unit. Catch the outflow in a bucket.
A case study from a U.S. boater showed this exact method clearing an ant nest that had completely blocked the lower-unit intake during off-season storage. He reported a sudden rush of ants, mud, and nest debris, followed by normal flow.
Flush the thermostat housing
Thermostats are a common trap for debris. According to marine technician Jim "Dangar", "the most common place that you'd have a blockage in your water circulation system would be in these thermostats." Remove the thermostat cover (usually two bolts), pull the thermostat(s), and inspect the passages. Use a garden hose to flush water through the housing while it's open. Replace the thermostat if it's corroded or won't open when heated in a pot of water on a stove. For detailed guidance on thermostat care, see our blog on how to replace the thermostat on your Yamaha F225, F250, or F300 outboard motor.
Address salt deposits in saltwater engines
If you run in saltwater and rarely flush, salt crystals can gradually narrow the cooling passages. This isn't a "clog" you can blow out with a hose. Salt binds to metal and builds up over time. Some boaters use descaling products designed for marine engines, circulating them through the cooling system per the product instructions. Caution: Strong acids can damage aluminum and rubber. Stick to marine-specific descalers and follow the directions exactly, or leave this job to a pro.
When Internal Debris Requires Lower-Unit Removal
If back-flushing from the top doesn't work, the blockage is likely in the lower unit itself. A troubleshooting case from Born Again Boating Academy showed grass and wood debris clogging the fuel cooler's intake port, which sits in the mid-section and feeds cooling water to the voltage regulator and VST. The fix required disassembling the fuel cooler, removing the debris, and reassembling. Post-cleaning, the telltale stream returned to normal and prevented regulator burnout.
When to remove the lower unit:
- You've flushed, cleared the telltale, and back-flushed from the top, but the stream is still weak or absent.
- You see or hear debris rattling inside the lower unit when you shake it.
- The water pump impeller is old (3+ years or 300+ hours) and might have shed pieces into the cooling passages.
Removing the lower unit is straightforward on most outboards—drain the gear oil, remove four to six bolts, and slide it off the driveshaft—but if you've never done it, your shop manual is your friend. Torque specs for reassembly bolts matter. Over-torque and you'll crack the housing; under-torque and you'll have a water leak.
Checking and Replacing the Water Pump Impeller

While the lower unit is off, inspect the impeller. A damaged impeller won't pump enough water, even if the intake is clear. Look for:
- Missing or broken vanes
- Vanes that won't flex (hardened rubber from age or heat)
- Wear grooves in the pump housing
Replace the impeller if it's older than three years or shows any damage. When you reassemble, coat the new impeller with glycerin or soapy water (not grease—it can swell and bind the rubber). Align the vanes in the direction of rotation per your manual, or you'll shred it on the first start. For a full step-by-step replacement process, check our guide on how to replace a Mercury outboard water pump impeller.
Propeller and Fishing-Line Damage to Seals
Weeds and fishing line don't just clog the intake screen. Line can wrap around the prop shaft and work its way into the front seal of the lower unit, cutting the seal lip and allowing water into the gear oil. If your gear oil looks milky or you're losing water pressure despite a clear intake, pull the prop and check for line behind it. Cut away any line with a razor blade and inspect the seal for damage. A nicked seal needs replacement, or you'll pump water into your gearcase and trash the gears.
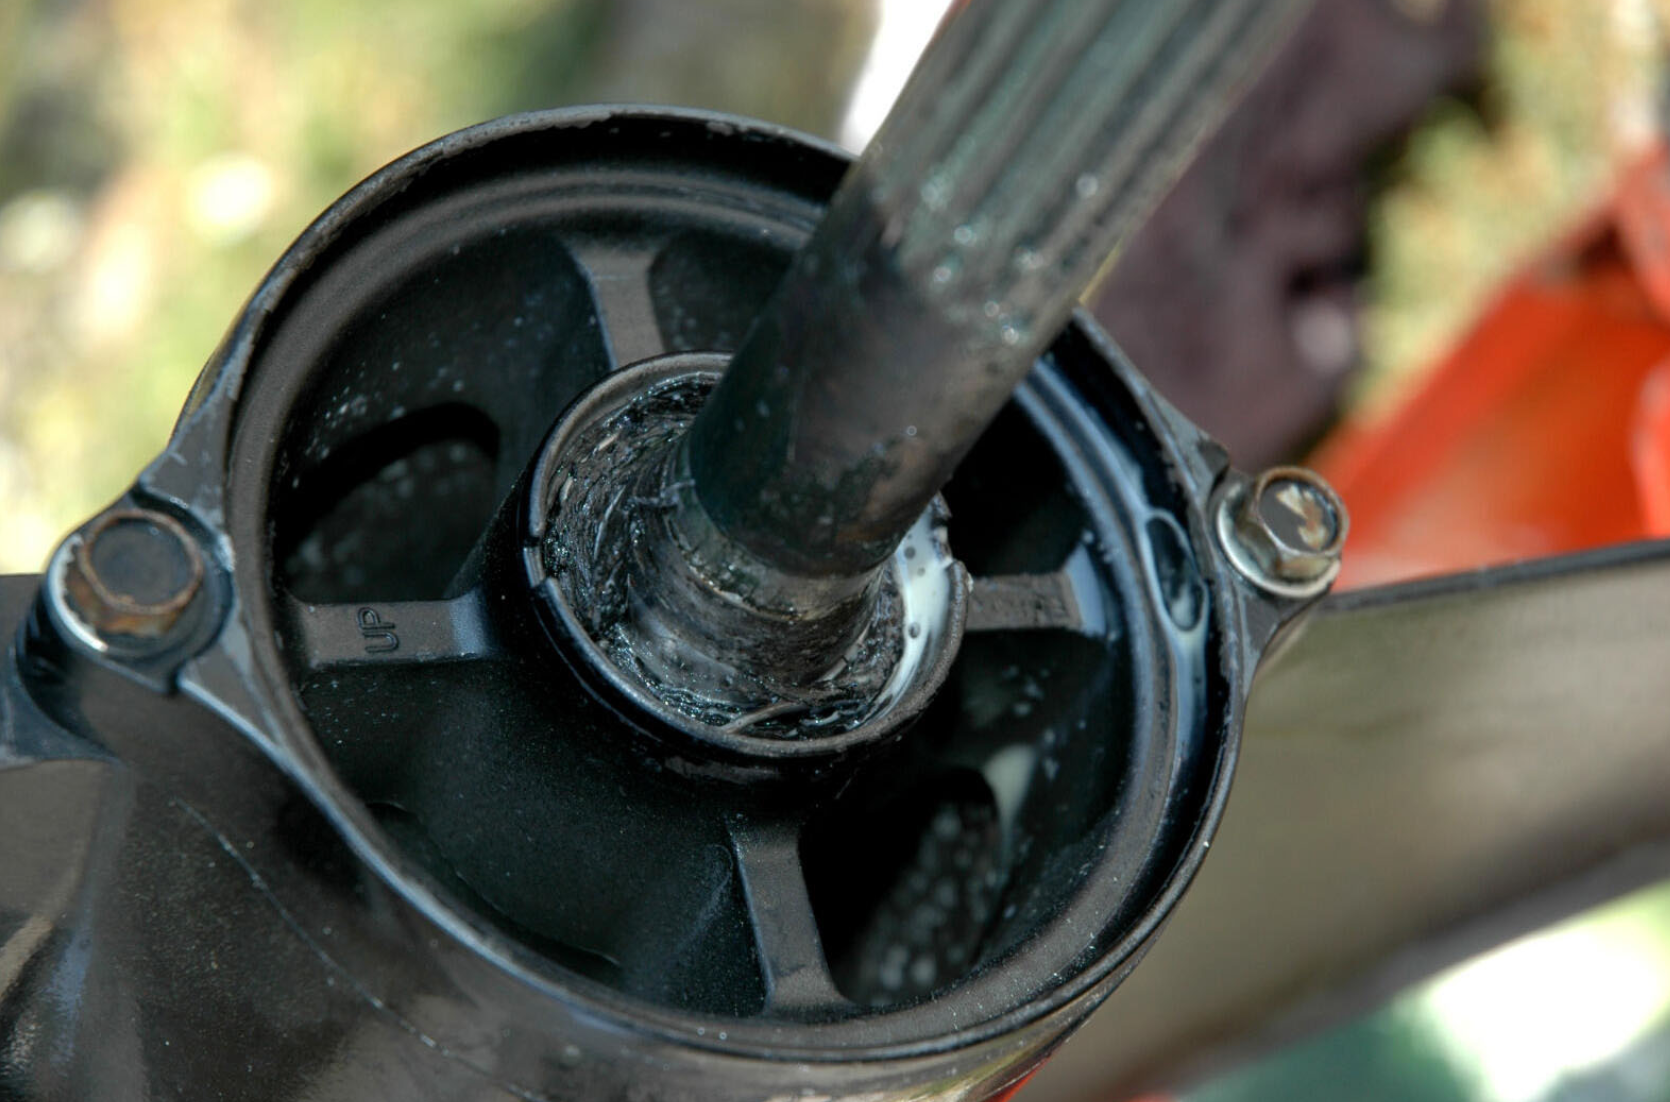
Case Study: Clearing an Ant Nest Blockage
![]()
A boater in the U.S. installed a fresh impeller, ran the engine on muffs in his driveway, and immediately got an overheat alarm. He found zero water coming from the telltale. He posted on iBoats that he disconnected the main water intake hose at the pump and used a garden hose to back-flush high-pressure water through the lower unit. A sudden rush of ants, mud, and nest debris shot out of the intake grates. After reassembly, the telltale flowed strong and the overheat alarm never returned. His takeaway: "I put masking tape over the intakes during storage now."
This case shows why visual inspection of the intake grates isn't always enough. Debris can pack deep inside the intake tube, invisible from the outside.
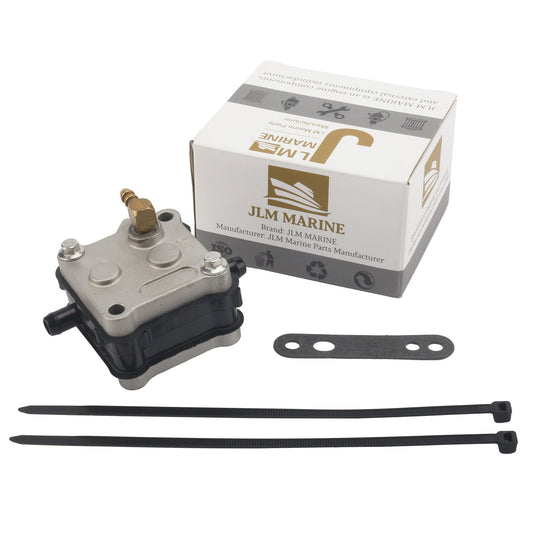
Fuel and Oil Filter Restrictions (Not "Clogs" but Close)
![]()
While this guide focuses on cooling-water blockages, fuel restrictions cause similar symptoms—loss of power, sputtering, or shutdown—and novice boaters often confuse the two.
In-line fuel filters vs. fuel-water separators
- In-line fuel filter: A small cylindrical filter between the tank and the engine. When clogged, the engine starves for fuel and bogs under load. Replace it per your manual (usually annually or every 100 hours). Don't try to clean it; a new filter costs a few dollars and saves you from a tow. Find quality fuel filters suitable for your outboard at JLM Marine.
- Fuel-water separator: A larger canister with a clear bowl at the bottom. Water is heavier than gasoline and settles in the bowl. Check the bowl regularly. If you see water, drain it immediately via the drain screw at the bottom. If the filter element inside is dirty or more than a year old, replace it.
Inspection tip: Disconnect the fuel line at the engine and turn the key to "on" (or squeeze the primer bulb). Fuel should flow freely. If it dribbles or doesn't flow, the filter or pickup screen in the tank is clogged.
Step-by-Step: Removing Internal Carburetor Clogs
If your engine runs rough, idles poorly, or won't reach full RPM, and you've ruled out fuel filters, the carburetor jets are likely clogged with fuel varnish or carbon deposits. Varnish forms when gasoline sits in the carb for months, especially with ethanol fuel.
Fuel varnish is a sticky, amber residue left behind when gasoline evaporates. It clogs tiny jets and passages, blocking fuel flow.
Disassembly
- Remove the carburetor from the engine (usually two nuts and a throttle linkage).
- Take off the float bowl (four screws on most carbs). Dump the old fuel.
- Remove the main jet (brass fitting in the center of the bowl) and the pilot jet (smaller brass fitting on the side).
- Pull the float and needle valve. Inspect the needle tip for wear.
Cleaning
Use a quality carburetor cleaner—spray versions work, but a soak in a parts-cleaning tank is better. We've used products that meet the same active-ingredient specs as OEM cleaners for years; the key is acetone or toluene as the primary solvent, not generic "engine degreaser." Soak all metal parts for 20–30 minutes, then blow out every passage with compressed air. Do not use wire to ream out jets—you'll enlarge the orifice and ruin the fuel mixture. Compressed air only.
For parts or kits, browse the carburetor repair kits collection at JLM Marine to find compatible components for your outboard.
Reassembly
Install new gaskets (old ones tear or leak). Torque the main jet and bowl screws to spec—your manual will list foot-pounds or inch-pounds. Over-tighten and you'll strip the soft aluminum housing. Under-tighten and you'll have a fuel leak.
Test
Run the engine. It should idle smoothly and accelerate without hesitation. If it still bogs, you missed a passage or the needle valve is worn and flooding the bowl.
For a detailed carburetor rebuild process, see our Yamaha Outboard Carburetor Rebuild Tutorial.
When to Call a Qualified Marine Technician
We're all about fixing it yourself when you can, but modern outboards have electronic fuel injection, computerized ignition, and sealed cooling passages that require diagnostic software to troubleshoot. If you've flushed the intake, cleared the telltale, back-flushed the system, checked the impeller, and you're still getting weak flow or overheat alarms, the blockage is in a passage you can't reach without tearing down the powerhead. That's pro territory.
Also consider cost. A carburetor ultrasonic cleaning at a shop runs about $150–200. If you don't own the tools or the time, that's cheaper than buying a parts washer and cleaner, and the shop's ultrasonic tank will get deposits out of passages you can't see or reach with a spray can.
Warranty note: Many new outboards carry multi-year warranties. DIY repairs—especially removing the lower unit or opening the powerhead—can void coverage. Check your warranty terms before you wrench on a new engine. One improperly torqued bolt can give the manufacturer an excuse to deny a claim.
Preventative Maintenance: Stop Clogs Before They Happen
Flush your outboard with fresh water after every saltwater run. Salt crystals start forming within hours of shutdown. If you trailer your boat, connect earmuffs and run the engine for five minutes with fresh water flowing. If your engine has a built-in flush port, use it—connect the hose, turn on the water, but do not start the engine (flush ports are pressurized systems and don't require the engine to run).
According to Chris Larkin, Senior Marine Technician at Bridge Marina (New Jersey), "One of the most common reasons for an outboard motor not cooling properly or 'peeing' is a clogged water intake." Regular flushing keeps sand, salt, and organic debris from building up in the first place.
Storage tip: If your boat sits for more than a few weeks, cover the lower-unit intakes with tape or a plastic bag secured with a rubber band. This prevents insects (wasps, ants, mud daubers) from nesting inside the intake tube. We've pulled wasp nests, ant colonies, and even small frogs out of intakes on stored engines.
Before you relaunch after storage, remove the tape and visually confirm the intakes are clear. One forgotten piece of tape will overheat your engine in 30 seconds flat.
Inspect your water pump impeller every season or every 300 hours, whichever comes first. Impellers are cheap (usually $20–40 for quality aftermarket versions that meet OEM specs), and replacing one takes 30 minutes. A failed impeller won't just stop water flow—it can shed pieces into your cooling passages, causing blockages that require a full system flush or even powerhead removal to clear. A case study of a Johnson 115 V4 showed exactly this: the owner replaced the water pump, lower unit, and removed thermostats, yet the engine still overheated because impeller debris had lodged in the block's cooling passages. Only after removing the lower unit and back-flushing while alternating the garden hose between cylinder head ports did the debris finally dislodge.
After any intake-clearing work, run the engine for five minutes at idle and check for leaks around hose connections and the lower-unit seal. Then take it up to 3,000 RPM (in the water or in a test tank) and confirm the telltale stream is strong and steady. If the stream weakens at higher RPM, you've got a restriction you didn't fully clear, or the impeller isn't seating correctly.
Per U.S. Coast Guard boating safety guidance, always ensure everyone aboard has a properly fitted USCG-approved life jacket before you test-run the engine on the water, and never work near the prop or intakes with the engine running or the battery connected.
Daily tip: Before you launch, pull the cowling and visually check the telltale hose connection at the top of the engine. It's a small rubber hose, often clipped or zip-tied to the powerhead. If it's cracked, dry-rotted, or loose, you'll get no telltale stream even though the cooling system is working fine. Replace worn hoses before they fail on the water.
For a broad selection of necessary parts for your outboard motor, including water pumps, impellers, carburetors, and filters, explore our JLM Marine parts collections and the main JLM Marine website for direct factory marine parts with free worldwide shipping.
Sources:
- https://www.youtube.com/watch?v=TciuKObaDfM
- https://www.youtube.com/watch?v=RVGgVCJ12bE
- https://forums.iboats.com/threads/blocked-water-intake-on-lower-unit.689533/
- https://www.bridgemarina.com/blog/why-is-my-outboard-motor-not-peeing/
- https://www.uscgboating.org/library/accident-statistics/Recreational-Boating-Statistics-2024.pdf
- https://local-news-archive.crystalbeach.com/recreational-boating-safety-understanding-boat-fires/
- https://www.uscgboating.org/assets/1/AssetManager/Boaters-Guide-to-the-Federal-Requirements-for-Receational-Boats-20231108.pdf
Hi—I’m Jim Walker
I grew up in a Florida boatyard, earning pocket money (and a few scars) by rebuilding outboard carbs before I could drive. That hands-on habit carried me through a Ph.D. in mechanical engineering, where I studied how salt water quietly murders metal.
I spent ten years designing cooling systems for high-horsepower outboards, then joined JLM Marine as CTO. We bench-test every new part in the lab, but I still bolt early prototypes onto my own 23-foot skiff for a weekend shake-down— nothing beats real wake and spray for finding weak spots.
Here on the blog I share the fixes and shortcuts I’ve learned so your engine—and your day on the water—run smooth.

Para propietarios de motores fuera de borda:
Para ayudarlo a mantener y reparar sus motores marinos, esperamos que los siguientes recursos puedan serle de utilidad:
-
Bombas de combustible de JLM Marine
-
Kits de bomba de combustible de JLM Marine
- Kit de bomba de combustible
- Kit de bomba de combustible Yamaha
- Kit de bomba de combustible Mercury
- Kit de bomba de combustible Johnson
- Kit de bomba de combustible Evinrude
- Kit de bomba de combustible Suzuki
- Kit de bomba de combustible Honda
- Kit de bomba de combustible Tohatsu
- Kit de bomba de combustible Volvo
Acerca de JLM Marine
Fundada en 2002, JLM Marine se ha consolidado como un fabricante dedicado de piezas marinas de alta calidad, con sede en China. Nuestro compromiso con la excelencia en la fabricación nos ha ganado la confianza de las principales marcas marinas a nivel mundial.
Como proveedor directo, evitamos intermediarios, lo que nos permite ofrecer precios competitivos sin comprometer la calidad. Este enfoque no solo promueve la rentabilidad, sino que también garantiza que nuestros clientes reciban el mejor valor directamente del proveedor.
Estamos entusiasmados de ampliar nuestro alcance a través de canales minoristas, llevando nuestra experiencia y compromiso con la calidad directamente a los propietarios de embarcaciones y entusiastas de todo el mundo.
Bomba de combustible en venta
- $21.99
$19.00- $21.99
- Unit price
- per
- $16.00
$0.00- $16.00
- Unit price
- per
- $73.50
$88.00- $73.50
- Unit price
- per

- $17.99
$21.00- $17.99
- Unit price
- per
- $46.50
$60.00- $46.50
- Unit price
- per

- $45.99
$55.00- $45.99
- Unit price
- per

- $28.99
$34.00- $28.99
- Unit price
- per

- $18.99
$15.00- $18.99
- Unit price
- per

- $26.80
- $26.80
- Unit price
- per

- $23.59
$28.00- $23.59
- Unit price
- per
- $24.80
- $24.80
- Unit price
- per
- $28.90
- $28.90
- Unit price
- per

- $27.77
$22.00- $27.77
- Unit price
- per

- $21.99
$19.00- $21.99
- Unit price
- per

- $138.00
- $138.00
- Unit price
- per

- $56.99
- $56.99
- Unit price
- per
- $24.80
$45.00- $24.80
- Unit price
- per

- $31.20
$37.00- $31.20
- Unit price
- per

- $129.95
$155.00- $129.95
- Unit price
- per

- $129.95
$155.00- $129.95
- Unit price
- per