


Outboard Engine Overheating at High RPM? How to Diagnose & Fix Exhaust Plate Corrosion
- Why High RPM Overheating Is Different
- Checking the Telltale Stream First
- Step-by-Step Diagnosis for High-RPM Overheating
- How to Diagnose Exhaust Plate Corrosion
- How to Fix Exhaust Plate Corrosion
- Why Exhaust Plate Corrosion Happens
- Case Study: Yamaha 90 TLRA High-RPM Alarm
- Preventing Exhaust Plate Corrosion and Overheating
- OEM vs Aftermarket Parts for Cooling System Repairs
- When to Call a Pro
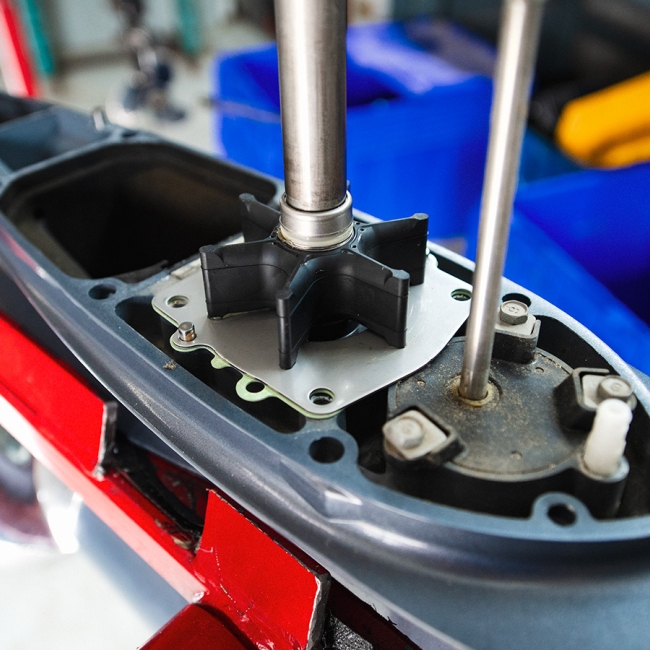
If your outboard's throwing an overheat alarm when you open it up, you're looking at a cooling system that can't handle the load. I've spent 20 years pulling lower units and rebuilding powerheads, and high-RPM overheating almost always comes down to the same handful of failures. The cooling system works fine at idle because it doesn't need much volume. Push it to 4500 RPM and suddenly that worn impeller or stuck poppet valve can't keep up.
Why High RPM Overheating Is Different
At idle, your water pump only needs to push enough volume to handle low combustion heat. Crack the throttle to wide-open and the physics change—the engine's generating three times the heat, the hull's lifting, and the water intake sees different pressure. A cooling system with marginal flow will show no symptoms at 2000 RPM but cook the powerhead at 5000. That's why you'll see motors that pee strong at the dock but trigger alarms 30 seconds into a plane.
The pressure relief valve (poppet valve) is supposed to regulate flow at speed. When it sticks closed or the spring weakens, water can't bypass properly and you starve the block. Combine that with a half-worn impeller and you've got a recipe for a seized motor.
Checking the Telltale Stream First
The pee stream tells you most of what you need to know. At idle, you want a steady pencil-thick stream. Bring it up to 3000 RPM and that stream should get stronger and faster. If it's strong at idle but turns to a dribble or starts spitting steam at throttle, you've confirmed a high-RPM restriction.
Stick your hand under the stream—if it's scalding hot, the engine's already cooking. Normal operating temp should feel warm but not painful. Water that's too hot means it's not circulating fast enough or the thermostat's stuck.
Specific symptom: Motor pees fine when you blip the throttle in neutral, but 10 seconds into a wide-open run the alarm sounds and the stream weakens. That's classic worn impeller or poppet valve failure.
Step-by-Step Diagnosis for High-RPM Overheating

1. Inspect Water Intake Ports
Pull the motor and look at the intakes on the lower unit. I've pulled plastic grocery bags, entire seaweed mats, and once a full crab shell out of these. If you fish shallow water or launch in weedy areas, this is your first check. Use a pick or small screwdriver to clear the screens—don't force anything that might push debris deeper.
2. Drop the Lower Unit and Check the Impeller
Tools needed: Socket set (typically 10mm and 12mm), impeller puller or needlenose pliers, gasket scraper, torque wrench.
Pull the lower unit per your engine's manual. On most motors this is 4-6 bolts on the midsection plus disconnecting the shift linkage. Once it's off, remove the water pump housing. The impeller sits inside—pull it out and check every vane.
What to look for:
- Vanes that don't spring back when you bend them
- Melted or rounded tips (they should be square)
- Cracks at the base of the vanes
- A permanent set or curve instead of sitting flat
A good impeller is flexible rubber that snaps back. A cooked one feels stiff like hard plastic. If you're in saltwater, replace it every year regardless of hours. Freshwater, you can push it to 100 hours, but I wouldn't go further.
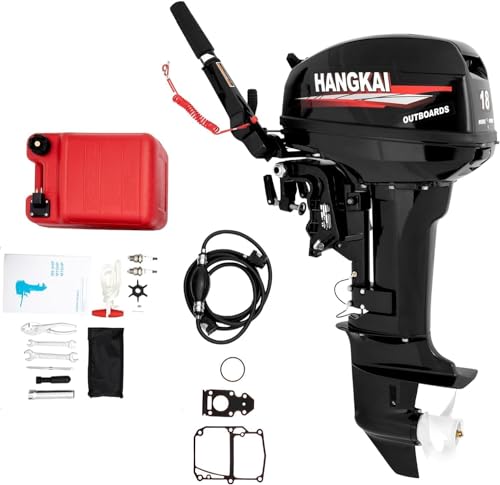
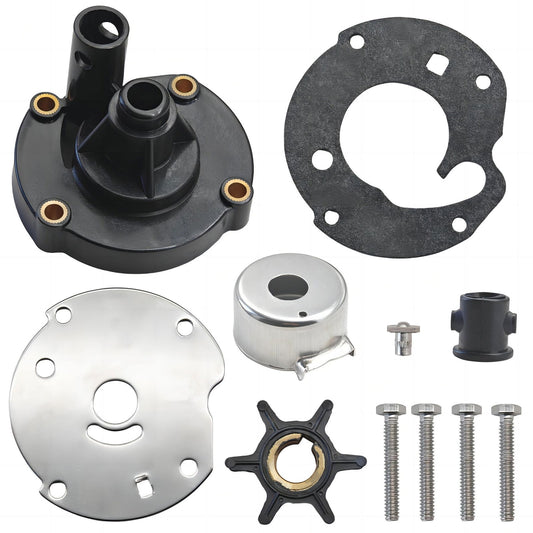
The JLM impeller kits use factory-spec rubber and include the housing gasket, O-rings, and the wear plate. You're not paying dealership markup, but you're also not getting the garbage-tier $12 kits that don't fit right. Those cheap ones use the wrong durometer and either tear on installation or last two months. See our comprehensive guide on Signs Your Outboard Impeller Needs Replacement for detailed symptoms and tips.
3. Test the Thermostat
Difficulty: 3/10
The thermostat housing is usually a small clamshell unit near the top of the powerhead. Two or three bolts, pull the housing, and the thermostat drops out. Most engines use a 140-160°F thermostat—check your manual for the exact spec.
Drop it in a pot of water on the stove with a thermometer. Heat it up. At around 143°F (Mercury) or 140°F (Yamaha), the thermostat should visibly start to open. By 160°F it should be fully open. If it's lazy, stuck, or doesn't move at all, toss it.
Salt and mineral deposits glue these shut. I've seen thermostats so corroded they wouldn't budge even after sitting in CLR for an hour. Clean the housing with a gasket scraper and check the mating surface for pitting before reassembly.
Pro tip for stuck bolts: If the housing bolts are seized, hit them with a 50/50 mix of acetone and automatic transmission fluid. Let it soak 20 minutes. Works better than PB Blaster.
For a detailed DIY walkthrough, check our step-by-step guide on How to Replace the Thermostat on Your Yamaha F225, F250, or F300 4.2L V6 Outboard Motor.
4. Inspect and Clean the Poppet Valve
This is the part most DIYers miss. The poppet valve sits in a small housing near the thermostat or in the midsection. Its job is to dump excess pressure at high RPM so you don't blow a hose or overpressurize the block.
Pull the valve and check the spring. If it's weak, corroded, or missing (yes, I've seen missing), the valve won't open when it needs to. The seat should be clean metal—if it's caked with salt or carbon, the valve can't seal properly and your pressure regulation goes out the window.
Clean it with a wire brush and carb cleaner. Make sure it moves freely. If the spring's collapsed or the valve face is pitted, replace the whole assembly.
Symptom this fixes: Overheating only above 4000 RPM, strong pee stream at 3000 but alarm at wide-open throttle.
5. Check for Internal Blockages and Exhaust Plate Corrosion
If you've replaced the impeller, cleaned the poppet, swapped the thermostat, and you're still overheating, you're looking at internal corrosion or blockages.
Salt buildup in the water jackets is common if you don't flush after every saltwater trip. Over time, salt crystallizes in the passages and chokes flow. You can try flushing with a descaler like Salt-Away or a vinegar solution (1 part vinegar to 3 parts water, run it through with muffs for 15 minutes), but heavy buildup might need a shop to tear down and clean.
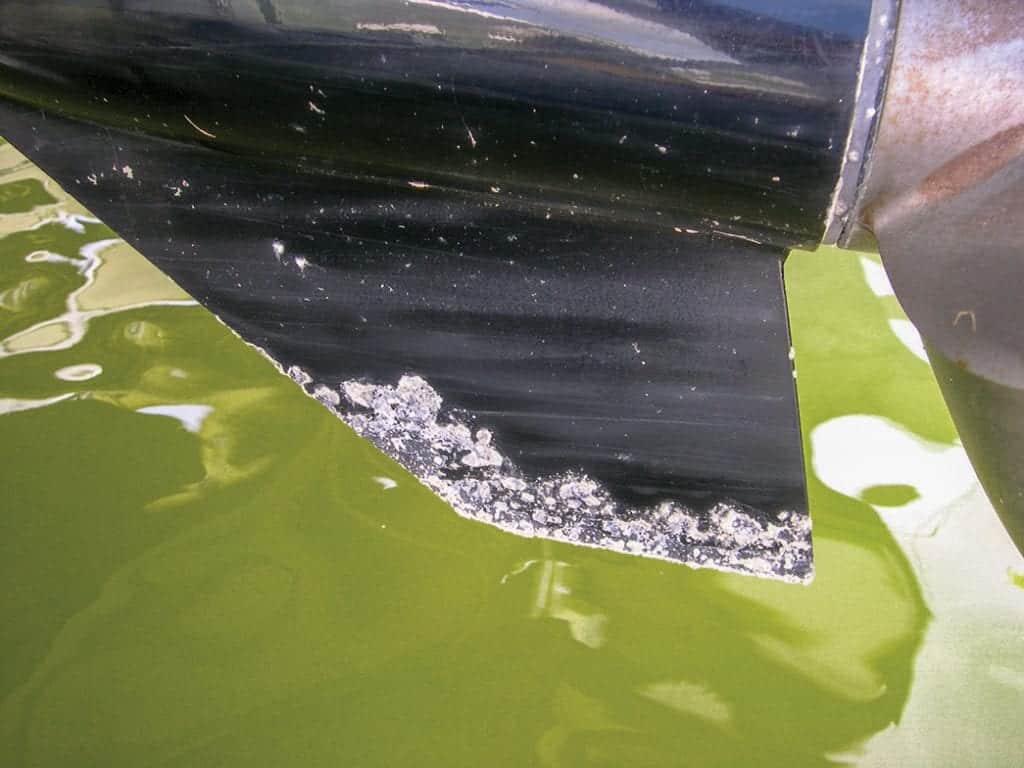
Exhaust plate corrosion is a specific failure we see constantly on Yamaha F150s, F200s, and F250s. The exhaust plate (also called the adapter plate or midsection plate) sits between the powerhead and lower unit. Saltwater plus electrolysis eats through the aluminum, creating pits and holes that let exhaust gases into the cooling passages or block water flow entirely. For more on preventing corrosion damage, see our tips on Saltwater Use and Overheating: Prevention Tips.
How to Diagnose Exhaust Plate Corrosion
Difficulty: 7/10 (requires lower unit removal)
With the lower unit dropped, shine a flashlight up into the exhaust tubes and midsection. You're looking for:
- White powdery corrosion (aluminum oxide)
- Visible pitting or small holes around the exhaust ports
- Rust-colored streaks or water weeping from the plate
- Rough, eroded surfaces where the plate mates to the block
Use a borescope if you've got one—stick it into the water jacket ports and look for scale buildup or holes. Pressure-test the cooling passages if you've got access to a test rig (most DIYers don't).
Red flag symptom: Rusty or brown water coming out of the telltale stream. That's corrosion debris circulating through your system.
Engine Models We See Fail Most
From our bench, the repeat offenders for exhaust plate corrosion are:
- Yamaha F150 (2006-2012)
- Yamaha F200 and F225 (2004-2010)
- Mercury Verado 200-250 (mid-2000s)
- Suzuki DF140/150 (early 2010s)
These models have aluminum midsections that don't hold up well in saltwater without religious flushing and anode maintenance.
How to Fix Exhaust Plate Corrosion
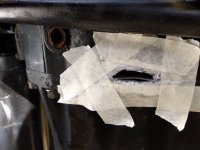
Minor Pitting Repair
Tools and materials:
- Angle grinder or Dremel with wire wheel
- 80-grit and 220-grit sandpaper
- Acetone or brake cleaner
- High-temp marine epoxy (JB Weld WaterWeld or similar rated to 2400°F)
- Corrosion-resistant primer (zinc chromate or epoxy-based)
- High-heat engine paint
Steps:
- Remove the plate from the powerhead (usually 6-10 bolts). Mark the orientation before removal.
- Wire-brush all corrosion until you hit clean metal. Use the grinder for heavy pitting—you want to expose fresh aluminum.
- Clean with acetone. Wipe it down twice. Any oil or salt will prevent the epoxy from bonding.
- Mix the epoxy per the instructions. Pack it into the pits and holes, overfilling slightly. Smooth it with a putty knife.
- Let it cure fully (24-48 hours depending on product and temperature).
- Sand the epoxy flush with 220-grit. The surface should be smooth to the touch.
- Apply zinc chromate primer to the entire repaired area. Two coats.
- Topcoat with high-heat paint rated for exhaust temps.
- Replace all gaskets. Never reuse a midsection gasket.
- Reinstall with a torque wrench—over-torquing aluminum causes cracks. Spec is usually 18-22 ft-lbs; check your manual.
This fix works for pits smaller than a dime. Anything bigger and you're looking at welding or replacement.
Severe Corrosion: Welding or Replacement
If the plate has holes larger than a pencil eraser or multiple pitted areas, epoxy won't hold under pressure and heat cycling. You need TIG welding with aluminum filler (5356 or 4043 alloy) to build up the corroded sections. This isn't a DIY job unless you've got a TIG rig and know how to weld aluminum without warping it.
Cost estimate (US, 2024):
- DIY epoxy repair: $30-50 in materials
- Professional TIG welding: $200-400 depending on extent
- New OEM exhaust plate: $300-700 (Yamaha F150 plate is around $450)
- New aftermarket plate: $150-350 (quality varies—avoid no-name eBay parts)
- Shop labor for removal/install: $150-300
Some guys try to avoid plate replacement by welding a thin aluminum patch over the outside of the holed area. It works short-term but doesn't address internal corrosion. You'll be back in there within a season.
Why Exhaust Plate Corrosion Happens
Aluminum and stainless steel in saltwater create a galvanic cell. The aluminum acts as the anode and sacrifices itself to protect the stainless steel drive components. If your bonding system is broken or you're missing sacrificial anodes, the exhaust plate becomes the sacrificial part.
Electrolysis accelerates this. Stray current from bad wiring, a shore power ground fault, or a corroded battery cable will eat through aluminum in months instead of years. Check your boat's bonding per ABYC E-2 standards if you're seeing rapid corrosion.
Salt that doesn't get flushed out concentrates in the exhaust passages. When the motor sits, that salt pulls moisture from the air and starts the corrosion cycle. This is why motors that sit on a trailer for weeks between uses corrode faster than ones that run daily. For more on proper winterization and corrosion prevention, see our Yamaha Outboard Winterization Guide.
Case Study: Yamaha 90 TLRA High-RPM Alarm
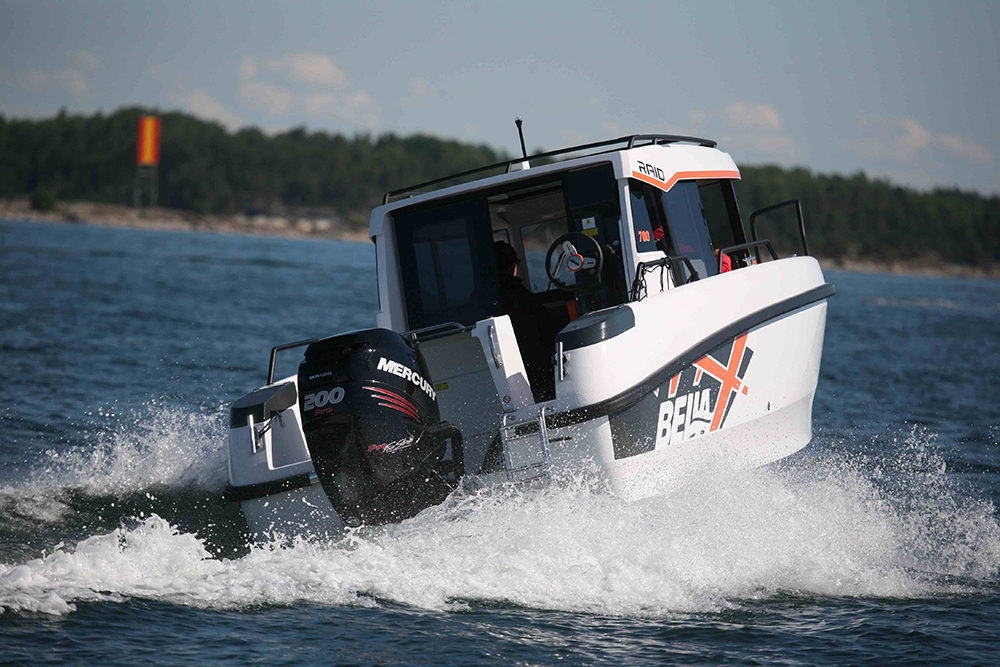
Customer brought in a Yamaha 90 four-stroke that ran perfect at idle and low cruise but threw an overheat alarm above 4500 RPM. Telltale was strong at the dock, weakened under load.
What we found:
- Impeller had two cracked vanes
- Poppet valve was stuck half-closed with salt buildup
- Thermostat was slow to open (took until 170°F instead of 143°F)
- Water pump output tube grommet was split, causing a slight air leak
The fix: Replaced the impeller, cleaned the poppet valve and spring, installed a new thermostat, and swapped the grommet. Motor ran cool at all RPMs after that. Total parts cost was under $80. If he'd kept running it, he'd have seized the powerhead.
Preventing Exhaust Plate Corrosion and Overheating
After every saltwater use (non-negotiable): Flush the engine for 15-20 minutes minimum. Use flusher muffs or the built-in flush port if your engine has one. Plain freshwater works. For extra protection, add Salt-Away to the flush water once a month. Establishing a Daily Engine Flush for Saltwater Boats is a proven habit.
Every 6 months: Pull the cowling and inspect all sacrificial anodes (zincs). Replace them when they're 50% depleted. A half-gone anode isn't doing its job. Anodes on the lower unit, trim tab, and midsection all need checking.
Annual maintenance checklist:
- Replace impeller (100 hours or 1 year)
- Replace thermostat
- Inspect poppet valve and clean/replace spring
- Check all cooling hoses for cracks or soft spots
- Replace any questionable hose clamps (stainless only)
- Pressure-test the cooling system if you've got the equipment
Electrical system: Make sure your boat's bonding is intact per ABYC E-11 standards. All underwater metals (outboard, trim tabs, transducer, through-hulls) should be electrically connected to a common ground. If you're on shore power, use a galvanic isolator to prevent dock current from eating your drive.
OEM vs Aftermarket Parts for Cooling System Repairs
OEM impellers and thermostats are good quality. You're paying $60 for a Yamaha impeller that costs $8 to manufacture, but it'll fit perfectly and last a full season. The dealership markup is the real problem.
The cheap aftermarket stuff—$10 impeller kits from random sellers—is garbage. The rubber is too hard, the vane count is sometimes wrong, and the fitment is sloppy. You'll spend more time fighting the install than you save on the part, and it'll fail in two months.
The middle ground is high-quality aftermarket from manufacturers that supply OEM factories. JLM Marine sources from the same factories that make parts for the big brands. You get the same spec, the same materials, but without the 300% markup. A JLM impeller kit runs $25-35 and includes the gasket, plate, and all O-rings. It fits right the first time.
For critical items like thermostats and poppet valves, we'd rather you use a known-good part than gamble on a no-name brand. The $15 you save isn't worth a seized motor. Learn more about choosing quality parts in our article about OEM vs. Aftermarket Outboard Parts.
When to Call a Pro
If you've replaced the impeller, thermostat, and cleaned the poppet valve but you're still overheating, it's time to bring it to a shop. Internal blockages, cracked water jackets, or a blown head gasket aren't DIY fixes for most people.
What to look for in a mechanic:
- NMEA or ABYC certification (proves they know marine electrical and mechanical standards)
- Brand-specific master tech certification (Yamaha Master Technician, Mercury MasterTech, Suzuki Master Tech)
- A shop that'll let you supply your own parts if you want (some won't, which is a red flag)
Severe exhaust plate corrosion that needs welding or a full powerhead teardown for passage cleaning is a $1000+ job. If the engine's old and the corrosion is extensive, you might be better off repowering than dumping $2500 into a 15-year-old powerhead.
Maintenance log tip: Keep a notebook or spreadsheet with every impeller change, thermostat swap, and hour meter reading. When you sell the boat or take it to a shop, that log is worth its weight. It also keeps you honest about when you actually did the work.
After every saltwater trip, hook up the muffs and flush for 20 minutes while you're washing the boat—make it part of the routine and you'll never deal with exhaust plate corrosion.
For quality marine parts direct from the factory and expert support, explore the extensive selection at JLM Marine: Direct from Factory Boat Parts | Free Worldwide Shipping.
This post includes internal links to key resources that help diagnose, maintain, and repair outboard cooling systems, including detailed guides on impellers, thermostats, and corrosion prevention to keep your engine running smoothly.