


Top 5 Fuel Filter Maintenance Tips for Outboard Engines
- Why Fuel Filter Maintenance Is Critical for Outboard Engines
- Types and Locations of Fuel Filters in Outboard Engines
- Recommended Maintenance Intervals and Best Practices for Spin-On Fuel Filters
- Step-by-Step Guide to Replacing Spin-On Fuel Filters
- Yamaha Outboard Fuel System and OEM Filter Recommendations
- Mercury Outboard Fuel Filter Maintenance Overview
- Troubleshooting Common Fuel Filter Issues
- When to Seek Professional Help
- General Tips and Best Practices for Fuel Filter Maintenance
- Common Mistakes to Avoid
- A Foundation for Engine Longevity

My boat's engine sputtered to a halt one too many times during a particularly frustrating fishing trip. It felt like every minor issue escalated into major downtime. I soon realized that a significant culprit behind these marine engine problems was often ignored: the fuel filter. It's easy to overlook these seemingly small components, but I've learned through experience and research that maintaining your spin-on fuel filter is absolutely critical for your outboard engine's health and your own enjoyment on the water. If you're like me, you just want your boat to run, and a clogged or faulty fuel filter is one of the quickest ways to prevent that.
The primary problem many boat owners face is understanding the real impact of fuel contamination and knowing precisely when and how to maintain their outboard engine's fuel filters. Fuel and fuel system issues consistently rank as a leading cause of marine engine trouble, often leading to frustrating symptoms like rough idling, difficulty starting, and even severe internal engine damage. Ignoring your fuel filter can quickly turn a fun day on the water into an expensive repair bill, something I've definitely learned to avoid!
This comprehensive guide is designed for DIY outboard owners, both beginners and experienced enthusiasts who want to take control of their engine's maintenance. By understanding their function, adhering to recommended intervals, and following proper replacement procedures, you can significantly reduce the risk of fuel-related breakdowns. I'll walk you through everything you need to know, from the importance of a clean fuel filter to a detailed, step-by-step replacement process, including brand-specific advice for Yamaha and Mercury outboards.
Here's what we'll delve into:
- The critical role of fuel filters in protecting your outboard engine
- Identifying different types of filters within your outboard's fuel system
- Understanding recommended maintenance schedules and best practices
- A comprehensive, step-by-step guide to replacing your spin-on fuel filter
- Brand-specific insights for Yamaha and Mercury outboards
- General tips to ensure your fuel system stays in top shape
- Troubleshooting common filter-related issues
- When to seek professional help
By attending to your fuel filters diligently, you're not just preventing immediate problems; you're investing in the longevity and reliability of your entire marine engine.
Why Fuel Filter Maintenance Is Critical for Outboard Engines
I can't stress this enough: the fuel filter is your outboard's first line of defense against all sorts of nasties lurking in your fuel tank. Think of it as the gatekeeper, diligently stopping rust, sediment, water, and other contaminants from reaching the delicate components of your engine's fuel injection system. Unfortunately, fuel and fuel system issues are undeniably a primary cause of marine engine problems. It's disheartening, but true.
When that filter becomes clogged or water starts to accumulate in its bowl, you'll notice it. The consequences of dirty fuel can range from frustrating starting issues and rough idling to more severe problems that can lead to significant engine damage and costly repairs. I learned this the hard way; an engine that hesitates or quits unexpectedly on the water is always a disheartening experience. Statistics show that up to 90% of diesel engine problems originate from contaminated fuelaccording to BoatUS, and while modern outboards are often gasoline, the principle remains the same – dirty fuel equals unhappy engines. Detecting water in the fuel system, especially in modern outboards with sensitive fuel injection systems, requires immediate action to prevent significant damage.
The Real-World Impact of Neglected Filters
The first time I experienced a major filter issue, I was about 10 miles offshore on what was supposed to be a full day of fishing. My engine started running rough, then began to surge and sputter. Eventually, it died completely, leaving me drifting. After getting towed in (an expensive and embarrassing experience), the mechanic showed me my clogged filter - it was packed with a gooey substance that had completely blocked fuel flow. The culprit? A combination of old fuel, water contamination, and algae growth that had developed over months of inconsistent maintenance. That $500 towing bill and lost fishing day taught me more about filter maintenance than any manual ever could!
Types and Locations of Fuel Filters in Outboard Engines

Outboard engines typically employ a multi-stage filtration system, and understanding where each filter resides is key to comprehensive maintenance. The most visible and often serviced filter is the spin-on fuel/water separator filter. This is usually the first line of filtration, situated in the fuel line between your fuel tank and the engine itself. Its primary job is to capture larger debris and, crucially, separate water from the gasoline.
Primary On-Engine Fuel Filter Details
Beyond the main spin-on filter, you'll find additional filters located directly on the engine. These primary on-engine filters often have a small water trap bowl at the bottom, similar to the main separator but typically smaller. I always give this a quick visual check when I'm doing my initial inspection; you can often spot water or debris accumulation in this bowl. These filters are vital for catching finer particles that might have slipped past the initial stage.
Optional Inline and VST Filters
Depending on your outboard's design, you might also have optional inline filters situated further down the fuel line, acting as an extra layer of protection before the fuel reaches the injectors. Many modern outboards, particularly Yamaha engines, also feature a Vapor Separator Tank (VST) filter. This filter is located within the VST, which is part of the fuel pump assembly on the engine. It's designed to filter fuel before it's pumped to the fuel injectors. Many manufacturers, like Yamaha, recommend that these VST filters be inspected and replaced by a dealer around every 300 hours, assuming all other primary filters are diligently maintained.
Comparing Spin-On Filters with Other Filter Types
Spin-on fuel filters offer distinct advantages over other filter types like cartridge or canister filters. From my experience, the main benefit is the ease of replacement - you simply unscrew the old one and spin on the new one. They also tend to be more secure against leaks since the entire assembly is replaced as a single unit. However, they do generate more waste compared to cartridge filters where only the filter element is replaced.
I've used both types extensively, and while cartridge filters are more environmentally friendly, I find spin-on filters to be far more convenient for DIY maintenance, especially when working in tight spaces on smaller outboards. The trade-off is worth it for me, especially since the self-contained design minimizes the risk of fuel spills during replacement.
Recommended Maintenance Intervals and Best Practices for Spin-On Fuel Filters

Consistency in maintenance is absolutely paramount. While manufacturer recommendations can vary slightly, a good general guideline for replacing your spin-on fuel filter element is every 100 engine hours or annually, whichever comes first. However, it's a bit more nuanced for the crucial 10-micron fuel/water separator, which many experts suggest replacing every 50 hours or annually, especially if you're frequently exposed to poor fuel quality or operate in challenging marine environments. The primary on-engine filter typically needs a check monthly and replacement if water is detected, or after every 100 hours of operation as a general rule.
Visual Inspection and Water Draining Procedures
I can't overstate how important it is to regularly check your fuel filter bowls. Before every outing, I make it a habit to visually inspect the transparent bowl on my primary fuel/water separator. If you see any water accumulation, it needs to be drained immediately until clean fuel flows out. This simple step is critical, especially with the prevalent use of ethanol-blended fuels, which are notorious for attracting and holding moisture. Signs of contamination to keep an eye out for include not just water, but also sediment, rust particles, or any murky discoloration in the fuel. Failing to drain this water can lead to significant engine performance issues and potential damage.
A practical tip that I always follow is to label the canister of your new fuel filter with the installation date and the engine hours. This makes it incredibly easy to track your maintenance intervals and helps you stay ahead of overdue filter changes. And for those longer trips or operating in remote areas, carrying spare filters is an absolute must. A single tank of contaminated fuel can clog your filter, and being prepared to swap it out on the water can save your day.
How Environmental Conditions Affect Maintenance Needs
I keep my boat in Florida, where the combination of heat, humidity, and frequent rain creates the perfect storm for fuel system issues. After experiencing several frustrating breakdowns during our rainy season, I realized that what works in drier climates simply doesn't cut it here. I now follow a more aggressive maintenance schedule than what most manuals recommend.
For example, after heavy rainfall, I always check my filter bowl for water - even if I checked it just days before. Ethanol fuels in high-humidity environments can accumulate water at surprising rates. Similarly, boats stored in saltwater environments need more frequent inspection for corrosion around filter housings and connections. I've seen filters that looked fine externally but had severe corrosion on the mounting threads that caused slow fuel leaks.
If you boat in brackish water or keep your vessel in a humid environment, I strongly recommend checking your filters twice as often as the manufacturer suggests. This proactive approach has saved me countless hours of troubleshooting and frustration.
Step-by-Step Guide to Replacing Spin-On Fuel Filters

Replacing a spin-on fuel filter is a task most boat owners can handle with the right tools and a bit of care. For me, safety is always the top priority. Ensure the engine is off and has had sufficient time to cool down. Always have a fire extinguisher readily available and work in a well-ventilated area, as you'll be dealing with gasoline. Proper fuel handling and disposal are non-negotiable.
Safety Precautions
Before you begin, make sure your engine is completely off and cool to the touch. Work in a well-ventilated area, ideally outdoors. Have a good quality fire extinguisher within easy reach at all times. Wear safety glasses to protect your eyes from any fuel splashes.
Tools Needed
You'll typically need a strap wrench to grip the old filter, a suitable container to catch any drained fuel (an old oil drain pan or purpose-built fuel catch can works well), and potentially new O-rings or gaskets for the filter assembly. I also like to have some shop towels handy for inevitable drips and spills.
Filter Removal and Disposal
First, place your catch container directly underneath the fuel filter you're working on. If your filter has a drain bowl, open the drain valve or screw to release any accumulated water and fuel into the container. Once drained, position the container beneath the main filter body. Using your strap wrench, grip the old filter firmly and turn it counter-clockwise. Be prepared, as there will still be fuel inside the filter, so have your container ready. After removing the old filter, properly dispose of the drained fuel and the old filter according to local regulations. Many auto parts stores accept used oil and filters for recycling.
New Filter Prep
Now, take your new spin-on filter and inspect it. Ensure the threads are clean and free of debris. Before installing, I always like to lightly apply a thin film of fresh engine oil to the rubber O-ring or gasket on the new filter. This helps create a good seal and makes future removal easier. A crucial step often overlooked by DIYers is to fill the new filter about 75-80% full with fresh gasoline before screwing it on. This process, known as priming, helps prevent air locks in your fuel system and ensures quicker engine start-up. Avoid reusing old seals or gaskets; always use the new ones provided with the new filter.
Installation Techniques
Carefully screw the new, pre-filled filter onto the filter head. Once the O-ring makes contact with the sealing surface, tighten it by hand an additional three-quarters to a full turn, or according to the manufacturer's specifications. Over-tightening can damage the seal, while under-tightening can lead to leaks. The goal is a snug fit. After installation, it's a good practice to immediately mark the installation date and the engine hours on the new filter using a permanent marker. This makes tracking your next service interval much easier.
Handling Difficult Filters
It's not uncommon to encounter a filter that's really stuck. If a standard strap wrench isn't cutting it, try wrapping a bit of sandpaper around the filter before using the strap wrench for extra grip. Be careful not to dent the filter too much, as this can make removal even harder. Sometimes, a gentle tap with a rubber mallet on the filter housing (away from the threads) can help break it free, but always proceed with caution to avoid damaging the filter head.
When a Filter Fails Catastrophically While Underway
I once experienced a filter that literally split open while I was 15 miles offshore. The sudden loss of fuel pressure caused my engine to die instantly, and fuel began leaking into my bilge - a dangerous situation. Here's what I learned to do in this emergency:
- Immediately shut down all electrical systems to eliminate ignition sources
- Use bilge blowers to ventilate the engine compartment thoroughly
- If you carry spare filters, replace the damaged one (I now always carry spares)
- If replacement isn't possible, you can create a temporary bypass by connecting the fuel lines directly, bypassing the filter - this is a last resort that will get you home but risks engine damage
The key is prevention - always inspect filter housings for cracks or stress marks during routine maintenance, and replace filters showing any signs of damage or corrosion immediately, not just when they're due by hours or date.
Yamaha Outboard Fuel System and OEM Filter Recommendations
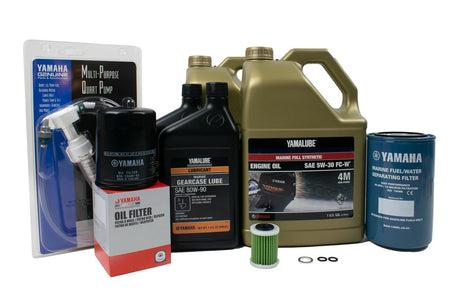
Yamaha really emphasizes a comprehensive approach to fuel system health, and I've found their Yamalube fuel additives to be quite beneficial in keeping things clean. Their approach involves a staged filtration system designed to deliver unparalleled fuel purity. For optimal performance and to ensure your engine warranty remains valid, using Yamaha genuine OEM filters is strongly recommended. These filters are engineered specifically for your Yamaha outboard, ensuring perfect fitment and filtration efficiency.
I've personally seen the benefits of sticking to OEM. While aftermarket options might seem cheaper, they often don't meet the same rigorous standards for material quality, filtration micron ratings, or sealing integrity that Yamaha demands. A clogged or poorly filtered fuel system can wreak havoc on the sensitive fuel injectors found in modern outboards, leading to costly repairs. Yamaha often advises that the VST filter replacement is best handled by dealer-managed service as part of their recommended maintenance schedule, typically around every 300 hours if other filters are properly maintained. For managing your maintenance, I've also heard good things about the Yamaha Siren Connected Boat app, which can provide maintenance reminders based on your engine's usage.
My Experience with OEM vs. Aftermarket Filters for Yamaha
After running my Yamaha F200 for three seasons, I decided to experiment with high-quality aftermarket filters to save money. The filters I chose had identical specifications and were made by a reputable manufacturer. For the first few months, everything seemed fine, but then I noticed my engine was taking longer to start and occasionally hesitating under load.
When I pulled the aftermarket filter, I discovered that despite having the same micron rating, it wasn't capturing contaminants as effectively as the OEM filter. The material appeared to be compressing under pressure, creating channels where unfiltered fuel could pass through. I immediately switched back to Yamaha OEM filters and the performance difference was noticeable within the first few hours of operation.
That said, I've had good experiences with certain high-end aftermarket filters from manufacturers like JLM Marine, which actually produce components for several OEM brands. Their filters maintain consistent performance and sometimes offer additional features like improved water separation capabilities. The key is researching who actually manufactures the filter, not just who sells it.
Mercury Outboard Fuel Filter Maintenance Overview

Mercury, much like Yamaha, places a strong emphasis on using their genuine Mercury OEM filters. This commitment ensures that the filtration meets the precise requirements of their engine designs, contributing to overall reliability and longevity. Mercury typically recommends maintenance intervals ranging from 100 to 300 hours for their fuel filters, which is a good benchmark to keep in mind.
One of the great resources Mercury offers its customers is access to step-by-step replacement videos for various Mercury horsepower models. I find these incredibly helpful, as seeing the process visually can demystify the task for many owners. If you're unsure about where to source these genuine filters, checking with your local Mercury dealership or authorized marine parts supplier is always the best route. They can ensure you get the exact filter matched to your specific outboard engine.
Mercury Filter Replacement Walkthrough
My experience replacing filters on my friend's Mercury Verado differed significantly from my Yamaha procedure. Mercury's filter housing design, particularly on newer Verado models, includes a more accessible mounting location and a different draining system.
With Mercury filters, I've found it's essential to pay attention to the specific tightening specifications. Over-tightening Mercury filters can damage the housing more easily than on some other brands. I always use a torque wrench when the service manual provides specifications, which Mercury does for most of their models.
The biggest difference I noticed was in the priming procedure. Mercury engines often require using the primer bulb for a specific number of squeezes after filter replacement, followed by turning the key to "on" position (without starting) for set intervals to properly pressurize the system. Following these specific steps has consistently resulted in easier starts after filter changes on Mercury outboards.
Troubleshooting Common Fuel Filter Issues
Even with regular maintenance, you might encounter issues with your fuel system that require troubleshooting. Here's how I approach common problems:
Engine Sputters or Loses Power
If your engine runs fine at idle but sputters or loses power under load, this often indicates a partially clogged filter. I've found that this happens when the filter can pass enough fuel at low demand but restricts flow when the engine needs more fuel. The solution is simple: replace the filter even if it's not yet due by hours.
Hard Starting After Filter Replacement
If your engine is difficult to start after replacing a filter, improper priming is usually the culprit. I've made this mistake myself - not filling the new filter with fuel or not pumping the primer bulb enough times. To fix this, make sure your primer bulb is firm, then turn the key to "on" without starting for 5-10 seconds. Do this 3-4 times to allow the electric fuel pump to push any air through the system. If problems persist, check for air leaks in fuel line connections.
Water in the Fuel After Filter Replacement
Finding water in your filter bowl shortly after changing filters could indicate several problems. First, check your fuel tank for water contamination. If the tank is clean, inspect the filter mounting surface for proper sealing. I once had recurring water issues that turned out to be rain water tracking down the engine cover and entering through a poorly sealed filter housing. Applying a small amount of dielectric grease around the mounting surface fixed the problem completely.
Recurring Filter Clogs
If you're replacing filters more frequently than expected, investigate the source of contamination. In my case, I discovered that my fuel tank vent was allowing humid air (and occasional rain) into the tank, promoting algae growth. Installing a better vent filter and using a quality fuel stabilizer with biocide eliminated my recurring clog issues.
When to Seek Professional Help

While I'm a strong advocate for DIY maintenance, there are certain situations where professional assistance is warranted. Here's when I recommend calling in the experts:
-
When you detect metal particles in your filter - This could indicate internal fuel pump failure or other serious issues requiring specialized diagnosis.
-
If you experience persistent fuel leaks after proper filter installation - This might indicate damaged mounting threads or housing problems that require professional repair.
-
When dealing with computerized fuel management systems - Modern engines with complex electronic fuel management sometimes require dealer-level diagnostic equipment to properly reset and calibrate after fuel system service.
-
If you notice fuel discoloration or strange odors - These symptoms could indicate chemical breakdown of fuel or other contamination issues that might require tank cleaning by professionals.
-
When VST filter replacement is needed - As mentioned earlier, the Vapor Separator Tank filter on many outboards requires special tools and procedures best handled by trained technicians.
I learned this lesson the hard way when I attempted to clean a VST on my own. What should have been a simple filter replacement turned into a much bigger project when I accidentally damaged a delicate pressure sensor. The repair cost far exceeded what I would have paid for professional service.
General Tips and Best Practices for Fuel Filter Maintenance

Beyond the core replacement process, there are several general best practices that can significantly enhance your fuel system's health and prevent future headaches. First and foremost, maintaining a regular inspection and replacement schedule is key. As much as I dislike routine tasks, the cost and frustration of dealing with a fuel-related breakdown far outweigh the effort of regular checks and timely replacements.
As I mentioned earlier, carrying spare fuel filters onboard is an absolute lifesaver. A clogged filter can strand you, and having the means to swap it out is invaluable, especially when you're miles from shore or a service dock. I also want to strongly advise against using cheap, aftermarket fuel filters. Investing in quality, ideally OEM, filters ensures you're getting the filtration performance your engine needs and can handle.
If you're ever unsure about any aspect of your fuel system maintenance, don't hesitate to consult certified marine technicians. They have the expertise and specialized knowledge to handle more complex issues or simply offer advice. Lastly, remember that proper disposal of drained fuel and used filters is crucial for environmental protection. Always follow local regulations for disposing of hazardous materials. By combining diligent maintenance with smart practices, you're setting yourself up for many more enjoyable hours on the water.
Quick-Reference Maintenance Checklist
Here's my personal maintenance checklist that has kept my outboard running smoothly for years:
- Before Each Trip:
- Visually inspect filter bowl for water/contaminants
- Drain water if present
- Check for fuel leaks around filter connections
- Ensure primer bulb firms up properly
- Every 50 Hours:
- Replace 10-micron water separator filter (more frequently if using ethanol fuel)
- Check all fuel line connections for wear/damage
- Test fuel tank vent for proper operation
- Every 100 Hours:
- Replace on-engine primary filter
- Inspect fuel pump for leaks or unusual noise
- Check anti-siphon valves if equipped
- Every 300 Hours:
- Have VST filter professionally inspected/replaced
- Consider professional fuel system cleaning
- Inspect tank for contamination
- Annually (Even with Low Hours):
- Replace ALL filters regardless of hour accumulation
- Use fuel stabilizer before storage periods
- Consider fuel system additives to combat ethanol issues
This schedule has proven more aggressive than manufacturer recommendations, but it has eliminated virtually all fuel-related issues from my boating experience.
Common Mistakes to Avoid
In my years of maintaining outboards and helping fellow boaters, I've seen numerous mistakes that could have been easily avoided:
-
Not labeling filters with installation date - This simple step prevents guesswork about when filters were last changed.
-
Overtightening new filters - I've seen crushed gaskets and cracked housings from excessive force. Hand-tight plus a quarter turn is usually sufficient.
-
Failing to prime the system properly - Many hard-starting issues after filter changes come from air in the fuel system.
-
Ignoring small leaks - What starts as a minor seep can quickly become a major leak or fire hazard.
-
Mixing filter types - I once saw someone install a gasoline filter in a diesel system. Always verify you have the correct filter for your specific application.
-
Neglecting the tank - The best filtration system can't overcome a severely contaminated fuel tank. Periodic tank cleaning is essential.
-
Using household tools - Improvising with pliers or other makeshift tools often damages filter housings. Invest in a proper filter wrench.
My own worst mistake? Rushing through a filter change as a storm approached. I failed to properly fill and prime the new filter, resulting in a stalled engine right as rain began falling. The lesson was clear: proper maintenance deserves your full attention, regardless of circumstances.
Frequently Asked Questions
How often should I replace my spin-on fuel filter on my outboard?
Most manufacturers recommend replacing your spin-on fuel filter at least annually or every 100 engine hours, whichever comes first. For the 10-micron fuel/water separator filter, many experts suggest changing it every 50 hours or annually, especially if you encounter poor fuel quality or operate in harsh marine environments. Always consult your specific owner's manual for the most accurate intervals for your engine model.
Can I clean and reuse my spin-on fuel filter?
Generally, no. Most spin-on fuel filters are designed for single use and cannot be adequately cleaned and reused. Attempting to clean them can damage the filtration media or leave behind contaminants. It's far more cost-effective and safer for your engine to replace the filter with a new one.
What are the signs that my fuel filter needs replacement?
The most common signs include engine sputtering, rough idling, difficulty starting, hesitation during acceleration, or an overall loss of power. If you notice water or debris accumulating in the filter's drain bowl, it's a clear indicator that the filter needs immediate attention, either by draining or replacement.
Should I use OEM or aftermarket fuel filters for my Yamaha/Mercury outboard?
It is highly recommended to use OEM (Original Equipment Manufacturer) filters for your Yamaha or Mercury outboard. OEM filters are designed and tested to meet the specific performance and filtration standards set by the engine manufacturer, ensuring optimal engine health, reliability, and often maintaining warranty validity. While aftermarket filters may be cheaper, they may not offer the same level of quality or filtration efficiency.
How do I safely dispose of fuel drained from my filters?
Fuel is a hazardous material. You should collect the drained fuel in a sealed, approved container. Never pour it down a drain, into the ground, or into regular trash. Contact your local waste management facility or auto parts store that handles hazardous waste as many accept used fuel for proper disposal and recycling. Always ensure your work area is well-ventilated and you have appropriate safety equipment, like gloves and eye protection, when handling fuel.
A Foundation for Engine Longevity
The journey to keeping your outboard engine running smoothly starts with understanding the vital role of its fuel filter. We've explored why maintaining these components is non-negotiable, detailing the various types of filters you'll encounter and their locations within the intricate fuel system of your Yamaha or Mercury outboard. Adhering to the recommended maintenance intervals—whether it's the 100-hour mark for general replacement or more frequent checks for water separators—is paramount. I've personally found that implementing a routine of visual inspection and regular water draining before each trip isn't just a good practice, it's a necessity that prevents major headaches down the line.
Perhaps the most impactful takeaway is the importance of being prepared and using the right parts. Carrying spare fuel filter elements is a smart move for any boater, and prioritizing OEM filters for your Yamaha or Mercury outboard ensures you're using components built to the manufacturer's exacting standards. Following our step-by-step guide for replacement, including crucial safety precautions and proper new filter preparation like priming and lubricating the O-rings, will arm you with the knowledge to tackle this essential task confidently. Remember the old adage: a stitch in time saves nine, and in the marine world, a clean fuel filter can save you from significant downtime and costly repairs.
By diligently attending to your outboard's fuel filter maintenance, you're doing more than just swapping out a part; you're safeguarding your engine's performance, extending its lifespan, and ensuring that your time on the water is spent enjoying the ride, not troubleshooting mechanical failures. It's a small effort that yields immense returns in reliability and peace of mind.
Discover more detailed marine parts and maintenance insights at JLM Marine.