


Mid-Season Maintenance: Keeping Your Outboard in Top Shape
- Why This Matters
- Tools and Parts You'll Need
- Checking and Changing Lower Unit Lubricant
- Inspecting the Propeller and Shaft
- Four-Stroke Oil Level Check
- Bolt and Mount Tightness Checks
- Trailer Bearings and Tires
- Hitch and Safety Chain Inspection
- Mid-Season Service Planning
- Parts: OEM vs. Aftermarket
- Saltwater vs. Freshwater Differences
- Why Low-Hour Engines Fail
- Post-Trip Maintenance: Flushing and Protection
You're halfway through the season. Your outboard's been running hard, and if you haven't done a proper check yet, now's the time. I've been wrenching on outboards for 20 years, and I can tell you the motors that die mid-season are the ones that got skipped over in July. Mid-season maintenance isn't optional if you want to finish the year without a tow-in.
Most recreational boaters log under 50 hours a year, but if you're fishing twice a week or running a guide service, you're hitting 50-100 hours by mid-summer. Yamaha, Mercury, and Honda all recommend service every 100 hours or annually, whichever comes first. For heavy users, that means you're due for a mid-season service right now.
Here's what we're covering:
- Lower unit lubricant change
- Propeller and shaft inspection
- Mounting bolt checks
- Trailer bearings and tires
- Hitch and safety chain inspection
- Mid-season service planning
- Daily maintenance habits
Why This Matters

A well-maintained outboard lasts 1,500 to 4,000 hours. Skip the basic checks and you're inviting expensive failures. Poor lubrication causes nearly 40% of premature bearing failures, according to NMMA studies. A neglected gearcase can turn a $20 oil change into a $3,000 to $5,000 lower unit replacement.
The US Coast Guard's 2023 recreational boating statistics list machinery failure as a top cause of accidents, right alongside operator error. Regular checks cut that risk significantly.
Tools and Parts You'll Need
Before you start, gather these:
- Flathead screwdriver (large, fitting the drain plug slots perfectly)
- Gear lube pump
- Torque wrench
- Socket set
- Grease gun with marine-grade lithium complex grease
- Prop wrench
- Drain pan
- Shop rags
- Lower unit lubricant (check your manual for the exact type and quantity—typically 1 liter for 40-60 HP outboards)
- Fuel filter and water separator
Checking and Changing Lower Unit Lubricant
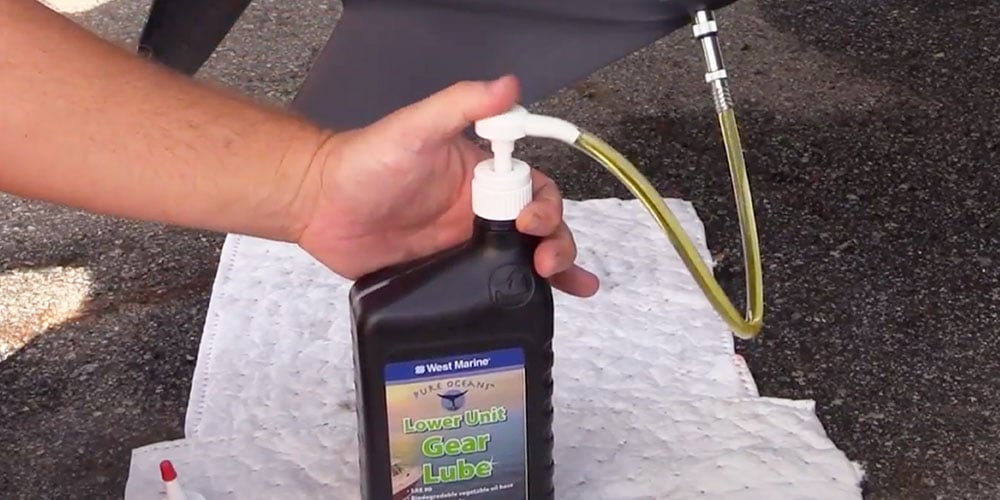
The lower unit is your gearbox. It keeps the gears meshed, lubricated, and cool. If you've ever priced a replacement lower unit, you know why this 20-minute job is critical. We've seen customers facing $3,000 to $5,000 bills for seized lower units that could have been saved with regular oil changes.
Here's the process:
- Tilt the outboard to a level position.
- Locate the two plugs on the lower unit—one near the bottom (drain) and one higher up (vent/fill).
- Loosen the top vent plug first, then remove the bottom drain plug. Removing the top plug while draining ensures air displaces the oil and it flows out smoothly.
- Let all the old oil drain into your pan. Watch for milky or foamy oil—that's water intrusion from a bad seal. If you see metal shavings mixed in, that's gear failure, not just a seal problem. Water intrusion means you need new seals; metal shavings mean you're looking at internal damage.
- Once fully drained, reinstall the bottom drain plug snugly.
- Attach your gear lube pump to the bottom hole (where the drain plug was) and pump new gearcase lubricant in from the bottom up. This pushes out any trapped air.
- When fresh oil starts coming out of the top vent hole, quickly replace the top plug first, then remove the pump and replace the bottom plug.
Use quality, brand-specific lubricant. Cheap stuff fails faster and costs more in repairs. Some non-OEM manufacturers produce in the same facilities as OEM brands and meet the same standards—JLM Marine lubricants, for example, are factory-spec quality without the dealership markup. Our marine lubrication and grease products collection offers trusted options that protect your engine and lower unit.
If the drain screw is stuck: Use an impact driver or ensure your screwdriver fits the slot perfectly to avoid stripping it. A stripped drain plug turns a simple job into a nightmare.
Inspecting the Propeller and Shaft
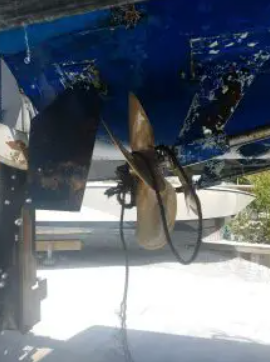
Braided fishing line is insidious. It works into the propeller shaft seals like a scalpel, shredding them. Once it gets past the seals, it destroys your lower unit. We've seen props wrapped so tightly the shaft was completely hidden.
The signs: Milky or foamy lower unit oil, reduced performance, vibration.
What to do:
- Tilt the engine up.
- Grab the prop and spin it. Look closely between the propeller and the lower unit housing.
- If you see fishing line, pull it out carefully. If it's embedded deep, you'll need to remove the prop.
- To remove the prop, place a block of wood between a propeller blade and the anti-ventilation plate to stop rotation. Use your prop wrench to loosen the prop nut.
- Slide the prop off and inspect the shaft and seals behind it for nicks, line damage, or wear.
Remove the prop every 3-4 trips if you fish regularly, especially with braided line. Check the shaft for any damage, and replace the prop if blades are bent or the hub is spun. For more detailed guidance on prop maintenance and replacements, check out our stainless steel vs. aluminum propellers guide.
Four-Stroke Oil Level Check
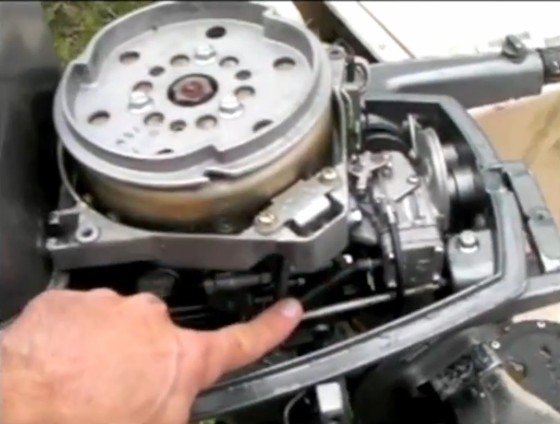
This is basic, but it's also the most skipped step. We've seen engines nearly seize because the owner didn't bother checking oil before heading out.
How to check:
- Level the engine (not tilted).
- Remove the dipstick, wipe it clean, reinsert it fully, then pull it out again.
- Check the oil level against the dipstick markers. It should be between the low and high marks.
- If it's low, top it off with the manufacturer-specified oil. Don't overfill.
- Look at the oil color. If it's black and gritty, you're overdue for a change. If it's milky, you've got water intrusion—likely a head gasket or cracked block.
Do this before every outing. It takes 30 seconds.
Bolt and Mount Tightness Checks
Your outboard bolts to the transom. Over time, vibration loosens these mounting bolts. If they come loose, you're looking at increased vibration, transom damage, or—worst case—the motor detaching from the boat.
What to do:
- Use a socket wrench and check every mounting bolt and nut.
- Snug them to the manufacturer's torque spec (typically 35-50 ft-lbs for mid-size outboards, but check your manual).
- Don't overtighten and strip the threads, but make sure they're firm.
- Use a marker to draw a line across the nut and bolt (a reference mark). Next time you check, you'll instantly see if anything has rotated and loosened.
Check these every few months and definitely at mid-season.
Trailer Bearings and Tires
Your trailer gets your boat to the water. If it fails on the highway, it's not just inconvenient—it's dangerous.
Bearings:
Trailer bearings live a hard life. They get submerged in water, grit, and road salt. Re-greasing them is critical, especially after submersion.
- Locate the grease fittings (zerk fittings—the small metal grease nipples on the hub).
- Hook up a grease gun loaded with marine-grade lithium complex grease.
- Pump a few shots into each fitting. You'll see old grease and water pushed out; fresh grease should follow.
- Warning: Don't over-grease. Too much pressure can blow out the rear seal, letting water into the hub. Pump until you see fresh grease, then stop.
- If the grease is contaminated with water, or if the bearings feel rough when you spin the hub, it's time for a full bearing replacement.
Diagnosis trick: Jack up the trailer and grab the tire at 12 and 6 o'clock. Wiggle it. Then grab it at 9 and 3 o'clock and wiggle again. Any play indicates bad bearings.
Tires:
Check tire pressure before every significant trip. Underinflated tires wear faster, reduce fuel economy, and increase blowout risk. Overinflated tires give a harsh ride and uneven wear.
- Check the sidewall for the maximum recommended PSI.
- Use a tire gauge and inflate accordingly.
- Inspect for cracks, bulges, or uneven wear. Replace any tire showing these signs.
Hitch and Safety Chain Inspection 
Your hitch holds your boat and trailer to your vehicle. The safety chains are your last line of defense if the hitch fails. We've heard stories of tow balls snapping and trailers going rogue.
Hitch:
- Inspect the hitch ball and coupler for cracks, wear, or damage.
- Ensure the coupler latches properly onto the ball and the locking pin is secure.
- If the coupler nut is loose on the ball, tighten it until it fits snugly but still allows smooth operation.
Safety chains:
- Make sure the chains aren't dragging on the ground.
- Cross them under the hitch in an X pattern. This creates a cradle that catches the trailer tongue if it drops, preventing the trailer from hitting the pavement and giving you a chance to stop safely.
- Check that the chains are long enough to allow turning without pulling taut, but not so long they drag.
- Inspect the links and hooks for wear or cracks. Replace if damaged.
Do this visual check and give the chains a hard tug every time you hook up.
Mid-Season Service Planning
You're at the halfway point. Now's the time for a deeper check beyond the basics.
If you're at 50-100 hours, do this:
-
Water pump impeller check: If you boat in shallow, silty, or sandy water, the impeller takes a beating. Remove the lower unit and inspect the impeller for cracked or missing vanes. John Park, owner of Swift Marine Yacht Management, says, "If you run in sandy, muddy, or shallow Charleston waterways, replace the impeller every single year… Impeller failures are one of the top causes of overheating and powerhead damage." For a step-by-step replacement guide, see our How to Replace a Mercury Outboard Water Pump Impeller article.
-
Thermostat inspection: Pull the thermostat and test it in a pot of water on the stove. Heat the water to the thermostat's rated opening temperature (usually stamped on it, around 140-160°F). It should open fully. If it stays closed or only opens partway, replace it. A stuck thermostat causes overheating or prevents the engine from reaching operating temperature. Detailed instructions are available in our How to Replace the Thermostat on Your Yamaha F225, F250, or F300 4.2L V6 Outboard Motor blog.
-
Anode check: If you run in saltwater, inspect sacrificial anodes. Replace them if they're dissolved by 50% or more. Anodes prevent corrosion on your lower unit and engine. If they're gone, corrosion attacks your engine instead.
-
Fuel filter and water separator replacement: Swap these out. Ethanol-blended fuel attracts water and gums up over time, especially in humid coastal areas. A clogged filter starves your engine of fuel. JLM Marine offers a variety of fuel filters suitable for different outboard models.
-
Spark plug inspection: Pull the plugs and look at the electrodes. Black soot means the engine's running rich (too much fuel). White or blistered electrodes mean it's running lean (too little fuel). Tan or light brown is normal. Replace fouled plugs. Gap them to spec before reinstalling.
-
Grease all zerk fittings: Hit every grease point on the engine and steering with your grease gun. This includes tilt/trim cylinders, steering pivot points, and throttle linkage.
Lakeside Marine service advisors recommend: "For others who use their boats more frequently, or for an extended season, choose to change your oil mid-season as well." Research shows engines stored with clean oil last 50% longer, making mid-season oil changes critical for high-use outboards.
Usage-based guide:
- Light use (under 50 hours/year): Stick to basic fluid checks and annual service.
- Moderate use (50-100 hours/year): Mid-season oil change if you're on the higher end, plus cooling system and anode inspection.
- Heavy use (100-200 hours/year): Full bi-annual service including impeller, thermostat, and all filters.
Parts: OEM vs. Aftermarket
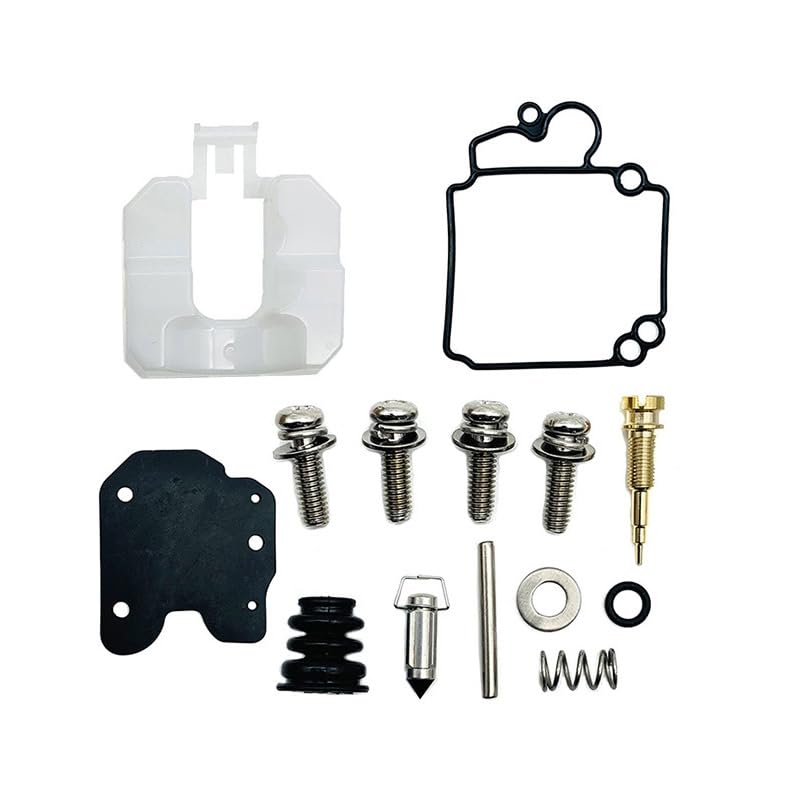
OEM parts are reliable, but you're paying a premium for the logo on the box. At the other end, cheap no-name kits from random online sellers are a trap. We see it constantly—someone buys a $10 carburetor kit, and the rubber is too hard, the gaskets don't seal, and two weeks later they're tearing the engine apart again.
Why cheap kits fail: The rubber compounds aren't resistant to ethanol-blended fuels. Ethanol degrades low-quality rubber, causing it to swell, crack, or harden. The result is fuel leaks, air leaks, and poor performance.
The smart middle ground is reputable aftermarket parts. Some factories that manufacture for OEM brands use excess capacity to produce non-OEM items, and these are often high quality. JLM Marine parts, for instance, are manufactured to factory specs and tested to the same standards as OEM, but without the dealership markup. You get parts that fit right, last, and don't burn unnecessary cash. Browse our extensive carburetor repair kit collection and other OEM-quality replacement parts.
Saltwater vs. Freshwater Differences
If you run in saltwater, double the frequency of post-trip flushing and anode checks. Salt accelerates corrosion and clogs cooling passages faster than freshwater. Coastal US boaters—especially in the Gulf, Southeast Atlantic, and Southern California—need to flush engines with fresh water after every single trip and inspect anodes monthly during the season.
Freshwater boaters can extend some intervals, but don't skip the basics. Algae, silt, and debris still clog intakes and damage impellers.
Why Low-Hour Engines Fail

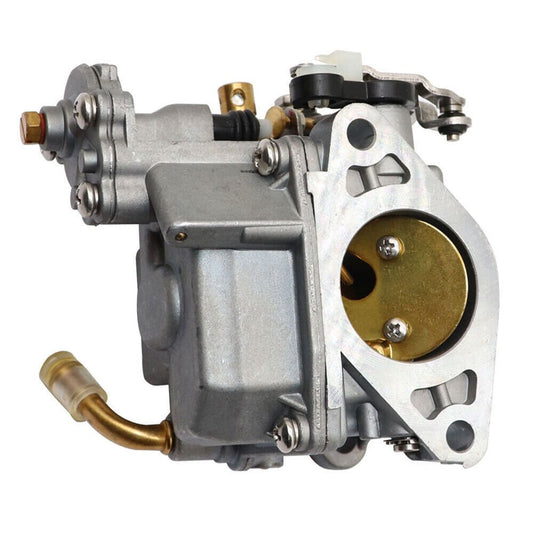
Here's something that surprises people: low-hour engines sitting unused often have more problems than high-hour engines that run regularly. Fuel systems are the main culprit. Ethanol-blended gas absorbs moisture and separates in as little as 30 days. If your engine sits for weeks between uses, fuel gums up in the carb, clogs jets, and corrodes metal parts.
If you're a low-hour user, run your engine monthly and use ethanol-free gas or add a fuel stabilizer. Movement keeps seals lubricated and prevents corrosion.
Post-Trip Maintenance: Flushing and Protection
After every outing—especially in saltwater—flush your engine thoroughly with fresh water. Use flush muffs, a flush bag, or the built-in flush port if your engine has one. Run fresh water through the cooling system for at least 5-10 minutes to clear out salt, sand, and debris.
After flushing:
- Remove the cowling.
- Spray the powerhead with a corrosion protectant (Yamashield or equivalent).
- Wipe down visible components with a rag to remove any salt residue.
This habit alone will extend your engine's life by years.
When you're done for the day, check your oil level one more time before you shut the garage door. It's the simplest habit, but it's the foundation of a long-lasting engine.
For detailed pre- and post-season maintenance, visit our comprehensive Complete Annual Maintenance Guide for Boat Engines.
Sources: