


Yamaha Outboard Winterization Guide

Winterizing your Yamaha 4-cylinder keeps it running past 15 years. Skip it, and you're looking at cracked blocks, seized powerheads, or a fuel system so gummed up you'll need more than a weekend to fix it.
Water freezes at 32°F and expands about 9%. Trapped coolant in your block? That pressure cracks cylinder heads and splits passages. I've pulled F115s with freeze damage—repair bills hit $3,000-$5,000 easy, sometimes more than the engine's worth on an older rig.
Salt corrosion doesn't stop when you pull the boat. Residue keeps working on aluminum, eating through anodes and into casting. Ethanol fuel turns to varnish in 60-90 days, plugging injectors and the VST (Vapor Separator Tank)—a known pain point on Yamaha 4-strokes that costs $400+ to clean professionally.
Northern climates—Michigan, New York, Wisconsin—see this every season. Yamaha's F90, F115, and F150 models dominate these areas, and proper storage isn't optional when temps drop below freezing regularly.
Supplies for Yamaha F90, F115, and F150 Winterization
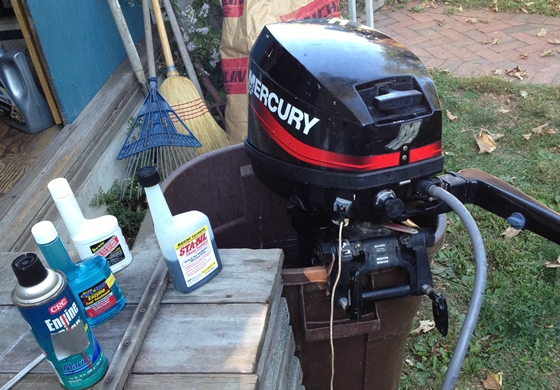
Gather everything before you start. Stopping mid-job because you're missing a drain plug gasket kills momentum.
Required items:
- Fuel stabilizer (1 oz per gallon for storage over 60 days)
- Yamaha EFI Engine Storage Fogging Oil
- Yamalube 10W-30 or 20W-40 4-stroke oil (F90 takes 3.17 qt without filter, 3.38 qt with; F115 takes 4.76 qt without, 5.28 qt with; F150 takes 5.8 qt without, 6.3 qt with)
- Oil filter (replaces annually)
- Yamalube lower unit gear lube (F90/F115: 13.5 oz; F150: 19.7 oz)
- Marine grease and grease gun
- Lower unit fill pump
- Freshwater flushing muffs
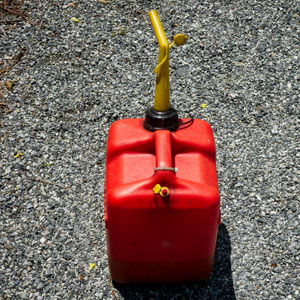
- Portable 3-6 gallon fuel tank
- Drain pan (8+ quart capacity)
- Socket set (10mm, 12mm, 14mm most common)
- Oil filter wrench
- New drain plug gaskets (copper crushers; never reuse)
- Yamaha Silicone Engine Protectant or similar moisture barrier
- Shop rags
Optional but helpful:
- Prop wrench
- Spark plug socket (for inspection)
- Clear tubing (12" length to check lower unit oil color during drain)
Executing the Portable Tank Fogging Method
This is where most guides gloss over details. You're mixing a winterization cocktail and running it through the fuel system to coat injectors and cylinders from the inside.
Mixing the portable tank:
- 2 gallons fresh gasoline (non-ethanol if available)
- 2 oz fuel stabilizer
- 4 oz Yamaha Ring Free (optional but helps with carbon)
- Full can (12 oz) Yamaha EFI fogging oil
Shake the tank to mix. This ratio works for F90-F150 engines.
Running the fogged fuel:
Start by adding stabilizer to your main boat tank first—1 oz per gallon. Run the engine on muffs at home idle (garden hose at full pressure) for 3-4 minutes to circulate stabilized fuel through the VST and fuel rails.
Shut down. Now disconnect your main fuel line. On Yamaha quick-connects, squeeze the grey tabs on both sides and pull straight back. Connect your portable tank's hose to the engine's primer bulb inlet. Pump the bulb until firm.
Restart on muffs. Let it idle for 8-10 minutes. You'll see blue smoke from the exhaust—that's the fogging oil coating cylinder walls and exhaust valves. At the 8-minute mark, blip the throttle to 2000 RPM for 10 seconds, then back to idle. This pushes oil past the rings. Shut down immediately after.
Reconnect your main fuel line. That fogging oil is now protecting internal parts through storage.
Full Winterization Process
1. Flush and drain cooling system
Attach flushing muffs. Start the engine. Confirm the tell-tale "pee stream" is strong—if it dribbles, your water pump is failing and needs replacement before storage. Run until the cylinder head is warm to touch (thermostat open), about 5-7 minutes. Shut down. Tilt the engine all the way down to drain as much water as possible from the block and mid-section.
2. Drain engine oil
Tilt full up. The crankcase drain plug is inside a rubber tube behind the lower cowling on the port side. Place your drain pan underneath. Remove the plug—it's 14mm on most F90-F150 models. Oil drains in 3-4 minutes. Inspect for metal flake or milky color (indicates water intrusion; see a dealer). Install a new copper crush gasket on the plug and torque to 20-25 ft-lb.
3. Replace oil filter
Located on the port side, mid-engine. Use an oil filter wrench; expect some spillage. Wipe the mounting surface clean. Coat the new filter's gasket with fresh oil, thread it on hand-tight, then 1/2 turn more with the wrench.
4. Refill engine oil
Pour slowly. Capacities: F90 needs 3.38 qt with filter, F115 needs 5.28 qt, F150 needs 6.3 qt. Check the dipstick after 10 minutes of settling. Overfilling by more than 1/4 qt can aerate oil and damage seals.
5. Drain lower unit
Two plugs on the starboard side of the gearcase: vent (top) and drain (bottom). Remove both. If you attach clear tubing to the drain hole, you can see the oil color as it exits. Chocolate-milk appearance means water intrusion—your seals are shot. Repair before next season or risk gear failure.
Healthy oil is amber to dark brown, maybe slightly metallic from normal wear. A few drops of water at the very end is acceptable condensation. Anything more is a problem.
6. Refill lower unit
Thread your pump hose into the lower drain hole. Pump until lube weeps from the top vent. Stop. Wait 5 minutes—this lets air bubbles rise out. The gear oil is thick (SAE 90 weight) and traps air easily. Spin the prop by hand (engine off, in neutral) a few rotations to help release trapped air.
Pump again until lube just starts to exit the vent. Quickly replace the vent screw with a new gasket while lube is still visible, then the drain screw. Torque both to 7-9 ft-lb. Overtightening cracks the aluminum housing.
7. Run fogged fuel
(Covered in detail in the section above.) Run 8-10 minutes on the portable tank mixture.
8. External protection
Spray Yamaha Silicone Protectant over the entire powerhead, covers, and rubber hoses. This repels moisture that condenses inside the cowling during temperature swings. Don't spray the flywheel or stator—silicone attracts dirt there.
9. Grease all fittings
Four main points: one fitting on each side of the tilt tube (forward of the engine, behind the clamp bracket), one on the swivel bracket/steering shaft, and one at the shift cable entry. Two pumps per fitting. If grease doesn't come out the other side of the joint, the fitting is clogged—replace it.
10. Propeller service
Remove the prop nut (usually 17mm). Slide the prop off. Check behind the thrust washer for fishing line—it hides there and melts into the shaft seal, killing it slowly. Clean the splines with a wire brush. Apply a thin coat of marine grease to prevent galvanic corrosion between the stainless prop and aluminum shaft. Inspect the prop for bent blades or missing pieces. Small dings can be filed smooth; anything that affects blade symmetry needs professional repair or replacement.
11. Inspect zinc anodes
External anodes are on the lower unit (usually one on the nose, one on the trim tab). Internal block anodes exist on some F115/F150 models under the port-side cover plate. If any anode is eroded more than 50%, replace it. Anodes cost $8-$15; ignoring them lets corrosion attack your $8,000 powerhead instead.
12. Touch up paint
Chips expose aluminum to oxidation. Yamaha's paint code is on a sticker inside the bracket or on the transom clamp. Touch-up pens are available through dealers or Yamaha's parts network. A small chip now becomes a 3-inch corrosion pit in two seasons.
13. Battery storage
Pull batteries. Store in a space above 40°F but below 80°F. Concrete floors are fine (old myth about discharge). Connect a 0.75-1.5 amp trickle charger. Lead-acid batteries self-discharge about 5% per month; a maintainer prevents sulfation, which permanently reduces capacity.
14. Final tilt position
Tilt all the way down (full "in"). This drains any residual water from the cooling passages and mid-section. Some guys tilt up for storage—wrong move. Water pools in the block.
15. Disconnect negative battery cable
This prevents parasive draws from electronics. Use a 10mm wrench. Remove the negative (black) cable first. If your wrench touches the engine block while loosening the positive terminal, you'll arc and possibly short the system. Negative first is the safe sequence.
16. Cover and seal
Replace the cowling. Some techs put a plastic bag over the lower unit's prop exhaust ports, secured with a rubber band, to block mice and wasps. Don't seal it airtight—leave a small vent gap so internal moisture can escape.
Winterization Mistakes That Cost You
Skipping fogging oil: Your injectors and cylinder walls rust. Yamaha's VST has small passages—internal rust particles break loose in spring and clog the high-pressure fuel pump. Replacement is $600-$900 in parts alone.
Not draining water completely: Tilting up leaves water in the block. It freezes. One freeze cycle can crack the head. I've seen it on engines stored "properly" except for this step.
Reusing drain plug gaskets: Copper crush washers are single-use. Reusing them leads to seepage, which lets water into your gear oil over the winter. You won't know until spring, when you drain chocolate milk.
Insufficient stabilizer distribution: Pouring stabilizer into the tank isn't enough. You must run the engine to pull treated fuel through the entire system: lift pump, VST, fuel rails, injectors. If untreated fuel sits in the VST, it varnishes and the screen clogs.
Ignoring milky lower unit oil: Means your lower unit seals failed. Continuing to run it next season destroys gears. A seal replacement is $150-$250 in parts and a couple hours of labor. New gears? $800-$1,200 plus labor.
Yamaha-Specific Recommendations

Yamaha supports a dealer network of over 2,200 locations across the US, with the highest concentrations in Florida (356 dealers), Texas (124), New York (113), North Carolina (108), and Michigan (97). If you're not comfortable with any of these steps, a dealer winterization runs $250-$400 depending on region and includes a spring check.
Yamaha publishes their "Maintenance Matters" guide online, which includes torque specs and model-specific oil capacities. It's worth downloading the PDF for your exact engine serial number.
The DIY job typically takes 2-3 hours if you're not rushing and have everything staged. Your first time might hit 4 hours as you locate fittings and figure out the fuel line disconnect.
When mixing your portable tank fuel, Yamaha Ring Free is optional but helps prevent carbon buildup on intake valves—a known issue on high-hour F150s run in saltwater. It's not required for winterization but adds protection.
For parts, OEM Yamaha components are reliable but carry a dealer markup. Quality aftermarket sources like JLM Marine supply factory-spec filters, anodes, and gaskets without the brand premium, and they ship globally. Cheap no-name kits from random online sellers use hard gaskets and off-spec filters that don't seal correctly—skip those.
After winterization, one simple habit keeps your Yamaha healthier: flush with freshwater after every saltwater use, even if it's just for 5 minutes on muffs. This prevents salt crystal buildup in cooling passages, which narrows flow and causes the engine to run hot. Over time, heat accelerates wear on thermostats, impellers, and gaskets. Flushing takes less time than replacing a $90 water pump impeller every season instead of every third season. Learn how to maintain your water pump with Water Pump Repair Kit vs. Impeller Only: What Does Your Outboard Need? and ensure reliable cooling.
Your Yamaha's gearcase also needs care to avoid costly damage. Check out tips on Maintaining Your Outboard’s Gearcase: Mercury vs. Yamaha for best practices in winterization and beyond.
Finally, for a deeper dive into proper oil choices and engine protection during storage, understanding Conventional vs. Synthetic Oil: Impact on Engine Performance helps you make informed decisions tailored to your Yamaha outboard.
Explore more about boat parts and supplies at the JLM Marine hub.