


Troubleshooting No Spark in a Chrysler 15 HP Outboard: Beyond Points & Condensers
Mechanical and Battery Checks First
Your Chrysler 15 HP cranks but won't fire. Zero spark on one cylinder, both cylinders, or cuts out when the engine warms up—you've got a no-spark problem. Before you pull the flywheel or crack open the wiring harness, run through the mechanical stuff. Check compression on both cylinders. If one reads significantly weaker, stop and fix that first. Pull the flywheel cover and look at the magnets. Are they cracked? Loose? We've had magnets come unglued and cause chaos. Check your battery voltage—12 to 16 volts is the sweet spot. If the starter is dragging and the flywheel spins sluggishly, your ignition system won't generate enough voltage to produce a good spark, even if every component tests fine.
Tools and Safety
You'll need a digital multimeter with a DVA (Digital Voltmeter Adapter). This adapter reads the high-voltage pulses from the stator and trigger that a standard multimeter can't catch. Without it, you'll miss voltage drop issues that kill spark. Grab an insulated spark tester so you don't shock yourself. Keep a socket set, screwdrivers, and wrenches handy. Disconnect the battery before working around the flywheel. These systems store charge.
Component-by-Component Diagnostic Flow
Work from easiest to hardest. Don't skip steps.
Step 1 — Spark Plug and Plug Cap Checks
Pull your spark plugs. A fuel-washed plug looks wet and smells like gas—often means flooding or a carburetor issue. A carbon-fouled plug has dry, black soot—sign of a rich fuel mixture or weak spark that didn't burn the fuel completely. If either plug looks bad, replace it. Use the manufacturer-recommended plug and gap it to 0.030 inches. Even a healthy-looking plug can fail internally. Install a known-good plug, connect your insulated spark tester between the plug and ground, then crank. You want a strong, consistent blue spark. Weak yellow spark or nothing? The plug isn't your problem.
Step 2 — Kill Switch and Ignition Switch Isolation
The kill circuit grounds out the CDI unit when you hit the emergency stop. On Chrysler 15 HP motors, it's typically a solid blue or white wire running from the CDI to the kill switch or lanyard. Disconnect this wire completely from the CDI module. Crank the engine again. If spark suddenly appears, the problem is in the kill circuit—a bad switch, frayed wire, or corroded connection. We've seen guys replace ignition coils, stators, and CDI units only to find a short in the kill wire. If your engine has been rewired or repaired before, the wire colors might not match the manual. Trace the wire physically from the CDI to the switch and document it with photos.
To isolate a break hidden inside an intact wire sheath, set your multimeter to continuity mode. Disconnect both ends of the suspect wire. Touch one probe to each end. No beep? The wire is broken internally. Flex the wire along its length while testing—if continuity flickers, you've found the exact spot where the copper strands broke inside the insulation.
Step 3 — Ground Checks and Wiring Colors
Clean, tight grounds are critical. Check grounds from the stator, trigger, and engine block. Corrosion is common, especially in saltwater. We had one motor where every ground looked perfect, but a tiny nick in the CDI ground wire caused intermittent no-spark. Chrysler and Force outboards are notorious for inconsistent wiring colors. What the manual says and what's on your engine can be different, especially after decades of use or prior repairs. Take clear photos of the wiring harness before you disconnect anything. Trace each wire from source to destination. Write down the colors and the terminals they connect to.
After any connector work, coat the bullet connectors with dielectric grease. This prevents corrosion and keeps moisture out, which is the real enemy of these systems.
Step 4 — DVA Testing the Stator and Trigger Under Flywheel
Now you're under the flywheel. The stator generates power for the CDI unit. The trigger (timer base) sends the timing signal telling the CDI when to fire. A failed trigger looks exactly like a bad CDI, so test them separately.
To remove the flywheel, you'll need a harmonic balancer puller. Do not pry or hammer on the flywheel—you'll crack it or damage the crankshaft taper. Once the flywheel nut is off, thread the puller into the flywheel, tighten it down, and give the puller bolt a sharp tap with a hammer. The flywheel should pop free. Watch for the woodruff key on the crankshaft—don't lose it, and check that it's not sheared.
With the flywheel off, locate the stator wires (usually blue/yellow or blue/blue depending on the year). Using your DVA adapter, measure the stator output while cranking. You should see at least 180 volts. Resistance between the stator wires should read 680-800 ohms for OEM stators or 250-350 ohms for aftermarket units (like those from JLM Marine, which are factory-spec quality without the dealership markup). If you get a flatline zero-voltage DVA reading during cranking, the stator is dead—either shorted internally or the windings are open.
Test the trigger resistance next. It should read approximately 50 ohms between the wire sets and be open to ground. DVA voltage should be 0.5 volts or higher. If you see zero volts or infinite resistance, the trigger has failed.
Step 5 — CDI Unit and Coil Tests
The CDI unit stores power from the stator and discharges it to the ignition coils at the exact moment. Symptoms of a failing CDI include intermittent spark, no spark at all, or heat-related failures where the unit works cold but quits when warm. To test for heat-related failure, bench-test the CDI unit and use a heat gun or hair dryer to gently warm the module to operating temperature (around 150-180°F). If spark cuts out as it heats, the CDI is failing internally.
The ignition coils step up voltage from the CDI to thousands of volts. Test coil resistance with your multimeter. Primary resistance (the wire going into the coil from the CDI) should read 0.2 to 0.4 ohms. Secondary resistance (from the coil to the spark plug wire) should read 5,000 to 10,000 ohms. If either reading is way off or shows infinite resistance (open circuit), replace the coil.
Important: A shorted trigger or stator can damage a new CDI unit. Always test and fix the stator and trigger before replacing the CDI.
We recommend sourcing a CDI conversion kit and ignition coils from reputable manufacturers like CDI Electronics or JLM Marine to ensure quality and reliability.
Case Study — Troubleshooting Negative Voltage Readings and Wiring Gremlins

A member from the Antique Outboard Motor Club had a 1991 Chrysler Force 15 HP with zero spark on both cylinders. He'd bench-tested the coils, found one bad, and replaced both with a CDI Electronics conversion kit. He cleaned all grounds and bypassed the kill switches—still no spark. When he tested the stator wiring, he got what looked like a negative voltage reading on his multimeter, which confused him. It turned out the wiring colors didn't match the manual. The kill wire was gray instead of the expected brown, and it was still partially grounded through a corroded connector he'd missed. The "negative" voltage was actually the multimeter reading the polarity backwards because the probe was on the wrong terminal. Once he physically traced every wire under the flywheel, documented the actual colors, and found the hidden corrosion on the gray kill wire, he disconnected it completely. Spark came back. The case shows how even with new parts, wiring mismatches and hidden corrosion can leave you dead in the water.
Keep a detailed troubleshooting log. Write down your symptoms, every component you check, the exact DMM and DVA readings (voltage and resistance), and which wires you've bypassed. Take photos of every connection and any corrosion. If you're stuck, contact CDI Electronics technical support. They're excellent if you can give them detailed test data.
What Competitors Miss
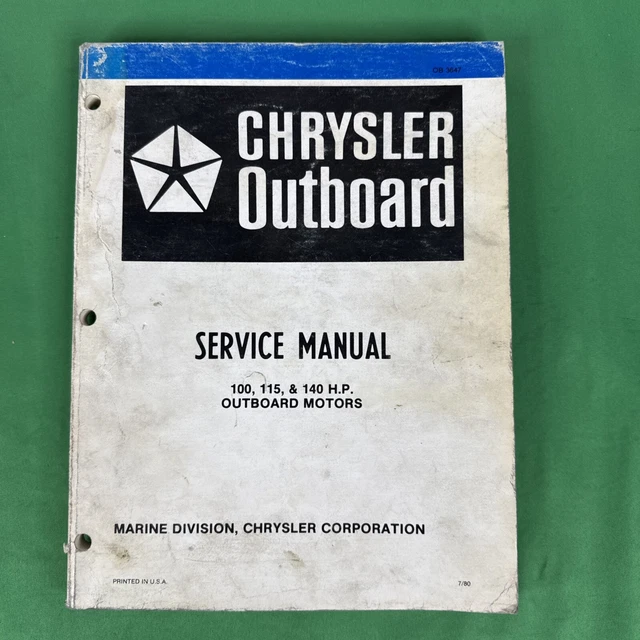
Most online forums and blogs list common ignition components and give general advice. What they don't provide: model-specific wiring diagrams with actual wire colors, real voltage and resistance specs you should see during DVA testing, and step-by-step instructions for physically accessing and testing components. They'll tell you to "test the stator," but they won't tell you that the Chrysler 15 HP stator sits under the flywheel, that you need a puller to remove it, or that the blue/yellow wires should read 680-800 ohms cold and deliver at least 180 volts cranking.
For a detailed troubleshooting flowchart, the CDI Electronics Troubleshooting Guide for Force/Chrysler is the reference standard. It walks through the exact DVA test points and gives specific voltage thresholds for condemning parts.
To learn more about various parts and get direct access to quality components, explore our wide range of outboard motor parts at JLM Marine.
Sources for Vintage Chrysler Replacement Parts
OEM Chrysler parts are largely discontinued. You'll find some new-old-stock on sites like MarineEngine.com or through vintage outboard parts suppliers, but expect high prices and limited availability.
Aftermarket is a mixed bag. Cheap no-name kits from random sellers use hard rubber, poor fitment, and you'll be tearing the engine apart again in six months. Reputable aftermarket suppliers like JLM Marine manufacture parts to factory specs, often in the same facilities that made OEM components. You get the quality without the dealership markup, and we ship directly from the factory worldwide.
Common replacement part numbers for Chrysler 15 HP electronic ignition:
- Spark Plug: Champion L77JC4 or NGK B7HS (gap 0.030")
- CDI Conversion Kit: CDI Electronics 113-3115 (replaces unreliable BIM modules)
- Ignition Coil: CDI 183-3115 or JLM Marine equivalent
- Stator: Aftermarket 250-350 ohm units (JLM Marine part available via quality OEM replacement parts)
Quick-Reference Troubleshooting Table
| Symptom | Likely Component Failure | Article Section |
|---|---|---|
| No spark on both cylinders | Kill circuit shorted, CDI failure, stator failure | Step 2, Step 4, Step 5 |
| No spark on one cylinder | Bad ignition coil, bad plug wire, plug cap corrosion | Step 1, Step 5 |
| Intermittent spark when warm | Heat-related CDI failure, poor ground connection | Step 3, Step 5 |
| Weak yellow spark | Bad spark plug, weak stator output, low battery | Step 1, Step 4, Mechanical Checks |
| Spark returns when kill wire disconnected | Faulty kill switch, corroded kill wire, shorted lanyard | Step 2 |
Pro Tip: After diagnosing or replacing ignition components, coat all bullet connectors and terminal pins with dielectric grease before reassembly. This keeps moisture out and prevents the corrosion that causes most intermittent spark issues on these motors.
For more detailed information on parts and accessories for your outboard motor, browse the extensive JLM Marine collections.
Sources
- CDI Electronics Troubleshooting Guide - Force/Chrysler
- Chrysler Outboard Data - Electronic Ignition Systems
- AOMCI Forum - 91 Chrysler Force 15 HP No Spark
- AOMCI Forum - 1982 Chrysler 15 HP No Spark Diagnostics
- Outboard Spares - Troubleshooting 2-Stroke Ignition Problems
- Cope Marine - Symptoms of a Bad Coil on an Outboard Motor
- MarineEngine.com Forum - Chrysler 15 HP Starting Problems
Explore more expert marine parts and accessories at the JLM Marine homepage.