


DIY Outboard Fuel Pump Replacement Guide: Save Money and Time
Replacing an outboard fuel pump might seem like a job best left to professionals, but with the right tools, parts, and guidance, many boat owners can successfully tackle this project themselves. DIY fuel pump replacement can save you significant labor costs—typically $100-300 depending on your location—and get you back on the water faster without waiting for a service appointment.
This comprehensive guide will walk you through the process of replacing your outboard fuel pump step by step, covering everything from preparation to testing. We'll also address special considerations for different outboard brands and help you determine when you should attempt this repair yourself versus seeking professional assistance.

Advantages of DIY Fuel Pump Replacement
Before diving into the replacement process, let's consider the benefits of handling this repair yourself:
- Cost savings - Save $100-300 in labor costs, depending on your location and outboard model.
- Convenience - Complete the repair on your schedule without waiting for a service appointment.
- Learning opportunity - Gain valuable knowledge about your outboard's fuel system.
- Satisfaction - Experience the pride of successfully maintaining your own equipment.
- Future maintenance - Develop skills that will help with other maintenance tasks.
However, DIY fuel pump replacement isn't for everyone. Consider your mechanical aptitude, available tools, and the complexity of your specific outboard model before deciding to tackle this project.
Tools and Materials Needed
Gathering all necessary tools and materials before starting will make the job much smoother. Here's what you'll need:
Essential Tools:
- Socket set and wrenches (metric and/or SAE, depending on your outboard)
- Screwdrivers (flathead and Phillips)
- Torque wrench (for proper tightening of fuel pump mounting bolts)
- Fuel line disconnect tools (specific to your outboard's fuel line connections)
- Fuel pressure gauge (for testing)
- Clean rags and container for fuel spillage
- Safety glasses and gloves
Materials Needed:
- New fuel pump (OEM or quality aftermarket)
- Replacement gaskets and O-rings (usually included with new pump)
- Fuel line clamps (if needed)
- Marine-grade thread sealant (if required by manufacturer)
Optional but Helpful:
- Service manual for your specific outboard model
- Digital camera or smartphone (to document the original configuration)
- Small parts organizer (to keep track of bolts and small components)
- Shop light or headlamp (for better visibility)
- Anti-seize compound (for bolts in marine environments)

Safety Precautions
Working with fuel systems requires special safety considerations. Follow these precautions to ensure a safe repair process:
- Work in a well-ventilated area - Always work outdoors or in a well-ventilated space to prevent the buildup of fuel vapors.
- No open flames or sparks - Ensure there are no ignition sources nearby, including cigarettes, open flames, or tools that might create sparks.
- Disconnect the battery - Always disconnect the negative battery terminal before working on any fuel system component.
- Relieve fuel system pressure - Follow the manufacturer's procedure for relieving pressure in the fuel system before disconnecting any lines.
- Wear appropriate safety gear - Safety glasses and fuel-resistant gloves are essential.
- Have a fire extinguisher nearby - Keep a marine-rated fire extinguisher within reach.
- Clean up spills immediately - Have absorbent materials ready to clean up any fuel spills.
- Dispose of old parts properly - Fuel-contaminated parts should be disposed of according to local regulations.
Important Safety Warning:
Fuel is highly flammable and its vapors can be explosive. Never smoke or have any open flame or spark-producing equipment in the area when working with fuel systems. If you're not confident in your ability to safely complete this repair, seek professional assistance.
Step 1: Preparation
Proper preparation is crucial for a successful fuel pump replacement. Follow these steps before removing any components:
Disconnect the Battery
- Locate your outboard's battery or the main battery that powers your outboard.
- Disconnect the negative (black) terminal first, then the positive (red) terminal if necessary.
- Secure the battery cables away from the terminals to prevent accidental reconnection.
Relieve Fuel System Pressure
The method for relieving pressure varies by outboard type:
For Carbureted Outboards:
- Locate the fuel line that connects to the engine.
- Place a rag under the connection point to catch any fuel.
- Slowly loosen the connection to allow pressure to release gradually.
- Retighten the connection once pressure is released.
For EFI (Electronic Fuel Injection) Outboards:
- Remove the engine cowling to access the fuel system.
- Locate the Schrader valve on the fuel rail (similar to a tire valve).
- Place a rag around the valve to catch fuel spray.
- Use a Schrader valve tool to depress the valve core briefly, releasing pressure.
- Alternatively, disconnect the fuel pump fuse, start the engine, and let it run until it stalls.
Gather Documentation
- Take clear photos of the fuel pump and surrounding components from multiple angles before disassembly.
- Note the orientation of the pump, hose connections, and electrical connections.
- If available, review your outboard's service manual for model-specific instructions.

Step 2: Locate and Remove the Old Fuel Pump
Fuel pump locations vary significantly between outboard models and manufacturers. Here's how to locate and remove your fuel pump:
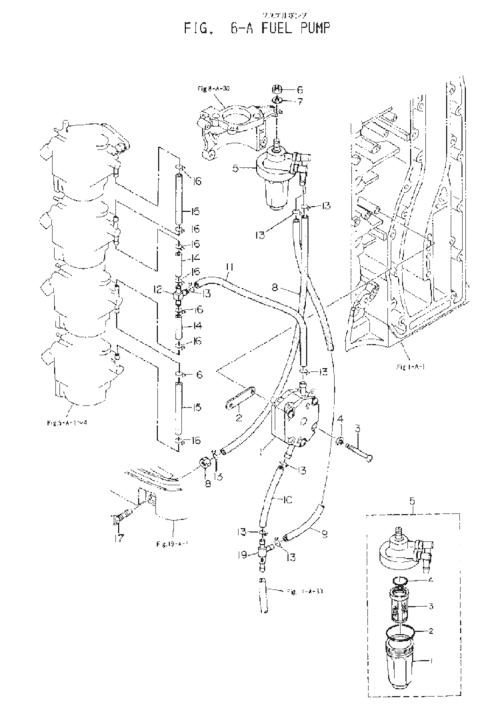
Locating the Fuel Pump
Common Fuel Pump Locations by Brand:
- Mercury/Mariner - Often located on the side of the engine block or under the intake manifold.
- Yamaha - Typically found on the side of the powerhead or under the intake manifold.
- Johnson/Evinrude - Usually mounted on the side of the cylinder block.
- Suzuki - Often located under the intake manifold or on the side of the engine block.
- Honda - Typically found on the side of the engine block or under the flywheel cover.
If you're having trouble locating your fuel pump, consult your engine's service manual or look for fuel lines leading to a component with electrical connections (for electric pumps) or pulse lines (for mechanical pumps).
Removing the Old Fuel Pump
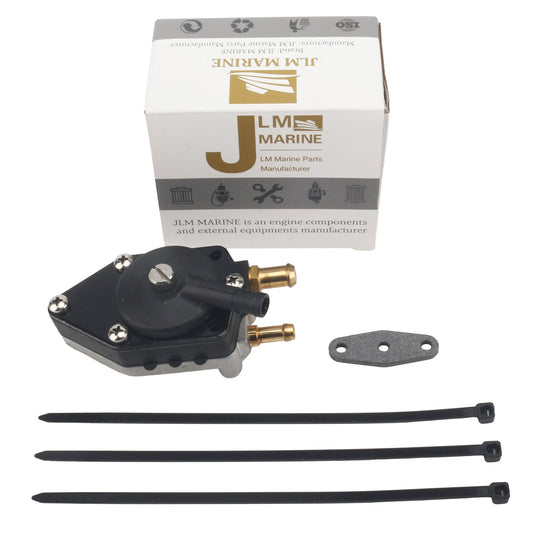
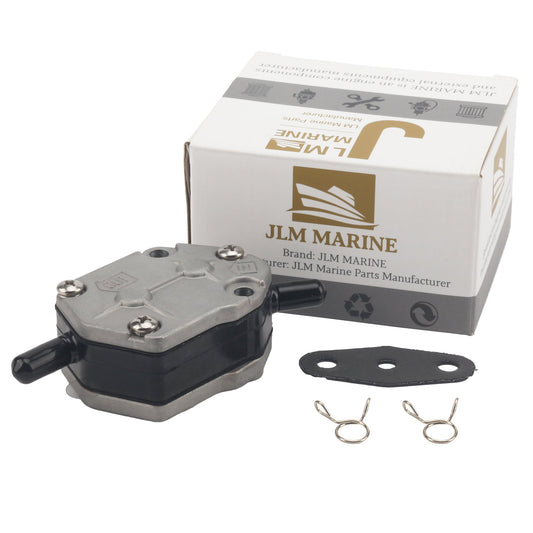
For Mechanical Fuel Pumps:
- Identify and label all fuel lines connected to the pump.
- Place a container below the pump to catch any fuel spillage.
- Remove the fuel lines from the pump, using appropriate disconnect tools if necessary.
- Remove the mounting bolts that secure the pump to the engine block.
- Carefully remove the pump, noting the orientation of the gasket and diaphragm.
- Inspect the mounting surface and clean it thoroughly of any old gasket material.
For Electric Fuel Pumps:
- Identify and label all electrical connections to the pump.
- Disconnect the electrical connectors, taking photos if necessary.
- Place a container below the pump to catch any fuel spillage.
- Remove the fuel lines from the pump using appropriate disconnect tools.
- Remove the mounting bolts or brackets that secure the pump.
- Carefully remove the pump, noting its orientation and any special mounting considerations.
- For VST (Vapor Separator Tank) systems, you may need to remove the entire VST assembly to access the pump inside.
Expert Tip:
When removing fuel lines, use proper fuel line disconnect tools rather than pulling or cutting the lines. This prevents damage to the fittings and ensures proper reconnection. Different outboard brands may use different types of quick-connect fittings that require specific tools.

Step 3: Install the New Fuel Pump
With the old pump removed, it's time to install the new one. Follow these steps for a proper installation:
Preparing the New Pump
- Unpack the new fuel pump and verify it's the correct model for your outboard.
- Compare the new pump to the old one to ensure they match in size, connection points, and overall design.
- Check that all necessary gaskets, O-rings, and mounting hardware are included.
- If rebuilding a mechanical pump, ensure all components are assembled correctly according to the rebuild kit instructions.
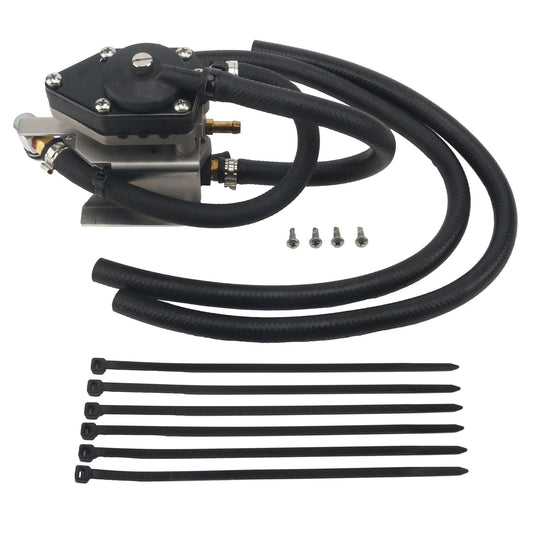
Installing a Mechanical Fuel Pump
- Place the new gasket on the mounting surface. Do not use additional sealant unless specifically recommended by the manufacturer.
- Position the pump correctly, ensuring the pulse line connection is properly aligned.
- Install the mounting bolts and tighten them in a cross pattern to the manufacturer's torque specifications.
- Connect the fuel lines to the appropriate inlet and outlet ports, ensuring they are fully seated.
- Secure the fuel lines with new clamps if the original ones show signs of wear.
Installing an Electric Fuel Pump
- Position the new pump in the same orientation as the old one.
- Install any mounting brackets or hardware, tightening to the manufacturer's specifications.
- Connect the fuel lines to the appropriate inlet and outlet ports, ensuring they click or lock into place.
- Connect the electrical connectors, making sure they are fully seated and locked.
- For VST systems, ensure the assembly is properly sealed and all components are correctly positioned.
Common Installation Mistakes to Avoid
- Incorrect orientation - Some pumps must be installed in a specific direction to function properly.
- Over-tightening bolts - This can warp the pump housing or damage gaskets.
- Using the wrong gaskets - Always use the gaskets provided with the new pump.
- Reversing inlet and outlet connections - This will prevent proper fuel flow.
- Damaging O-rings during installation - Lubricate O-rings with clean fuel before installation.
- Forgetting to reconnect electrical connections - Double-check all connections before finalizing the installation.
Step 4: Testing and Troubleshooting
After installing the new fuel pump, it's essential to test the system thoroughly before returning to the water. Follow these steps to ensure everything is working properly:
Initial Testing
- Reconnect the battery, connecting the positive terminal first, then the negative.
- Turn the ignition key to the "on" position without starting the engine.
- Listen for the fuel pump to run for a few seconds (electric pumps only).
- Check for any fuel leaks around the pump and connections.
- Squeeze the primer bulb until firm to ensure fuel is flowing to the engine.
Engine Start Test
- Start the engine and let it idle.
- Check again for any fuel leaks around the pump and connections.
- Monitor engine performance for any signs of fuel delivery issues.
- Gradually increase RPM to ensure the pump delivers adequate fuel under load.
- Return to idle and shut down the engine.
- Perform a final leak check after the engine has cooled.
Troubleshooting Common Issues
Engine Won't Start:
- Verify all fuel lines are correctly connected.
- Check that the fuel pump is receiving power (electric pumps).
- Ensure the pulse line is properly connected (mechanical pumps).
- Confirm fuel is reaching the engine by checking the fuel filter.
- Verify the pump is installed in the correct orientation.
Fuel Leaks:
- Check all connections for proper seating and tightness.
- Inspect gaskets and O-rings for proper placement.
- Verify mounting bolts are tightened to specification.
- Ensure fuel lines are not cracked or damaged.
Poor Performance:
- Check for air in the fuel system and purge if necessary.
- Verify the fuel filter is not restricted.
- Ensure the pump is delivering adequate pressure (use a fuel pressure gauge if available).
- Check for restrictions in fuel lines or fittings.
Expert Tip:
If you have access to a fuel pressure gauge, testing the actual fuel pressure output of your new pump can provide valuable confirmation that it's functioning correctly. Compare the readings to the manufacturer's specifications for your outboard model.

Brand-Specific Fuel Pump Replacement Considerations
Different outboard brands have unique fuel pump designs and replacement procedures. Here are some brand-specific considerations to keep in mind:
Yamaha Outboard Fuel Pump Replacement
- Newer Yamaha four-strokes often use an integrated fuel pump/VST assembly that requires special care during replacement.
- Many Yamaha models require precise routing of the pulse tube for mechanical pumps.
- Some Yamaha models use specific torque sequences for the pump mounting bolts.
- HPDI models have high-pressure and low-pressure pumps that may need to be replaced as a set.
- Always use Yamaha-approved gaskets and O-rings for best results.
Mercury Outboard Fuel Pump Replacement
- Mercury EFI systems often use a dual-pump configuration with a lift pump and a high-pressure pump.
- Verado models have a unique fuel system design that may require specialized tools.
- Many Mercury models require the removal of the intake manifold to access the fuel pump.
- Mercury often uses specialized quick-connect fittings that require specific disconnect tools.
- Some Mercury models require ECU reprogramming after fuel pump replacement.
Johnson/Evinrude Fuel Pump Replacement
- Many Johnson/Evinrude models use mechanical pumps that are relatively straightforward to replace.
- E-TEC models have more complex fuel systems that may require dealer service.
- VRO (Variable Ratio Oil) pump systems require special attention during fuel pump service.
- Older models may have fuel pumps that are no longer manufactured, requiring aftermarket solutions.
- Pay special attention to the pulse line connection, as it's critical for proper pump operation.
Suzuki Outboard Fuel Pump Replacement
- Many Suzuki models have the fuel pump located under the intake manifold, requiring significant disassembly.
- Suzuki often uses specialized electrical connectors that must be disconnected carefully.
- Some Suzuki models have integrated fuel pump/pressure regulator assemblies.
- Four-stroke EFI models may require special procedures for priming the system after pump replacement.
- Always follow Suzuki's specific torque specifications for mounting hardware.
When to Seek Professional Help
While many outboard fuel pump replacements can be handled by DIY-minded boat owners, there are situations where professional assistance is recommended:
Consider Professional Service If:
- Your outboard is under warranty - DIY repairs may void your warranty coverage.
- You have a complex EFI system - Modern electronic fuel injection systems can be intricate and may require specialized diagnostic equipment.
- The fuel pump is difficult to access - Some models require extensive disassembly to reach the pump.
- You lack specialized tools - Certain outboards require brand-specific tools for fuel system service.
- You're uncomfortable working with fuel systems - Safety should always be your priority.
- The repair involves computer reprogramming - Some modern outboards require ECU updates after component replacement.
- You encounter unexpected complications - If you start the job and run into problems, don't hesitate to seek professional help.
Expert Tip:
If you're uncertain about tackling a fuel pump replacement yourself, consider this compromise: Purchase the parts yourself to save money, then hire a mobile marine mechanic to perform the installation. This approach can still save you money while ensuring proper installation.
Conclusion: The Rewards of DIY Fuel Pump Replacement
Successfully replacing your outboard's fuel pump yourself can be a rewarding experience that saves you money and gets you back on the water faster. By following the steps outlined in this guide and taking appropriate safety precautions, many boat owners can complete this repair with confidence.
Remember that proper preparation is key to success. Gather all necessary tools and parts before starting, document the original configuration, and work methodically through each step of the process. Take your time, especially during the testing phase, to ensure everything is functioning correctly before returning to the water.
If you encounter any challenges during the replacement process, don't hesitate to consult additional resources or seek professional assistance. The goal is not just to complete the repair, but to do so safely and correctly.
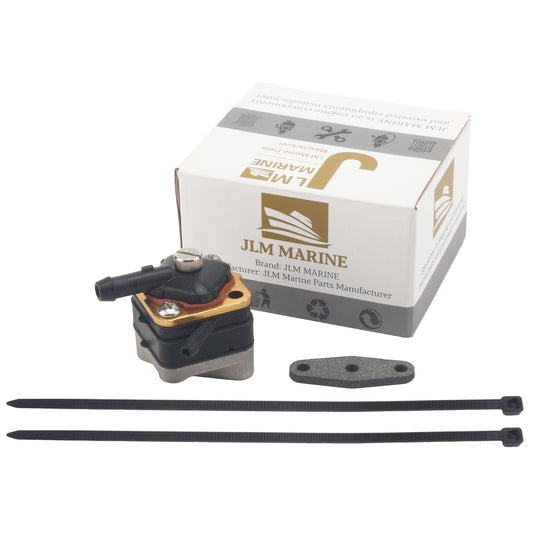
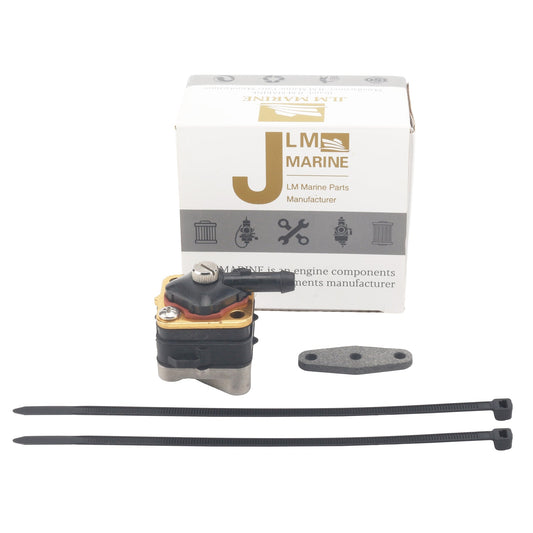
At JLM Marine, we offer high-quality OEM-specification fuel pumps for all major outboard brands. Our products are manufactured to strict quality standards in ISO9002 certified facilities, ensuring the same performance and durability as original equipment at competitive prices.
Frequently Asked Questions About DIY Outboard Fuel Pump Replacement
How long does it take to replace an outboard fuel pump?
The time required to replace an outboard fuel pump varies significantly depending on your experience level, the outboard model, and the pump's accessibility. For a relatively straightforward mechanical pump replacement on an older outboard, an experienced DIYer might complete the job in 1-2 hours. For more complex electronic fuel injection systems or models where the pump is difficult to access, the job could take 3-5 hours or more. First-time DIYers should plan for the longer end of these estimates and allow extra time for careful work and troubleshooting. It's always better to allocate more time than you think you'll need, especially if you're new to fuel system work.
Can I rebuild my old fuel pump instead of replacing it?
For mechanical fuel pumps found in many older outboards, rebuilding is often a viable option. Rebuild kits typically include new diaphragms, gaskets, valves, and other wear components. This approach can be more economical than full replacement, especially for vintage outboards where new pumps may be expensive or difficult to find. However, rebuilding is generally not recommended for electric fuel pumps used in modern EFI systems, as these contain precision components that aren't designed to be serviced. Additionally, if your mechanical pump shows signs of housing damage, corrosion, or excessive wear, a complete replacement is usually the better choice for reliability. When deciding between rebuilding and replacing, consider the age of your outboard, the availability of quality rebuild kits, and your comfort level with more detailed mechanical work.
How do I know if my new fuel pump is working correctly?
After installing a new fuel pump, several indicators can confirm it's working properly. For electric pumps, you should hear the pump run for a few seconds when you turn the key to the "on" position before starting the engine. The primer bulb should firm up after a few squeezes and stay firm, indicating the system is holding pressure. When you start the engine, it should idle smoothly without hesitation or stalling. During operation, the engine should accelerate cleanly and maintain consistent performance at all RPM ranges. For a more definitive test, you can use a fuel pressure gauge to verify the pump is delivering the manufacturer-specified pressure. If you notice any issues like rough running, hesitation during acceleration, or the inability to reach full throttle, these could indicate the pump isn't delivering adequate fuel volume or pressure. Always perform a thorough leak check after installation, both with the engine off and after running it, to ensure all connections are secure.
Should I replace my fuel filter when installing a new fuel pump?
Yes, it's highly recommended to replace all fuel filters when installing a new fuel pump. This includes both the primary filter/water separator and any secondary or on-engine filters. There are several important reasons for this: First, a clogged or partially restricted filter could have contributed to the original pump failure by forcing it to work harder. Second, any debris in the old filter could potentially contaminate your new pump if not removed. Third, starting with fresh filters ensures your new pump operates under optimal conditions from the beginning. Fourth, since you're already working on the fuel system, replacing filters at the same time is efficient and saves you from additional labor later. Finally, many manufacturers specifically recommend filter replacement as part of the fuel pump replacement procedure. The relatively small additional cost of new filters is insignificant compared to the investment in a new fuel pump and the labor involved in the replacement.
Hi—I’m Jim Walker
I grew up in a Florida boatyard, earning pocket money (and a few scars) by rebuilding outboard carbs before I could drive. That hands-on habit carried me through a Ph.D. in mechanical engineering, where I studied how salt water quietly murders metal.
I spent ten years designing cooling systems for high-horsepower outboards, then joined JLM Marine as CTO. We bench-test every new part in the lab, but I still bolt early prototypes onto my own 23-foot skiff for a weekend shake-down— nothing beats real wake and spray for finding weak spots.
Here on the blog I share the fixes and shortcuts I’ve learned so your engine—and your day on the water—run smooth.

For Outboard Owners:
To assist you in maintaining and repairing your marine engines, we hope the following resources may be of use:
-
Fuel Pumps from JLM Marine
-
Fuel Pump Kits from JLM Marine
About JLM Marine
Founded in 2002, JLM Marine has established itself as a dedicated manufacturer of high-quality marine parts, based in China. Our commitment to excellence in manufacturing has earned us the trust of top marine brands globally.
As a direct supplier, we bypass intermediaries, which allows us to offer competitive prices without compromising on quality. This approach not only supports cost-efficiency but also ensures that our customers receive the best value directly from the source.
We are excited to expand our reach through retail channels, bringing our expertise and commitment to quality directly to boat owners and enthusiasts worldwide.
Fuel Pump on Sale
- $21.99
$19.00- $21.99
- Unit price
- per
- $16.00
$0.00- $16.00
- Unit price
- per
- $73.50
$88.00- $73.50
- Unit price
- per

- $17.99
$21.00- $17.99
- Unit price
- per
- $46.50
$60.00- $46.50
- Unit price
- per

- $45.99
$55.00- $45.99
- Unit price
- per

- $28.99
$34.00- $28.99
- Unit price
- per

- $18.99
$15.00- $18.99
- Unit price
- per

- $26.80
- $26.80
- Unit price
- per

- $23.59
$28.00- $23.59
- Unit price
- per
- $24.80
- $24.80
- Unit price
- per
- $28.90
- $28.90
- Unit price
- per

- $27.77
$22.00- $27.77
- Unit price
- per

- $21.99
$19.00- $21.99
- Unit price
- per

- $138.00
- $138.00
- Unit price
- per

- $56.99
- $56.99
- Unit price
- per

- $31.20
$37.00- $31.20
- Unit price
- per
- $24.80
$45.00- $24.80
- Unit price
- per

- $129.95
$155.00- $129.95
- Unit price
- per

- $129.95
$155.00- $129.95
- Unit price
- per