


Outboard Runs Fine at Idle, Dies on Throttle: What to Check
- Check the Propeller First
- Fuel Quality and Ethanol Problems
- Clogged Fuel Filter and Fuel Line Restrictions
- Test the Fuel Pump
- Vapor Separator Tank and EFI-Specific Issues
- Ignition System: Spark Plugs, Coils, and Power Packs
- Cooling System and Overheat Protection Mode
- Carburetor Adjustments and Idle Mixture
- Compression Test and Mechanical Health
- Troubleshooting Checklist
- Tools You'll Need
- When to Call a Mechanic
- Saltwater vs. Freshwater Considerations
- Preventative Maintenance to Avoid Throttle Problems
- Frequently Asked Questions

Your outboard fires up, idles smooth, then chokes out the second you push the throttle. I've diagnosed this exact problem hundreds of times over the past two decades. It's rarely one catastrophic failure—usually it's a restriction somewhere that can't keep up when the engine demands more fuel, air, or cooling under load.
At idle, your engine operates in a low-demand state. Most systems can compensate for minor restrictions or weak components. But when you crack the throttle, fuel demand spikes, cylinder pressures jump, and heat builds fast. If any part of the fuel delivery, ignition, or cooling chain can't scale up, the engine bogs or dies. According to the U.S. Coast Guard's 2023 recreational boating statistics, machinery failure—including outboard issues—ranked as the fifth leading primary contributing factor in accidents, causing 291 incidents, 9 deaths, and 80 injuries nationwide.
Here's what you need to check, from most likely to least:
Check the Propeller First
A tangled prop creates drag. At idle, the engine barely notices. At higher RPM, that drag becomes a brick wall. I've pulled fishing line, plastic bags, thick kelp, even a tow rope off prop shafts. Spin your prop by hand—it should turn smooth with no binding. If it's tangled, cut the debris away carefully with a razor knife and work it off the shaft.
Beyond tangles, inspect for bent blades or missing chunks. A damaged prop creates uneven load and vibration that can stall the engine under throttle. If you see damage, replace it. But there's a third failure mode many DIYers miss: spun hubs. The rubber bushing inside the prop hub can slip, allowing the prop to spin freely on the shaft. The engine revs, but the boat goes nowhere. You'll feel this as a sudden loss of bite when you throttle up. To test, mark the prop and hub with a grease pencil, run the boat, then check if the marks moved relative to each other.
Fuel Quality and Ethanol Problems 
Ethanol-blended fuel is standard at U.S. marinas, and it's a nightmare for marine engines. Ethanol absorbs water. When enough water gets into your tank, you get phase separation—the ethanol and water physically separate from the gasoline and settle as a distinct layer at the bottom. This layer smells like varnish or old turpentine and won't combust properly. If your pickup tube sits low in the tank, you'll suck that sludge straight into your fuel system.
Phase separation is common in boats that sit for weeks between uses. The fix is to drain the tank completely and refill with fresh fuel. Use premium non-ethanol gasoline whenever possible. If ethanol fuel is your only option, add a quality fuel stabilizer before every storage period and run the engine for five minutes to circulate treated fuel through the entire system. For boats stored over winter, this step is non-negotiable.
Clogged Fuel Filter and Fuel Line Restrictions
This is the single most common cause of "dies on throttle" complaints on every marine forum I've read. Your fuel filter traps debris before it reaches the carburetor or injectors. At idle, the engine only needs a trickle of fuel, so even a half-clogged filter can supply enough. But when you open the throttle, fuel demand jumps five to ten times, and that clogged filter becomes a bottleneck.
Replace your fuel filter annually or every 100 hours, whichever comes first. It's a $15 part that takes ten minutes to swap. While you're in there, inspect your fuel hoses. Rubber degrades over time, especially with ethanol fuel and UV exposure. Look for cracks, stiffness, or kinks. Many newer hoses are clear, which is a huge advantage—if you see floating debris or a collapsed inner liner, replace the hose immediately.
Don't overlook the anti-siphon valve at the tank pickup. This small valve prevents fuel from siphoning out of the tank, but it can stick partially closed or clog with sediment. It mimics every symptom of a weak fuel pump. To test, try running the engine off a separate portable fuel tank. If the problem disappears, your main tank, vent, or anti-siphon valve is the culprit.
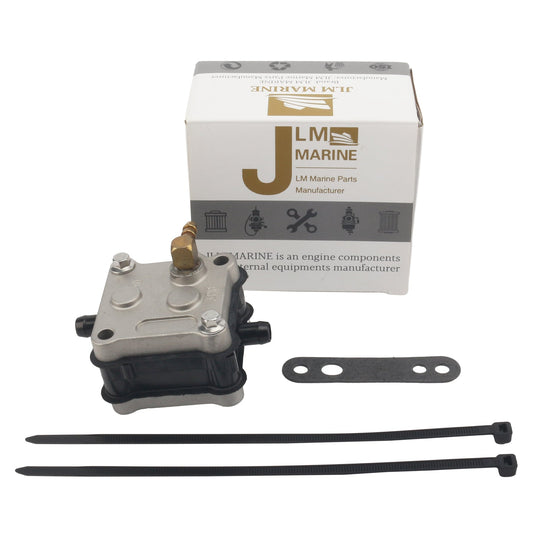
Test the Fuel Pump
If the filter is clean and the fuel is fresh, the pump itself may be failing. The fuel pump pulls fuel from the tank and delivers it under pressure to the carburetor or vapor separator tank (VST). A weak pump might supply enough fuel for idle but can't keep up when you slam the throttle.
Here's a quick field test: while the engine is running and starting to bog, squeeze the primer bulb repeatedly. If the engine immediately recovers and runs strong as long as you're squeezing, your fuel pump isn't delivering adequate volume or pressure. You can verify this with a fuel pressure gauge—compare the reading to your engine's service manual spec. Most outboards need 3–6 psi for carbureted models, higher for EFI. You can find quality replacement fuel pumps to keep your system performing at its best.
Replacing a fuel pump typically requires removing the vapor separator (on EFI engines) or the carburetor assembly (on carbureted models). It's not complicated, but you need to follow torque specs when reassembling to avoid vacuum leaks.
Vapor Separator Tank and EFI-Specific Issues

If you're running a modern fuel-injected outboard (most engines built after 2005), you have a Vapor Separator Tank (VST) instead of a traditional carburetor. The VST is essentially a small fuel reservoir with an internal filter and low-pressure pump. It's designed to prevent vapor lock by keeping fuel under slight pressure near the high-pressure injector pump.
The VST filter is a common failure point. It clogs with the same ethanol varnish and sediment that kills traditional fuel filters, but it's hidden inside the VST canister. Symptoms are identical to a clogged external filter: runs fine at idle, starves under throttle. You need to remove the VST, disassemble it, and replace the internal filter and O-rings. This is a 30-minute job if you've done it before, but take your time the first time—those O-rings must seat cleanly or you'll have air leaks.
On Yamaha outboards, the VST is notorious for developing small cracks in the plastic canister itself, allowing air to enter the fuel system. If you've replaced the filter and the problem persists, inspect the canister carefully under good light.
Ignition System: Spark Plugs, Coils, and Power Packs
Weak ignition components might fire acceptably at idle but fail under the higher cylinder pressures of wide-open throttle. At idle, compression is low and the air-fuel mixture is easy to ignite. Under throttle, compression spikes and the mixture is denser—it takes more electrical energy to jump the spark gap.
Pull your spark plugs and inspect them. Black and sooty means you're running rich (too much fuel). White and chalky means lean (not enough fuel, or an air leak). Oily plugs indicate internal engine wear—worn rings or valve seals. The correct plug should be light tan to gray. Check the gap with a feeler gauge; most outboards spec 0.030" to 0.040", but confirm with your manual. Replace plugs every 300–1000 hours depending on plug type (resistor, iridium, etc.).
Beyond the plugs, test your ignition coils and spark plug wires. You can use a spark tester to verify strong spark. A healthy spark should jump a 7/16" gap with a sharp blue snap, not a weak orange spark. If you have multiple cylinders and one is weak, swap the coil with a good cylinder. If the problem moves, the coil is bad.
On older two-stroke outboards, the power pack (also called a switch box or CDI module) can fail under heat and load. It'll work fine cold at idle, then cut out as it heats up under throttle. This is harder to diagnose without a multimeter and service manual, but if you've ruled out fuel and the spark is intermittent, the power pack is suspect.
Cooling System and Overheat Protection Mode

Modern outboards have built-in overheat protection. If the engine temperature climbs too high, the ECU cuts power or shuts down the engine entirely to prevent damage. This can feel like a fuel or ignition issue because the symptom is identical: engine bogs or dies under load.
The impeller is the most common cooling system failure. It's a rubber component inside the water pump that moves cooling water through the engine. Impeller vanes harden, crack, or break off over time, especially if the engine has been run dry or in sandy shallow water. A failing impeller reduces water flow, and the engine overheats as soon as you push it hard.
Check the telltale stream. This is the small stream of water that exits the back of the outboard (usually near the top of the motor). At idle, it should be a strong, steady stream—not a dribble. If the stream is weak or intermittent, your impeller is suspect. Replace the impeller every 2–3 years as preventative maintenance, or annually if you operate in sandy or silty water. Consider getting a water pump impeller or a water pump repair kit as part of your maintenance routine.
While the lower unit is off for impeller service, inspect the water pump housing and plate for erosion or debris. Also check the thermostat—if it's stuck closed, it'll block coolant flow and trigger overheat shutdown. A thermostat costs $20 and takes five minutes to swap once you're in there. For a detailed guide, refer to our instructions on thermostat maintenance.
Carburetor Adjustments and Idle Mixture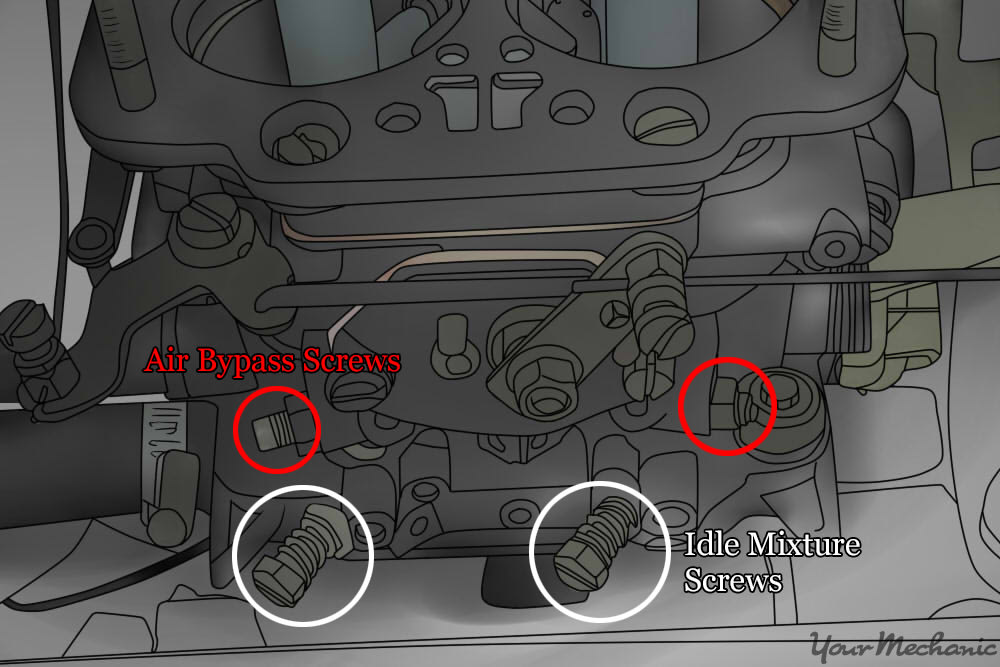
For carbureted engines, a lean idle mixture is a classic cause of "dies on throttle." The idle mixture screw controls the fuel-air ratio at low RPM. If it's set too lean (not enough fuel), the engine will stumble or die when you crack the throttle because there's not enough fuel to support the transition to the main jet.
Start from the factory baseline—typically 1 to 1.5 turns out from lightly seated. Turn the screw in small increments (1/8 turn) and let the engine stabilize for 10–15 seconds between adjustments. You're looking for the smoothest idle with the highest RPM before it starts to run rough. Once you find that sweet spot, back the screw out 1/8 turn for a slight safety margin.
Beyond mixture, confirm the accelerator pump is working. This small pump squirts a shot of fuel into the venturi the instant you open the throttle, preventing a lean stumble during the transition. If the pump diaphragm is torn or the jets are clogged, you'll get a hesitation or stall. Rebuild kits are cheap; if you're already tearing into the carb, replace all the gaskets and diaphragms. Our selection of carburetor repair kits includes OEM-quality gaskets and parts.
Compression Test and Mechanical Health
If you've checked fuel, spark, and cooling and the engine still dies on throttle, it's time for a compression test. Low or uneven compression points to internal engine wear—scored cylinder walls, worn piston rings, blown head gasket, or valve problems (on four-strokes).
You need a compression tester and someone to crank the engine. Remove all spark plugs, hold the throttle wide open, and crank the engine through at least four or five compression strokes per cylinder. Record the readings. Compression should generally be above 100 psi and within 10% across all cylinders. If one cylinder is significantly low, you have a mechanical problem that won't be fixed with new filters or plugs.
Low compression across all cylinders can sometimes be improved with a "wet test"—squirt a teaspoon of oil into the cylinder and re-test. If compression jumps significantly, the rings are worn. If it stays low, suspect valves or a head gasket.
Troubleshooting Checklist 
Work through these steps in order. Each one rules out or confirms a system.
Step 1: Visually inspect the propeller. Spin it by hand. Clear any debris. Look for damage or a spun hub.
Step 2: Squeeze the primer bulb. It should become hard and stay hard. If it loses pressure immediately, the bulb's internal check valve is faulty or you have a leak in the fuel line.
Step 3: Check the telltale stream. Strong and steady = good. Weak or absent = impeller or blockage.
Step 4: Pull and inspect spark plugs. Check color, gap, and electrode wear. Replace if fouled or worn.
Step 5: Inspect fuel filter and hoses. Replace the filter. Look for cracks, kinks, or internal collapse in hoses.
Step 6: Test fuel quality. Smell it—phase-separated fuel smells like varnish. If in doubt, drain and refill with fresh non-ethanol premium.
Step 7: Run the engine off a separate portable fuel tank. If the problem disappears, your main tank, vent, or anti-siphon valve is the issue.
Step 8: Perform the primer-bulb squeeze test under load. If the engine runs strong while you're squeezing, suspect the fuel pump or a restriction upstream.
Step 9: If you have EFI, check and clean the VST filter.
Step 10: If all basics check out, test ignition components (coils, power pack) and perform a compression test.
Tools You'll Need
- Spark plug socket (typically 5/8" or 13/16")
- Feeler gauge for plug gaps
- Compression tester
- Fuel pressure gauge
- Screwdrivers (flathead and Phillips)
- Spark gap tester or inline spark tester
- Grease pencil (for marking prop hub)
- Razor knife (for cutting fishing line)
- Fuel stabilizer and fresh gas can
When to Call a Mechanic
If compression variance exceeds 10% between cylinders, you're looking at internal engine work—rings, valves, or gaskets. If you've confirmed strong spark, clean fuel delivery, good compression, and proper cooling, but the engine still wonts run, the problem is likely in the ECU, stator, or trigger (on older models). These require a multimeter, service manual, and specific diagnostic skills. At that point, contact a certified marine mechanic.
Saltwater vs. Freshwater Considerations
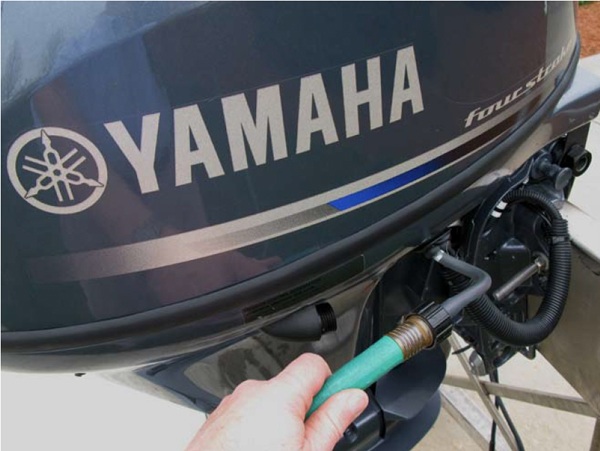
Saltwater boaters face accelerated corrosion in fuel fittings, hose clamps, and cooling passages. Even small deposits of salt in the cooling system can restrict flow and cause overheating under load. If you operate in saltwater, flushing the engine with fresh water after every use is not optional—it's mandatory. Run the flush for at least 10 minutes at idle to clear all salt residue from the cooling passages and exhaust.
Freshwater boaters have an easier time with corrosion but often deal with more organic debris—leaves, algae, and sediment. If you operate in weedy or silty lakes, inspect your water intake screens every few trips and clean them before they clog.
Preventative Maintenance to Avoid Throttle Problems
Fuel stabilization: Before off-season storage, add stabilizer to a full tank and run the engine for 5 minutes to circulate it through the fuel system. This prevents varnish buildup and phase separation.
Filter replacement schedule: Replace the inline fuel filter annually or every 100 hours. Replace the VST filter (on EFI engines) every 200 hours or if you experience fuel starvation symptoms.
Impeller service: Replace the impeller every 2–3 years, or annually if you run in sandy or shallow water. It's cheap insurance. Get your water pump impeller kit ready for this regular maintenance.
Spark plug service: Inspect plugs every 100 hours. Replace them every 300–1000 hours depending on plug type. Always use marine-grade plugs with the correct heat range and gap.
Fuel quality: Use non-ethanol premium whenever possible. If you must use ethanol fuel, add a quality ethanol treatment and never let the boat sit for more than 30 days without running the engine or draining the fuel system.
Annual lower unit service: Drop the lower unit annually to inspect the impeller, water pump housing, driveshaft splines, and prop shaft seals. Replace the gear oil and check for water contamination (milky oil).
Frequently Asked Questions
Why won't my outboard get up to full throttle?
Fuel starvation under load is the most common cause. Check the fuel filter, primer bulb, anti-siphon valve, and fuel pump. On EFI engines, inspect the VST filter. If fuel delivery is confirmed good, test spark strength under load and verify the cooling system isn't triggering overheat protection.
How do I know if my outboard impeller is bad?
Check the telltale stream while the engine is running. A weak, dribbling, or absent stream indicates impeller failure. You may also notice the engine running hotter than normal or triggering overheat alarms. Impellers should be replaced every 2–3 years as preventative maintenance. For more on this, see our blog on the signs your outboard impeller needs replacement.
What is phase separation and how does ethanol affect my marine fuel?
Phase separation occurs when ethanol in fuel absorbs water, causing the ethanol and water to separate from the gasoline and settle at the bottom of the tank. This layer doesn't burn properly and causes sputtering, stalling, and fuel system corrosion. Use non-ethanol fuel or add stabilizer to prevent this.
Can I fix a clogged fuel filter myself?
Yes. Most outboard fuel filters are inline spin-on or cartridge types. Turn off the fuel valve (if equipped), place a rag under the filter to catch spills, unscrew the old filter, and screw in the new one. Prime the system by squeezing the bulb until it firms up, then start the engine and check for leaks. Browse our fuel filter collection for suitable replacement options.
When should I replace spark plugs on my outboard?
Inspect plugs every 100 hours and replace them every 300–1000 hours depending on plug type (standard resistor plugs wear faster than iridium). Replace immediately if you see fouling, heavy carbon buildup, worn electrodes, or if the engine is misfiring or hesitating.
How do I test if my fuel pump is working?
Install a fuel pressure gauge in the fuel line between the pump and carburetor (or VST on EFI engines). Compare the reading to your engine's service manual spec—typically 3–6 psi for carbureted models. You can also perform the primer-bulb squeeze test: if the engine runs strong only while you're squeezing the bulb, the pump isn't keeping up.
What's the difference between OEM and aftermarket marine parts?
OEM parts are made by the original equipment manufacturer and are guaranteed to fit and meet factory specs, but they carry a premium price. Cheap aftermarket parts vary widely in quality—some are junk that won't last a season. High-quality aftermarket suppliers source from the same factories that produce OEM parts or maintain equivalent standards at lower prices. We recommend parts that meet or exceed OEM specifications without the dealership markup.
Pro tip: Flush your outboard with fresh water after every saltwater use. Connect a flush adapter to the water intake or use the built-in flush port if your engine has one, and run the engine at idle for 10 minutes. This prevents salt buildup in the cooling passages and extends the life of your thermostat, impeller, and entire cooling system. For detailed outboard cooling maintenance tips, visit our JLM Marine hub.