


Mercury Outboard Overheating Alarm: Causes and Cures
- Mercury Outboard Operating Temperature Ranges
- Diagnosing False Alarms vs. Real Overheating
- Cooling System Component Failures
- Electrical Faults: Wiring, Modules, and Control Box Compatibility
- Water Pressure Gauge Readings (If Equipped)
- When to Call a Professional Mechanic
- Required Tools for Mercury Cooling System Diagnostics
- OEM vs. Aftermarket Parts for Mercury Cooling Systems
- Daily Pre-Trip Maintenance

Your Mercury outboard's overheat alarm screaming at startup or mid-run means one thing: the cylinder head temperature sensor hit its limit—usually around 190°F (88°C)—or the alarm circuit thinks it did. Either the cooling system failed, or you've got a bad sensor or wiring short. Both need different fixes.
Mercury Outboard Operating Temperature Ranges
Normal operating temp for most Mercury outboards sits between 140°F (60°C) and 160°F (71°C). Above that, you're in trouble. The alarm activates when head temp climbs past 190°F, though some models trigger slightly lower depending on year and horsepower.
You can't decode the alarm cause from beep patterns alone on most Mercurys—you interpret by RPM, runtime, and what you see at the tell-tale. A continuous tone usually means the temp sensor circuit closed, either from real heat or a grounded wire. Some models share the same buzzer for low oil, so cross-check your oil reservoir before tearing into the cooling system.
This guide covers 2-stroke and naturally aspirated 4-stroke models. Optimax and Verado cooling systems have additional electric pumps and closed-loop circuits; the basic diagnostics overlap, but those engines need model-specific troubleshooting beyond this scope.
Diagnosing False Alarms vs. Real Overheating
First question: is the engine actually hot, or is the alarm lying?
Grab an infrared temperature gun. Aim it at the cylinder head near the thermostat housing or the temp sensor boss. If the gun reads 140–160°F but the alarm is blaring, you've got an electrical fault—sensor, wiring, or module. If it reads 190°F+, the alarm is honest and your cooling system is failing.
Testing Temperature Sensors and Wiring
The Mercury temp sensor is a normally-open thermistor that closes the circuit to ground when it gets too hot. It typically uses a tan or tan/blue wire for signal (some older models use brown). A short anywhere in that wire—chafed insulation at the lifting eye, block ground near cylinder #1, or harness pass-throughs—will ground the circuit and trigger a constant alarm even when the engine is cold.
Quick test: disconnect the sensor wire at the sensor terminal. If the alarm stops immediately, the problem is in the sensor itself or that wire run. If it keeps screaming, the fault is in the alarm module, a different sensor, or another grounded circuit (oil level switch on older 2-strokes sometimes cross-signals).
To bench-test the sensor, measure resistance with a multimeter:
- At room temp (70°F / 21°C): approximately 1,000–1,500 ohms (check your service manual for exact spec—varies by model year).
- Submerge the sensor in boiling water (212°F / 100°C): resistance should drop to near 50–100 ohms, and the circuit should close if you're using a continuity tester set for the alarm threshold.
If resistance is out of spec or the sensor doesn't close at the rated temp, replace it. Don't use a $12 no-name sensor off a generic listing—fitment and resistance curves matter. A sensor that closes 10°F early will nuisance-alarm all day.
Heat Soak and Immediate Restart Alarms
If the alarm sounds the instant you turn the key after a hot shutdown, you're seeing heat soak. When you kill the engine, water stops circulating but the head keeps radiating heat into the sensor area. Temperature spikes for 30–60 seconds post-shutdown, sometimes enough to close the sensor. On restart, the module reads that closed circuit and alarms before the impeller even spins.
Let the engine sit 5 minutes, then restart. If the alarm clears and doesn't return under normal load, heat soak was the culprit and your cooling system is marginal but functional. If it returns under throttle, you have flow restriction.
Cooling System Component Failures

If your temp gun confirms real heat, the cooling system has a mechanical fault. Work from the water intake forward.
Water Intake Screens and Tell-Tale Flow
Check the lower unit intake grates on both sides of the gear case. Plastic bags, seaweed, sand, and mud plug these constantly. Pull the boat, tilt the engine, and scrape them clean with a flat screwdriver or wire brush.
The tell-tale stream (pee stream) exiting the mid-section should be strong and steady: pencil-thick at idle, thicker at 2,000+ RPM. Weak or sputtering flow means one of three things:
- The tell-tale hose itself is clogged (spider webs, salt crystals). Pull the hose and blow compressed air backward.
- The water pump isn't pulling.
- Internal passages are blocked.
Pro check: a tell-tale blockage looks like pump failure but isn't. Before you drop the lower unit, pull the tell-tale hose at the powerhead and start the engine briefly (in a tank or on muffs). If water shoots out the powerhead fitting but not the tell-tale exit, the hose or outlet is clogged—not the pump.
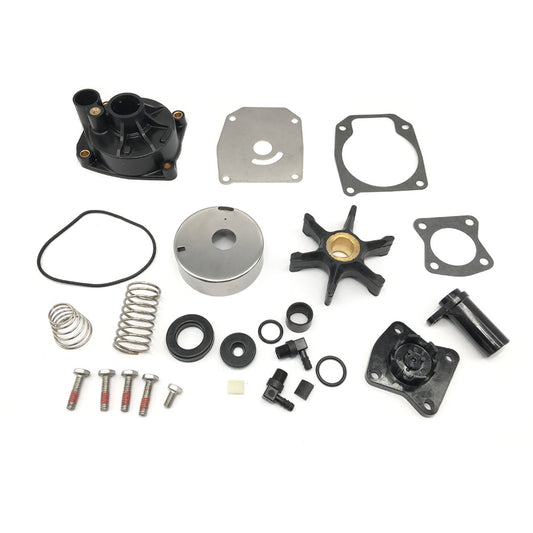
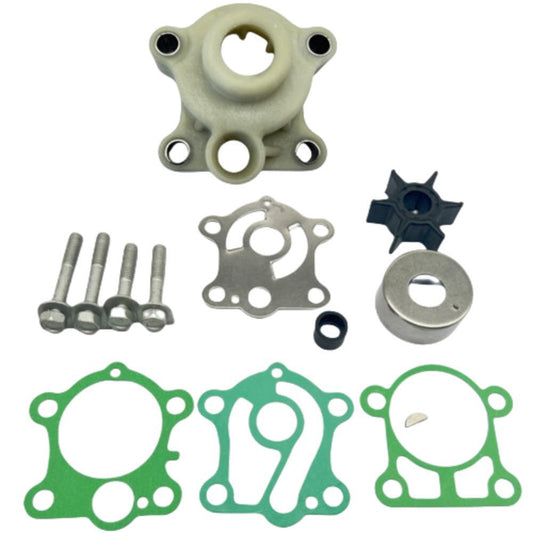
Water Pump Impeller Inspection and Replacement
The impeller is the single most common overheat cause. Rubber blades wear, crack, or melt if you ran the engine dry even once. An impeller with rounded or missing blade tips can't generate pressure. It might move enough water at idle (alarm stays quiet) but starves the engine at 3,000+ RPM (alarm screams).
Replacement interval:
- Saltwater or sandy conditions: every year, no exceptions.
- Freshwater, light use: every two years maximum, or every 100 hours.
- Brackish or high-temp summer running: annual.
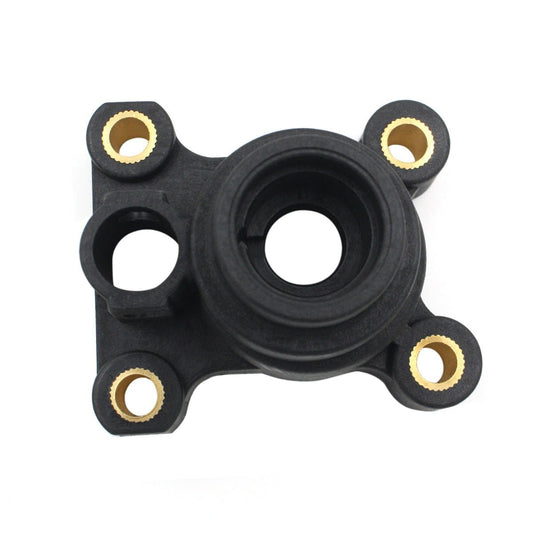
Remove the lower unit (usually four bolts on the midsection and two at the front), pull the pump housing, and inspect:
- Worn blades: tips rounded or shorter than new.
- Cracked rubber: any hairline cracks mean replace.
- Melted vanes: black, shiny, or stuck to the housing—engine was run dry.
- Missing chunks: you'll find bits in the cooling passages or exhaust. Flush the system.
When you install the new impeller, coat the vanes with dish soap or glycerin so they don't tear on first start. Grease makes them swell; never use it.
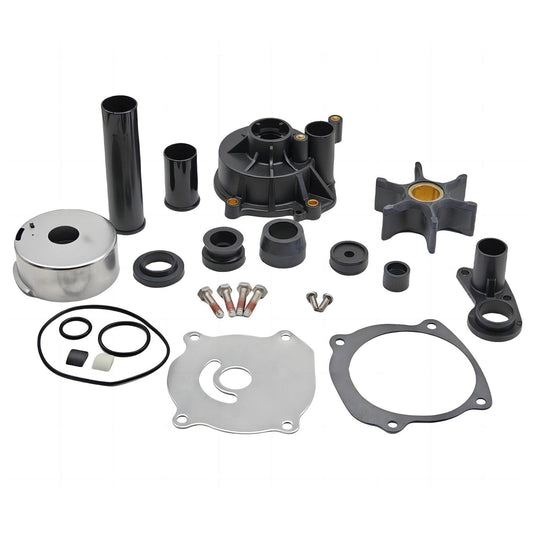
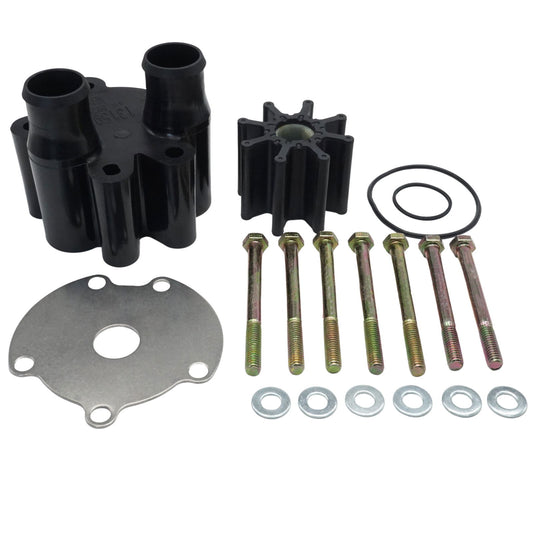
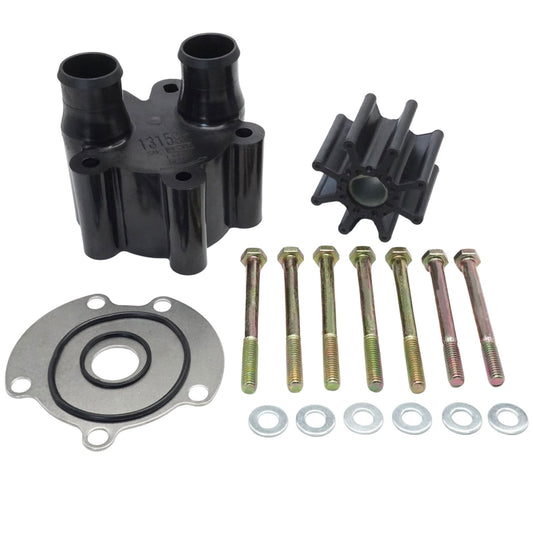
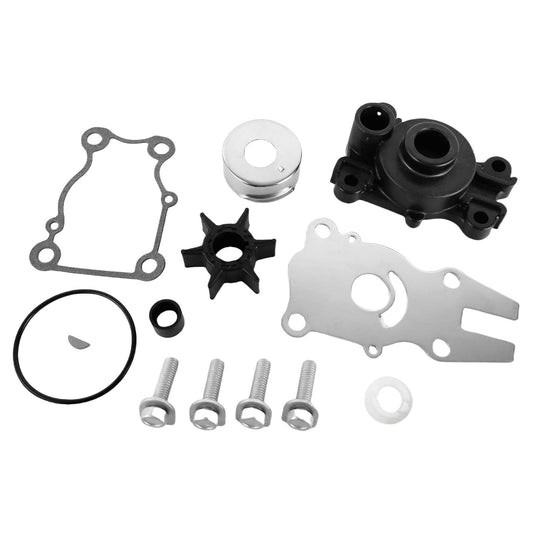
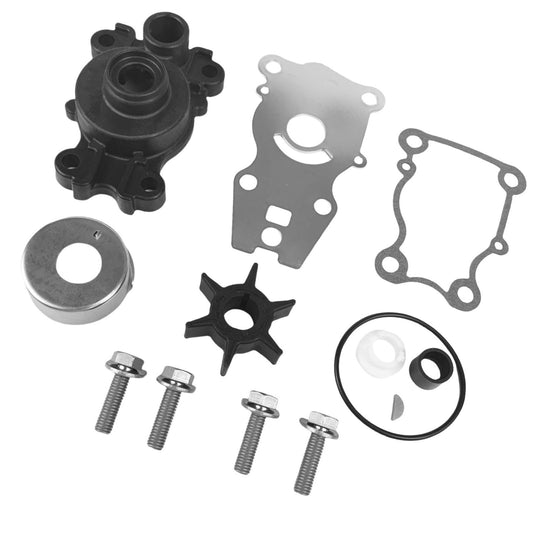
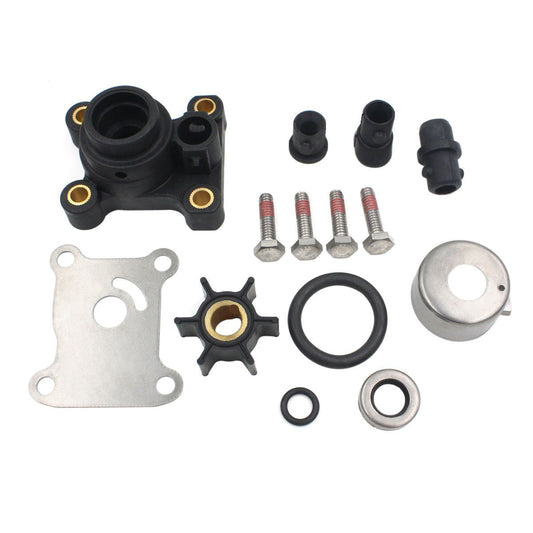
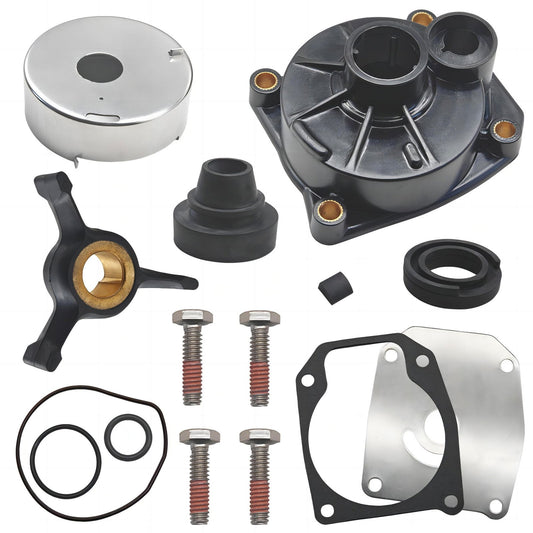
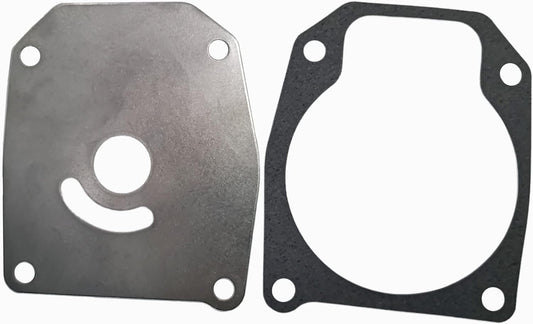
Mercury pump kits include the impeller, gaskets, O-rings, and usually the faceplate seal. Don't reuse old gaskets—they compress and leak on reassembly.
For replacement parts, consider sourcing high-quality options from the Mercury Water Pump Impeller Kit collection to ensure the best fit and durability.
Thermostat and Poppet Valve Testing
The thermostat keeps the engine in the 140–160°F range by staying closed until operating temp, then opening to allow full flow. Mercury thermostats are rated to open at 143°F (62°C) on most models (check your manual—some 4-strokes open at 140°F, some racing 2-strokes at 150°F).
A thermostat stuck closed causes overheating at idle or low speed, because the impeller is pumping but the water can't circulate through the block. You'll see a weak tell-tale and rising temp even though the lower unit and pump are fine.
Boiling water test:
- Remove the thermostat (usually two bolts on the starboard cylinder head).
- Suspend it in a pot of water with a thermometer. Don't let it touch the pot bottom (conducts heat and gives a false reading).
- Heat the water. The thermostat should visibly start to open at 143°F ± 5°F. Full open is around 160°F.
- If it stays shut past 150°F, or if it's stuck open at room temp, replace it.
Install a new thermostat with a new gasket. Torque to spec—overtightening warps the housing and causes leaks.
For detailed guides on thermostat maintenance and replacement, check our blog post on Thermostat Maintenance: Keeping Your Outboard Running Cool.
The Poppet Valve (Pressure Relief Valve)
The poppet valve is a spring-loaded bypass that opens at high RPM to route extra water around the thermostat, preventing overheating under heavy load. It's usually on the cylinder head or mid-section, depending on model.
Symptom of poppet failure: engine is fine at idle and mid-range, but overheats at wide-open throttle (WOT) or sustained 4,000+ RPM. The thermostat can't flow enough volume for WOT cooling, so the poppet opens to bypass it. If the poppet sticks closed, you hit a flow ceiling and temp spikes.
Remove the poppet, inspect the spring and valve seat for corrosion or carbon, and test the spring tension. If it's weak or the valve is gummed shut, replace it. Clean the poppet bore with a wire brush and flush it with solvent before reinstalling.
On a 600-hour service interval engine, we've seen poppet valves stuck with salt and exhaust carbon that dropped head temp from 142°F to 130°F just by freeing the valve.
Internal Cooling Passage Blockages
If the impeller, thermostat, and poppet are all good but the alarm persists, you have internal scale or debris in the water jackets.
Salt, calcium, sand, and corrosion build up inside the block, exhaust passages, and water transfer tubes. This buildup acts like plaque—it doesn't stop flow completely, but it chokes it enough that the engine can't shed heat.
Saltwater/brackish runners: this is your enemy. Even with regular flushing, salt creeps into tight passages and crystallizes.
Freshwater runners in hard-water regions (upper Midwest, desert lakes): mineral scale does the same thing.
Clearing blockages:
- Mechanical flush: Pull the thermostat, attach a garden hose to the flush port (or rig a hose into the thermostat housing), and run high-pressure freshwater backward through the block while the engine is off. This dislodges loose debris.
- Chemical descale: Use a marine descaling solution (Salt-Away, Barnacle Buster, or diluted CLR for severe cases). Follow the product instructions—usually circulate through the system for 15–30 minutes, then flush thoroughly with fresh water.
- Compressed air: After flushing, blow compressed air (max 40 PSI) through the cooling passages to clear residual water and debris. Watch for mud, sand, or salt chunks in the discharge water.
If you see metal shavings, rust chunks, or the passages won't clear, you may have internal corrosion or a failed base gasket. At that point, the powerhead needs disassembly and inspection by a pro.
Base Gasket Failure (Rare but Real)
The powerhead base gasket seals between the block and the midsection. If it fails, cooling water pressure drops—sometimes catastrophically. Symptoms:
- Water leaking from the midsection joint at idle or under load.
- Weak tell-tale despite a new impeller and open thermostat.
- Overheat alarm that won't clear no matter what you replace.
Fixing a base gasket means pulling the powerhead off the midsection, which is a full-day job. If you're not set up for that, this is a "call the pro" situation.
Electrical Faults: Wiring, Modules, and Control Box Compatibility
Alarm Module and Oil Module Cross-Talk
Older Mercury 2-strokes (pre-EFI) route both temp sensor and oil level sensor signals through the same alarm module. The module interprets a closed circuit from either sensor and sounds the same buzzer. A failing module can misinterpret signals or latch a false alarm.
If you've verified the engine is cool, the temp sensor tests good, and disconnecting the temp sensor wire doesn't stop the alarm, check the oil reservoir level switch and its tan wire. A stuck float or grounded oil-sensor wire will trigger the same continuous tone.
Bypass test: disconnect both the temp sensor and oil sensor. If the alarm finally stops, one of those circuits is grounding. If it still screams, the alarm module itself is faulty or you have a short elsewhere in the tan/tan-blue harness.
Control Box and Gauge Compatibility
We've diagnosed multiple cases where a mismatched control box caused false alarms. Example: a Mercury 60hp with a Mercury 40hp control box installed. The 40hp box expects different sensor resistance curves, so it interprets the 60hp's normal 150°F reading as an overheat and alarms.
Always verify your control box, gauge cluster, and engine are spec'd together. Check the model and serial number on the control box against Mercury's compatibility charts. If you bought a used boat or swapped controls, this is a common trap.
Wiring Inspection Points
Inspect the temp sensor harness at these failure points:
- Cylinder head pass-through: wire chafes on the block edge or exhaust plate.
- Midsection clamp bracket: harness rubs the bracket or pinches under a clamp.
- Lower cowl hinge area: wire flexes every time you tilt and can fray internally.
- Helm connection: corrosion in the helm-side plug creates intermittent ground.
Use a multimeter in continuity mode: key off, sensor disconnected, check resistance from the tan wire pin to engine ground. Should read open circuit (OL or infinite ohms). Any reading below 1,000 ohms means you have a partial short. Anything near zero means a hard ground.
Water Pressure Gauge Readings (If Equipped)
If your boat has a water pressure gauge, use it:
- At idle (600–800 RPM): 2–4 PSI.
- At cruise (3,000–4,000 RPM): 10–15 PSI.
- At WOT: 12–18 PSI, depending on model.
Low or zero pressure at any RPM confirms a pump or blockage issue. High pressure (20+ PSI) can indicate a stuck-closed thermostat or poppet, or a kinked discharge hose.
No gauge? You can tee a mechanical 0–30 PSI gauge into the tell-tale hose at the powerhead for diagnostic purposes.
When to Call a Professional Mechanic
Stop DIY and get a certified Mercury tech if:
- Water in the cylinders. Pull the plugs; if they're wet or you see water spray during cranking, you have a head gasket failure, cracked head, or exhaust crossover leak. Running the engine will hydro-lock it.
- Metal shavings in the gear lube (lower unit). This means bearing or gear failure, which can overheat the lower unit and starve the water pump.
- Melted or burned wiring harness. This is a fire/safety hazard and indicates a major short or failed voltage regulator.
- Persistent alarm after you've replaced impeller, thermostat, poppet, tested sensor, and checked wiring. You've done the common fixes; deeper issues (internal corrosion, cracked block, failed ECM on EFI models) need diagnostic scan tools and tear-down.
- You lack the tools or confidence. Pulling a lower unit without a service manual, impact wrench, and prop puller can damage shift linkage or water tube seals.
A tech with 20+ years on Mercurys will spot things you won't: exhaust plate corrosion that partially blocks the water jacket, a failing stator that causes voltage sag and sensor glitches, or a mis-drilled aftermarket impeller plate that creates an air leak. They also have access to Mercury's service bulletins—some model years have known issues (certain Optimax thermostat failures, specific EFI sensor batches) that trigger overheat alarms and have updated parts.
Required Tools for Mercury Cooling System Diagnostics
![]()
- Infrared temperature gun (essential—no guessing): $25–$60. Aim for ±2°F accuracy.
- Multimeter with continuity and resistance modes: $20–$100.
- Socket set (metric and SAE): 8mm, 10mm, 13mm most common for lower unit bolts.
- Gear lube pump (to refill lower unit after impeller service).
- Impeller puller or long needle-nose pliers (impellers stick in the housing).
- Torque wrench (critical for thermostat housing bolts—spec is usually 60–80 in-lbs; overtorque warps the housing).
- Compressed air supply (40 PSI max, for flushing passages).
- Mercury service manual for your model/year (wiring diagrams, torque specs, sensor resistance tables). Download from Mercury's site or buy the Seloc/Clymer printed manual.
OEM vs. Aftermarket Parts for Mercury Cooling Systems
OEM Mercury parts fit correctly and meet factory spec, but you're paying for the branding. A Mercury thermostat kit runs $40–$60; an impeller kit $50–$80 at the dealer.
Cheap no-name aftermarket (the $10 impeller kits on random marketplace sellers): gamble. We've seen rubber that's too hard (won't seal the housing), blades with incorrect pitch (won't pump volume), and gaskets that are 1mm undersize (leak immediately). Not worth the risk of a second tear-down.
Quality aftermarket from reputable manufacturers (JLM Marine, Sierra, CEF, Mallory): these often come from the same factories that supply OEM brands, using excess capacity to produce non-OEM runs. The rubber compound, blade count, and fitment match OEM specs. You save 30–50% without sacrificing reliability. JLM kits, for example, are built to Mercury's dimensional tolerances and include all gaskets and seals in the box—direct fit, no surprises.
For sensors and electrical: we lean OEM or premium aftermarket only. A $15 temp sensor that reads 10°F high will drive you insane chasing false alarms.
Explore our full range of Chrysler cooling system parts, including impellers and thermostats, at the Cooling System collection.
Daily Pre-Trip Maintenance

Before you turn the key every single time:
- Visual check of the lower unit intake screens. Scrape off any grass, sand, or debris.
- Start the engine on the hose or in the tank. Verify a strong, steady tell-tale stream within 15 seconds of startup.
- Look for leaks around the midsection, lower unit seals, and hose clamps while it's running.
If the tell-tale is weak or absent, do not leave the dock. You'll overheat within minutes under load.
After every saltwater or brackish run, flush the engine with fresh water for at least 10 minutes using muffs or the flush port. This single habit prevents 80% of the salt buildup that causes chronic overheating.
For additional resources and boat parts to help maintain your Mercury outboard and other marine equipment, visit our JLM Marine main site.
Internal links added:
About JLM Marine
Founded in 2002, JLM Marine has established itself as a dedicated manufacturer of high-quality marine parts, based in China. Our commitment to excellence in manufacturing has earned us the trust of top marine brands globally.
As a direct supplier, we bypass intermediaries, which allows us to offer competitive prices without compromising on quality. This approach not only supports cost-efficiency but also ensures that our customers receive the best value directly from the source.
We are excited to expand our reach through retail channels, bringing our expertise and commitment to quality directly to boat owners and enthusiasts worldwide.
Water Pump Repair Kits on Sale
- $29.75
$35.00- $29.75
- Unit price
- per
- $16.99
$27.00- $16.99
- Unit price
- per
- $19.99
$23.00- $19.99
- Unit price
- per

- $85.99
$103.00- $85.99
- Unit price
- per

- $27.99
$33.00- $27.99
- Unit price
- per

- $35.00
$42.00- $35.00
- Unit price
- per
- $50.99
$59.00- $50.99
- Unit price
- per

- $55.00
$66.00- $55.00
- Unit price
- per
- $39.89
$45.00- $39.89
- Unit price
- per
- $55.50
- $55.50
- Unit price
- per

- $29.99
$35.00- $29.99
- Unit price
- per
- $26.90
- $26.90
- Unit price
- per
- $39.98
$45.00- $39.98
- Unit price
- per

- $49.99
$59.00- $49.99
- Unit price
- per

- $27.99
$33.00- $27.99
- Unit price
- per

- $45.99
$55.00- $45.99
- Unit price
- per

- $43.00
- $43.00
- Unit price
- per

- $25.56
$30.00- $25.56
- Unit price
- per

- $36.00
- $36.00
- Unit price
- per

- $35.98
$43.00- $35.98
- Unit price
- per