


How Prop Ventilation Affects Hole Shot and Planing
- Understanding Prop Ventilation
- How Exhaust Venting Improves Hole Shot
- Drilling Vent Holes in Your Prop Hub
- Real-World Results
- Troubleshooting Over-Ventilation
- Two-Stroke vs. Four-Stroke Differences
- Jack Plate Interaction
- Why Bass Boats Use This, Skiffs Don't Always
- Tools and Safety
- Weight Distribution and Hull Design
- Post-Modification Testing Protocol
- OEM vs. Aftermarket Vented Props
- When Not to Vent
- Maintenance Considerations
Understanding Prop Ventilation
Ventilation happens when air or exhaust gases get sucked into the prop blades instead of solid water. For small skiff owners dealing with sluggish acceleration, controlled ventilation is one fix worth knowing. The idea is to let a measured amount of exhaust bleed through small holes drilled in the prop hub. This aerates the water just enough to let the engine spool up faster without bogging down under load.
Ventilation reduces the load on the prop by making the water "lighter." The engine can hit its power band—usually 4,000 to 4,500 RPM for most outboards—much quicker, which translates directly into faster time to plane. Once you're cruising, water pressure seals those vent holes, so the prop grips solid water again with no effect on top speed.
OMC Service Bulletin 2092 explained it this way: "Drilling the holes allows exhaust gasses to bleed onto the propeller blades causing controlled ventilation during acceleration. This allows the motor to turn higher RPM under acceleration providing more power to plane the boat."
The catch: drill too large or in the wrong spot, and you'll over-ventilate. The prop will blow out in turns or slip so badly you can't get past 5 mph.
How Exhaust Venting Improves Hole Shot

When you punch the throttle, your outboard dumps exhaust out the lower unit. With vent holes in the hub, some of that exhaust gets drawn around the blade edges as the prop spins. This creates tiny bubbles that momentarily break the suction between blade and water. The engine isn't fighting a heavy load anymore, so RPM climbs fast.
Mercury Marine's Performance Vent System documentation states: "As the boat accelerates, exhaust gases are drawn out of vent holes behind each blade to aerate the water, which allows engine rpm to rise more rapidly for quicker acceleration." They also warn: "Too much air, however, will cause a propeller to over-ventilate and lose its bite."
This effect only matters during acceleration. Once you're on plane, external water flow over the vent holes seals the exhaust in, and the prop operates in solid water again. Bass Cat Boats recommends about 1 to 1.5 seconds of ventilation as the bow starts to drop during hole shot. Any more than that means your engine height is too high, your prop pitch is wrong, or your holes are too big.
Testing by Boats.com on a Stingray 190RS showed 0-36 mph acceleration in 7.91 seconds with solid plugs (no venting), versus 11.09 seconds with fully open vents. The sweet spot was medium plugs at 8.58 seconds. Over-venting slowed everything down.
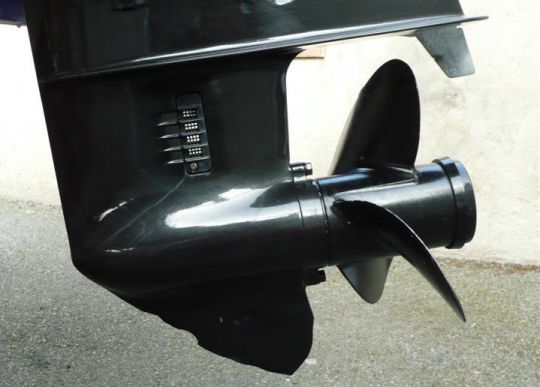
Drilling Vent Holes in Your Prop Hub

Many high-performance props come with built-in vent systems like Mercury PVS, but you can modify an existing aluminum prop yourself. Don't try this on expensive stainless unless you're comfortable with metalwork—one mistake and you've ruined a $400 prop.
You'll need a center punch, cobalt drill bits (for stainless) or standard high-speed steel bits (for aluminum), and a deburring tool. Mark your holes in the aft portion of the hub, typically near the trailing edge of the blades. Start with 1/4-inch holes. You can always enlarge them later if needed.
OMC Service Bulletin 2092 specified exact hole sizes and locations for different engine types, but the general rule is to space 4 to 6 holes evenly around the hub. BBlades notes that vent holes should primarily affect the first 1 to 1.5 seconds of acceleration as the bow drops.
The bulletin also warned: "Incorrect hole size or location will result in no improvement or in excessive ventilation, particularly in turns."
Measure at least 1/4 inch from the blade root to avoid weakening the hub structure. Deburr all holes thoroughly—sharp edges will cause turbulence and unpredictable flow.
After drilling, test in calm water. Start hard and watch your tachometer. If RPM climbs smoothly to around 3,500 instantly and the boat planes within 1.5 seconds, you've nailed it. If the prop screams past 5,000 RPM but the boat barely moves, you've over-ventilated. Plug the holes with appropriately sized rubber plugs and re-drill smaller.
Real-World Results
A Boston Whaler Outrage 21 owner running twin Mercury 150 Optimax engines installed a vented Mercury Vensura prop. With two vent plugs removed, he noted improved acceleration without additional throttle. After switching to solid plugs, he reported the hole shot became "frighteningly fast", with instant throttle response and better planing. Fuel economy also improved to over 6 MPG at 32 MPH cruise.
A waterski setup user drilled 7/32-inch holes per the OMC bulletin on a 13x19 stainless Johnson prop for a 140HP outboard. The result: hole shot transformed to "perfection" with higher RPM under load and faster planing. Another skier enlarged holes iteratively for a 500 RPM boost at climb-out, maintaining top speed once planed.
On bass boats, the Bass Cat engineering team has consistently pushed for controlled ventilation during the critical nose-drop phase. This allows the outboard to spool up quickly and get the boat airborne onto plane, essential for tournament performance in shallow water.
Troubleshooting Over-Ventilation
If your prop blows out in turns or you can't accelerate past 5 mph initially, you've drilled too large. The prop is slipping because it can't grip water. The fix: plug the holes with rubber stoppers or Marine-Tex epoxy and re-drill at 1/8 inch smaller diameter.
Another symptom: RPM surges at cruise. This means the vent holes aren't sealing under water pressure, which shouldn't happen. Either your holes are too large or you're running the engine too high on the transom. Lower the engine or reduce vent size.
OMC's bulletin emphasized: "Properly drilled, the holes will have no affect on top speed, maximum RPM or ventilation in turns." If you're seeing any of those issues, the modification is wrong.
On the flip side, if you drill and see zero change in hole shot, your holes are too small or too far forward on the hub. Enlarge incrementally—go up 1/16 inch at a time.
Two-Stroke vs. Four-Stroke Differences

Two-stroke outboards benefit more from venting because their torque curve is peakier. They need to hit a specific RPM range to make power, and ventilation helps them get there faster under load. Four-strokes have flatter torque curves and can sometimes muscle through the transition to plane without venting, but they still see gains on heavier hulls. For more details on engine performance differences, see our article on Yamaha 4-Stroke vs. Evinrude 2-Stroke: Performance & Maintenance.
If you're running a four-stroke on a flat-bottom aluminum skiff, you may find that venting reduces the "sluggish" feel at takeoff. The engine doesn't have to fight as hard to break the hull free from the water.
Jack Plate Interaction
Raising your engine on a jack plate changes everything. Higher engine height reduces drag but also brings the prop closer to the surface, where it's more prone to ventilation. If you've already got your engine jacked up near the top of its range, adding vent holes might push you into uncontrolled blowout territory.
Conversely, if your engine is mounted low and you're struggling with hole shot, venting can compensate without requiring you to raise the jack plate. This keeps the prop deeper for better grip in rough water while still giving you the RPM boost you need.
Test after every jack plate adjustment. Mark your current height with a grease pencil before drilling vent holes so you have a baseline to return to if things go wrong. For more on jack plates and shallow water performance, see Installing a Jack Plate: Benefits for Shallow Water Boating.
Why Bass Boats Use This, Skiffs Don't Always
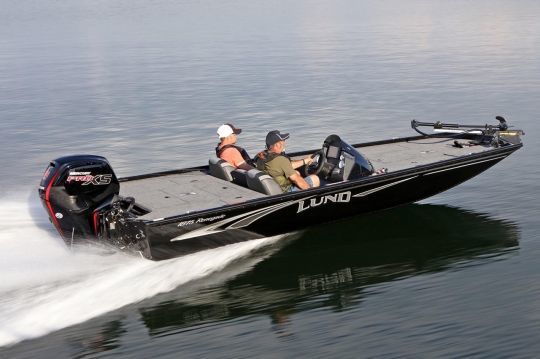
Bass boats popularized prop venting because tournament anglers need explosive hole shot in shallow, weedy water. They're running high-horsepower outboards on light hulls, often with the engine jacked to the moon. Controlled ventilation is the difference between getting on plane in 50 feet versus 150 feet.
Skiffs—especially heavier center consoles or deep-V hulls—don't always need it. If your hull planes easily and your engine isn't struggling, drilling holes won't help. But if you're running a 25HP on a loaded 16-foot skiff and it takes 10 seconds to plane, venting is worth trying.
Tools and Safety


Use a vise to hold the prop steady. Don't try to drill freehand. Mark all hole locations with a center punch to prevent bit wander. Wear safety glasses—aluminum shavings will fly.
For stainless props, use cutting oil and a slower drill speed to prevent overheating the bit. For aluminum, standard speed is fine, but deburr aggressively. Sharp edges will cause microscopic cracks under load.
If you're uncomfortable drilling, ship the prop to a shop like BBlades or a local prop specialist. Most charge $40 to $60 for custom vent holes, which is cheaper than replacing a prop you've wrecked.
Weight Distribution and Hull Design
![]()
Flat-bottom skiffs respond differently to ventilation than deep-V hulls. Flat bottoms want to "stick" to the water at low speeds, creating high initial drag. Venting helps break that suction by letting the engine spin faster early. Deep-V hulls cut through rather than stick, so they benefit less.
Tiller-steer skiffs tend to carry weight aft, which buries the transom and loads the prop harder. Venting compensates for that extra load. Center consoles with forward seating distribute weight more evenly, so they may not need as much venting.
If you're carrying heavy coolers or gear, shift weight forward when possible. This lifts the stern slightly and reduces prop load, working in tandem with venting. For more on optimizing boat balance, see Weight Distribution for Speed: Balancing Your Boat.
Post-Modification Testing Protocol

After drilling, run the boat in calm water with no passengers. Start with a hard throttle from a dead stop. Listen for the prop sound—controlled ventilation sounds like a brief "whoosh" followed by solid grip. Over-ventilation sounds like a constant high-pitched whine with no forward bite.
Check your tachometer. A good modification should show RPM climbing to around 3,500 within one second, then continuing smoothly to your engine's rated max (usually 5,500 to 6,000 RPM for most outboards). If RPM spikes instantly to 5,000+ but the boat barely moves, you've over-done it.
Test in turns. If the prop blows out mid-turn, your holes are too large or your engine is too high. Lower the engine one hole on the transom bracket or plug the vents and re-drill smaller.
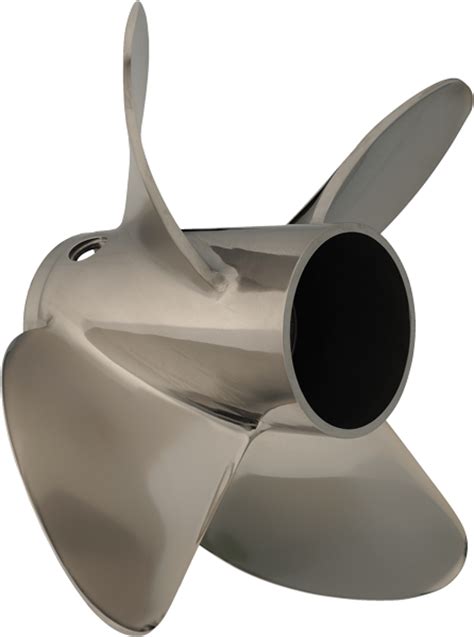
OEM vs. Aftermarket Vented Props

Mercury's PVS system and similar OEM setups use adjustable plugs (small, medium, large, solid) to fine-tune ventilation. This is convenient but expensive—expect to pay $400+ for a stainless PVS prop.
Aftermarket shops like BBlades offer custom vent drilling on your existing prop for a fraction of the cost. Some factories that manufacture for OEM brands use excess capacity to produce high-quality non-OEM props with similar features. JLM Marine, for example, sources props from these facilities, delivering OEM-spec quality without the dealership markup. For premium parts and trusted suppliers, explore the JLM Marine homepage.
Cheap aftermarket vented props from unknown sellers are a gamble. We've seen poorly machined vent holes with rough edges that cause premature cracking. Stick with reputable sources.
When Not to Vent

If your prop is already slipping at wide-open throttle, venting will make it worse. Fix your pitch or diameter first.
If you're running a performance hull that planes instantly, venting adds no value. It's a solution for boats that struggle, not ones that already perform well.
If your outboard is under-propped (RPM exceeds max rated by 500+), venting will push you further over-rev. You need more pitch, not more venting.
Maintenance Considerations
Vent holes can trap sand and debris if you run in shallow water. Flush thoroughly with fresh water after every outing to prevent buildup. Use a small bottle brush to clear the holes if you notice reduced venting effect over time.
Inspect vent holes every season for cracks radiating from the edges. Any visible cracks mean the prop is failed and unsafe. Replace it immediately.
If you plug holes for testing, use marine-grade rubber plugs, not generic hardware-store stoppers. Generic rubber degrades in saltwater and can blow out at high RPM.
Pro tip: After every saltwater run, flush your outboard with fresh water for at least 10 minutes. This prevents corrosion in the cooling passages and keeps the exhaust system clear, ensuring consistent exhaust flow through vent holes.
For tips on flushing and cooling system care, see our Cooling System parts collection and guides on Replacing a Mercury Outboard Water Pump Impeller.