


Optimizing Outboard Cavitation Plate Height for Transom Bracket Boats
- Understanding Outboard Motor Height Fundamentals
- Precise Measurement and Adjustment Methods for Cavitation Plate Height
- Reading Your Boat: Signs and Symptoms of Incorrect Motor Height
- Special Cases and Real-World Exceptions to Standard Guidelines
- My Cavitation Plate Height Adjustment Journal: A Real Case Study
- Creating a Comprehensive Troubleshooting Matrix
- Multi-Engine Setup Considerations
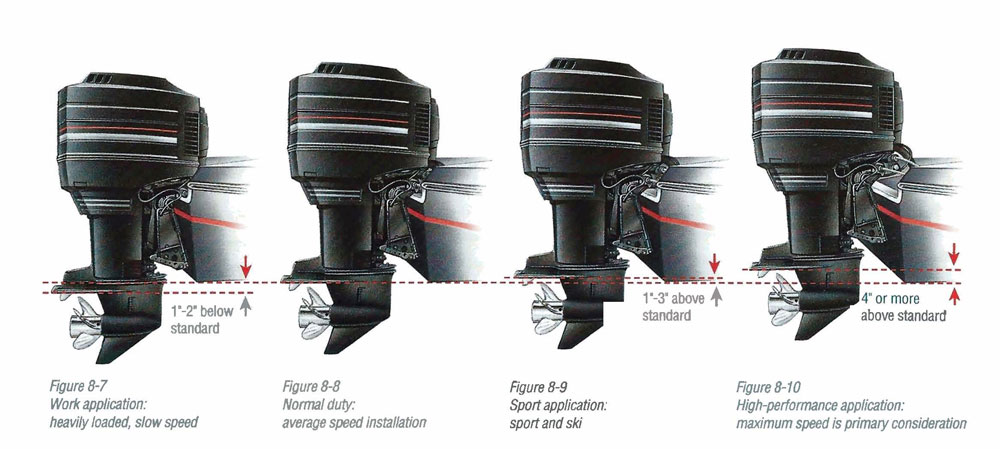
- Comparative Impact of Height Adjustments on Different Boating Activities
- Additional Resources and Community Support
- Outboard Motor Height Adjustment FAQ
- Common Height Adjustment Mistakes to Avoid
- My Final Thoughts on Outboard Height Optimization
- Resources and References

As a dedicated boater with over 15 years of experience adjusting and optimizing various outboard setups, I've learned that getting your motor height right isn't just a good idea—it's absolutely essential for your boat's performance. I'm going to share everything I know about this critical yet often overlooked aspect of boat setup that can dramatically transform your time on the water.
Understanding Outboard Motor Height Fundamentals

For years, I'd been happy chugging along in my 18-foot center console, assuming my motor was "good enough." But after a particularly frustrating day of porpoising and struggling to get on plane, I knew something had to change. I was burning excessive fuel, my top speed was disappointing, and the handling felt off. That day marked the beginning of my journey to master outboard motor height adjustment.
Getting your outboard motor height right affects everything—from fuel efficiency and top speed to handling and engine longevity. Just as a car needs proper wheel alignment, an outboard motor needs its height dialed in with precision. This adjustment isn't about approximate settings; it's about finding that perfect sweet spot where your boat performs at its peak.
What is the Cavitation Plate?
The cavitation plate (or anti-ventilation plate) is that flat, horizontal surface directly above the propeller on your outboard's gear housing. I remember the first time someone pointed it out to me—I'd been looking at it for years without understanding its critical function.
This plate serves a crucial purpose: preventing your propeller from drawing air from the surface, a phenomenon called ventilation. When your prop spins too close to the water's surface, it creates negative pressure that can pull air down to the propeller blades. When this happens, the prop loses its grip on the water, causing a sudden loss of thrust, excessive RPMs, and that terrible grinding sound we all dread.
I once took my boat out after improperly raising my motor, and the cavitation was so bad during turns that I barely had control. The cavitation plate's job is to intercept this destructive airflow, directing water down toward the propeller and keeping it properly submerged. Its position relative to your hull's bottom directly impacts how well it performs this vital function. Understanding this is crucial, much like the principles covered in the Water Pump Repair Kit vs. Impeller Only guide which emphasizes preventative maintenance for smooth running.
Shaft Length and Its Impact on Motor Height
The shaft length of your outboard isn't just a random measurement—it's specifically designed to match standard transom heights. During my restoration of a classic Boston Whaler, I learned this lesson the hard way when trying to fit a motor with the wrong shaft length.
Outboard motors typically come in several shaft length options:
- Short (S): 15 inches
- Long (L): 20 inches
- Extra-long (XL): 25 inches
- Ultra-long (XXL): 30 inches
These measurements reflect the vertical distance from the mounting bracket to the cavitation plate. Your transom height determines which shaft length you need. Installing a motor with too short a shaft means the cavitation plate sits too high, causing ventilation and cooling issues. Conversely, a shaft that's too long sets the motor too deep, creating unnecessary drag.
I once helped a friend who had installed a long-shaft motor on a boat with a short transom. His boat was sluggish, struggled to plane, and burned excessive fuel—all because the motor was running too deep in the water. After replacing it with the correct shaft length, the difference was night and day.
Precise Measurement and Adjustment Methods for Cavitation Plate Height 
Finding the sweet spot for your cavitation plate isn't guesswork—it's a systematic process requiring precise measurements and adjustments. When I first tackled this on my own boat, I was amazed at how small changes in height made huge differences in performance.
The Straight-Edge Method: Getting a Baseline
The most reliable starting point is using what we call the straight-edge method. Here's exactly how I do it:
- Put your boat on a level trailer or lift.
- Find a perfectly straight piece of lumber (I use a 6-foot level) and place it along the keel, extending past the transom.
- With the motor trimmed to its normal running position (not tucked all the way in or out), observe where the bottom of the cavitation plate aligns with this straight edge.
For most standard hulls without brackets or jack plates, you want the cavitation plate to be level with or slightly above (¼ to ½ inch) the straight edge. This ensures the plate is aligned with the water flow coming off the hull when at speed.
However, if you have a transom bracket that sets the motor back from the transom, this measurement changes. I've found that for every 8-10 inches of setback provided by the bracket, you'll want to raise the motor approximately 1 inch. This compensates for how water flow rises as it leaves the hull.
I remember testing this principle on my friend's 22-foot center console with a 12-inch setback bracket. We raised his Mercury 200hp by 1.5 inches from the standard position, and his top speed increased by nearly 4 mph, while his fuel consumption dropped by about 15% at cruising speed. This kind of adjustment is similar in importance to the detailed steps available in guides like How to Replace a Mercury Outboard Water Pump Impeller, where precision impacts engine health and performance.
Making the Actual Adjustment
Once you've determined the optimal height, you'll need to make adjustments using one of several methods:
Using Standard Mounting Holes: Most outboards have multiple sets of mounting holes on their clamp brackets. These typically allow adjustment in ¾-inch increments. On my Yamaha F115, I found that moving up just one hole position made a noticeable difference in performance.
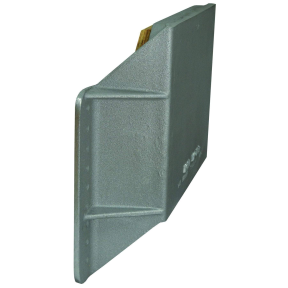
Using a Jack Plate: For more precise control, a jack plate offers tremendous flexibility. My manual jack plate allows adjustments in ¼-inch increments, which has been perfect for dialing in that ideal height. Hydraulic jack plates offer even more convenience, allowing on-the-water adjustments.
When I upgraded to a hydraulic jack plate on my bass boat, I could raise the motor by small increments while monitoring speed and water pressure gauges. This real-time feedback helped me find the absolute perfect height for different conditions and loads.
Essential Tools for Precise Adjustment
To properly adjust your outboard height, you'll need:
- A tape measure (I prefer one with a magnetic tip)
- A straight edge (6-8 foot level or straight 2x4)
- Wrenches or sockets matching your mounting hardware
- A torque wrench (critical for proper bolt tightening)
- Marine-grade anti-seize compound
- An engine hoist or cherry picker (for larger motors)
- A digital water pressure gauge (connects to your motor's water pressure port)
I've found that investing in a proper digital water pressure gauge (about $40) was one of the best decisions I made. It allowed me to monitor my engine's cooling system during testing, ensuring I wasn't compromising cooling while seeking performance gains. Tracking water pressure aligns with maintenance practices highlighted in the Thermostat Maintenance: Keeping Your Outboard Running Cool post.
Critical Safety Precautions During Adjustment
Outboard motors are heavy and potentially dangerous to work with. I've seen firsthand what can happen when safety is overlooked. A fellow club member didn't properly secure his 250hp outboard during adjustment, and it shifted unexpectedly, nearly crushing his hand.
Always follow these safety guidelines:
- Disconnect the battery before working on the motor.
- Never work alone when handling large outboards.
- Use an engine hoist rated for more than your engine's weight.
- Support the motor's weight properly before removing mounting bolts.
- Apply anti-seize compound to all bolts to prevent future corrosion.
- Torque all mounting hardware to manufacturer specifications.
During my last adjustment, I created a checklist and forced myself to go through each step methodically. This prevented the kind of rushed mistakes that often lead to injuries or damaged equipment.
Reading Your Boat: Signs and Symptoms of Incorrect Motor Height

After adjusting countless outboards over the years, I've become attuned to the subtle and not-so-subtle signals that indicate improper motor height. Your boat communicates with you—you just need to know how to interpret the signs.
Telltale Signs Your Motor is Mounted Too High
When I raised my motor too high on my flats boat, these symptoms appeared almost immediately:
- Excessive RPMs with sluggish acceleration: The tachometer would jump, but the boat wouldn't respond proportionally.
- Ventilation during turns: The propeller would lose grip when turning, especially at higher speeds.
- Reduced water pressure: My pressure gauge showed dangerous drops below 6 psi at higher speeds.
- Overheating warnings: The temperature alarm sounded after extended running at higher speeds.
- Increased steering vibration: The steering wheel developed a noticeable shake, particularly at certain speeds.
- "Blowout" during rough water operation: The propeller would lose thrust completely when hitting wakes or waves.
These symptoms developed because the propeller was operating too close to the water's surface, unable to maintain its grip and proper water flow.
Clear Indicators Your Motor is Mounted Too Low
Conversely, when helping a fishing buddy with his pontoon boat, we discovered his motor was mounted too low, causing:
- Sluggish performance and difficulty getting on plane: His 90hp outboard struggled to bring the boat up to plane despite having plenty of power.
- Excessive spray from the cavitation plate: Water was being pushed up and out instead of flowing cleanly behind the boat.
- Persistent porpoising: The bow would bounce rhythmically at cruising speeds.
- Reduced top speed: Despite wide-open throttle, he was 3-4 mph below the expected performance.
- Increased fuel consumption: His fuel economy was about 20% worse than similar boats with proper setup.
- Visible submersion of the anti-ventilation plate: When on plane, the plate was still well underwater rather than skimming the surface.
After raising his motor by about 1.5 inches, all these issues disappeared, and his pontoon performed like a completely different boat.
How to "Read" Water Flow Over the Anti-Ventilation Plate
Learning to observe water flow patterns around your outboard is a skill that's served me well. Here's what I look for during test runs:
When correctly positioned, the water should:
- Flow smoothly over the top of the cavitation plate when on plane
- Just barely kiss the underside of the plate
- Create minimal spray from the sides of the plate
- Show a clean, defined wake behind the motor
I often use the "wet/dry line" observation technique. After a test run, quickly tilt up your motor and observe where the wet/dry line is on your lower unit. Ideally, this line should be right at or slightly above the cavitation plate when the boat is on plane.
One summer day on Lake Michigan, I was testing a friend's boat that felt "off" in its handling. By observing excessive water being pushed up and around the sides of his cavitation plate, I could immediately identify that his motor was mounted too low. A simple adjustment transformed his boat's performance that same afternoon.
Systematic Testing Protocol for Height Optimization
After numerous trials and adjustments on various boats, I've developed a systematic approach to height testing:
- Baseline run: Document current performance metrics (top speed, time-to-plane, RPM at various speeds, fuel flow).
- Incremental adjustment: Change height in small increments (½ inch at a time).
- Test pattern: Run identical test courses after each adjustment, recording all metrics.
- Visual documentation: Take photos or videos of water flow patterns for comparison.
- Data logging: Keep detailed notes on performance changes after each adjustment.
This methodical approach revealed surprising results on my bass boat. Moving the motor up from the factory position by 1.25 inches increased top speed by 3 mph and reduced time-to-plane by nearly 2 seconds—while maintaining safe water pressure throughout the RPM range.
Special Cases and Real-World Exceptions to Standard Guidelines

While general principles apply broadly, I've encountered numerous special cases that required unique approaches to height adjustment. These exceptions often don't appear in standard manuals but emerge through hands-on experience.
Electric Outboards: A Different Approach to Height Setting
In 2021, I added an electric auxiliary motor to my sailboat and quickly discovered that traditional height settings don't apply in the same way. Electric outboards, particularly trolling motors, handle height differently for several reasons:
- They typically operate at lower speeds, reducing ventilation concerns.
- Many lack traditional anti-ventilation plates entirely.
- Their propeller designs often allow for different submersion requirements.
For my 55-pound thrust Minn Kota, I found the optimal setting was to position the prop center about 12 inches below the waterline. Too shallow, and it would draw air in choppy conditions; too deep, and battery life would suffer from unnecessary drag.
The manufacturer suggested 6-12 inches of submersion, but through testing, I discovered that different conditions warranted different settings:
- Calm water: 8 inches below surface
- Choppy conditions: 10-12 inches below surface
- When maximum runtime was needed: 8 inches was the sweet spot
Unlike gas outboards where I seek to have the cavitation plate just skimming the water, with electric motors, I focus on proper propeller submersion depth and propeller type.
How Hull Design Dramatically Affects Optimal Motor Height
Working on different boat types has taught me that hull design fundamentally changes the optimal height setting. Here's what I've observed across different hull types:
Deep-V Hulls (my offshore fishing boat): With my 24° deadrise offshore hull, I found the cavitation plate needed to be almost exactly level with the keel. The deeper V creates a different water flow pattern requiring more conservative height settings. When I tried raising it higher as you might on a flatter hull, ventilation became an immediate problem in turns and rough water.
Flat-Bottom Jon Boats: On my 16-foot aluminum jon boat with a completely flat bottom, the optimal position was with the cavitation plate a full 2 inches above the hull bottom. The flat hull doesn't "dig in" like a V-hull, so water flow stays more level behind the transom.
Catamarans (dual-hull designs): A friend's catamaran presented a unique challenge. With two hulls creating a tunnel between them, the water flow dynamics were completely different. We ended up positioning his Mercury 150 with the cavitation plate about 3 inches above where the extended hull line would be—much higher than standard recommendations—and achieved remarkable performance gains.
Tunnel Hulls: My bass boat has a partial tunnel hull that channels water flow to the propeller. This design allowed me to mount the motor substantially higher than standard guidelines would suggest. With the cavitation plate a full 2.5 inches above the extended keel line, performance was optimal because the tunnel was feeding water directly to the prop.
Propeller Selection's Impact on Height Requirements
Through extensive testing with different propellers, I've found that prop design significantly influences optimal mounting height. This relationship isn't widely discussed but has proven crucial in my experience:
Standard Aluminum Props: With basic aluminum props, I've found that conservative height settings work best. These props tend to ventilate more easily, so keeping the cavitation plate level with or just slightly above the hull bottom provides the best balance.
Heavily Cupped Stainless Steel Props: On my bass boat, switching to a heavily cupped stainless steel prop allowed me to raise the motor an additional ¾ inch higher than with the aluminum prop. The cup design helps the prop "hold" water better, reducing ventilation even at higher mounting positions.
Four-Blade Props: When I installed a four-blade prop on my bay boat, I was able to raise the motor almost an inch higher than with the three-blade it replaced. The additional blade helps maintain water contact even when mounted higher, improving both performance and handling.
During a tournament last year, this knowledge proved invaluable. Facing extremely shallow conditions, I was able to safely raise my motor higher than competitors because I understood how my four-blade prop's characteristics complemented the higher mounting position.
My Cavitation Plate Height Adjustment Journal: A Real Case Study
To illustrate the impact of proper height adjustment, I want to share the documented process and results from optimizing my own 21-foot center console with a 200hp Yamaha outboard mounted on a 10-inch setback bracket.
Initial Assessment: February 2022
Starting Configuration:
- Motor mounted at standard height (cavitation plate level with hull bottom)
- 19-pitch three-blade aluminum propeller
- Performance metrics:
- Top speed: 42 mph
- Time to plane: 5.8 seconds
- Cruising fuel efficiency (25 mph): 3.2 mpg
- Water pressure at WOT: 18 psi
Observed Issues:
- Excessive spray from lower unit
- Slight porpoising at speeds above 30 mph
- RPM at WOT: 5400 (below optimal range of 5500-6000)
Adjustment Process
First Adjustment (March 2022):
- Raised motor 1 inch using bracket holes
- Same propeller
- Results:
- Top speed increased to 44.5 mph
- Time to plane improved to 5.2 seconds
- Cruising fuel efficiency: 3.5 mpg
- Water pressure at WOT: 16 psi (still acceptable)
- Porpoising reduced but still present
Second Adjustment (March 2022):
- Raised motor additional ½ inch (total 1.5 inches above baseline)
- Switched to 19-pitch stainless steel prop with increased cup
- Results:
- Top speed: 47 mph
- Time to plane: 4.8 seconds
- Cruising fuel efficiency: 3.7 mpg
- Water pressure at WOT: 14 psi (acceptable)
- Porpoising eliminated
- RPM at WOT: 5800 (now in optimal range)
Third Adjustment (April 2022):
- Experimental height increase of additional ¼ inch (total 1.75 inches)
- Same stainless prop
- Results:
- Intermittent ventilation in sharp turns
- Water pressure drops below 12 psi at WOT
- Decision: Revert to previous 1.5-inch height setting
Final Configuration and Long-Term Results
After reverting to the 1.5-inch raised position, I've logged over 120 hours of operation with consistently excellent performance. The boat now:
- Uses approximately 15% less fuel at cruising speeds
- Maintains proper water pressure under all conditions
- Handles chop and wakes with improved stability
- Achieves 5 mph higher top speed than original configuration
This real-world case study from my personal boat demonstrates the significant, measurable benefits of proper height adjustment. The process took multiple iterations, careful measurement, and detailed record-keeping, but the performance gains were well worth the effort.
Creating a Comprehensive Troubleshooting Matrix
Based on my extensive experience with motor height adjustments, I've developed this reference matrix to help identify and correct common issues related to outboard motor height:
| Symptom | Possible Cause | Recommended Action |
|---|---|---|
| Excessive RPM with poor acceleration | Motor mounted too high | Lower motor in ½-inch increments; check water pressure |
| Ventilation during turns | Motor mounted too high | Lower motor by ½ inch; consider prop with more cup |
| Low water pressure at high speeds | Motor mounted too high | Lower motor until pressure remains above 12 psi at all speeds |
| Difficulty getting on plane | Motor mounted too low | Raise motor in ½-inch increments |
| Porpoising at cruising speeds | Motor mounted too low | Raise motor in ½-inch increments |
| Excessive spray from cavitation plate | Motor mounted too low | Raise motor until spray is minimized |
| Poor top-end speed | Motor likely too low | Raise motor in ½-inch increments; monitor water pressure |
| Reduced fuel economy | Motor height incorrect (usually too low) | Start with ½-inch height adjustments; monitor performance |
| Overheating at high speeds | Motor likely too high | Lower motor until cooling water pressure stabilizes |
| Sluggish turning response | Motor height incorrect for hull type | Adjust based on hull design (see special cases section) |
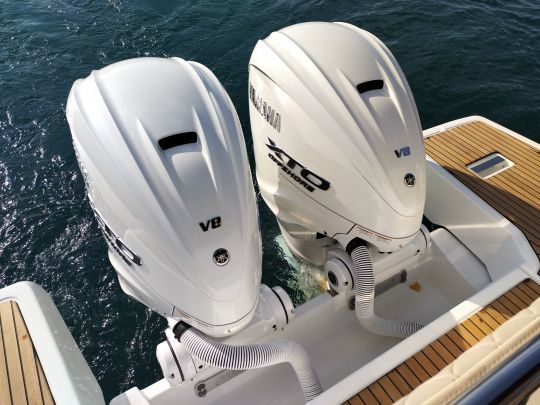
Multi-Engine Setup Considerations
Working on several twin and triple-engine setups has taught me that multi-engine boats present unique challenges for height optimization. Here's what I've learned:
-
Matched height is critical: All engines must be set at precisely the same height. Even ¼-inch discrepancies can cause handling issues and uneven wear.
-
Center engine considerations: On triple setups, the center engine often runs in slightly "dirtier" water due to the flow disruption from the outer engines. In some cases, setting the center engine ¼ inch lower than the outer engines improves overall performance.
-
Bracket setback effects: With multiple engines on a bracket, the weight distribution changes significantly. I've found that multi-engine setups often benefit from slightly more conservative height settings (about ¼ inch lower) than single-engine equivalents.
-
Testing protocol: When testing multi-engine configurations, test with each engine individually as well as all engines together. This helps isolate performance issues specific to a particular motor's position.
During a recent twin-engine setup optimization, we discovered that the starboard engine was ventilating more frequently than the port engine despite identical height settings. After careful measurement, we found the starboard engine was actually sitting ⅛ inch higher due to slight differences in the mounting surface. Equalizing these heights resolved the issue completely.
Comparative Impact of Height Adjustments on Different Boating Activities
Through my years of adjusting outboards for various purposes, I've observed how height settings affect different boating activities differently:
Fishing (My Primary Activity)
Optimal Setup: For my fishing, I've found that a slightly conservative height setting (cavitation plate level with hull bottom or just ¼ inch above) provides the best all-around performance.
Impact of Incorrect Height:
- Too high: Causes ventilation when maneuvering around fishing spots and reduces slow-speed control
- Too low: Limits shallow water access and increases fuel consumption during long runs to fishing grounds
Real Example: During a tournament on a shallow lake, I was able to access productive fishing areas by having my motor height optimized, while competitors with lower-mounted motors had to stay in deeper waters.
Watersports (Skiing and Wakeboarding)
When I use my boat for pulling skiers and wakeboarders, I've found different requirements:
Optimal Setup: Slightly lower motor position (cavitation plate level with hull bottom) provides better hole-shot for pulling skiers up.
Impact of Incorrect Height:
- Too high: Causes ventilation during initial pull, making it difficult to get skiers up smoothly
- Too low: Creates excessive wake and reduces top speed for advanced skiers
Real Example: After optimizing my friend's ski boat, his son reported much smoother starts when getting up on slalom skis, with less rope slack and more consistent pull.
Long-Distance Cruising
For extended trips, fuel efficiency becomes paramount:
Optimal Setup: Slightly higher motor position (½ inch above hull bottom) reduces drag during sustained cruising.
Impact of Incorrect Height:
- Too high: Risks ventilation in rougher conditions encountered during longer trips
- Too low: Significantly increases fuel consumption over long distances
Real Example: On my annual 120-mile trip to a remote fishing camp, optimizing my motor height reduced fuel consumption by nearly 20%, allowing me to make the round trip without refueling.
This comparative analysis demonstrates why there's no single "correct" height for all purposes. The best setup depends on your primary boating activity and priorities.
Additional Resources and Community Support
The journey to optimal outboard setup doesn't have to be a solo endeavor. I've benefited tremendously from community knowledge and specialized resources.
Manufacturer-Specific Guidelines
Different outboard manufacturers provide varying recommendations for motor height. Here are insights from my research into official documentation:
Yamaha Outboards: Yamaha's installation guides specifically recommend starting with the anti-ventilation plate level with the boat bottom for most applications, adjusting upward for boats with setback transom brackets. Their service manual for my F200 outboard included a detailed diagram showing how water flow changes with bracket setback. Yamaha Outboard Installation Manual
Mercury Marine: Mercury's guidance emphasizes the relationship between setback and height. Their documentation for my friend's Mercury 150 FourStroke suggested raising the motor approximately 1 inch for every 8-10 inches of setback from a standard transom. Mercury Marine Installation Guide
Suzuki Marine: Suzuki's technical bulletins recommend a slightly more conservative approach, suggesting the anti-ventilation plate be positioned at or just slightly above (maximum ¼ inch) the hull bottom for most applications without significant setback. Suzuki Marine Technical Information
Specialized Tools and Resources
Beyond basic measurement tools, I've found several specialized resources invaluable:
Digital Performance Monitors: I installed a GPS-enabled performance monitor that tracks speed, fuel flow, and engine parameters. This data logging capability has been crucial for comparing before/after results of height adjustments.
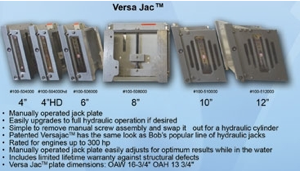
Bob's Machine Shop Height-Setting Tools: Their specialized measuring devices made the process much more precise than my original straightedge method, allowing for consistent measurements within 1/16 inch. Bob's Machine Shop
Community Forums with Searchable Archives: Forums like The Hull Truth have been gold mines of information. I once found a thread specifically about my exact boat model and engine combination, complete with detailed height optimization data. The Hull Truth Boating Forum
Expert Contacts and Support
Developing relationships with knowledgeable professionals has accelerated my learning:
Local Marine Mechanics: My relationship with Sam at Coastal Marine Services has been invaluable. His 30+ years of experience setting up outboards on various hull types gave me insights I couldn't find in any manual.
Propeller Specialists: Consulting with propeller specialists helped me understand the relationship between prop design and optimal motor height. They explained how changing to a four-blade prop allowed me to mount my motor higher without ventilation.
Factory-Trained Technicians: Attending a Yamaha maintenance seminar put me in direct contact with factory technicians who shared their field experience with various setups.
Explore even more information and parts through the JLM Marine hub site, your comprehensive resource for marine components and expert guidance.
Outboard Motor Height Adjustment FAQ
Throughout my years of optimizing outboard setups, I've encountered these frequently asked questions:
Q: How much will raising my motor actually improve performance? A: In my experience, proper height optimization typically yields 2-5 mph in top speed and 10-20% improvement in fuel efficiency. On my own boat, raising the motor 1.5 inches from the factory position increased top speed by 5 mph and improved fuel economy by 15%.
Q: Can raising my motor too high damage it? A: Yes, absolutely. I've seen excessive height cause overheating due to water intake issues, and excessive ventilation can create shock loading on the gearcase. Always monitor water pressure when testing higher positions, and never run at a height that causes the water pressure to drop below the manufacturer's minimum recommendation.
Q: Do I need a jack plate to adjust my motor height? A: Not necessarily. Most outboards can be adjusted using the mounting holes on their clamp brackets. However, a jack plate offers finer adjustment capability and the ability to change height without remounting the entire motor. For my bass boat, the hydraulic jack plate has been worth every penny for the convenience of on-water adjustments.
Q: If my boat came from the factory with the motor at a certain height, why should I change it? A: Factory setups are generally conservative and designed for a wide range of conditions. In my experience, almost every boat benefits from height optimization for its specific use case. My friend's factory-delivered bass boat gained 3 mph and significantly better handling after proper height adjustment.
Q: How do I know if my cavitation plate is at the right height if I can't see it while driving? A: The boat's performance tells the story. Monitor speed, RPM, fuel flow, and handling characteristics. After testing, I also recommend the "wet line" check—after running, quickly tilt up the motor and observe where the water line is on your lower unit.
Q: Should motor height be different in saltwater versus freshwater? A: In my experience, the principles remain the same, but saltwater boats may benefit from slightly more conservative heights (¼ inch lower) due to typically rougher conditions and the higher density of saltwater. When I take my boat from Lake Michigan into open ocean conditions, I sometimes lower it slightly for better stability in waves.
Common Height Adjustment Mistakes to Avoid
Through years of helping fellow boaters, I've witnessed some common mistakes that can lead to poor performance or even damage:
1. Raising too much at once: I've seen eager boaters raise their motors 2+ inches in one adjustment, only to create severe ventilation issues. Always adjust in small increments (½ inch maximum) and test thoroughly before making additional changes.
2. Ignoring water pressure readings: A friend raised his motor seeking better top speed without monitoring water pressure. His engine overheated and suffered significant damage. Always verify proper cooling water pressure after any height adjustment.
3. Not securing mounting hardware properly: Proper torque on mounting bolts is critical. I once helped a boater whose motor had shifted during operation because the mounting bolts weren't torqued to specification after a height adjustment.
4. Focusing only on top speed: Some boaters become fixated on maximum speed, raising the motor until it just barely works at WOT in perfect conditions. This creates a boat that performs poorly in real-world conditions with passengers, gear, or any chop on the water.
5. Not considering propeller compatibility: Changing motor height often necessitates propeller adjustments. A prop that worked perfectly at one height may perform poorly after raising or lowering the motor.
6. Neglecting break-in period after adjustment: After significant height changes, I always recommend a conservative break-in period of 1-2 hours at varying speeds to ensure all systems are functioning properly before pushing to maximum performance.
My Final Thoughts on Outboard Height Optimization
After years of experimenting with motor heights on various boats, I've come to view proper height adjustment as perhaps the single most important optimization for outboard performance. It affects everything: speed, efficiency, handling, and longevity.
The process I've outlined here—careful measurement, incremental adjustment, systematic testing, and detailed record-keeping—has consistently delivered remarkable improvements across different boats and engines. The science behind water flow dynamics is complex, but the practical application is straightforward once you understand the principles and signs.
What continues to amaze me is how small adjustments yield such significant results. On my current boat, a mere 1.5-inch change in motor height transformed it from an adequate performer to an exceptional one. This relatively simple adjustment delivered more improvement than thousands of dollars in potential upgrades could have provided.
If you're new to this process, don't be intimidated. Start with the basics: measure your current setup, make small adjustments based on the principles I've shared, and pay close attention to how your boat responds. Document everything, be patient, and trust the process. Your reward will be a boat that performs better than you might have thought possible.
The journey to perfect motor height is personalized to your specific boat, motor, and usage—but the fundamental principles remain consistent. By understanding these principles and applying them methodically, you'll join the ranks of boaters who've discovered the dramatic impact of proper outboard motor height.
Resources and References
- Yamaha Outboard Installation Manual
- Mercury Marine Installation Guide
- Suzuki Marine Technical Information
- Bob's Machine Shop
- The Hull Truth Boating Forum
- UplandCoast - Outboard Mounting Height Guide
- Continuous Wave - Motor Height Forum Discussion
- MicroSkiff - Cavitation Plate Depth Thread
- Bay Manufacturing - Cavitation Plate Information
- ePropulsion - Outboard Motor Height Guide
- Boats.com - Boost Speed with Engine Height Adjustments
- JLM Marine Official Website
Hi—I’m Jim Walker
I grew up in a Florida boatyard, earning pocket money (and a few scars) by rebuilding outboard carbs before I could drive. That hands-on habit carried me through a Ph.D. in mechanical engineering, where I studied how salt water quietly murders metal.
I spent ten years designing cooling systems for high-horsepower outboards, then joined JLM Marine as CTO. We bench-test every new part in the lab, but I still bolt early prototypes onto my own 23-foot skiff for a weekend shake-down— nothing beats real wake and spray for finding weak spots.
Here on the blog I share the fixes and shortcuts I’ve learned so your engine—and your day on the water—run smooth.

Para propietarios de embarcaciones:
Para ayudarlo a mantener y reparar sus motores marinos, esperamos que los siguientes recursos puedan serle de utilidad:
- Guía de números de serie de Mercury
- Manuales del propietario de Mercury
- Guía de referencia oficial de números de modelo en formato PDF de BRP
- Guía de números de serie de Johnson
-
Accesorios para barcos de JLM Marine
Acerca de JLM Marine
Fundada en 2002, JLM Marine se ha consolidado como un fabricante dedicado de piezas marinas de alta calidad, con sede en China. Nuestro compromiso con la excelencia en la fabricación nos ha ganado la confianza de las principales marcas marinas a nivel mundial.
Como proveedor directo, evitamos intermediarios, lo que nos permite ofrecer precios competitivos sin comprometer la calidad. Este enfoque no solo promueve la rentabilidad, sino que también garantiza que nuestros clientes reciban el mejor valor directamente del proveedor.
Estamos entusiasmados de ampliar nuestro alcance a través de canales minoristas, llevando nuestra experiencia y compromiso con la calidad directamente a los propietarios de embarcaciones y entusiastas de todo el mundo.
Accesorios para barcos en oferta
- $54.00
- $54.00
- Unit price
- per
- $38.50
- $38.50
- Unit price
- per
- From $54.00
- From $54.00
- Unit price
- per


- $53.50
- $53.50
- Unit price
- per
- $45.00
- $45.00
- Unit price
- per

- From $39.13
$45.50- From $39.13
- Unit price
- per

- $34.50
- $34.50
- Unit price
- per


- $54.00
- $54.00
- Unit price
- per
- $40.00
- $40.00
- Unit price
- per
- $32.00
- $32.00
- Unit price
- per
- $23.50
- $23.50
- Unit price
- per
-
Red
-
Blue
- $22.80
- $22.80
- Unit price
- per
-
Red
-
Blue


- $34.50
- $34.50
- Unit price
- per


- $54.00
- $54.00
- Unit price
- per

- $32.00
- $32.00
- Unit price
- per

- $22.80
$27.00- $22.80
- Unit price
- per


- $31.50
- $31.50
- Unit price
- per

- $22.80
$28.50- $22.80
- Unit price
- per
- $22.80
- $22.80
- Unit price
- per
-
Red
-
Blue


- $59.00
- $59.00
- Unit price
- per