


How to Replace the Thermostat on Your Yamaha F225, F250, or F300 4.2L V6 Outboard Motor

There's a certain satisfaction that comes with maintaining your own boat. I've often found myself out on the water, far from shore, when a quirky engine sound or a dashboard warning light sends a jolt of anxiety through me. The feeling of helplessness in such moments is something I truly dislike. It's why I've dedicated myself to understanding the inner workings of my own engines, and why I believe every boat owner can benefit from learning key maintenance tasks. Keeping your marine engine in prime condition isn't just about performance; it's about peace of mind and, frankly, the safety of everyone on board.
Perhaps you've noticed your Yamaha outboard running a little hot, or maybe it just doesn't seem to be hitting its usual performance stride. These could be subtle hints that your engine's cooling system, specifically the thermostat, isn't doing its job properly. Neglecting these signals can lead to severe and costly engine damage, cutting short your boating season or turning a relaxing trip into a stressful tow back to the dock.
But what if you could tackle this issue yourself, ensuring your engine runs at its optimal temperature and prolonging its life, all while gaining valuable experience? I'm here to show you how. This comprehensive guide will walk you through the precise steps to replace the thermostat on your Yamaha F225, F250, or F300 4.2L V6 outboard motor.
Here's what we'll cover in detail:
- The crucial role of your thermostat in maintaining engine health.
- How to identify the tell-tale signs of a failing thermostat.
- A step-by-step journey through the replacement procedure, from preparation to post-installation checks.
- Expert tips and common pitfalls to avoid during the process.
- Essential maintenance advice to keep your engine running cool for years to come.
By the end of this guide, you'll not only have the knowledge to perform this vital maintenance task, but you'll also feel a renewed sense of confidence in your ability to keep your Yamaha outboard purring smoothly, season after season. With direct-from-factory parts readily available and expert support just an email away, taking charge of your boat's longevity has never been easier. For sourcing genuine parts, you can always rely on JLM Marine’s direct from factory boat parts.
Understanding the Thermostat in Yamaha Outboard Motors

The marine environment is incredibly harsh on engines, and cooling is paramount. I've seen firsthand what saltwater and constant use can do, and it highlights just how vital every component in the cooling system truly is.
What is a thermostat and its role in engine cooling?
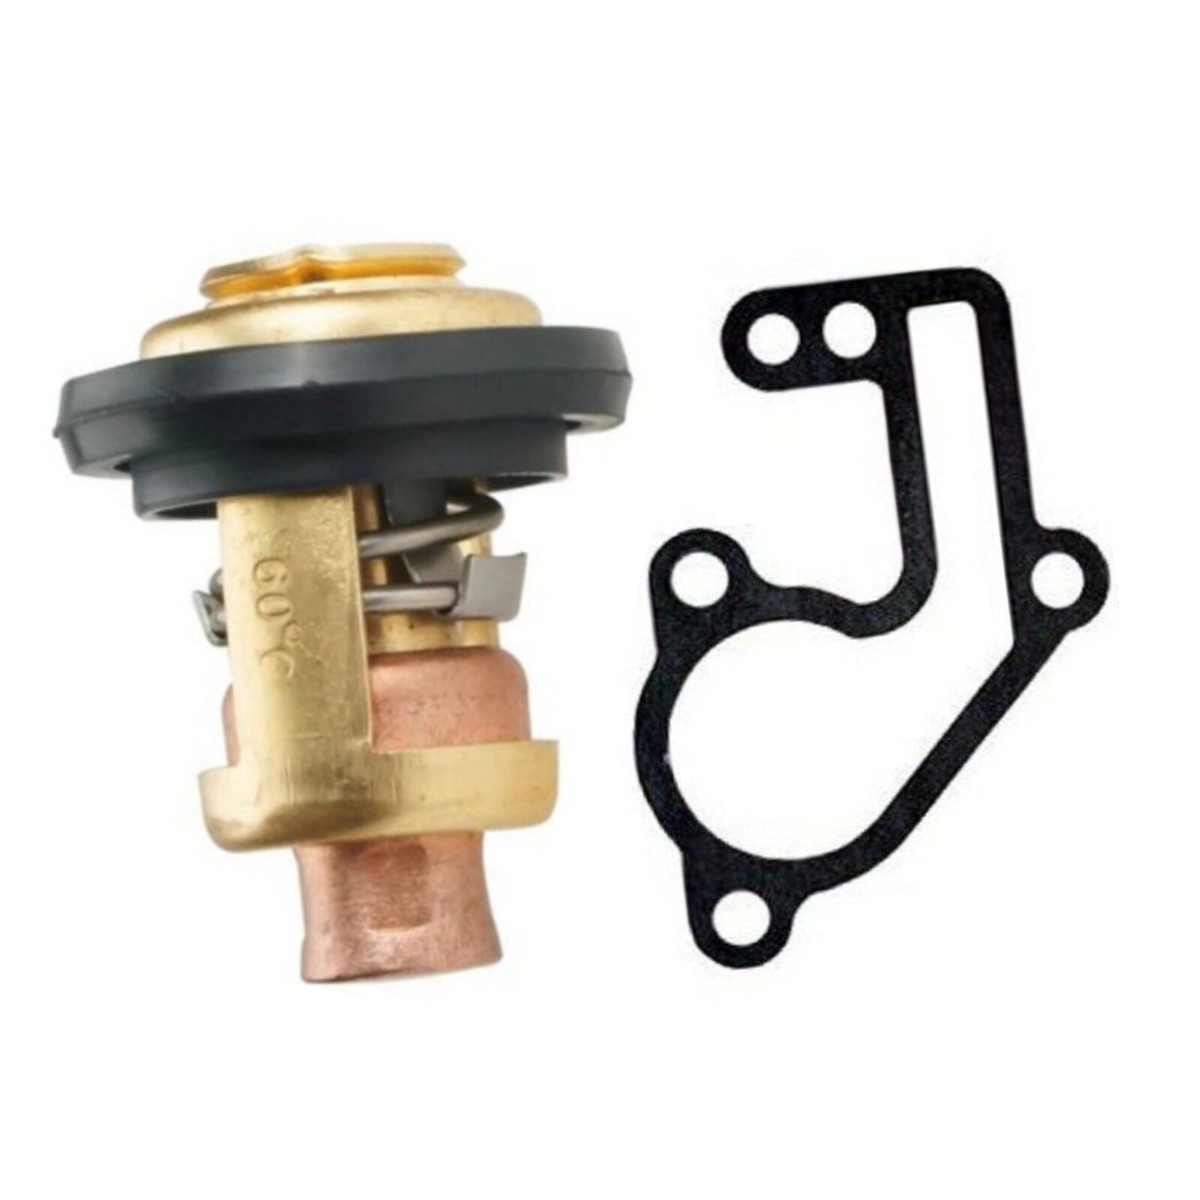
At its core, a thermostat in your Yamaha outboard motor is a temperature-sensitive valve, and its function is elegantly simple yet critically important. Think of it as the gatekeeper of your engine's internal temperature. When your engine is cold, the thermostat remains closed, restricting the flow of cooling water. This allows the engine to warm up quickly to its ideal operating temperature. Once that temperature is reached, the thermostat opens, permitting a steady flow of cooling water to circulate through the engine and carry away excess heat. As the engine's workload changes and its temperature fluctuates, the thermostat continuously adjusts, ensuring the engine remains within its optimal thermal range. Without this precise regulation, your engine would either run too cold (leading to inefficient combustion and increased wear) or, more dramatically, too hot (causing overheating, component damage, and potential catastrophic failure). It's a small part with a colossal responsibility within the outboard motor cooling system.
Why is thermostat maintenance critical?
I can't stress enough how critical proper thermostat maintenance is for the long-term health and performance of your Yamaha outboard. A few years back, I nearly learned this the hard way on a fishing trip. We were cruising along, and while my gauges looked fine, I noticed the tell-tale smell of hot rubber and a slight loss of power. Turns out, my thermostat was starting to stick. Had I ignored it, the consequences could have been dire.
Neglecting your thermostat can lead to two primary issues, both detrimental to engine performance and longevity:
- Overheating: This is the more obvious and immediately dangerous consequence. A thermostat stuck in the closed or partially closed position will prevent adequate cooling water from circulating, causing engine temperatures to skyrocket. This can lead to warped cylinder heads, blown head gaskets, piston seizure, and even melting of internal components. The cost of repairing an overheated engine far outweighs regular maintenance.
- Overcooling: While less dramatic, a thermostat stuck open can lead to the engine running consistently below its optimal operating temperature. This might not seem like a problem, but it significantly impacts combustion efficiency, fuel economy, and can accelerate wear on internal parts due to improper lubrication and increased condensation inside the crankcase.
Regular inspection and timely thermostat replacement are not just about preventing catastrophic failure; they're about ensuring your engine runs efficiently, delivers peak performance, and provides you with countless hours of trouble-free boating. Yamaha themselves recommend inspecting or replacing the thermostat every year or 100 hours of engine operation, whichever comes first. While some owners might stretch this, perhaps replacing one closer to the 500-hour mark or only when symptoms appear, I personally lean towards sticking to the manufacturer's suggested intervals, especially given the harsh marine environment. It's a small investment that pays huge dividends in peace of mind and engine lifespan.
Signs your thermostat needs replacement
Recognizing the symptoms of a faulty Yamaha thermostat is key to preventing further damage. Pay attention to your engine's behavior, because it will often tell you when something is amiss.
Here are the most common signs that your thermostat might be failing:
- Engine Overheating: This is the most common and concerning symptom. If your engine temperature gauge consistently runs high, or if your alarm sounds, your thermostat might be stuck closed. On my old F150, an overheating alarm always sent shivers down my spine – don't ignore it!
- Fluctuating Temperature Gauge: The needle on your temperature gauge might jump erratically, or cycle between normal and hot, indicating the thermostat is opening and closing improperly or sticking intermittently.
- Cool Running Engine: Conversely, if your engine never seems to reach normal operating temperature, or runs consistently cooler than usual, the thermostat could be stuck in the open position. This leads to reduced fuel efficiency and increased engine wear over time.
- Excessive Fuel Consumption: An engine that's running too cold due to a stuck-open thermostat will try to compensate by running a richer fuel mixture, leading to noticeably higher fuel consumption.
- Poor Performance: Reduced horsepower, sluggish acceleration, or a general lack of enthusiastic response from your engine can sometimes be attributed to improper operating temperatures.
- Corrosion or Deposits on Old Thermostat: When you do get around to opening the housing, often the old thermostat itself will show visible signs of corrosion, salt buildup, or calcium deposits, especially if you operate in brackish or saltwater environments. This physical degradation affects its ability to open and close smoothly.
If you observe any of these Yamaha outboard overheating issues or other irregular behaviors, investigating your thermostat should be high on your maintenance list. For understanding how these symptoms may relate to other engine issues and preventive measures, consider reading more about marine cooling system parts and maintenance.
Preparing for Thermostat Replacement

Before you begin, gathering your tools and understanding the layout of your engine will save you a lot of frustration. Trust me, nothing derails a DIY project faster than having to stop midway to hunt for a forgotten wrench.
Required tools and materials
Having the right tools at hand is half the battle. For this job, you don't need a huge arsenal, but having the specific items will make the process much smoother. My garage shelves contain all sorts of marine-specific tools I've accumulated over the years, and I can tell you that using the right tool for the job never disappoints.
Here's what you'll need for this thermostat replacement checklist on your Yamaha F225, F250, or F300 4.2L V6:
- New Yamaha Thermostat and Gasket: Always choose a genuine Yamaha part or a high-quality aftermarket equivalent from a reputable supplier like JLM Marine. It ensures proper fit and function.
- Torque Wrench: Absolutely essential for proper tightening of the thermostat cover bolts. This prevents both overtightening (which can strip threads or crack the housing) and undertightening (which can lead to leaks).
- Socket Set and Ratchet: You'll need the correct size sockets for the thermostat housing bolts. It's typically a small metric size, often a 10mm or 12mm.
- Screwdrivers: Philips and flathead for various small tasks.
- Scraper or Gasket Remover Tool: For carefully removing old gasket material without damaging the mating surfaces. A plastic scraper is often preferred to avoid scratching aluminum parts.
- Fine Sandpaper or Abrasive Pad (e.g., Scotch-Brite): To clean and prep the mating surfaces.
- Marine Grease: A good quality marine-grade grease is vital for lubricating new gaskets and bolts, preventing corrosion, and making future disassembly easier.
- Kilrock Descaler or White Vinegar: For descaling and cleaning the thermostat housing.
- Rags and Shop Towels: For cleanup.
- Container for Drained Water: You'll likely encounter some old cooling water during the process.
- Protective Eyewear and Gloves: Safety first, always.
Having all these items laid out before you start working on your Yamaha F225/F250/F300 will make the process incredibly efficient. For more ideas on essential marine tools and parts to keep in your workshop, check out JLM Marine's full range of quality boat parts and accessories.
Locating the thermostat on Yamaha 4.2L V6 outboards
Pinpointing the exact location of the thermostat on your Yamaha 4.2L V6 outboard is one of the first steps. On these particular models, it's fairly accessible, which is a blessing in the world of marine mechanics. Typically, you'll find the thermostat housing located on the cylinder head at the upper section of the engine block. It's often identifiable by a small, usually metallic or composite, circular or oblong cover, often held down by several bolts. On the Yamaha F225, F250, and F300 4.2L V6 models, the thermostats are usually located near the top of the cylinder head, often underneath a plastic shroud that might need to be removed first.
One common mistake I've seen – and made once early in my boating days – is confusing it with other components. For instance, the high-pressure fuel pump or voltage regulator might be nearby. So, consult your owner's manual or a service diagram explicitly for your Yamaha 4.2L V6 thermostat location to be absolutely sure. This upfront verification ensures you're working on the right part, avoiding unnecessary disassembly and potential damage to other components.
Safety precautions and owner's manual consultation
Before you even think about grabbing a wrench, prioritizing safety is non-negotiable. I learned this lesson early on when a small oversight turned into a much bigger headache. Your Yamaha outboard engine contains various hazards: hot components, moving parts (even when off), electrical systems, and corrosive fluids.
Here are the essential safety precautions:
- Disconnect the Battery: Always, always disconnect the negative battery terminal before starting any work on your engine. This prevents accidental starting and eliminates the risk of electrical shock.
- Allow Engine to Cool: If the engine has been running recently, give it ample time to cool down completely. Cooling systems can remain pressurized and components can be extremely hot for a long time.
- Wear Personal Protective Equipment (PPE): This includes safety glasses to protect your eyes from splashes and debris, and gloves to protect your hands from grease, fuel, and sharp edges.
- Proper Ventilation: If working in an enclosed space, ensure adequate ventilation to disperse any fumes.
- Stable Working Environment: Make sure your boat is securely trailered or docked to prevent unexpected movement.
Beyond these general safety measures, consulting your Yamaha owner's manual is an absolutely critical step. Your owner's manual contains model-specific information, including precise diagrams for component location, torque specifications for all fasteners, and detailed steps tailored to your exact engine. It's the ultimate authority for your specific outboard. Trust me, every time I think I know it all, a quick check of the manual reveals a nuance I might have otherwise overlooked. While this guide provides general instructions, your manual is indispensable for precise details. For more detailed procedural guidance, see the official guide to replacing your F225, F250, or F300 4.2L V6 Yamaha outboard motor thermostat.
Step-by-Step DIY Thermostat Replacement Procedure

Now that we're properly prepared, let's get into the nitty-gritty of replacing that thermostat. This is where your attention to detail will really pay off. This process requires patience, but it's incredibly rewarding once completed.
Removing the thermostat cover and inspecting components
With your safety precautions in place and tools at the ready, the first hands-on step is to access the old thermostat.
- Locate the Thermostat Housing: As discussed, identify the thermostat cover on the top of the cylinder head. It's usually a small, bolted cover.
- Remove Any Obstructing Components: On some models, you might have a plastic engine cover or a hose clamp that slightly obstructs access. Carefully remove these.
- Prepare for Drainage: Place a rag or small container beneath the housing, as a small amount of cooling water will drain out when you remove the cover.
- Carefully Remove Bolts: Using your socket wrench, slowly loosen and remove the bolts holding the thermostat cover in place. Pay attention to the bolt lengths and their corresponding holes; sometimes they differ. A trick I picked up years ago: sketch the cover and place the bolts on your drawing as you remove them, ensuring they go back into the identical spots.
- Pry the Cover Loose (Gently!): The cover might be stuck due to corrosion or the old gasket. Do not force it with a screwdriver directly. Instead, gently tap around the edges with a rubber mallet, or use a plastic pry tool. If it's truly stubborn, a little heat applied to the cover with a heat gun (carefully, not to surrounding plastic or wiring!) can help loosen things, as one experienced boater shared on a DIY F2.5 thermostat replacement. Don't be afraid to apply steady, firm pressure rather than sudden jerks.
- Inspect the Cover and Interior: Once the cover is off, immediately inspect its internal surface and the housing cavity itself for signs of corrosion, salt buildup, or debris. This initial inspection is crucial for understanding the condition of your outboard motor cooling system.
Descaling and cleaning the thermostat housing
This step is often overlooked, but it's paramount for ensuring your new thermostat functions correctly and prolongs its life. Corrosion and scale buildup, especially in saltwater environments, can dramatically impede water flow and thermostat operation.
- Remove Old Gasket Material: Use a plastic scraper or a razor blade (very carefully, at a shallow angle) to remove all traces of the old gasket material from both the thermostat cover and the engine block mating surface. Any remaining bits can cause leaks from your new gasket.
- Inspect the Housing Cavity: Look closely at the inside of the housing and the passages leading into and out of it. You'll likely find white, crusty salt deposits, particularly if you operate in saltwater. This scale restricts water flow and can cause the new thermostat to stick.
- Descaling Process: My preferred method is a Kilrock descaler solution, as demonstrated in a detailed F2.5 replacement case study. Alternatively, a strong solution of white vinegar works well. Pour or spray the descaler into the housing a bit, let it sit for 15-30 minutes, and then use a small scrub brush (like an old toothbrush) to agitate and break down the deposits. Rinse thoroughly with fresh water. Repeat if necessary until the metal is clean.
- Clean Mating Surfaces: Once the descaling is done, use a fine-grit sandpaper or a Scotch-Brite pad to lightly buff the mating surfaces on both the cover and the engine block. This ensures a perfectly flat and clean surface for the new gasket to seal against. Wipe thoroughly clean with a rag to remove any grit.
Removing the old thermostat and anode
With the cover off and the housing cleaned, it's time to extract the culprits: the old thermostat and, crucially, the cylinder head anode.
- Remove Old Thermostat: The thermostat usually just lifts out of its seat, sometimes with a gentle wiggle. Note its orientation—the spring end typically faces towards the engine, or as per your manual's diagram.
-
Remove the Cylinder Head Anode: This is where many DIYers miss an important opportunity for information gain during maintenance. The cylinder head anode (sometimes called a pencil anode) is a sacrificial zinc or magnesium plug designed to corrode before your engine's vital metal components do. It's often located directly next to or slightly below the thermostat, screwed into the block. In my experience, these anodes are often heavily corroded, sometimes completely eaten away, indicating they've done their job. If it's been neglected, it could be a small stub or even completely gone.
- Use a socket (often an 8mm or 10mm) to carefully unscrew the anode. Be prepared for it to be stiff, especially if it's heavily corroded. If it breaks off, you might need an anode extraction tool.
- Inspect it: If it's more than half-eaten away, it's definitely time for a replacement.
- Clean the Anode Bore: Use a small wire brush or a cotton swab to clean out any remaining corrosion or debris from the anode's threaded bore.
By replacing the anode now, you're addressing another critical aspect of your engine's internal protection, turning a simple thermostat job into a comprehensive cooling system refresh.
Testing and selecting a new thermostat
You might think a new thermostat is ready to go, but a quick test can prevent future headaches. I make it a habit to test every new thermostat I install; it's a quick verification that truly boosts my confidence in the part.
-
Perform a Simple Hot Water Test: Grab a pot, a thermometer, and your new thermostat.
- Hang the thermostat in the pot using a piece of wire or string, ensuring it's suspended in the water without touching the bottom.
- Place the thermometer in the water.
- Slowly heat the water on a stovetop.
- As the water heats up, observe the thermostat. Note the temperature at which it begins to open and the temperature at which it's fully open. Compare this to the specification printed on the thermostat itself or found in your Yamaha owner's manual (e.g., "60°C" or "140°F").
- As the water cools, ensure the thermostat closes completely.
- This simple test confirms that the thermostat opens correctly and fully at the specified temperature, ensuring your engine will regulate temperature efficiently.
-
Selecting the Right Thermostat: It's absolutely crucial to use the correct thermostat for your specific Yamaha F225, F250, or F300 4.2L V6 model. Using an incorrect temperature rating could lead to the overcooling or overheating issues we discussed earlier. While cost-effective aftermarket parts are available from reliable suppliers like JLM Marine, always ensure their specifications match or exceed OEM standards. Don't cheap out on a critical component like this.
Installing the new thermostat and gasket
This is where all your preparation culminates. Precision and cleanliness are key here to ensure a watertight seal.
-
Apply Marine Grease: One of the most effective tips I learned from a seasoned marine mechanic is to liberally apply marine-grade grease.
- Lightly grease the new rubber grommet on the new thermostat. This helps it slide smoothly into its seat and prevents tearing.
- Lightly grease both sides of the new gasket. This helps it seal better and, crucially, prevents it from sticking stubbornly to the mating surfaces, making future removal much easier.
- Lightly grease the threads of the new anode (if replacing) and the thermostat cover bolts. This prevents corrosion and galling, especially in saltwater.
- Install the New Thermostat: Carefully place the new thermostat into its seat in the engine block. Ensure it is oriented correctly, usually with the spring assembly facing downwards or towards the engine block, as it was removed. It should sit flush.
- Install the New Anode: If you're replacing the anode, screw the new one into its cleaned bore. Snug it up, but don't overtighten it just yet.
- Position the New Gasket: Place the greased new gasket squarely on the engine block mating surface around the thermostat.
- Reinstall the Thermostat Cover: Carefully place the thermostat cover back onto the engine block, aligning the bolt holes. Make sure the gasket doesn't shift out of place.
Torque specifications and bolt tightening procedures
This is arguably the most critical part of installation. Over or undertightening can cause significant problems. Using a torque wrench is non-negotiable here.
- Hand-Tighten Bolts First: Insert all the thermostat cover bolts by hand and thread them in until they are finger-tight. This ensures proper alignment and prevents cross-threading. Remember the exact order and position if they varied during removal.
- Initial Snug-Up: Using your socket wrench, gently snug up all the bolts in a cross pattern (like tightening lug nuts on a car tire). Apply just enough force to lightly compress the gasket.
- Apply Final Torque: Now, set your torque wrench to the manufacturer's specified torque for the thermostat cover bolts. Consult your Yamaha owner's manual for the precise torque specification for your F225, F250, or F300 4.2L V6 model. A common torque value for these smaller bolts is typically quite low, often around 5-7 ft-lbs (or 8-10 Nm). For example, on a smaller F2.5, it's 5.9 ft-lb. Overtightening aluminum can easily strip threads or crack the housing, turning a simple job into a major repair.
- Tighten in a Cross Pattern: Go around and tighten each bolt to the specified torque in a methodical cross pattern, similar to how you initially snugged them up. This ensures even pressure distribution on the gasket and cover. I usually do two passes: first pass to half torque, then second pass to full torque.
- Tighten Anode: If you installed a new anode, carefully tighten it. Confirm its torque spec in your manual as well; it's usually also relatively low.
Final inspection and testing after installation
You've done the hard work; now it's time to confirm everything is sealed and working correctly. This post-replacement thermostat check for your Yamaha outboard is vital.
- Reattach Obstructing Components: Reinstall any plastic shrouds, hoses, or other components you removed to access the thermostat. Reconnect the battery terminal.
- Visual Inspection: Before starting, double-check all your connections. Look around the thermostat housing for any tools left behind, or anything that looks out of place. Ensure all wires and hoses are securely reconnected.
- Run the Engine (on Muffs or in Water): Start your engine. If you're on a trailer, use proper "ear muffs" for cooling water supply. If you're in the water, check under the boat for proper water discharge from the tell-tale (the "piss stream"). This indicates the water pump is working and water is circulating.
- Check for Leaks: Immediately after startup, carefully inspect around the thermostat housing for any signs of water leaks. A small drip can quickly become a stream. If you spot a leak, shut down the engine, allow it to cool, and re-check the bolt torque and gasket seating. Sometimes, a slight retorque after the engine has warmed up once can help, but be cautious with aluminum threads.
- Monitor Temperature Gauge: Let the engine run for several minutes at idle, and then if possible, at a slightly higher RPM (in gear, if safely in water). Carefully monitor your temperature gauge. It should gradually rise to the normal operating range and then stabilize. It should not continue climbing indefinitely, nor should it stay consistently low.
- Test Tell-Tale Water Flow: Ensure the tell-tale stream is strong and consistent. The water coming from the tell-tale should eventually feel warm, indicating the thermostat has opened and hot water is circulating. If it stays cold, or if the stream is weak, it could signal an issue with the water pump or a stuck closed thermostat.
- Final Bolt Check: After the engine has completely cooled down after its initial run, you might want to do one final check of the thermostat cover bolt torque. This ensures that the gasket has settled properly.
By following these post-replacement engine testing tips, you can be confident that your Yamaha outboard's cooling system is ready for your next adventure.
Maintenance Tips and Troubleshooting
Even with a brand new thermostat, ongoing vigilance keeps your engine in tip-top shape. Regular care can prevent many future headaches, and knowing how to troubleshoot simple issues is a great skill to have.
Regular thermostat inspection and maintenance schedule
Adhering to a consistent maintenance schedule is, in my opinion, the single best thing you can do for your outboard. While the hard statistics on Yamaha outboard thermostat changes annually in the US are elusive, anecdotal evidence and manufacturer guidelines point to clear recommendations. Yamaha advises inspecting or replacing the thermostat every year or 100 hours of engine operation. While some owners might stretch this due to concerns about breaking bolts on older engines or simply waiting for signs of malfunction, I always recommend sticking as close as possible to the manufacturer's cycle.
Here's my usual routine for outboard motor thermostat care:
- Annual Inspection: At the beginning of each boating season or during your annual service, visually inspect the thermostat housing for any signs of corrosion or leakage. While you won't remove the thermostat every year, external signs can hint at internal issues.
- Every 100 Hours/Annually (or Bi-Annually if low hours): Consider pulling the thermostat and anode as outlined in the replacement procedure. This lets you inspect their physical condition, descaling the housing, and replace them if there's any doubt about their integrity. The small cost of a new thermostat and anode often outweighs the risk of letting an old one fail.
- Freshwater Flush After Each Saltwater Use: This is an absolute must! Running your engine on muffs with fresh water for 10-15 minutes after every saltwater outing helps flush out salt deposits that can accumulate in the cooling passages, including the thermostat housing. This significantly extends the life of your cooling system components.
- Monitor Engine Temperature: Make it a habit to glance at your engine's temperature gauge regularly while running. Any deviation from the normal operating range is a signal to investigate.
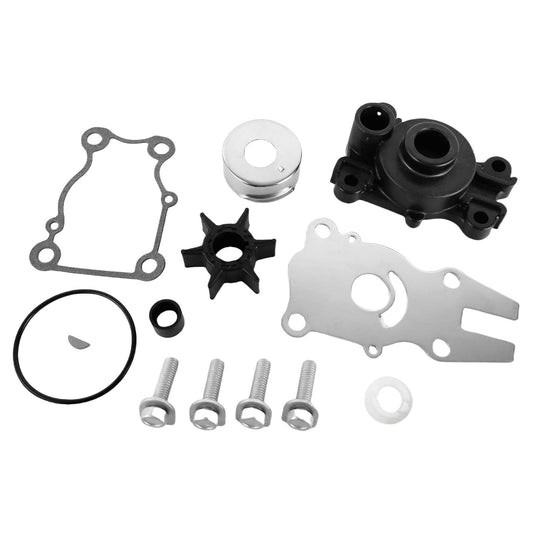
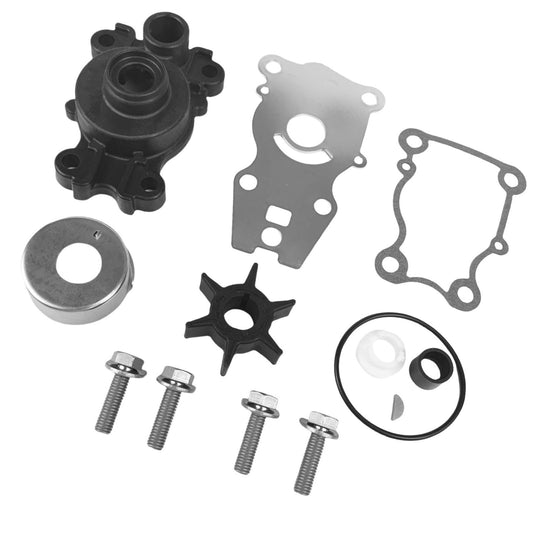
Consistency truly is the key here. For ongoing engine care and parts replacements such as water pumps and impellers that accompany thermostat maintenance, check out the cooling system components collection.
Common problems during replacement and how to solve them
Even the most straightforward DIY job can throw a curveball. I've encountered my fair share of frustrating moments, and these are some of the most common issues you might face during a Yamaha outboard thermostat replacement:
-
Stuck Thermostat Cover Bolts: Corrosion is the enemy here. If a bolt won't budge, don't force it with excessive torque – you risk stripping the bolt head or, worse, breaking it off, which quickly escalates the job.
- Solution: Apply penetrating oil (like PB Blaster or WD-40) liberally and let it soak for several hours, or even overnight. Gently tap the bolt head with a hammer multiple times to help the oil penetrate the threads. If still stubborn, carefully apply heat to the bolt head with a heat gun or small torch (avoiding other components that could melt!). Repeat the penetrating oil and tapping. Use a good quality 6-point socket, not a 12-point, to get maximum grip.
-
Broken Anode Removal (Stuck Anode Removal Yamaha): This is surprisingly common, especially if anodes haven't been changed in a long time and are heavily corroded.
- Solution: If the anode snaps off flush or below the surface, you'll need an anode extraction tool. These are typically reverse-threaded bits that bite into the anode and allow you to unscrew it. Sometimes, patience with a pick and some descaler solution can help break up the remaining corrosion to carefully twist out the broken piece.
-
Thermostat Cover Sealing Issues Yamaha (Gasket Leak): A leak immediately after reassembly is frustrating.
- Solution: First, ensure you used a new gasket, and that it was properly placed and not pinched. Next, confirm that the mating surfaces on both the cover and the engine block were meticulously clean and smooth (no old gasket residue, no nicks). Finally, double-check that the bolts were torqued to the exact specification, in a cross pattern. Sometimes, if the surface is slightly warped on an old cover, a very thin bead of RTV silicone sealant (marine grade, non-corrosive type) can be applied to the gasket, but this should be a last resort. The greased gasket usually seals perfectly.
Taking your time and being prepared for these common snags will help you overcome them without too much stress.
When to seek professional help
While I firmly believe in empowering boat owners to tackle their own maintenance, there are times when calling in a professional is not just advisable, but essential. Knowing your limits is part of being a responsible boat owner.
Here are scenarios where I would highly recommend seeking a Yamaha certified mechanic for thermostat replacement or related issues:
- Persistent Overheating After Replacement: If you've replaced the thermostat, confirmed it opens, cleaned the housing, and checked for leaks, but your engine still overheats, there's a deeper cooling system issue at play. This could be a failing water pump impeller, a clogged cooling passage further in the block, or even a thermostat stuck open because the powerhead is suffering from internal issues. This warrants professional diagnosis.
- Broken or Stripped Bolts During Removal/Installation: If you're struggling with a severely seized thermostat cover bolt that snaps off, or if you accidentally overtighten and strip the threads in the engine block, attempting a repair (like drilling out a broken bolt or re-tapping threads) can cause irreversible damage if not done correctly. A professional has the specialized tools and expertise to handle these delicate repairs.
- Complex Electrical Diagnosis: If your temperature gauge isn't working at all, or if you suspect an issue with the sending unit or engine control module (ECM) related to temperature, a professional will have the diagnostic tools to pinpoint the electrical problem accurately.
- Lack of Confidence or Time: Frankly, marine repair takes time, patience, and a degree of mechanical aptitude. If you don't feel comfortable undertaking this DIY task, or simply don't have the time to dedicate to it, hiring a professional Yamaha outboard repair technician is always a smart choice. Their expertise ensures the job is done right, the first time, saving you potential headaches and costs down the line. It offers peace of mind, allowing you to focus on enjoying your time on the water.
Frequently Asked Questions
How often should I replace the thermostat on my Yamaha outboard motor?
Yamaha officially recommends inspecting or replacing the thermostat every year or every 100 hours of engine operation, whichever milestone you reach first. While some boaters, like myself, might extend this period slightly if operating exclusively in freshwater or with very low hours, it's a component that sees a lot of wear from heat cycles and potential corrosion. Given the critical role it plays in preventing catastrophic engine damage, I personally lean towards sticking close to that annual/100-hour guideline, especially for saltwater use. It's a small investment that offers huge peace of mind.
What are the common signs that my Yamaha outboard thermostat is failing?
The most common and concerning sign is engine overheating, where your temperature gauge rises above normal operating range, or an alarm sounds. However, symptoms can also be more subtle: the engine consistently running too cold, fluctuating temperature gauge readings, unexplained increases in fuel consumption, or a general reduction in engine performance. Visually inspecting the old thermostat upon removal, looking for signs of heavy corrosion or salt crystal buildup, can also confirm its failure.
Can I replace the thermostat myself or should I hire a mechanic?
Yes, absolutely! Replacing the thermostat on your Yamaha F225, F250, or F300 4.2L V6 outboard is a maintenance task that most boat owners with basic mechanical skills and a good set of tools can accomplish. This guide, along with your official Yamaha owner's manual, provides all the necessary instructions. It's a fantastic DIY project that saves money and builds confidence. However, if you encounter severely stuck bolts, break an anode, or are simply uncomfortable with the process, don't hesitate to consult a professional marine mechanic. Knowing when to call in an expert is a sign of a smart boat owner.
What tools are essential for replacing a Yamaha outboard thermostat?
You'll need a new Yamaha thermostat (and gasket), a torque wrench (crucial for correct bolt tightening), a socket set and ratchet (for the cover bolts), screwdrivers, a scraper for old gasket material, marine grease, and a descaling solution like Kilrock or white vinegar. Having rags, protective eyewear, and gloves are also essential for safety and cleanliness.
How do I test a new thermostat before installation?
It's a simple, worthwhile step! Suspend the new thermostat in a pot of water on a stovetop with a thermometer. Slowly heat the water, observing the thermostat. It should begin to open at or very near the temperature specified on the thermostat itself or in your Yamaha manual. As the water cools, verify it closes completely. This test confirms your new thermostat is functional and ready to install, alleviating any doubts about a faulty part.
Maintaining Your Cooling System: A Final Word
My journey with outboards has taught me that the health of a marine engine's cooling system is paramount to its longevity and your enjoyment on the water. The process of replacing your Yamaha outboard thermostat, especially on powerful F225, F250, and F300 4.2L V6 models, might seem daunting at first glance. However, by understanding the critical role this small component plays, preparing diligently, and following a methodical step-by-step approach, it's a perfectly manageable DIY project.
We've covered everything from recognizing the subtle whispers of an impending issue to the nitty-gritty of correct torque specifications and post-installation checks. We've even touched upon the importance of anode replacement, a critical piece of the cooling system puzzle often overlooked. In my experience, taking this proactive approach, paired with using high-quality parts—which JLM Marine makes readily accessible with their direct-from-factory model and free worldwide shipping—will save you time, money, and headaches down the line.
Ultimately, performing this maintenance yourself isn't just about fixing a potential problem; it's about taking ownership of your vessel, expanding your knowledge, and building a deeper connection with your passion for boating. Go forth with confidence, and let your Yamaha outboard continue to power countless adventures on the water.
For a wide range of replacement parts, including thermostats and anodes, directly sourced to maintain your Yamaha outboard’s longevity, visit the JLM Marine homepage.
References:
Para propietarios de motores fueraborda Yamaha:
Para ayudarlo a mantener y reparar sus motores marinos, esperamos que los siguientes recursos puedan serle de utilidad:
-
Piezas para motores fueraborda Yamaha
- Bomba de agua Yamaha
- Impulsor de bomba de agua Yamaha
- Kit de impulsor de bomba de agua Yamaha
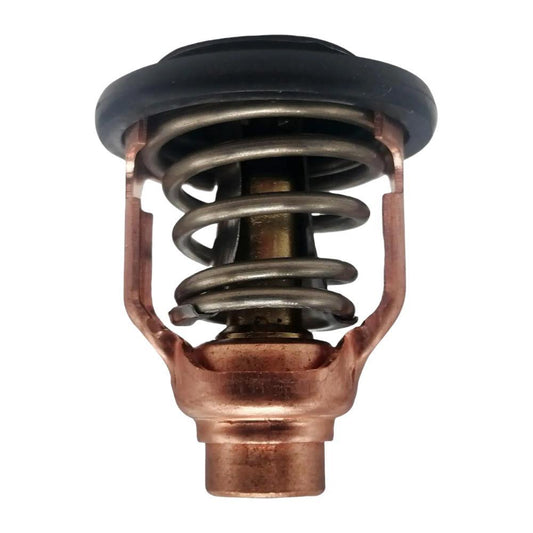
- Termostato Yamaha
- Carburador Yamaha
- Kit de reparación de carburador Yamaha
- Bomba de combustible Yamaha
- Filtro de combustible Yamaha
- Línea de combustible y conector de Yamaha
- Línea de combustible Yamaha
- Sello de aceite Yamaha
- Junta de Yamaha
- Interruptor de encendido Yamaha
- Kit de bomba de combustible Yamaha
Acerca de JLM Marine
Fundada en 2002, JLM Marine se ha consolidado como un fabricante dedicado de piezas marinas de alta calidad, con sede en China. Nuestro compromiso con la excelencia en la fabricación nos ha ganado la confianza de las principales marcas marinas a nivel mundial.
Como proveedor directo, evitamos intermediarios, lo que nos permite ofrecer precios competitivos sin comprometer la calidad. Este enfoque no solo promueve la rentabilidad, sino que también garantiza que nuestros clientes reciban el mejor valor directamente del proveedor.
Estamos entusiasmados de ampliar nuestro alcance a través de canales minoristas, llevando nuestra experiencia y compromiso con la calidad directamente a los propietarios de embarcaciones y entusiastas de todo el mundo.
Repuestos Yamaha en venta
- $34.50
- $34.50
- Unit price
- per
- $32.00
- $32.00
- Unit price
- per
- $15.19
$32.00- $15.19
- Unit price
- per
- $55.50
- $55.50
- Unit price
- per
- $22.80
$28.50- $22.80
- Unit price
- per

- $36.00
- $36.00
- Unit price
- per
- $27.00
$25.00- $27.00
- Unit price
- per
- $30.00
- $30.00
- Unit price
- per

- $73.50
$84.99- $73.50
- Unit price
- per

- $30.49
- $30.49
- Unit price
- per
- $15.79
- $15.79
- Unit price
- per
- $34.99
- $34.99
- Unit price
- per

- $42.50
- $42.50
- Unit price
- per
- $17.58
$23.00- $17.58
- Unit price
- per


- $89.50
$119.00- $89.50
- Unit price
- per
- $69.99
$88.88- $69.99
- Unit price
- per

- $17.59
$13.00- $17.59
- Unit price
- per


- $56.20
$67.00- $56.20
- Unit price
- per
- $18.99
$16.00- $18.99
- Unit price
- per
- $44.50
- $44.50
- Unit price
- per