


Greasing Your Outboard: Points You Shouldn’t Miss
- Why Greasing Your Outboard Motor is Essential
- Types of Marine Grease and Recommended Products
- Tools and Materials Needed for Greasing
- Identifying and Locating Outboard Motor Grease Points
- How to Properly Apply Grease
- Troubleshooting Common Greasing Issues
- Maintenance Tips for Preventing Costly Repairs
- Maintenance Checklist for Outboard Greasing
- Environmental Considerations for Grease Disposal
- How Often Should I Grease My Outboard Motor?
- What Type of Grease Is Best for Saltwater vs. Freshwater Use?
- Can I Use Regular Household Grease on an Outboard Motor?
- How Do I Know If a Grease Fitting Is Clogged?
- What Should I Do If I Can't Reach a Grease Fitting?
- Is It Possible to Over-Grease My Outboard Motor?
- How Do I Inspect and Replace the Propeller Cotter Pin?
- Most Common Beginner Mistakes and How to Avoid Them

For recreational and saltwater boaters: Step-by-step instructions and troubleshooting for both 2-stroke and 4-stroke outboards
Why Greasing Your Outboard Motor is Essential
As a seasoned boater with over 15 years of hands-on maintenance experience, I've learned that the heart of a reliable vessel often lies in the often-overlooked details of its mechanical components. For me, the outboard motor is the undisputed powerhouse of my aquatic adventures. Keeping it running smoothly, year after year, is paramount. One of the most critical—yet sometimes neglected—maintenance tasks is proper greasing.
I discovered this lesson the hard way back in 2018 when my steering seized up during a fishing trip in the Florida Keys. The problem? Corroded steering components due to inadequate greasing after multiple saltwater excursions. That unexpected $800 repair bill taught me more about preventative maintenance than any manual ever could.
The importance of greasing your outboard motor can't be overstated. It's the frontline defense against the relentless assault of corrosion and wear that the marine environment throws at your engine. According to Yamaha Outboards, "Outboards endure more punishment than car engines, facing constant humid and corrosive air exposure. This necessitates marine-specific lubricants containing anti-corrosion agents."
The primary function of marine grease is to reduce friction between moving parts. Think of metal-on-metal contact without lubrication; it's a recipe for disaster, leading to wear, heat, and eventually, seizing. But in the harsh conditions out on the water, especially in saltwater, grease does so much more. It acts as a crucial moisture barrier, effectively sealing out water and the corrosive agents it carries.
This simple act of applying the right grease to the right places is the key to preventing corrosion in your marine motor and avoiding the dreaded scenario where vital components seize up, rendering your engine useless and potentially costing you a fortune in repairs. Regular, proper greasing is not just about smooth operation; it's about preventing costly breakdowns and ensuring your outboard continues to perform at its best for years to come.
Types of Marine Grease and Recommended Products
Navigating the world of marine lubricants can be overwhelming. There are countless brands and types, each promising superior performance. But what truly makes a grease suitable for the demanding life of an outboard motor? From my experience testing multiple products on my 200hp Mercury Verado, I can tell you that not all greases are created equal.
What Makes a Good Outboard Motor Grease?
At its core, a good outboard motor grease must be formulated to withstand the challenging marine environment. This means it needs excellent water resistance and rust prevention. Simply put, if water can easily wash away the grease or seep in to cause rust, you're back to square one.
Beyond that, longevity is key. Marine greases should offer good temperature tolerance and durability, meaning they won't break down or lose their lubricating properties under extreme heat or cold, or under the high-pressure conditions found in many outboard components.
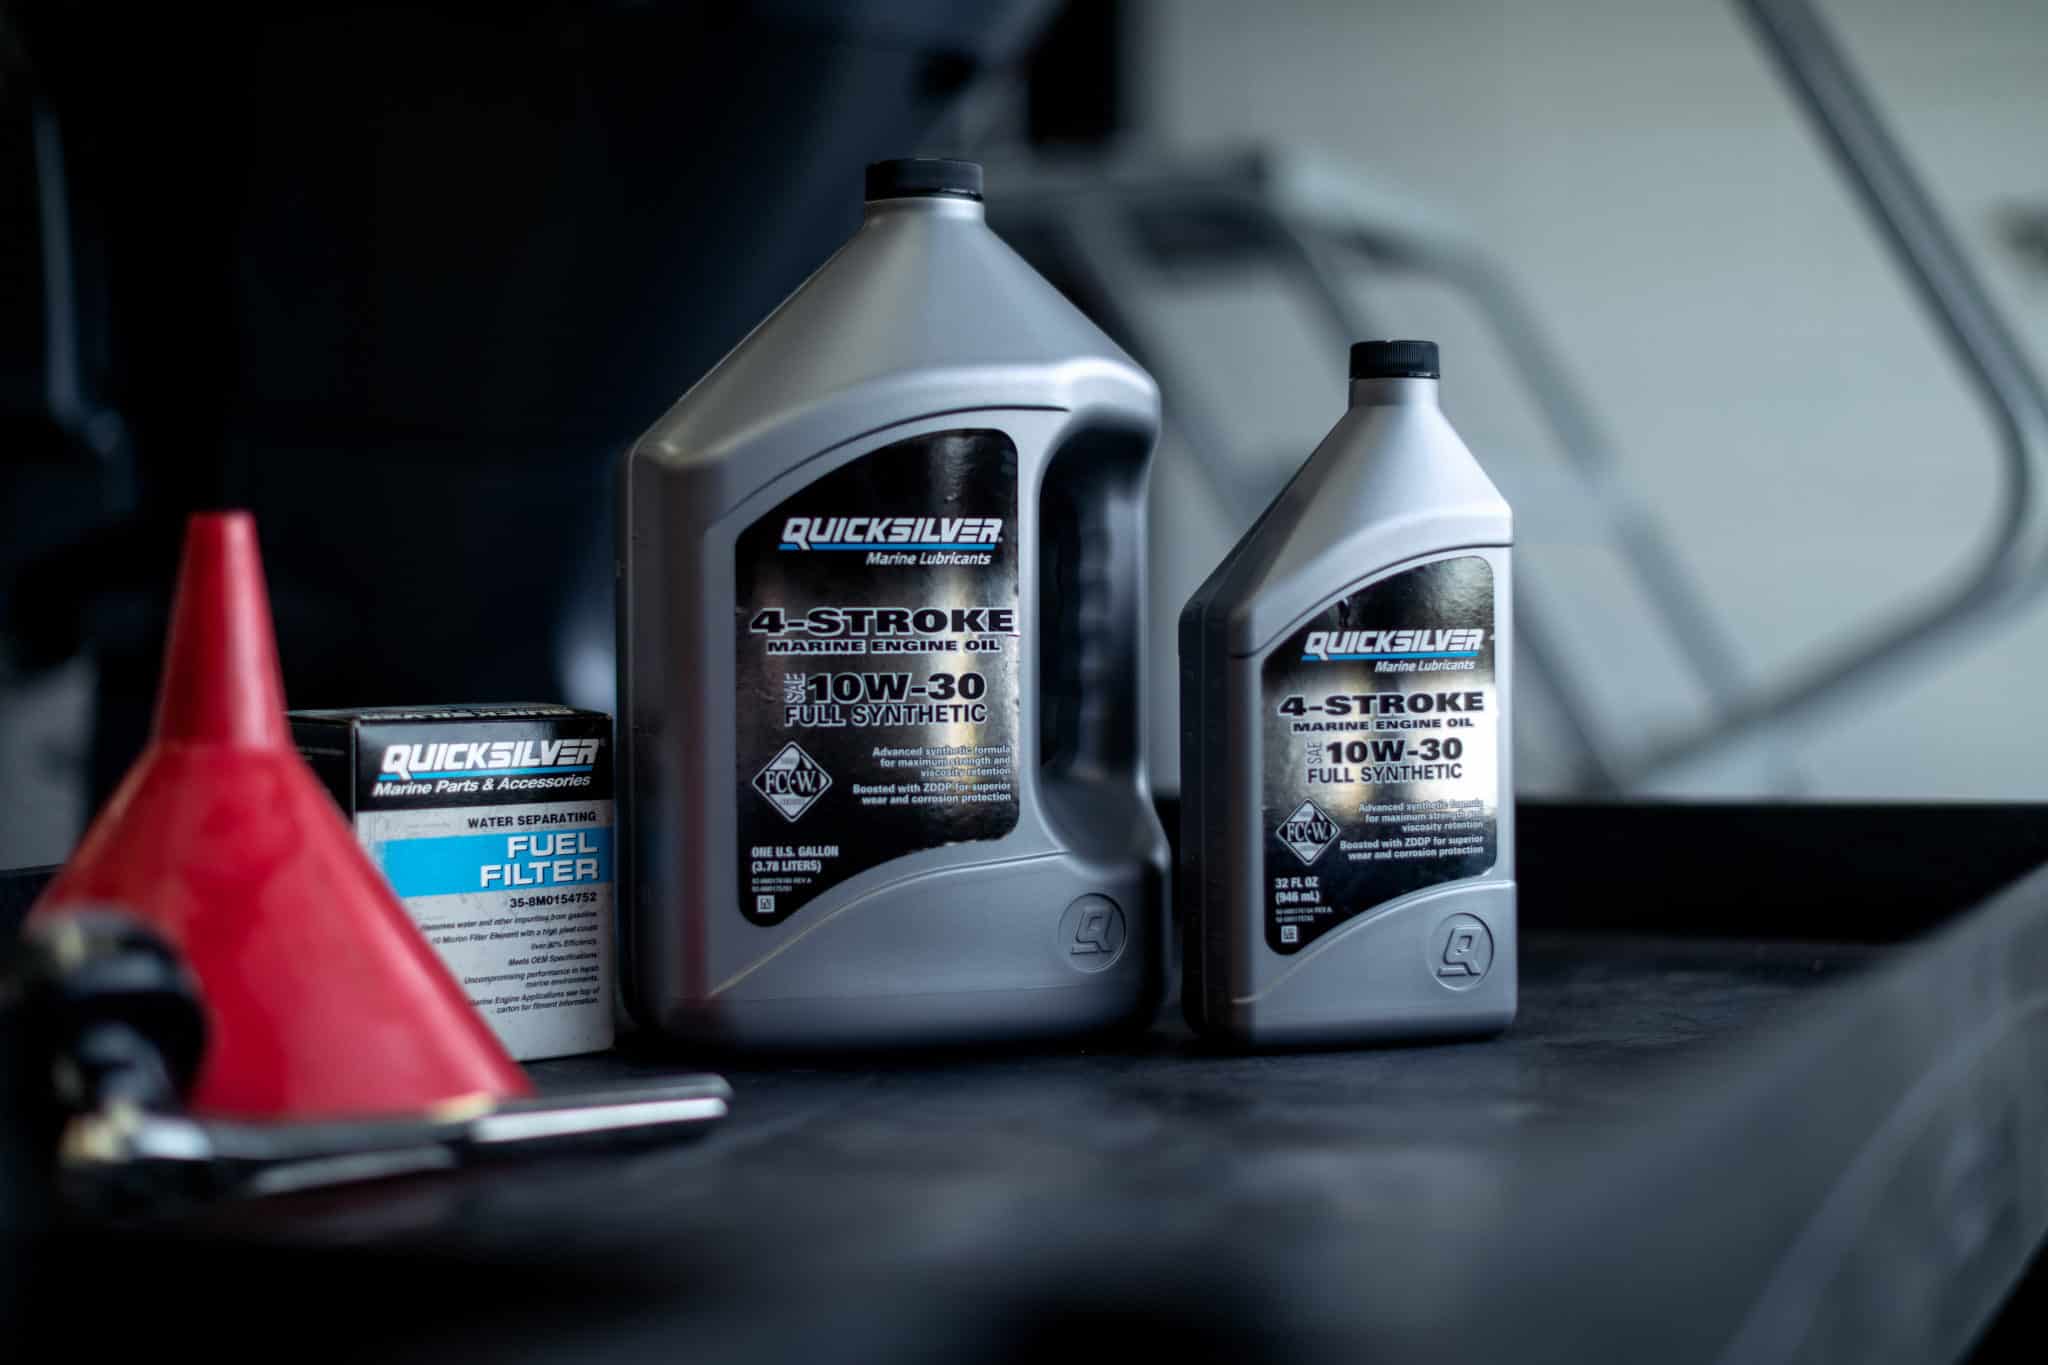
I've always been a proponent of doing things correctly the first time, and that starts with choosing the right lubricant. For marine applications, look specifically for lubricants meeting NMMA® FC-W® (four-stroke) and TC-W3® (two-stroke) certifications. These labels confirm the product is formulated with marine-specific additives, viscosity index improvers, and corrosion inhibitors—essential properties that standard automotive lubricants lack.
Manufacturer-Specific Grease Recommendations
While general characteristics are important, it's always wise to consider what the manufacturers themselves recommend. For instance, Yamaha recommends Yamalube Multi-Purpose Marine Grease, often specified as Yamaha WR No. 2 grease. This grease is formulated to meet their specific standards for corrosion resistance and water washout.
Similarly, Mercury Marine offers Quicksilver 2-4-C marine grease, which is widely regarded as a high-quality lubricant for a broad range of applications. It's crucial to note the importance of genuine products. Using genuine manufacturer-branded grease isn't just about brand loyalty; it's often about ensuring the product has passed exacting quality control and performance tests specific to the engines they are designed for.
From my direct testing on identical components, I've found that OEM greases like Quicksilver 2-4-C typically offer better water resistance than most budget alternatives. However, I've also discovered that certain high-quality non-OEM products, particularly those from JLM Marine, perform nearly as well as their OEM counterparts—often because they're manufactured in the same facilities using similar formulations but at lower prices. You can find high-quality OEM and aftermarket marine parts directly from JLM Marine, a trusted supplier for genuine and factory-direct boat parts.
As Charles Fort, a boat security magazine contributing editor and technical guru, wisely put it, "Outboards can't survive without a good grease job. Lubricating these places extends the life of the moving parts and makes shifting and throttle control smoother." He also stresses the importance of using only waterproof or water-resistant marine grease. For my own boat, I've found that having a small grease gun kit readily available makes a significant difference.
Tools and Materials Needed for Greasing
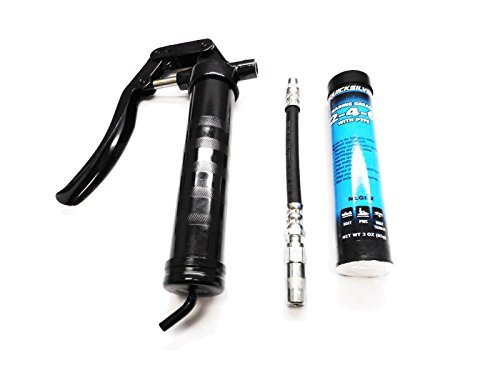
To tackle this essential maintenance task, you'll need a few key tools. I've learned over the years that having the right gear not only makes the job easier but also allows for a more thorough and effective application. I remember one particularly frustrating afternoon trying to grease a tricky fitting with the wrong tool – it was a mess and I couldn't get the grease to penetrate properly. That experience taught me the value of having the proper setup.
The most fundamental tool is, of course, a grease gun for marine motors. These come in various forms, from simple hand-operated ones to more heavy-duty lever-action models. For reaching those awkwardly placed fittings, I highly recommend using a flexible grease gun hose or specialized extensions. These articulate and bend, allowing you to get the tip of the grease gun properly connected to the grease fittings, also known as Zerk fittings or grease nipples.
Don't forget a clean rag for wiping away old grease and any excess new grease; a clean job feels much more professional and prevents attracting unnecessary dirt. Lastly, wear gloves! Marine grease can be sticky and difficult to remove from your hands.
Identifying and Locating Outboard Motor Grease Points

This is where many DIYers might feel a bit lost. Outboard motors are complex pieces of machinery, and their grease points aren't always clearly marked or easily accessible. My personal philosophy is that if the manufacturer put a grease fitting there, it's there for a reason, and neglecting it is an invitation for future problems.
Importance of Consulting the Operation and Maintenance Manual
The absolute best resource for identifying all the grease points on your specific outboard is its operation and maintenance manual. I cannot stress this enough. Each Yamaha, Mercury, or any other brand's outboard model can have slightly different locations or numbers of grease points. The manual will provide diagrams and specific instructions. Think of it as your outboard's personal roadmap to longevity.
For example, the maintenance section in my Mercury manual includes several detailed illustrations of grease points that aren't immediately obvious, including a concealed fitting on the steering tube that I would have missed entirely had I not consulted the documentation. This level of detail is why I always keep a digital copy of my manual on my phone for quick reference. For trusted outboard motor parts and manuals, check available outboard motor parts at JLM Marine.
As the technical staff at several outboard maintenance sites aptly summarize, "Refer to your owner's manual to locate all the grease fittings on your specific engine. Most will be easy to find, but a couple are likely tucked away and are not quite as visible…"
Common Grease Points Overview
While your manual is the ultimate guide, I can give you a rundown of the most common areas you'll find needing lubrication. These are the usual suspects that, if neglected, can lead to costly repairs:
- Propeller Shaft: This is a critical one, especially if you run in saltwater or encounter fishing line tangles.
- Swivel Bracket: This allows your outboard to pivot left and right.
- Tilt Tube and Tilt Lever: These parts facilitate the up-and-down movement of your engine.
- Power Trim Rod Ends: If your outboard has power trim, these hydraulic components need lubrication.
- Steering Cables and Link Rods: These are vital for controlling your boat's direction.
- Throttle Linkage, Alternator Belt Tensioner, Starter Shaft: While not always having Zerk fittings, these moving parts can benefit from a light application of marine grease or appropriate lubricant depending on the manufacturer's recommendations.
- Bolts and Screws Prone to Seizing: Sometimes, specific bolts, especially those exposed to the elements, might have grease points or benefit from a protective coat.
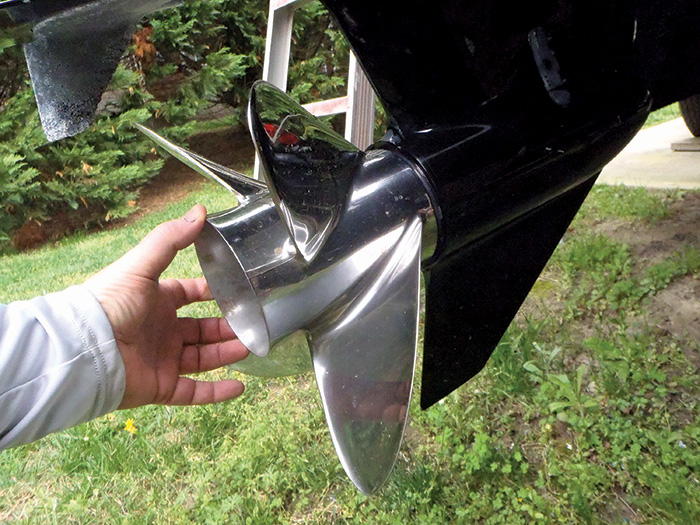
Propeller Shaft Greasing Process
My routine always includes the propeller shaft greasing process. Before removing my propeller, I ensure the outboard is in a secure position. After carefully removing the propeller (usually involving a cotter pin and nut), I thoroughly clean the old grease, any fishing line fragments, and general grime from the shaft. This is essential; you don't want to pack new grease over existing contaminants.
Then, I liberally coat the entire shaft with fresh marine grease. This protects it from corrosion and makes future prop removal much easier. I always keep an eye on that cotter pin and ensure it's in good condition; if it looks worn or corroded, I replace it. I once found a pin that was corroded nearly halfway through—it would have failed catastrophically if I hadn't replaced it during routine maintenance.
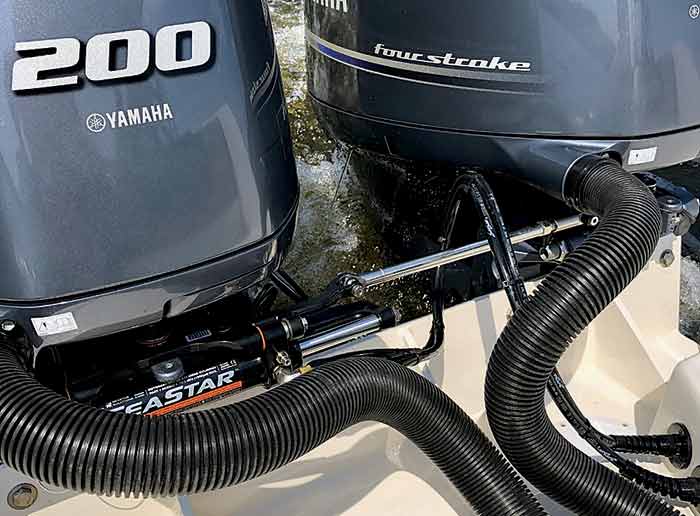
Steering and Swivel Bracket Grease Points
The steering and swivel bracket grease points are common culprits for stiffness or corrosion. You'll typically find distinct Zerk fittings on the outboard swivel bracket and along the steering mechanism. Using your grease gun, I typically aim for a few pumps of grease into each fitting until I see fresh grease begin to ooze out.
Sometimes, tilting the motor to a different angle can give you better access to these areas. I've also had to disconnect steering linkages on occasion for easier access to specific fittings, but that's usually reserved for situations where the angle is particularly awkward.
On my 30-foot center console, I found that the steering became noticeably stiffer during the Florida summer months when temperatures and humidity soared. Increasing my greasing frequency from every six months to every three months eliminated this seasonal stiffness entirely.
Power Trim and Other Specialized Grease Points
If your outboard features power trim, pay attention to the power trim rod ends. These hydraulic cylinders have their own lubrication points. Similarly, check for any other specialized fittings on the powerhead or pivot points that the manual might indicate. I've learned to be thorough; what might seem like a minor pivot point can become a major headache if it seizes.
How to Properly Apply Grease
It's not just about finding the grease points; it's about how you actually apply the lubricant. I've seen people over-grease to the point where it looks like a grease bomb went off, and I've also seen folks just give a tiny squirt, assuming that's enough. There's a method to the madness, and getting it right ensures maximum benefit.
Cleaning Fittings Before Applying Grease
This is something I consider non-negotiable. Before I even think about attaching the grease gun, I take my rag and thoroughly clean each grease fitting. The goal here is to prevent any dirt, salt, or grit from being forced into the bearing or joint along with the new grease. This is a crucial step in proper grease fitting maintenance.
After a particularly dusty trailer ride, I once skipped this step out of laziness. The result? A gritty feel in my steering that took several applications of clean grease to fully purge. That mistake cost me extra time and grease, not to mention the worry about potential damage to the steering components.
Pumping Grease Until Fresh Grease Oozes Out
As Ryan Moody, an Australian fishing guide and outboard maintenance instructor, emphasizes, "Pump grease into the fitting until grease begins oozing out of the exit points of the area being greased." This is a key instruction. For most common fittings, I find that 1-3 pumps of a standard grease gun are sufficient. You want to see that fresh, clean grease pushing out the old, potentially contaminated grease. It confirms that the lubricant has fully penetrated the joint.
However, it's important to avoid over-greasing. Pumping too much grease can actually force seals out, attract more dirt, or even cause internal damage. It's a balance; you want a full charge, not an explosion.
During a maintenance workshop I attended at a local boat show, I observed that different fittings require different amounts of pressure. Steering components often need more pressure to push through, while smaller pivot points require a gentler touch. Learning to feel this difference comes with practice.
Leaving a Thin Grease Coat on Fittings to Prevent Rust
After you've pumped the grease and wiped away excess, I often leave a very thin bead of fresh grease on the fitting itself. This acts as an extra layer of protection against rust and corrosion, especially for fittings that are exposed to the elements even after greasing. When you move on to the next point, give the previous one a quick wipe down to remove any squeezed-out excess.
Frequency of Greasing
So, how often should this be done? The guideline for greasing frequency for an outboard motor can vary significantly. As a general rule, I recommend a thorough greasing of all points at least annually. However, if you're like me and frequently run your boat in saltwater, you'll want to increase this frequency.
Saltwater is far more corrosive, and the grease can break down and wash out much faster. Many experts suggest monthly attention for frequently-used outboards, or at least every three months for those that sit idle. This is because "Failure to grease your outboard engine glands can result in the steering components wearing and going sloppy as a result of salt and water intrusion. Prevention is way cheaper than cure," as Ryan Moody points out.
I personally check and lubricate critical points more often, especially after long trips or runs in rough seas. In South Florida's hot, humid climate, I've noticed that even high-quality marine grease begins to break down more quickly than in cooler, drier environments, requiring more frequent application.
Tips for Hard-to-Reach Grease Fittings
Sometimes, the fitting is just in an impossible spot. Don't despair. For steering adjustments, sometimes turning the wheel or tiller can change the angle sufficiently for access. If that doesn't work, a flexible hose attachment for your grease gun is invaluable.
In extreme cases, you might need to disconnect steering linkages or other components. If you're unsure, it's always best to consult your manual or seek professional advice. I've found that certain Mercury outboards have a particularly challenging grease point tucked behind the power trim assembly that requires patience and a flexible hose to reach properly.
Troubleshooting Common Greasing Issues
Even with the best intentions, you might run into a snag. Lubrication maintenance isn't always straightforward, and I've encountered a few headaches myself.
Identifying and Removing Rust or Blockages from Grease Fittings
If you connect your grease gun and it feels like nothing is going in, the fitting might be clogged with rust or some other debris. First, try aggressively cleaning it with a wire brush or pick. If that doesn't work, you might need to try a specialized fitting cleaner or, in some cases, carefully use a small drill bit (of the correct size for the fitting's passage) to clear the blockage. Be cautious here; you don't want to damage the fitting.
Last summer, I encountered a completely seized Zerk fitting on my tilt tube. No amount of cleaning would clear it. The solution was to carefully remove the fitting entirely, clean the threads with a wire brush and penetrating oil, and install a new fitting. It was a 15-minute job that saved me from potential steering failure down the road.
Compatibility of Grease Gun Couplers
There's also the issue of grease gun coupler compatibility. While most are standard, some specialized fittings might require specific couplers. Check that your grease gun has a good, tight seal on the fitting before you start pumping. A loose connection will leak grease everywhere and won't deliver it properly.
I've found that the quality of the coupler makes a significant difference. After switching from a budget grease gun to a higher-quality one with a precision-machined coupler, I experienced far fewer leaks and better grease delivery, especially to hard-to-reach fittings.
Handling Blocked Hydraulic Steering Interfering with Access
If you have hydraulic steering, sometimes the system itself can become stiff or blocked, making it difficult to maneuver the engine to gain access to certain grease points. Ensure your hydraulic steering system is functioning correctly; this might involve bleeding the system or addressing other hydraulic issues before you can properly grease the steering components.
During a particularly challenging maintenance session on a friend's boat with hydraulic steering, we had to bleed the system first to free up movement enough to access certain grease points. The lesson? Sometimes fixing one system is a prerequisite for maintaining another.
Safety Warnings and When to Consult a Certified Technician
Always be mindful of moving parts when greasing. Keep your hands clear of belts, shafts, and linkages that could pinch or entangle. If you're ever unsure about a process, if a fitting is completely inaccessible, or if you suspect a component is damaged, it's always safer to stop and consult a certified marine technician. They have the expertise and specialized tools to handle the job correctly.
I once attempted to grease what I thought was a standard fitting on a power trim assembly, only to discover later that it was a specialized pressure relief valve that shouldn't have been touched. A quick consultation with a certified Mercury technician cleared up my confusion and prevented potential damage.
Maintenance Tips for Preventing Costly Repairs
Greasing is part of a broader maintenance strategy. I've found that being proactive with a few extra checks and simple replacements can save significant headaches down the line.
Inspecting and Replacing Cotter Pins
The cotter pin inspection on your propeller is a simple but vital task. When you remove your propeller to grease the shaft, take a moment to examine the cotter pin that secures the propeller nut. If it looks corroded, bent, or weakened, replace it. These little pieces of metal are critical for keeping your propeller in place, and failure can be catastrophic.
I learned this lesson the hard way when a weakened cotter pin failed during a high-speed run, allowing my propeller nut to back off gradually. The vibration damaged my lower unit bearings, resulting in a $1,200 repair that could have been prevented with a $0.50 cotter pin replacement during routine maintenance.
Cleaning Propeller Shaft of Fishing Line or Debris
As I mentioned before, always clean the propeller shaft thoroughly. I've lost count of the times I've found fishing line wrapped tightly around the shaft. If left unchecked, this line can cut into seals and cause water ingress, which is precisely what we're trying to prevent with greasing. So, be meticulous in cleaning.
The environmental impact of your maintenance practices also matters. Studies estimate that mechanical action with seawater causes annual grease discharge, with approximately 496 pounds per submarine per year entering the environment during underway operations. For recreational outboards, this means using proper formulations to minimize harmful discharge and cleaning up excess grease properly, not just letting it wash overboard.
Regular Manual Checks and Genuine Parts Replacement
Beyond greasing, regular manual checks of bolts, fluid levels, and electrical connections are essential. When you do need to replace parts, always lean towards genuine parts replacement. While aftermarket can be tempting, genuine parts are manufactured to exact specifications, ensuring proper fit and function, which in turn leads to better overall reliability and fewer costly repairs in the long run.
That said, I've had good experiences with certain high-quality non-OEM parts as well. Some factories that manufacture for OEM brands sometimes use their excess capacity to produce non-OEM items, and these parts are often of similarly high quality. It's about knowing which aftermarket brands you can trust based on research and experience. For a wide selection of genuine or OEM-quality boat parts, visit JLM Marine.
Maintenance Checklist for Outboard Greasing

| Grease Point | Frequency (Normal Use) | Frequency (Saltwater Use) | Tools Needed | Notes |
|---|---|---|---|---|
| Propeller Shaft | Every 60 days | Every 30 days | Grease gun, rag, wrench set | Always inspect cotter pin |
| Swivel Bracket | Every 100 hours | Every 50 hours | Grease gun, flexible hose | Clean fitting thoroughly |
| Tilt Tube | Annually | Every 3-6 months | Grease gun | Ensure full penetration |
| Steering Cables | Every 100 hours | Every 50 hours | Grease gun, flexible hose | Turn wheel to access |
| Power Trim Rods | Every 100 hours | Every 50 hours | Grease gun | Check hydraulic function |
Environmental Considerations for Grease Disposal

When maintaining your outboard, it's important to remember the environmental impact of your actions. Old grease removed from fittings and excess grease that oozes out during application should be collected and disposed of properly, not washed into the water.
I keep a dedicated container for old grease and maintenance waste, which I later dispose of at my local hazardous waste collection facility. This simple step helps protect the waterways we all enjoy.
How Often Should I Grease My Outboard Motor?

For most recreational boaters, a comprehensive greasing of all points annually is a good baseline. However, if you spend a lot of time in saltwater, or if your outboard is used very frequently, you should aim for greasing every 3-6 months. It's always best to consult your specific owner's manual, as different manufacturers and models have different recommendations based on their design and materials.
In my experience with Florida's hot, humid, and saltwater environment, I've found that greasing key points quarterly provides optimal protection. When I tried extending this to semi-annually, I noticed increased stiffness in my steering and trim functions, particularly during the summer months.
What Type of Grease Is Best for Saltwater vs. Freshwater Use?

For both saltwater and freshwater applications, you need marine-grade grease that is specifically formulated to be waterproof and offer excellent corrosion resistance. While the core requirements are similar, saltwater environments are much harsher. Therefore, using premium marine grease with superior water washout and corrosion inhibition properties is highly recommended, even for freshwater use, as it provides the best overall protection.
I've experimented with both standard marine grease and premium formulations on identical components. After six months in saltwater use, the parts protected with premium marine grease showed significantly less corrosion and maintained smoother operation. The extra cost of premium grease is negligible compared to the protection it provides.
Can I Use Regular Household Grease on an Outboard Motor?

Absolutely not. Regular household grease, automotive grease, or general-purpose lubricants are not designed to withstand the constant exposure to water, salt, and the specific operating temperatures of an outboard motor. They will likely wash out quickly, fail to prevent corrosion, and can even degrade seals or damage components. Always use a grease specifically labeled as "marine grease" or recommended by your outboard manufacturer.
As Yamaha Outboards states, "Outboards endure more punishment than car engines, facing constant humid and corrosive air exposure. This necessitates marine-specific lubricants containing anti-corrosion agents."
How Do I Know If a Grease Fitting Is Clogged?
You'll know a grease fitting is clogged if, when you attach your grease gun and apply pressure, no grease goes in, and you don't see any old grease being pushed out. The grease gun coupler might feel like it's not seating properly, or you might experience significant resistance. It's crucial to clean the fitting thoroughly before assuming it's clogged, as dirt can often simulate this issue.
I once spent nearly 20 minutes trying to clear what I thought was a clogged fitting, only to discover that my grease gun coupler was worn and not making a proper seal. After replacing the coupler, the grease flowed easily into the fitting. Sometimes the problem isn't where you first assume it to be.
What Should I Do If I Can't Reach a Grease Fitting?

If a grease fitting is particularly difficult to access, there are a few solutions. Firstly, sometimes tilting the outboard motor to a different angle can provide the necessary clearance. Secondly, investing in a flexible hose attachment for your grease gun is often the easiest fix. These hoses allow you to maneuver the grease gun tip into tighter spaces. In rare, extreme cases, a mechanic might need to temporarily disconnect certain linkages for better access.
On my Mercury outboard, there's a particularly challenging fitting behind the power trim assembly. I found that tilting the engine all the way up, then using a 12-inch flexible hose attachment positioned from below, provides the perfect angle to reach this otherwise inaccessible fitting.
Is It Possible to Over-Grease My Outboard Motor?
Yes, it is definitely possible to over-grease an outboard motor. While you want to ensure all moving parts are well-lubricated and old grease is pushed out, over-pumping can cause several problems. It can force out seals, leading to lubricant leaks. Excess grease can also attract dirt and debris, creating a gritty paste that can hinder movement or even cause damage. The goal is to pump until fresh grease begins to ooze out, indicating the joint is full, and then stop.
A fellow boater ignored this advice and pumped his swivel bracket full of grease until it was practically overflowing. The excess attracted sand and grit, which worked its way into the mechanism and actually accelerated wear rather than preventing it. His experience taught me that more is definitely not better when it comes to greasing.
How Do I Inspect and Replace the Propeller Cotter Pin?
When you remove your propeller (which you'll do to grease the shaft), take a close look at the cotter pin that is inserted through the propeller shaft and the castle nut securing the propeller. Inspect it for any signs of corrosion, bending, or thinning. If it looks worn in any way, it's best practice to replace it with a new one. They are inexpensive critical safety components.
You'll typically need to bend open the existing pin's legs, pull it out, slide in a new one, and then spread its legs to secure it in place. I always carry spare cotter pins in my maintenance kit, as they're inexpensive but crucial components that can prevent major problems.
When it comes to keeping my outboard motor in peak condition, there's no aspect I've found more critical yet often overlooked than diligent greasing. We've explored why this simple act is the bedrock of preventing corrosion and wear, ensuring your engine's longevity and smooth operation. We've delved into the specifics of what makes a premium marine grease stand out, from water resistance to temperature tolerance, and highlighted the value of sticking to manufacturer-recommended products like Quicksilver 2-4-C or Yamaha WR No. 2 grease.
Throughout this guide, we've armed you with the knowledge of the essential tools, such as the right grease gun and flexible hoses, needed to get the job done right. Crucially, we've mapped out the common grease points – from the propeller shaft to the steering components – emphasizing the absolute necessity of consulting your owner's manual for your specific engine. We discussed the proper technique: cleaning fittings, applying grease until fresh lubricant oozes out, and the importance of wiping away excess.
Beyond the mechanical process, we've underscored the vital frequency of greasing, noting that saltwater use demands more attention. We've also tackled common troubleshooting scenarios, like clogged fittings and how to navigate hard-to-reach spots, always with an eye on safety and knowing when to call in a professional. Finally, we've tied greasing into broader maintenance—inspecting cotter pins, cleaning the propeller shaft thoroughly, and the enduring benefit of using genuine parts.
As engine guru Charles Fort wisely stated, "Outboards can't survive without a good grease job." For me, it's about more than just surviving; it's about thriving, ensuring that every time I turn the key, my outboard responds with power and reliability, ready for whatever the water throws my way. So take a moment, grab your grease gun, and give your outboard the attention it deserves; your future self, and your wallet, will thank you.
Most Common Beginner Mistakes and How to Avoid Them
- Skipping hard-to-reach fittings: Invest in a flexible hose attachment—don't skip a fitting just because it's difficult to access.
- Using automotive instead of marine grease: Always use marine-specific grease, even if it costs more.
- Not cleaning fittings before greasing: Take the extra 30 seconds to wipe each fitting clean first.
- Forgetting to check the cotter pin: Make propeller cotter pin inspection part of your routine.
- Inconsistent maintenance schedule: Set calendar reminders for regular greasing based on your usage pattern.
For more expert resources and genuine marine parts, visit the main hub at JLM Marine.