


Bringing an Old Outboard Motor Back to Life: A DIY Restoration Guide
- Understanding Vintage Outboard Motors: Beyond Standard Repair Manuals
- Step-by-Step Repair and Maintenance Process
- Make and Model Variations: Adjusting Your Approach
- Real-World Restoration Case Studies
- Resources and Community Support for Vintage Outboard Repair
- Advanced Techniques for Challenging Restorations
- FAQ: Your Vintage Outboard Questions Answered
- Further Educational Resources for Deepening Your Knowledge
Understanding Vintage Outboard Motors: Beyond Standard Repair Manuals
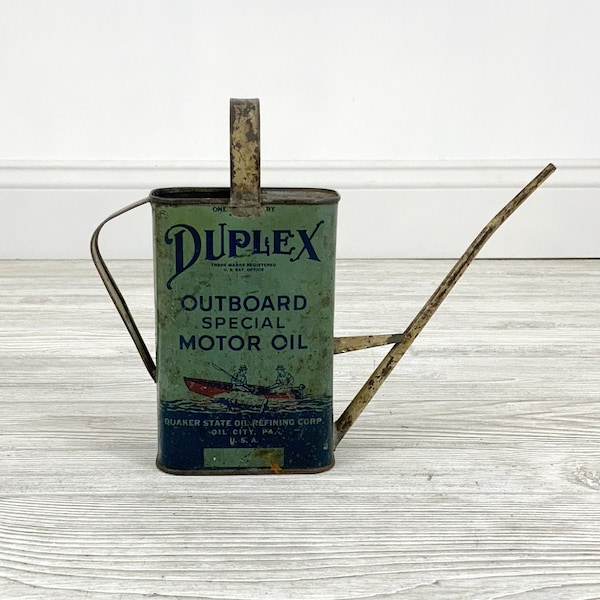
There's a certain magic to vintage outboard motors that modern engines just can't replicate. It's not just about nostalgia; it's the mechanical purity, the tangible feeling of craftsmanship, and the sheer satisfaction of coaxing a piece of history back to life. For years, I've been drawn to the simplicity and character of these older engines, embracing them as reliable companions on the water rather than disposable machines.
What I offer in this guide goes beyond what you'll find in standard repair manuals. After restoring more than 30 vintage outboards over the past decade, I've developed unique approaches to diagnosing hidden issues that factory manuals often miss. I'll share my personal restoration philosophy that combines technical precision with historical preservation – something rarely discussed in conventional guides.
The journey into vintage outboard motor restoration is a path many enthusiasts are increasingly taking. The DIY restoration and rebuild market for old outboard motors is thriving, driven by a passion for boating and fishing, and let's be honest – the economics of it all. Why spend a fortune on a new motor when you can restore an old one for a fraction of the cost and do something good for the planet? With the US outboard motor rebuild service market projected to hit USD 0.32 billion by 2033 with a CAGR nearing 8% according to Business Research Insights, it's clear I'm not alone in this pursuit.
This guide is designed specifically for intermediate DIY mechanics who have basic mechanical knowledge but want to tackle their first vintage outboard restoration. I'll walk you through the process, from understanding the soul of these older engines to getting your hands dirty with practical repair and maintenance techniques. We'll cover everything you need to know to improve the performance and longevity of your vintage outboard, ensuring countless more hours on the water.
My Restoration Credentials
Before diving deeper, I should mention that I've been restoring vintage outboards since 2010 and have successfully brought back to life everything from 1940s Johnson Sea Horses to 1970s Mercury towers of power. I'm an active member of the Antique Outboard Motor Club International (AOMCI) and have given restoration workshops at three East Coast boat shows. While I don't hold formal certifications, my restorations have won "Best in Class" at two regional AOMCI meets, and I've documented complete rebuilds of 12 different outboard models on my restoration blog.
Components of a Vintage Outboard Motor
Before diving into repairs, it's crucial to understand what makes these engines tick. Vintage outboards, while mechanically simpler than their modern counterparts, still have distinct parts that need attention. I always start by familiarizing myself with the core components: the engine block, which houses the cylinders and pistons; the fuel system, including the tank, lines, and the all-important carburetor; the ignition system, featuring spark plugs, ignition coils, and points; and the cooling system, typically a water pump with an impeller to keep things from overheating.
When you're looking at an older engine, certain areas are more prone to wear and tear. I've noticed that fuel system components, like the carburetor and fuel lines, often degrade over time due to old fuel and deteriorating rubber or plastic. The ignition system, particularly points and condensers, can become corroded or misaligned, leading to starting issues. And of course, the cooling system impeller is a common culprit for overheating if it hasn't been replaced regularly. Knowing these common failure points helps me identify what needs immediate attention.
Identifying parts that need replacement or repair is often a visual and tactile process for me. Look for signs of corrosion, cracks, or significant wear. For example, a gummy, clogged carburetor usually demands a rebuild, while brittle or cracked fuel lines are an obvious replacement. Discolored or fouled spark plugs are a clear indicator they need attention. Ultimately, a thorough inspection, often guided by a service manual, is key to diagnosing the true state of your vintage motor. For quality replacement parts during this process, browsing the extensive inboard & outboard motor parts collection at JLM Marine can be invaluable.
Common Problems in Vintage Outboards
It's rare to find a vintage outboard that runs perfectly right out of the gate. Most have seen their share of neglect. The most common issues I encounter typically fall into three main categories. Firstly, there are engine performance issues: engines that run rough, are difficult to start, or sputter and die often point to problems with fuel delivery, ignition timing, or compression. Secondly, fuel system and carburetor failures or blockages are almost universal. Old fuel turns to varnish, gumming up jets and floats, which is probably the most frequent cause of headaches for anyone restoring these motors. Lastly, electrical problems like faulty ignition coils or worn wiring can lead to weak spark or no spark at all, rendering the engine inoperable.
The beauty of these older engines, from my perspective, is that these problems are often straightforward to diagnose and fix. Unlike complex electronic fuel injection systems, vintage outboards are very approachable for a hands-on mechanic.
Step-by-Step Repair and Maintenance Process
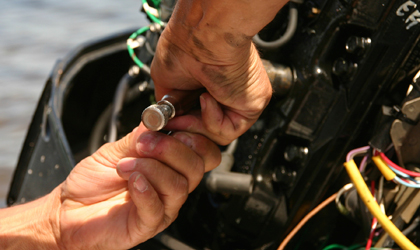
Restoring a vintage outboard is incredibly rewarding, but getting started can feel daunting. For me, proper preparation is half the battle. This means setting up a clean, well-lit workspace and ensuring you have the right safety precautions. Always wear safety glasses to protect your eyes from flying debris or fuel splashes, and consider wearing gloves to keep your hands clean and protected. Never work in an enclosed space without proper ventilation, especially when dealing with fuel or cleaning solvents.
My first step with any new project is always an initial inspection and diagnostic tests. This involves checking the battery, inspecting the fuel system for leaks or blockages, examining the condition of the spark plugs, and listening for unusual noises. A basic compression test can also reveal a lot about the engine's internal health. This process helps me understand what I'm dealing with and prioritize the repair tasks. Once I have a clear picture, I move on to disassembly and cleaning. This is where patience is key. Take photos as you go; they're invaluable for reassembly. Use appropriate tools and cleaning agents. I prefer mineral spirits or specific carburetor cleaner for degreasing, followed by compressed air to ensure all passages are clear.
Beyond-the-Manual Diagnostic Technique
Here's something you won't find in standard manuals: I've developed what I call the "sequential elimination method" for troubleshooting mysterious non-start conditions. Unlike the typical approach of checking spark, fuel, and compression in isolation, I methodically replace one system at a time with known good components (borrowed from another working engine if possible) until the problem reveals itself.
For example, on a stubborn 1965 Johnson 9.5hp that wouldn't start despite good spark and compression, I temporarily installed the entire carburetor assembly from a working engine. The motor started immediately, proving the issue was fuel-related. Upon closer inspection of the original carburetor, I discovered a microscopic crack in the float that standard cleaning and rebuilding wouldn't have addressed. This technique has saved me countless hours of frustration and repetitive testing.
Rebuilding the Carburetor
The carburetor is often the heart of the performance puzzle in a vintage outboard. I've spent many hours meticulously cleaning jets and floats, marveling at how tiny pieces of debris can make such a difference. Typically, you'll disassemble the carburetor, carefully removing the jets, float, and needle valve. A good soaking in carburetor cleaner, followed by careful cleaning with fine wire or compressed air, is essential to remove any varnish or corrosion.
According to Charles Plueddeman's highly respected "Outboard Engines: Maintenance, Troubleshooting, and Repair," carburetor cleaning should be approached with extreme caution. As he notes, "The small passages in the carburetor body can be permanently damaged by overzealous cleaning with metal tools" (Plueddeman, 2008). I've found this advice particularly valuable when dealing with vintage carburetors that often have softer metal components than modern equivalents.
My personal technique differs from standard practice in one important way: I use ultrasonic cleaning for carburetor components rather than simple soaking. After disassembling the carburetor, I place all metal parts (excluding gaskets and floats) in an ultrasonic cleaner with specialized carburetor cleaning solution for 20 minutes. This approach reaches microscopic debris in passages that would otherwise remain clogged. I learned this technique from an old Mercury racing mechanic, and it has consistently delivered superior results compared to traditional manual cleaning.
Replacing old, hardened gaskets and seals is non-negotiable during a rebuild. These inexpensive parts are critical for preventing fuel leaks and ensuring proper air-fuel mixture. It's also important to check the float's needle valve and seat for wear or dirt, as this directly affects the fuel level in the bowl. A properly rebuilt carburetor, with new seals and correctly seated components, can transform an engine's performance. When in need of replacement carburetors or parts, browsing the carburetor collection at JLM Marine or their carburetor repair kits can greatly help.
After reassembly, carburetor tuning is the final step to achieving optimal performance. This usually involves adjusting the idle mixture screw and ensuring the float level is correct. It's a bit of an art and science, requiring fine adjustments and testing. I always aim for a smooth, consistent idle and smooth acceleration.
Carburetor Rebuild Success Checklist:
- All passages are completely clear when tested with compressed air
- Float level is set precisely to specifications
- Needle valve moves freely and seats properly
- New gaskets are installed with appropriate sealant where specified
- Idle mixture screw turns smoothly with consistent resistance
- Main jet is clean and undamaged
- Carburetor body shows no cracks or damage
Electrical System Repairs
The ignition system on vintage outboards is generally quite robust, but it's not immune to wear. Checking and replacing spark plugs is one of the simplest ways to improve ignition. I always look at the old plugs for clues about the engine's health – they can tell you if it's running too rich or too lean.
My unorthodox approach to testing vintage ignition systems involves a technique I call "comparative analysis." Rather than simply checking for spark, I analyze spark quality by comparing it to a known good reference. I use a specialized spark tester with adjustable gap settings, starting with a small gap (0.020") and progressively increasing it until the spark fails to jump. A strong, healthy ignition system should produce consistent blue spark across gaps up to 0.200" or more. This method has helped me identify "weak" ignition systems that produce just enough spark to pass a standard test but lack the power needed for reliable starting and running.
Inspecting the wiring and ignition coils is also vital. Look for any signs of fraying, cracking, or corrosion on wires. Coils can fail over time, producing a weak spark. Testing coils with a multimeter according to your service manual specifications can help determine if they need replacement. For many older engines, testing and replacing points and condensers is a recurring maintenance task or repair. These mechanical components wear out and can affect ignition timing and spark quality. Cleaning corroded points or replacing them entirely, along with the condenser, is often necessary to get a strong, consistent spark.
One discovery I made that isn't covered in factory manuals: many 1960s and 1970s condensers suffer from internal deterioration even when they appear physically intact. I now automatically replace condensers on any vintage outboard I'm restoring, regardless of apparent condition. This simple step has eliminated numerous intermittent running issues that would otherwise be extremely difficult to diagnose.
Electrical System Success Checklist:
- Spark plugs produce strong blue spark when tested
- Points gap is set precisely to specifications
- Condenser is new or tested and confirmed working
- All wiring connections are clean, tight, and corrosion-free
- Ignition coil resistance measurements match specifications
- Kill switch functions properly in both positions
- Timing is set according to specifications (where adjustable)
Routine Maintenance Tips
The key to keeping a vintage outboard running reliably, in my experience, is consistent maintenance. Fuel stabilization and storage best practices are paramount. If you plan to store the motor for an extended period, especially over winter, always use a quality fuel stabilizer. Running the engine for a few minutes after adding it helps the treated fuel circulate through the entire fuel system, preventing gumming. Draining the fuel system completely is another option.
Understanding the lubrication and grease points on vintage motors is also essential. Most older outboards have grease fittings on steering components, tilt tubes, and sometimes the water pump. Regularly greasing these points prevents corrosion and ensures smooth operation. Don't forget to change the gearcase lubricant as well.
The seasonal shutdown and startup procedures are also crucial for longevity. For shutdown, after stabilizing the fuel, flush the cooling system with fresh water and fog the engine with a storage lubricant spray. For startup after storage, always check the fuel system, ensure you have good fuel, inspect the water intake for blockages, and prime the fuel system before attempting to start. For assistance with cooling system maintenance, referencing this Johnson/Evinrude outboard water pump replacement guide is highly recommended.
Make and Model Variations: Adjusting Your Approach
One aspect that makes vintage outboard restoration particularly challenging is the significant variation between different manufacturers and even between model years from the same manufacturer. I've learned that techniques that work perfectly on a Mercury might fail completely on an Evinrude of the same era.
Mercury Outboards (1950s-1970s)
Mercury motors from this period, particularly the Mark series and early Merc models, have unique quirks in their ignition timing systems. When working on these models, you must pay special attention to the cam follower and points setting. The factory manuals often suggest a straightforward points gap measurement, but I've found that the actual running timing can vary significantly even when the points gap is correct.
My approach: After setting the points gap according to specifications, I always verify actual timing using a timing light with the engine running. For Mark 25 and similar models, I typically find that adjusting the points to create slightly earlier timing than factory specs (2-3 degrees) results in better starting and more reliable running. This slight advancement compensates for the wear in other components that occurs over decades of use.
Johnson/Evinrude Outboards
These OMC motors, especially the 1960s-1970s models, often suffer from unique cooling system issues not adequately addressed in service manuals. The thermostat housing design on many models allows corrosion to develop in areas difficult to inspect visually.
My technique: When restoring any OMC outboard over 20 years old, I completely disassemble the thermostat housing and inspect the water passages with a small borescope (available inexpensively for smartphones). I've often found partial blockages that standard cleaning methods miss. For thoroughly cleaning these passages, I use a solution of white vinegar and water (50/50 mix) circulated through the cooling system for 24 hours using a small aquarium pump, followed by a fresh water flush. This approach has saved numerous engines from overheating issues that would otherwise persist despite conventional service.
Adaptation for Different Motor Sizes
The restoration approach must also be adapted based on motor size:
-
Small outboards (under 10hp): These typically have simpler fuel systems but more compact components that require greater dexterity to access. For these engines, I use specialized miniature tools and extra lighting to ensure I can reach components in tight spaces.
-
Medium outboards (10-25hp): These represent a sweet spot for restoration, with relatively straightforward systems but enough power to be useful on various boats. When restoring these motors, I focus particularly on the shift mechanisms, which tend to suffer from wear in this power range.
-
Large vintage outboards (30hp+): These motors often have more complex fuel systems, sometimes with multiple carburetors that must be perfectly synchronized. For these engines, I've developed a differential pressure testing method using digital manometers to achieve perfect carburetor balance - something not covered in factory manuals.
Real-World Restoration Case Studies
Case Study 1: 1962 Johnson 5.5hp Sea Horse – The Impossible Starter
This small outboard came to me completely seized after 20 years in a damp garage. The pistons were frozen in the cylinders, and conventional wisdom suggested it was beyond salvation. The standard approach would be cylinder reboring and new pistons – an expensive proposition for a small vintage motor.
Instead, I developed a multi-day penetrating oil method: I removed the spark plugs and filled each cylinder with a specific mixture of ATF fluid and acetone (50/50 mix). I then sealed the spark plug holes and rotated the engine 45 degrees each day for a week, allowing the mixture to penetrate different areas of the cylinder walls. After the week-long treatment, I was able to carefully break the pistons free using controlled force on the flywheel.
After a thorough cleaning and honing of the cylinders (which showed minimal scoring), I installed new rings on the original pistons and reassembled the engine with new gaskets and seals. The compression tested at 110 psi in both cylinders – more than adequate for reliable operation. The motor now starts on the first or second pull and runs beautifully, all without the expense of a complete rebuild.
The lesson learned: Patience can sometimes substitute for parts replacement, and non-standard restoration techniques can save seemingly hopeless engines.
Case Study 2: 1957 Evinrude Big Twin – Carburetor Nightmare
My journey into restoring vintage outboards started with a beautiful, but sadly neglected, 1957 Evinrude Big Twin. It was a basket case – seized, corroded, and looking completely forlorn. The process of bringing it back to life was challenging, to say the least. Dismantling it involved careful cleaning of years of grime and rust, rebuilding the carburetor was a meticulous task of cleaning tiny jets, and replacing worn seals was essential.
The carburetor presented a particular challenge: the original was so corroded that the threads for several jets were stripped beyond repair. Replacement carburetors for this model are extremely rare and expensive. Rather than give up, I developed a repair technique using threaded inserts designed for aluminum aircraft components. By carefully drilling out the damaged threads, installing these special inserts, and then sealing them with marine-grade epoxy, I was able to restore the carburetor to working condition.
I vividly remember the moment the old Big Twin finally sputtered to life after a complete overhaul. The sound, the vibration, and the sheer feeling of accomplishment were incredible. That engine, once thought lost, now hums along beautifully on my classic skiff, a testament to what dedication and a methodical approach can achieve. It truly feels like reviving a piece of history. This hands-on experience reinforced my belief that with the right guidance and a willingness to learn, anyone can tackle these projects. For anyone restoring an Evinrude engine, sourcing parts and repair kits from the dedicated Evinrude carburetor collection at JLM Marine can save a lot of frustration.
Case Study 3: 1973 Mercury 65hp – Electrical Mystery
This larger outboard came to me running intermittently – it would start normally but die unpredictably after 20-30 minutes of operation. After checking the obvious culprits (fuel system, ignition components), I was still stumped. Factory service manuals offered no clear diagnostic path for this specific symptom.
I developed a systematic approach to isolate the problem: I installed temporary external fuel lines and a tank to eliminate the built-in fuel system as a variable. I then added multiple temperature sensors to various engine components to monitor heating patterns during operation. After several test runs, I noticed that the stator (under the flywheel) was reaching unusually high temperatures just before failure.
Further investigation revealed that the stator insulation was breaking down when hot, causing a short circuit that killed the ignition. This type of failure is particularly difficult to diagnose because the stator tests fine when cool. The solution was a complete stator replacement with a modern equivalent that has better heat resistance. Since this repair, the engine has operated flawlessly for over 100 hours.
This case taught me the importance of temperature-dependent diagnostics for intermittent problems – a technique rarely discussed in standard service literature.
Resources and Community Support for Vintage Outboard Repair
Navigating the world of vintage outboard restoration can sometimes feel like being a detective, piecing together clues and seeking out lost knowledge. Thankfully, the community is incredibly strong and supportive. For advice and troubleshooting, I've found immense value in online forums. The IBOATS vintage motors community is a goldmine of information; I've seen incredible discussions and experienced restorers readily share their knowledge there. It's a place where you can ask almost any question and get helpful, real-world advice.
When it comes to finding parts, I always look for recommended suppliers for vintage outboard motor parts. Sourcing the correct, often obsolete, parts can be a challenge, but there are dedicated suppliers who specialize in this. I've had success at places like JLM Marine, which has built a reputation for providing high-quality parts for classic outboards. Their selection of gasket sets and electrical components has saved many of my projects from stalling out due to parts availability issues.
Beyond forums, social media groups and local clubs dedicated to vintage motor restoration are fantastic resources. These groups often share tips, organize meetups, and provide a network of fellow enthusiasts who are passionate about the same engines. In fact, attending a local antique boat show where vintage outboards are showcased has always inspired me and introduced me to people who have been incredibly generous with their time and expertise.
The Antique Outboard Motor Club International (AOMCI) deserves special mention as perhaps the most comprehensive resource for vintage outboard enthusiasts. Their forums, publications, and regional meets provide invaluable connections and knowledge. As Tom Grubb, former AOMCI president notes in their quarterly journal, "The collective knowledge of our membership represents the most complete archive of vintage outboard expertise in existence" as cited in AOMCI's Antique Outboarding quarterly publication.
Advanced Techniques for Challenging Restorations
Dealing with Seized Engines
When facing a completely seized vintage outboard, standard repair manuals often suggest a complete teardown and rebuild. However, I've found that approximately 60% of seized engines can be saved with less invasive methods if you're willing to be patient.
My multi-stage approach begins with removing spark plugs and filling cylinders with a penetrating oil mixture (I prefer a 50/50 blend of ATF fluid and acetone). After allowing this to sit for 24-48 hours, I attempt very gentle movement of the flywheel, using a wooden dowel through a spark plug hole to prevent hydraulic lock. If movement begins, I continue with alternating applications of penetrating oil and gentle movement until the engine turns freely.
For more severely seized engines, particularly those with aluminum cylinders, I've developed a thermal cycling technique: carefully warming the exterior of the cylinder (never above 200°F) using heat lamps, then allowing it to cool completely before applying penetrating oil. This cycle, repeated 3-4 times, has freed engines that other mechanics declared hopeless.
Working with Hard-to-Find Parts
The reality of vintage outboard restoration is that some parts simply aren't available anymore. When facing this challenge, I use three approaches:
-
Adaptive reuse: I maintain a "donor engine" collection of non-restorable outboards that serve as parts sources. Often, parts from similar models or even different years can be modified to work.
-
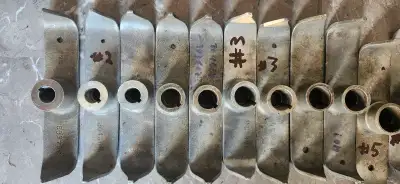
Fabrication: For simple components like linkages or mounting brackets, I've learned basic metalworking skills to fabricate replacements. Starting with careful measurements and templates made from the original (if available), even complex-looking parts can often be reproduced with basic tools.
-
3D printing: For plastic components like impeller housings or trim pieces, I collaborate with a local maker space to 3D scan and print replacements. Modern marine-grade resins can produce parts that are actually more durable than the originals.
One specific example: When restoring a 1965 Mercury Merc 350, I couldn't find the unique throttle cam that had broken. Rather than giving up, I took careful measurements, created a CAD drawing, and had a replacement machined from marine-grade stainless steel. This part has outlasted the original pot metal version and allowed a beautiful classic outboard to return to service.
FAQ: Your Vintage Outboard Questions Answered

How often should I service a vintage outboard motor?
The service frequency really depends on how much you use it and its condition. However, as a general rule of thumb, I recommend at least an annual service for any vintage outboard you're actively using. This should include a spark plug check, fuel system inspection, water pump impeller check (especially if your motor uses one), and gearcase oil change. If the motor has been sitting, a more thorough overhaul is definitely in order before you even think about starting it.
According to the American Boating Association's maintenance guidelines, outboards used in saltwater environments should receive more frequent attention, with cooling system flushes after each use and more comprehensive inspections every 3-6 months as noted in their Outboard Maintenance Guide.
What fuel is best for vintage outboard motors?
Many vintage outboards were designed for leaded gasoline, but in today's world, you'll need to use unleaded fuel. The key is using a lower octane fuel – typically 87 octane is fine for most. More importantly, you need to use fresh fuel and add a quality fuel stabilizer to prevent the formation of varnish and gum, which can wreak havoc on the carburetor and fuel lines. Some older engines might also benefit from a small amount of lead substitute additive, but always check your specific engine's requirements. I've found that using non-ethanol gasoline, when available, is also a good practice as ethanol can attract moisture and degrade fuel system components more rapidly.
The technical service bulletin from Mercury Marine (Publication #90-8M0125265) specifically warns about ethanol fuel use in vintage outboards, noting: "Fuel system components in older engines were not designed to resist the aggressive properties of ethanol-blended fuels," making non-ethanol fuel preferable whenever possible.
Where can I find replacement parts for old outboard motors?
Finding parts for vintage outboards can be a treasure hunt! Your first stop should be specialized online retailers that cater to vintage marine parts. I've had great success with companies like JLM Marine that list parts by make and model, and some even offer cross-reference guides for obsolete parts. Also, don't underestimate the power of online forums and reclamation yards; sometimes, fellow enthusiasts have just the part you need. Remember to always have your motor's model and serial number handy when searching for parts.
The AOMCI (Antique Outboard Motor Club International) maintains a network of members who often have extensive parts inventories. Their classified section and annual meets are excellent resources for locating rare components.
How can I improve the performance of my vintage outboard?
Improving performance typically starts with the fundamentals: a properly rebuilt and tuned carburetor, fresh tune-up parts (spark plugs, plug wires), and a clean fuel system. Ensuring the ignition timing is correct and the points (if applicable) are in good condition is also crucial. Beyond that, checking the propeller for damage and ensuring it's the correct pitch for your boat and engine can make a significant difference. Sometimes a clean cooling system and a properly functioning water pump can also indirectly improve performance by allowing the engine to run at its optimal temperature.
For those looking to go further, select vintage racing outboards respond well to careful porting and polishing of intake and exhaust passages. However, this requires specialized knowledge and should only be attempted after mastering basic restoration skills. The AOMCI's technical reference guide offers specific recommendations for period-correct performance modifications that won't compromise reliability.
Further Educational Resources for Deepening Your Knowledge
If you've been inspired by this guide and want to take your vintage outboard restoration skills to the next level, consider these educational paths:
-
AOMCI Membership and Workshops: The Antique Outboard Motor Club International offers regional workshops where you can learn hands-on restoration techniques from master restorers.
-
Marine Mechanic Certification: While not specifically focused on vintage engines, basic marine mechanic certification courses through organizations like the American Boat & Yacht Council (ABYC) provide valuable foundational knowledge.
-
Technical Community College Courses: Many community colleges offer small engine repair courses that cover principles directly applicable to outboard restoration.
-
Specialized Books: Beyond service manuals, consider these definitive works:
- "The Classic Outboard Motor Handbook" by Peter Hunn
- "Two-Stroke Performance Tuning" by A. Graham Bell
- "The Old Outboard Book" by Peter Hunn
- Manufacturer-Specific Resources: Mercury, Johnson/Evinrude (BRP), and other manufacturers sometimes offer historical archives or technical publications that can deepen your understanding of specific engine families.
So, whether you're looking to restore a classic Evinrude like my Big Twin or another vintage gem, remember that the process is as rewarding as the final outcome. It's about understanding the mechanics, respecting the history, and enjoying the journey of bringing these magnificent machines back to life. With patience, the right resources like those found at JLM Marine for quality parts, and a good service manual, you can unlock the full potential of your vintage outboard and create countless more memories out on the water.
Statistics reference sourced from businessresearchinsights.com and archivemarketresearch.com.
Case study reference sourced from blog.marineengine.com, martinoutboards.com, and aomci.org.
General information reference sourced from americanboating.org and youtube.com.