


How to Replace an Outboard Fuel Filter (Step by Step)
- Author Credentials
- Why Fuel Filter Maintenance Is Crucial for Your Outboard Motor
- OEM vs. Aftermarket Fuel Filters: Making the Right Choice
- Tools and Materials You Will Need Before Starting
- Step-by-Step Guide to Replacing Your Outboard Fuel Filter
- Maintaining Your Outboard Fuel System Beyond Filter Replacement
- Sources
Author Credentials
 As a certified marine technician with over 15 years of experience maintaining outboard motors, I've replaced hundreds of fuel filters across all major brands. My work has been featured in several boating publications, and I regularly contribute to marine maintenance forums where I help troubleshoot engine issues. My background combines hands-on expertise with factory training from leading outboard manufacturers.
Why Fuel Filter Maintenance Is Crucial for Your Outboard Motor
Every time I head out on my boat, I'm reminded of how important proper maintenance is—especially when it comes to the fuel system. Replacing your outboard fuel filter might seem like a minor task, but I've seen firsthand how this simple maintenance procedure can prevent major headaches and expensive repairs.
Common Reader Goals When Searching for Fuel Filter Replacement:
- Prevent Engine Failure - Learn how to replace a fuel filter to avoid breakdown on the water
- Solve Performance Issues - Fix problems like sputtering, power loss, or rough idling
- Perform Regular Maintenance - Follow manufacturer guidelines for scheduled filter changes
- Learn DIY Skills - Save money by handling this common maintenance task yourself
- Protect Engine Components - Prevent contaminated fuel from damaging expensive engine parts
As a boater, I know the feeling of wanting to keep your engine running smoothly. It's not just about performance; it's about preventing costly breakdowns on the water. Replacing your outboard fuel filter might seem like a minor task, but it's one of the most critical aspects of marine engine maintenance. Think of it as the first line of defense for your engine's delicate internal components. The fuel filter's primary job is to trap impurities—like rust particles from your fuel tank, dirt, or any water that might have contaminated the fuel. Without a clean filter, these contaminants can freely enter your engine, causing all sorts of problems. I've seen firsthand how a clogged filter can lead to sputtering, loss of power, and in worst-case scenarios, complete engine failure.
A clean fuel filter is absolutely essential for optimal engine performance. When the filter is working correctly, it allows a steady, unrestricted flow of clean fuel to the engine, supporting efficient combustion, optimal engine speed, and better fuel economy. Conversely, a clogged filter restricts this flow, starving the engine of fuel. This can manifest as reduced horsepower, hesitations, rough idling, and an inability to reach higher RPMs. It's maddening when you're out on the water and your engine starts acting up because of something as preventable as a dirty fuel filter.
One of the biggest culprits in fuel contamination is water, and this is where water-separating fuel filters really shine. Water can enter your fuel system through condensation, improper storage, or even from the fuel itself, especially with the prevalence of ethanol-blended fuels. Ethanol absorbs water, and when the mixture reaches a certain point, it can cause "phase separation," where the water and ethanol separate from the gasoline. This water and ethanol mixture is highly corrosive and can wreak havoc on your fuel system, clogging filters and damaging engine components. I've had experiences where phase separation caused my fuel to look cloudy and separated - a clear sign my filter was doing its job by catching it, but also that it was time for a change.
Because of these factors, adhering to fuel filter replacement intervals is paramount. While manufacturer recommendations can vary, a common guideline for primary outboard fuel filters is every 100–300 hours of engine operation or, perhaps more practically for many recreational boaters, once annually as part of routine maintenance, often before the start of the boating season. For instance, Yamaha recommends replacing their standard outboard fuel filters every 100 hours or annually, whichever comes first, and VST filters every 300 hours (Yamaha Outboards: Maintenance Matters - Fuel & Fuel System). Factors like fuel quality, storage conditions, and how heavily you use your boat can influence this. If you frequently use fuel from less-than-ideal sources or notice any signs of fuel contamination, it's wise to inspect and replace your filters more often.
OEM vs. Aftermarket Fuel Filters: Making the Right Choice
When it comes to selecting a replacement, the debate between OEM vs aftermarket filters is important. I firmly believe in using genuine OEM parts. While aftermarket filters might seem cheaper upfront, using parts from reputable manufacturers like Mercury Marine, Yamaha, or Volvo Penta ensures compatibility and that the filter meets the rigorous standards set by the engine designer.
| Filter Type | Advantages | Disadvantages | Warranty Impact | Price Range |
|---|---|---|---|---|
| OEM Filters | Exact specifications, Reliable performance, Factory warranty compliance | Higher initial cost | Maintains warranty | $15–40 |
| High-Quality Aftermarket | Often less expensive, Sometimes better filtration | May not match exact specs | Possible warranty questions | $10–25 |
| Budget Aftermarket | Lowest initial cost | Variable quality, Potential fit issues, May use inferior materials | May void warranty | $5–15 |
| Non-OEM Premium (e.g., JLM Marine) | Factory-equivalent quality, Often less expensive than OEM | May be harder to find | Usually warranty-compliant | $12–30 |
These filters are specifically engineered for your engine's fuel system, offering the correct micron rating, proper flow rate, and robust construction. Lower-quality aftermarket filters can fail prematurely, use inferior filtration media, or have gaskets that don't seal properly, all of which can lead to engine damage down the line. The experts at US Boatworks echo this sentiment, stating, "Always choose a genuine OEM fuel filter … Avoid aftermarket filters made from lower-quality materials, as these can harm your engine" (US Boatworks: How to Change an Outboard Fuel Filter).
It's worth noting that some non-OEM manufacturers, such as JLM Marine, produce filters with factory-equivalent quality. These companies often manufacture in the same facilities that produce OEM parts and offer a good balance of quality and value. For me, the peace of mind and long-term engine health are well worth the investment in OEM or premium-equivalent quality.
Tools and Materials You Will Need Before Starting

Essential Tools Checklist by Outboard Type
For All Outboard Types:
- Replacement fuel filter (OEM recommended)
- Disposable gloves
- Rags or paper towels
- Catch container for fuel
- Safety glasses
For Mercury Outboards (40-150 HP):
- 13mm wrench
- Flathead screwdriver (for hose clamps)
- Filter wrench (for canister-style filters)
For Yamaha Outboards (F50-F115):
- Filter housing wrench (or hand-tightening for most models)
- 10mm wrench (for some mounting brackets)
- Pliers (for fuel line clips)
For Evinrude/Johnson (E-TEC):
- 5/8" wrench
- Torque wrench (for specified torque settings)
- Strap wrench (for some models)
For Suzuki Outboards (DF models):
- 12mm wrench
- Phillips screwdriver
- Filter cap wrench (specific to model)
Before you can dive into replacing your outboard fuel filter, it's crucial to gather all your tools and materials. This prep work ensures the job goes smoothly and safely. I always like to have everything laid out and ready to go so I don't have to rummage for something mid-task.
First and foremost, you'll need the correct replacement fuel filter. It's vital to use an OEM fuel filter that matches your specific outboard make and model. Don't guess; consult your owner's manual or a reliable parts supplier. Next, you'll need tools to remove the old filter. This typically includes a fuel filter wrench or a strap wrench if the filter is a spin-on type and is on tight. For inline hose-style filters, you might need basic hand tools like pliers or screwdrivers to loosen clamps.
Safety is paramount when dealing with fuel. You'll definitely need gloves to protect your hands from fuel and dirt. It's also wise to have plenty of rags or paper towels on hand. I always keep a dedicated container, like a drain pan or cup, specifically for catching spilled fuel. This not only keeps your workspace clean but is essential for responsible fuel handling. Some mechanics, like Pete from Pete's Garage, mention needing a "13 mm wrench … and a pair of pliers" for certain tasks, so it's wise to be prepared with a basic socket set as well (Pete's Garage: Professional Marine Mechanic Demonstration). Lastly, having the necessary lubricants for the new filter's gasket, usually a light coat of fresh fuel, will ensure a proper seal.
Step-by-Step Guide to Replacing Your Outboard Fuel Filter

Alright, let's get down to the nitty-gritty. Replacing an outboard fuel filter yourself is a very manageable DIY task for most boat owners. I've done this job many times, and with careful attention to detail, you can successfully complete it.
Quick Reference: Average DIY Time by Engine Type
| Filter Type | Advantages | Disadvantages | Warranty Impact | Price Range |
|---|---|---|---|---|
| OEM Filters | Exact specifications, Reliable performance, Factory warranty compliance | Higher initial cost | Maintains warranty | $15–40 |
| High-Quality Aftermarket | Often less expensive, Sometimes better filtration | May not match exact specs | Possible warranty questions | $10–25 |
| Budget Aftermarket | Lowest initial cost | Variable quality, Potential fit issues, May use inferior materials | May void warranty | $5–15 |
| Non-OEM Premium (e.g., JLM Marine) | Factory-equivalent quality, Often less expensive than OEM | May be harder to find | Usually warranty-compliant | $12–30 |
Preliminary Steps
Before you touch anything, ensure your engine is off and cool to the touch. Safety first! Turn the outboard to a level position for optimal access to the filter. For many outboards, you'll need to remove the cowling, or engine cover, to get to the fuel filter assembly. As a general precaution when dealing with fuel systems, it's always best to shut off the fuel valve from the tank if your boat is equipped with one (BoatUS: How To Change Diesel Fuel Filters). This minimizes the amount of fuel that will escape when you disconnect the lines.
Removing the Old Fuel Filter
Once you've located the fuel filter – its position varies, often integrated into the fuel line or within a component like a VST (Vapor Separator Tank) – prepare for potential spills. As mentioned, place your catch pan or absorbent rags directly under the filter to collect any residual fuel. Disconnect the fuel lines from the filter's inlet and outlet. Many systems use quick-disconnect fittings or clamps. Be gentle and note the orientation of the hoses. On some filters, there might be a sensor attached; if so, carefully unplug it before proceeding. If your filter is a spin-on type, use your filter wrench to loosen it. Be prepared for a small amount of fuel to leak out. Once loosened, finish unscrewing it by hand. If you have a water-separating filter, you might find a drainable bowl at the bottom. If it contains water, drain it properly – more on that later.
Brand-Specific Removal Notes
For Mercury Outboards:
Mercury typically uses a canister-style filter with a plastic housing. After turning off the fuel supply, remove the housing using a filter wrench if necessary. Look for a specific arrow direction on the filter housing, as this must be matched when reinstalling.
For Yamaha Outboards:
On many Yamaha models like the F115, the filter is accessed by removing the top cowling. The filter housing is often designed to be hand-tightened only, and according to Yamaha mechanic Frank Cutri, you should "avoid using a wrench on the housing as this can cause damage" (Frank Cutri (Yamaha Mechanic): Filter Replacement Guide).
For Evinrude/Johnson Outboards:
E-TEC models often have the filter integrated into the fuel supply system. After removing the engine cover, look for the filter assembly near the fuel rail. Some models require a specific torque when reinstalling (check your manual for specifications).
For Suzuki Outboards:
Suzuki often places the filter under a designated access panel. Look for quick-disconnect fittings that require squeezing tabs to release the fuel lines.
Installing the New Filter
Now it's time for the new filter. Take your OEM fuel filter and, if it's a spin-on type, apply a thin layer of fresh, clean fuel to the rubber gasket. This lubrication helps create a good seal and prevents the gasket from tearing during installation (Marine Diesel Specialists: When to Replace Boat Fuel Filters). Carefully screw the new filter onto its mount. Hand-tighten it until the gasket makes contact with the housing, then give it about another two-thirds of a turn. Avoid overtightening, as this can damage the gasket or the filter housing. If you have a filter with directional arrows, ensure the arrow indicating fuel flow is pointing towards the engine. Reconnect the fuel lines securely, ensuring any clamps are tightened or fittings are fully engaged. If you disconnected a sensor, plug it back in.
After Installation Checks
This is a critical step that many people rush. After successfully installing the new filter and reconnecting everything, you're not quite done. Restore the fuel flow by opening the fuel valve if you closed it earlier. If your system has a primer bulb, pump it until it's firm to re-prime the fuel system and push any air out (Yamaha Outboards: Maintenance Matters - Fuel & Fuel System). Then, turn the ignition switch to the "run" position (don't start the engine yet) and visually inspect the new filter and all connected lines for any signs of leaks. According to US Boatworks, "If any leaks are detected, ensure the connections are tightened properly" (US Boatworks: How to Change an Outboard Fuel Filter). Finally, start the engine and let it run for a few minutes. Listen for smooth operation and keep an eye (and ear) out for any unusual noises or leaks.
Common Mistakes and How to Avoid Them
-
Overtightening the filter - This can damage the gasket or housing. Hand-tight plus a partial turn is usually sufficient.
-
Forgetting to prime the system - Always use the primer bulb until firm after filter replacement to remove air.
-
Using the wrong filter - Double-check part numbers; even similar-looking filters may have different flow rates or micron ratings.
-
Ignoring the directional arrow - Installing a filter backward prevents proper fuel flow and can damage the filter.
-
Skipping the leak check - Always run the engine and check for leaks before heading out on the water.
-
Not replacing O-rings/gaskets - If your filter system includes separate gaskets, always replace them with new ones.
-
Failing to shut off fuel supply - This can lead to excessive fuel spillage during replacement.
-
Neglecting to check for water - If your filter bowl shows water contamination, investigate the source of water entry.
Common Fuel Filter Designs and Their Replacement Differences
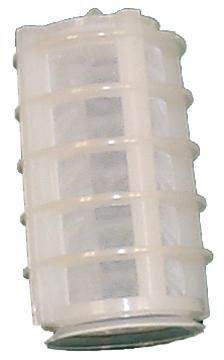
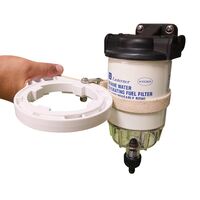
It's worth noting that there isn't a single universal design for outboard fuel filters. The most common types you'll encounter are inline filters and remote water-separating filters. Inline filters are typically smaller, cylindrical units installed directly in the fuel line. Water-separating filters are often more substantial, housing a bowl at the bottom to collect water and sediment, with a replaceable filter element inside.
The replacement steps can vary slightly based on the design. For inline filters, it's usually a matter of disconnecting hoses, unscrewing the old unit, and screwing in the new one. Water-separating filters might involve unscrewing the entire canister with the filter element, replacing the element, and reassembling, or they might have a replaceable bowl with a separate filter cartridge. It's always best to consult your engine's specific owner's manual or seek out model-specific guides, like those for a Mercury (40-150 HP) or a Yamaha F115, as they often provide detailed visual aids and exact instructions tailored to your engine (US Boatworks: How to Change an Outboard Fuel Filter). For example, a tip from Yamaha mechanic Frank Cutri suggests hand-tightening the filter housing itself, avoiding a wrench where possible (Frank Cutri (Yamaha Mechanic): Filter Replacement Guide). The key takeaway is to always prioritize following the manufacturer's guidelines for your specific outboard motor.
Maintaining Your Outboard Fuel System Beyond Filter Replacement
Performing the fuel filter replacement is a significant step in maintaining your outboard's fuel system, but it's not the end of the story. For optimal performance and longevity, you really need to think about the system as a whole.
Checklist: Signs Your Filter Needs Immediate Replacement
- Engine sputters or hesitates when accelerating
- Reduced top speed or inability to reach full RPM
- Hard starting or engine requires multiple attempts to start
- Visible water or debris in the filter bowl
- Rough idling or stalling at low speeds
- Sudden loss of power while operating
- Filter appears discolored or darker than normal
- Fuel economy has noticeably decreased
- Engine running hotter than usual
- Visible damage to the filter housing or connections
One of the most impactful things you can do is focus on using clean, fresh fuel and proper storage. Always try to refuel at reputable stations and avoid leaving your boat sitting with a nearly empty fuel tank for extended periods, especially over winter. A full tank minimizes condensation, which is a common source of water in fuel. If you must store your boat with fuel, use a quality fuel stabilizer. I've found that stabilizers really do make a difference in keeping fuel fresh and preventing issues like gumming and separation, especially if you use ethanol-blended fuel. For those concerned about ethanol, using non-ethanol fuel when possible is always a good practice, as it inherently reduces the risk of water absorption and phase separation (Frank Cutri (Yamaha Mechanic): Filter Replacement Guide).
Diagnosing fuel system problems early is also crucial. Pay attention to how your engine runs. Any signs of hesitation, surging, rough idling, or loss of power could indicate a fuel delivery issue. Don't ignore these symptoms; they often point to a problem with the fuel filter, fuel lines, or even a clogged VST or injectors. Regularly inspecting your fuel lines for cracks, kinks, or leaks is also part of good preventive maintenance, as is checking that your primer bulb remains firm after pumping.
The frequency of inspection and scenarios requiring more frequent filter changes are important to consider. While annual replacement is a good baseline, if you boat in areas known for questionable fuel quality, encounter water contamination, or put a lot of hours on your engine in a short period, you should inspect and potentially change your filters more often. A good rule of thumb is to check the old filter for debris or water when you replace it. If it looks excessively dirty or waterlogged, it's a signal that your fuel system might need more frequent attention.
While many maintenance tasks can be handled by a DIY boater, there are times when you should contact a professional mechanic. If you've replaced the filter and are still experiencing fuel system issues, or if you're simply uncomfortable performing the task, don't hesitate to seek professional help. Mechanics have specialized tools and extensive experience diagnosing complex fuel system problems, such as clogged fuel injectors, malfunctioning fuel pumps, or issues with the VST. For instance, marine mechanics possess the expertise to properly test fuel pressure and flow rates, which can help pinpoint the exact cause of poor engine performance.
Troubleshooting Common Fuel Filter Problems
Even with regular maintenance, you might encounter issues related to your fuel filter. Understanding the signs of a clogged or damaged fuel filter can help you troubleshoot effectively. The most common symptom is a noticeable drop in engine performance. This includes engine performance issues caused by fuel filters, such as a lack of power, sputtering, or stalling, especially under load or at higher RPMs. You might also experience difficulty starting the engine or rough idling. If your engine suddenly dies while running, a severely clogged filter is a likely suspect.
Sometimes, the filter itself can become damaged internally, though this is less common with quality OEM filters. Signs of a damaged filter might include leaks from its housing, a ruptured seal, or even bypass of contaminants if the filter media tears. A key indicator that your fuel filter needs replacing is the presence of water or debris you can see when you remove it, or if the filter body appears swollen or deformed.
To address fuel system problems, it's important to know how to test for fuel system contamination. Visually inspecting the fuel itself can reveal issues. If you drain a small amount of fuel from your tank into a clear container, water will typically settle at the bottom, and ethanol-blended fuel might appear cloudy if it has absorbed too much water and is nearing phase separation. Another method is to check the removed fuel filter for visible contaminants or water. If you suspect a fuel delivery problem but can't pinpoint it, a professional mechanic can perform a fuel pressure test to ensure the fuel pump is working correctly and that there are no significant restrictions in the fuel lines or filters.
A Real-World Filter Replacement Scenario
Last summer, I encountered a particularly challenging situation with my Mercury 90 HP outboard. The filter was completely seized due to corrosion between the metal housing and the filter itself. Despite my best efforts with a filter wrench, it wouldn't budge.
I solved this by first spraying penetrating oil around the filter's base and letting it sit for 15 minutes. Then, I carefully used a rubber strap wrench rather than a metal filter wrench to avoid damaging the housing. I applied steady, even pressure while slightly rocking the filter back and forth. Eventually, it broke free.
The lesson I learned was to always apply anti-seize compound to the threads when installing a new filter in a metal housing, especially in saltwater environments. This experience also taught me to replace filters more frequently on boats used in saltwater to prevent such issues in the future.
When it came to replacing the fuel filter on my own trusty Evinrude, I remember feeling a little apprehensive at first. It's one thing to read about it, another to actually get your hands dirty. But after following the steps meticulously, ensuring I had the right OEM fuel filter ready to go, and taking all the necessary safety precautions, I was genuinely proud of myself for completing the task. It's this kind of hands-on maintenance that really connects you with your boat and builds confidence.
Recap of Key Points:
We've walked through why fuel filter maintenance is absolutely essential for your outboard's health, covering how it protects against impurities and water contamination, especially with ethanol fuels. We then covered the necessary tools and materials, emphasizing the importance of using genuine OEM parts. The step-by-step guide detailed the process from preparation and removal to installation and final checks, highlighting crucial safety measures and troubleshooting tips. Finally, we touched upon ongoing fuel system maintenance and where to find reliable parts and support.
Final Takeaway:
Keeping your outboard's fuel system clean by regularly replacing the fuel filter is not just a recommendation; it's a fundamental practice for ensuring optimal engine performance, preventing costly damage, and guaranteeing a reliable experience on the water. Don't overlook this vital maintenance task – your engine will thank you for it.
Closing Thought:
So, the next time you're getting your boat ready for the season, or noticing a slight hiccup in performance, remember the humble fuel filter. A little proactive maintenance can save you a world of trouble and keep you out on the water, enjoying every moment.
If you have any questions about selecting the right filter for your specific outboard model or need assistance with the replacement process, please don't hesitate to reach out through our contact form or customer support email. Our team of marine experts is always ready to help ensure your outboard runs at its best.
Sources
- Yamaha Outboards: Maintenance Matters - Fuel & Fuel System
- US Boatworks: How to Change an Outboard Fuel Filter
- Pete's Garage: Professional Marine Mechanic Demonstration
- BoatUS: How To Change Diesel Fuel Filters
- Frank Cutri (Yamaha Mechanic): Filter Replacement Guide
- Marine Diesel Specialists: When to Replace Boat Fuel Filters
- JLM Marine: About Us