

How to Replace a Mercury Outboard Water Pump Impeller: A Step-by-Step Guide
Anyone who's spent time on the water knows the sinking feeling when your outboard starts to labor or, worse, overheat. It's the kind of problem that can turn a perfect day into a tow-boat rescue. More often than not, the culprit lurking within that powerful engine can be traced back to a seemingly small, rubber component: the water pump impeller. Failing to maintain this vital part is akin to ignoring a flickering engine light in your car – it's an invitation for disaster.
As someone who's repaired hundreds of outboards over my career, I can tell you that impeller maintenance is among the most critical yet overlooked services. I've rescued countless boaters stranded with overheated engines, and almost always, a deteriorated impeller was the cause.
The good news? Replacing your outboard's water pump impeller is a manageable DIY task for many boat owners. It's a crucial piece of preventative maintenance that, when done correctly, can save you significant downtime and money. This guide is designed to walk you through the entire process, from understanding why it's so important to safely getting your engine back on the water with a fresh impeller.
This guide is primarily intended for intermediate DIY boat owners with basic mechanical skills and tools. If you can change your car's oil, you can likely handle this task, though beginners should proceed carefully and consider professional help if they encounter complications.
Here's what we'll cover to get your outboard running cool and efficiently:
- The Heart of Cooling: Understanding the indispensable role of your outboard's water pump and impeller.
- When the Heat is On: Identifying the tell-tale signs that your impeller is nearing the end of its life.
- Timing is Everything: Determining the right schedule for replacing your impeller, based on hours, time, and conditions.
- Your Toolkit: Assembling the necessary tools and acquiring the correct parts for a successful replacement.
- The Big DIY Project: A comprehensive, step-by-step breakdown of the replacement procedure.
- After the Fix: Troubleshooting common post-replacement issues, especially those tricky gear selector alignment challenges.
- Keeping it Cool: Essential safety and operational tips to ensure your new impeller does its job.
By the end of this guide, you'll have the knowledge and confidence to tackle this essential maintenance task, ensuring your Mercury outboard runs reliably and efficiently for seasons to come.
For more related guides and parts, don't forget to check out the comprehensive resources at the JLM Marine.
Understanding the Water Pump and Impeller System

I've always been fascinated by the sheer ingenuity of outboard motors. They're these compact powerhouses that can propel a boat across the water, and at the core of their longevity is a deceptively simple cooling system. Without it, you'd be looking at seized pistons and a very expensive repair bill.
The Role of the Water Pump in Outboard Motors
At its most fundamental level, the water pump's job is to continuously circulate cooling water from the lake, river, or ocean around your outboard's engine block. This constant flow draws away the heat generated during combustion, preventing the engine from reaching critical temperatures that could cause catastrophic damage. Think of it as the engine's lifeblood, ensuring it operates within its designed thermal limits.
Without adequate water flow, the engine heats up incredibly fast. I personally witnessed a friend's engine overheat on a hot day simply because his telltale stream was weak. We were barely a mile offshore when his Mercury started making alarming noises. I immediately cut the engine and checked the telltale - just a few drops trickled out. Back at the dock, I found his impeller had lost three vanes. It turned a day of fishing into a very expensive lesson about water pump maintenance.
According to Mercury Marine's service documentation, an outboard can reach damaging temperatures in as little as 30 seconds without proper cooling water circulation, highlighting just how critical this system is for engine health.
If you need replacement cooling parts, it's best to source them from trusted suppliers like the Cooling System collection at JLM Marine to ensure OEM quality and fit.
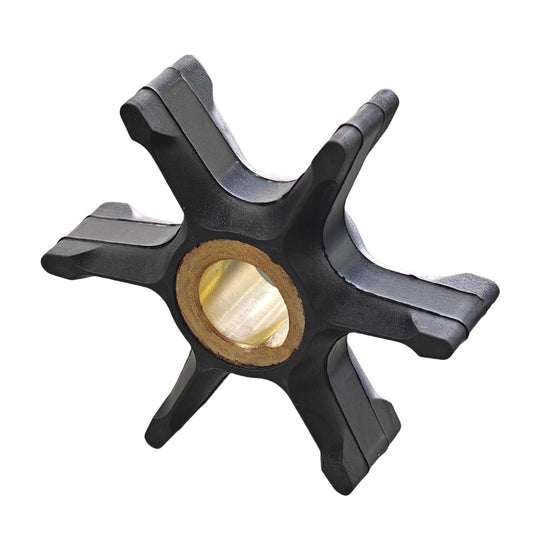
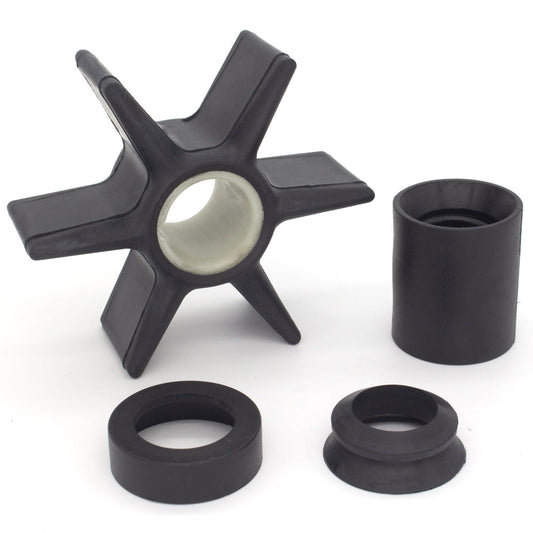
What is a Water Pump Impeller?
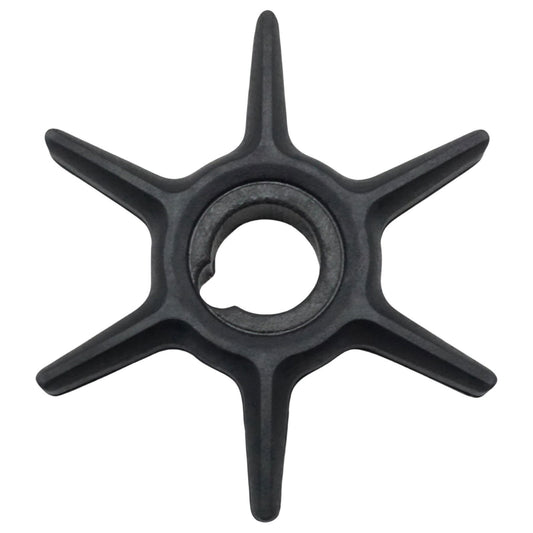
The workhorse of this system is the water pump impeller. Typically made of rubber or Neoprene with flexible "vanes" or "blades," the impeller is designed to flex and create suction as it rotates within the water pump housing. As the driveshaft spins, the impeller's vanes are spun at high speed, pushing water through the pump and out the engine's cooling passages.
The key here is the material's flexibility; it's this ability to bend and deform that allows it to pump water effectively, even in tight spaces. According to technicians at Mercury Marine's training division, a properly functioning impeller can pump up to 30 gallons of water per minute through a typical outboard cooling system.
For those who want direct access to parts, Mercury water pump impellers are constantly in stock at JLM Marine with free shipping options.
Importance of Regular Maintenance
This rubber component is subjected to constant stress – friction, heat, and the abrasive nature of the water it's pumping. Over time, these factors lead to wear and tear. The vanes can become brittle, cracked, or even break off entirely. This is why regular maintenance – specifically, inspecting and replacing the impeller – is not just recommended; it's essential. Ignoring it is like ignoring a worn tire on your car; it's a ticking time bomb that can lead to a much bigger problem down the line.
I once had a customer who operated a fishing charter and insisted his 15-year-old Mercury 250 had "never needed an impeller." When we finally convinced him to let us inspect it, we found the impeller had deteriorated to almost nothing, and the cooling passages were severely restricted with debris and salt buildup. He'd been operating on borrowed time, risking catastrophic engine damage with every trip.
Signs Your Water Pump Impeller Needs Replacement
You don't always have to wait for a specific hour or time interval to replace your impeller. Your outboard will often give you warning signs. Paying attention to these subtle (and sometimes not-so-subtle) cues can save you from a breakdown.
Common Symptoms of a Worn or Failing Impeller
The most obvious indicator is the water flow from the cooling telltale – that small stream of water spitting out of the side of your motor. If it's weaker than usual, spurts inconsistently, or has stopped altogether, your impeller is likely worn or damaged.
Another major sign is engine overheating. If your temperature gauge (if you have one) starts creeping up into the red zone, or if you notice abnormal engine noises or a loss of power due to the engine's safety systems kicking in, the water pump is a prime suspect.
I once had an engine surge unexpectedly during a fishing tournament. The RPMs would spike and fall erratically, and a quick glance confirmed the telltale had reduced to a mere trickle. I immediately headed for shore. Upon inspection, I found the impeller had lost several vanes, and those fragments were partially blocking the cooling passages. That was enough for me to grab my tools and perform an emergency replacement right at the dock.
According to Mercury's maintenance technicians, approximately 60% of all engine overheating cases they encounter are directly related to impeller or water pump issues, making this a critical maintenance item.
Environmental Factors that Accelerate Wear
Where you boat can significantly impact your impeller's lifespan. If you frequently run in silty, sandy, or muddy water, these abrasive particles act like sandpaper on the impeller vanes, wearing them down much faster than in clear, clean water.
Similarly, accidentally running aground and sucking up debris can quickly shred an impeller. A marine technician from Mercury's service department once told me, "We can often tell where a boat operates just by looking at the condition of the impeller during service. Boats from sandy, shallow areas tend to have much more aggressive wear patterns than those used in deeper, clearer waters." If your typical boating spots are less than pristine, you'll want to be more vigilant with your impeller inspections.
The US Geological Survey's studies on sediment content in various waterways have shown that certain rivers and lakes can carry up to five times more abrasive particles than others, directly correlating to accelerated wear rates on marine equipment like impellers.
Impeller Condition After Storage
This is a critical point many overlook. If your outboard has been sitting for an extended period, especially over winter, the rubber impeller can become stiff, brittle, or even take a "set" – meaning its vanes permanently bend in one direction.
When you then attempt to start the engine, these hardened vanes are far more prone to cracking and failing immediately. It's an absolute must to replace the impeller on any engine that's been in storage for a year or more, regardless of hours used.
I learned this the hard way after storing my small fishing boat for a season, only to have the impeller fail on the first outing. The impeller had hardened over the winter, and when I started the engine, several vanes broke off immediately. Now I make it standard practice to replace impellers on outboards coming out of extended storage, and I recommend this to every customer.
When and How Often to Replace Your Outboard Water Pump Impeller

Deciding when to perform this maintenance can sometimes feel like a guessing game, but thankfully, there are clear guidelines to follow.
Recommended Manufacturer Intervals
Mercury, like many manufacturers, provides recommendations based on usage. Generally, they suggest changing the water pump impeller annually, at 100 hours, or at 300 hours, with the exact interval often depending on the specific outboard model. For Mercury Verado models, for instance, a common recommendation is every 3 years or 300 hours, whichever comes first.
According to the official Mercury Marine Service Manual (Publication Number 90-13645), "The water pump impeller should be replaced at regular intervals to ensure optimum cooling performance. Failure to replace at recommended intervals may result in premature engine wear or failure."
In my professional experience, I've found that following these guidelines has kept my customers' engines running reliably for many seasons. However, I always emphasize that these are minimum recommendations, not absolute rules.
As always, consulting your specific outboard's owner's guide is indispensable. For detailed maintenance schedules and OEM parts, visit the Mercury Outboard Motor Parts collection at JLM Marine.
Early Replacement Considerations
However, these are just general guidelines. As I mentioned, if you're consistently boating in challenging conditions – like shallow, silty waterways or salt water environments – it's wise to err on the side of caution.
Early replacement based on symptoms or harsh operating conditions is always a smarter move than waiting for a breakdown. A worn impeller can lead to overheating even before the recommended interval is reached, potentially causing more significant engine damage than the cost of a new impeller kit.
I had a client who regularly fished the shallow back bays of the Gulf Coast, where silt and sand content in the water is exceptionally high. Despite Mercury's 300-hour recommendation for his Verado, we found his impellers severely worn at just 150 hours. We established a 150-hour replacement schedule that has since prevented any cooling issues.
Consulting Your Owner's Manual
My best advice? Always consult your specific owner's manual. Manufacturers provide detailed maintenance schedules tailored to their engines. While this guide offers general knowledge for Mercury outboards, your manual is the ultimate authority for your particular model. It will clarify the exact intervals and any unique procedures or specifications you need to be aware of.
The Mercury Owner's Guide (Publication 8M0063722) explicitly states, "Following the recommended maintenance schedule and using proper parts and procedures will preserve your outboard's optimum performance for many seasons. Consult your authorized dealer on specific local requirements that may vary from factory specifications."
Tools and Materials Needed for Impeller Replacement

Before you even think about dropping the lower unit, having the right tools and parts laid out is crucial. It makes the job go from frustrating to efficient.
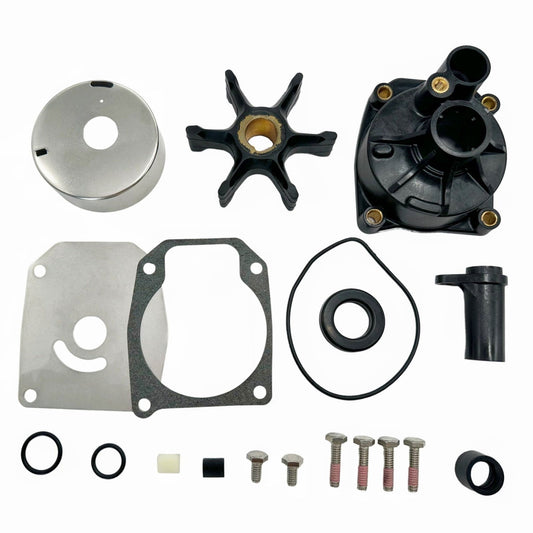
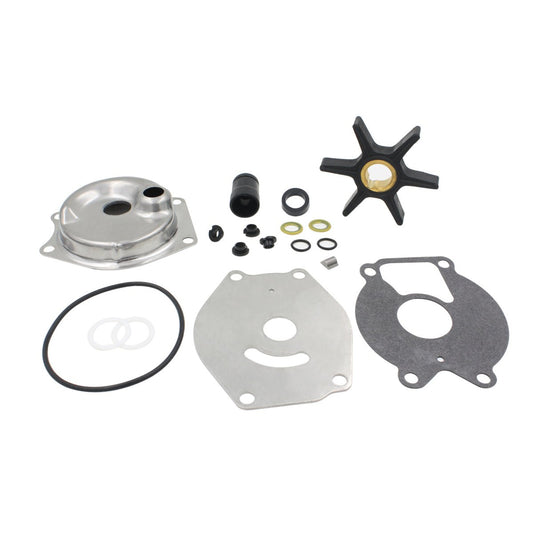
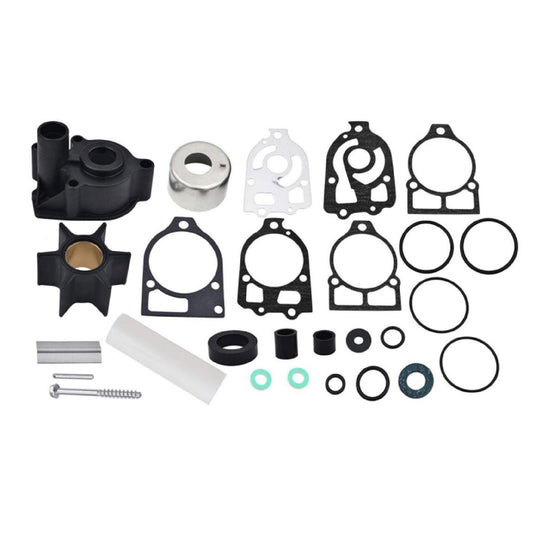
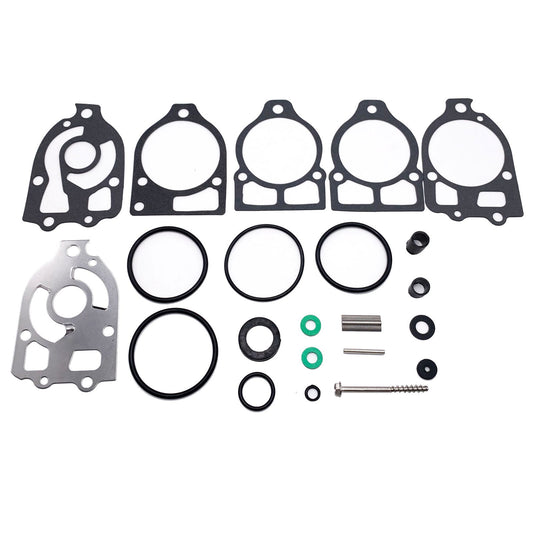
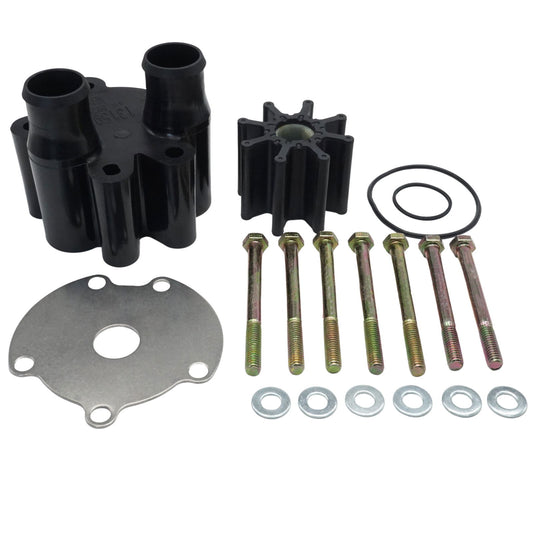
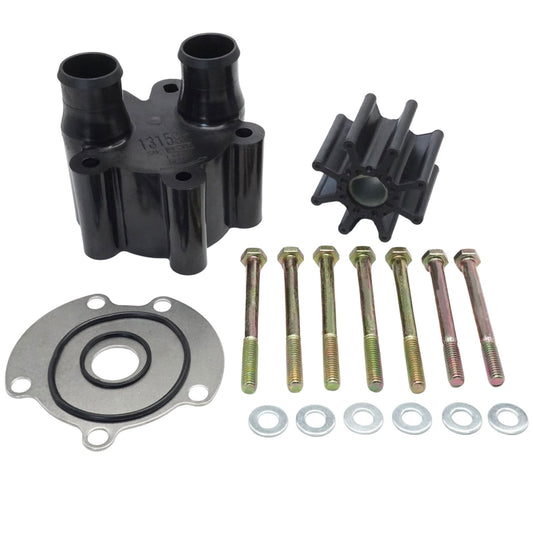
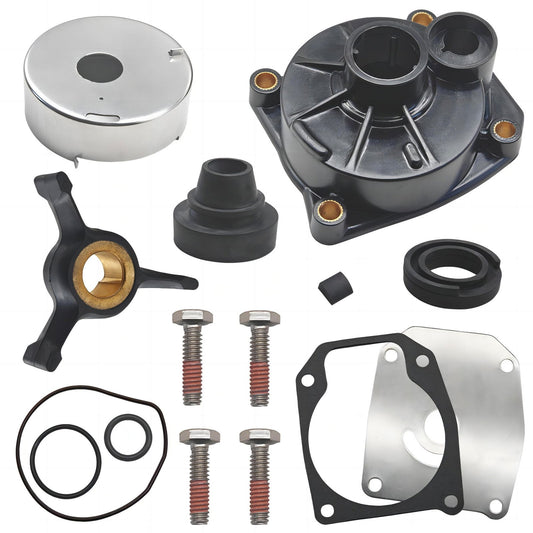
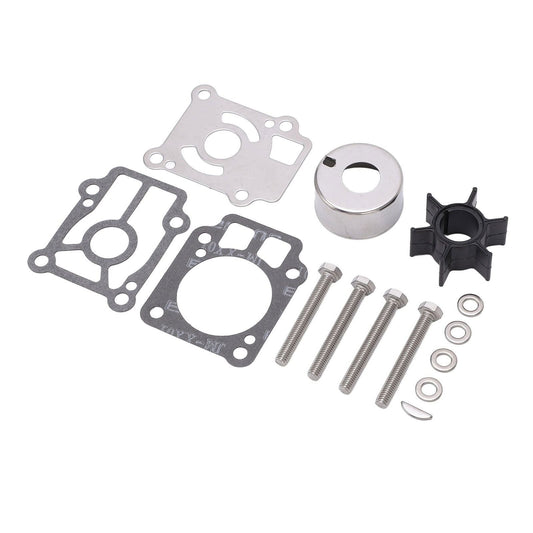
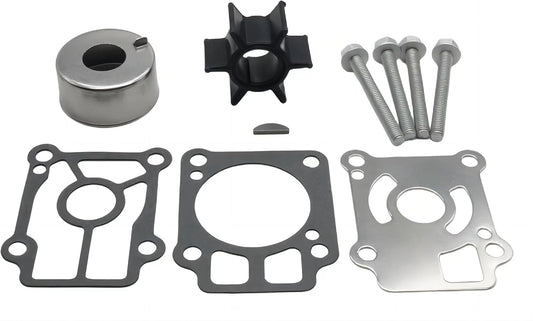
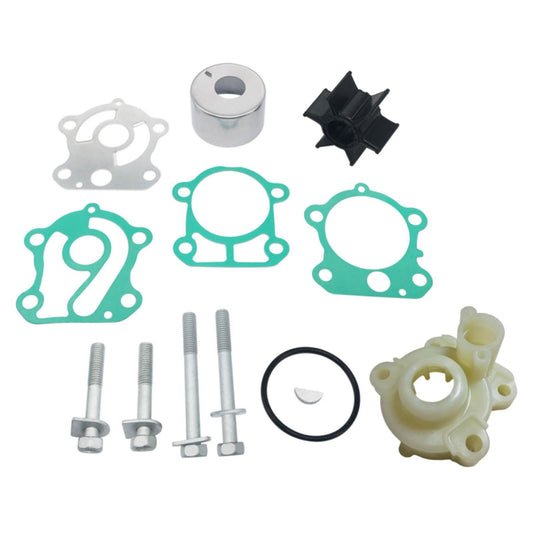
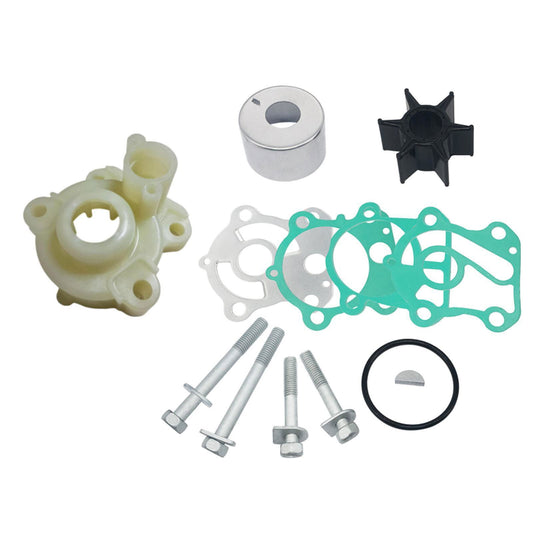
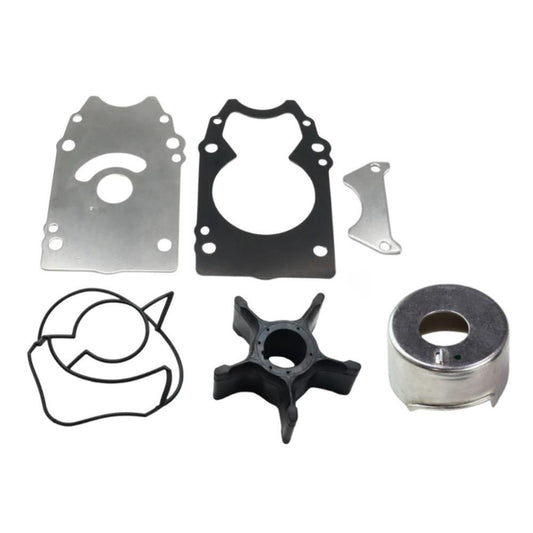
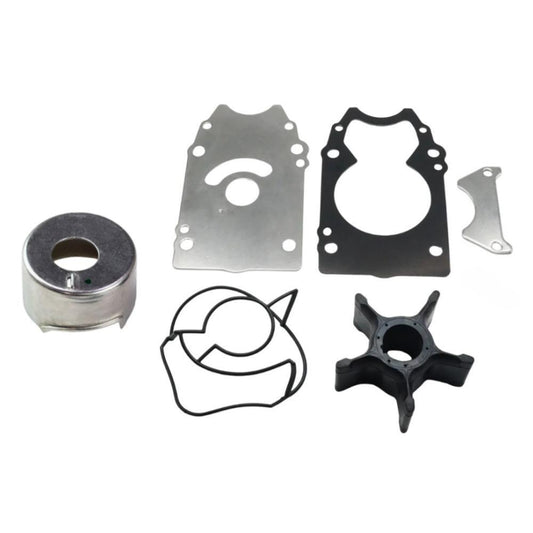
OEM Water Pump Repair Kits
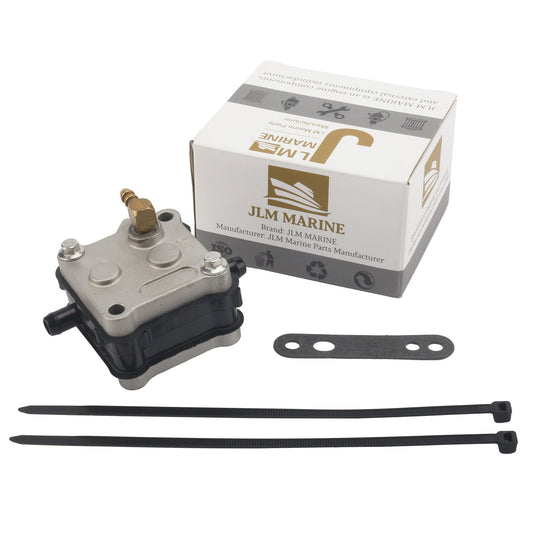
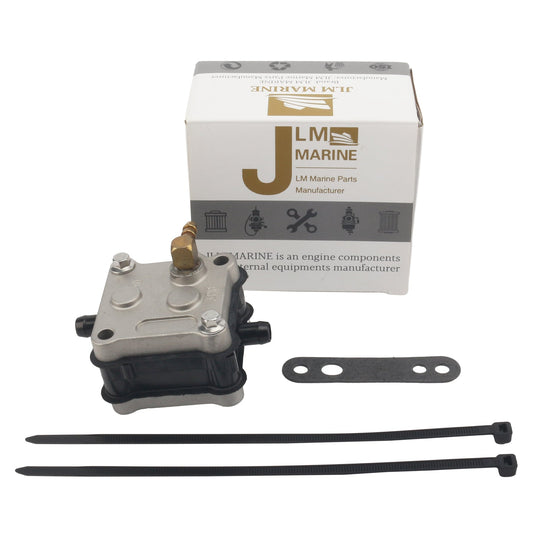
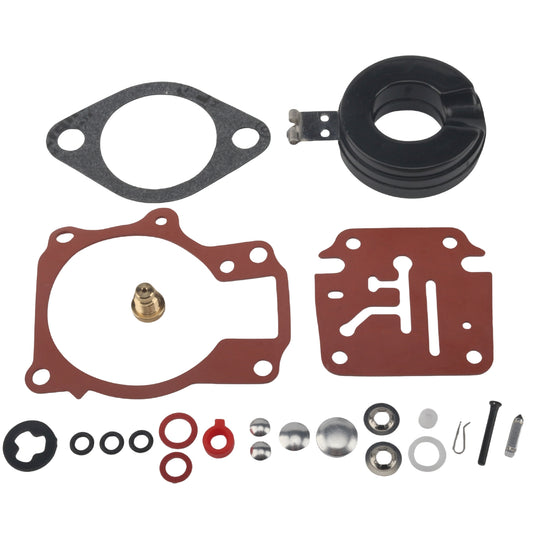
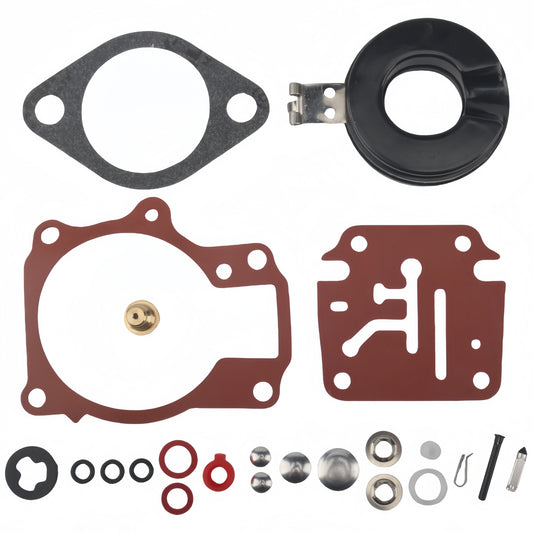
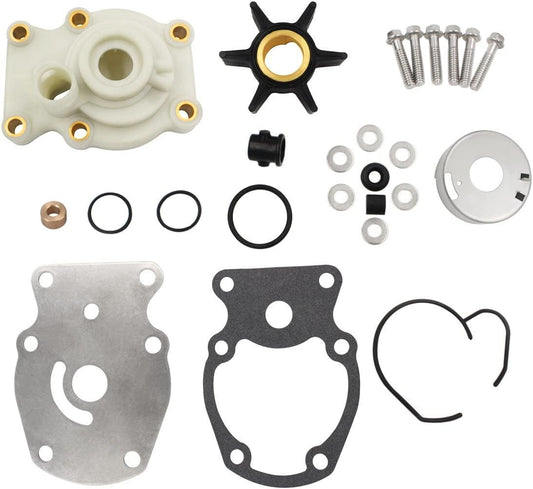
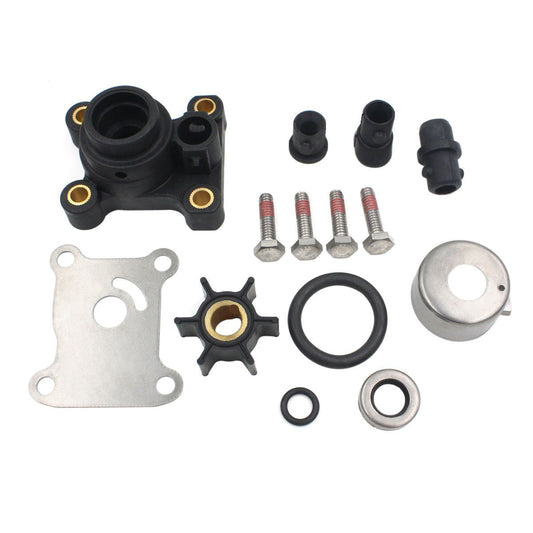
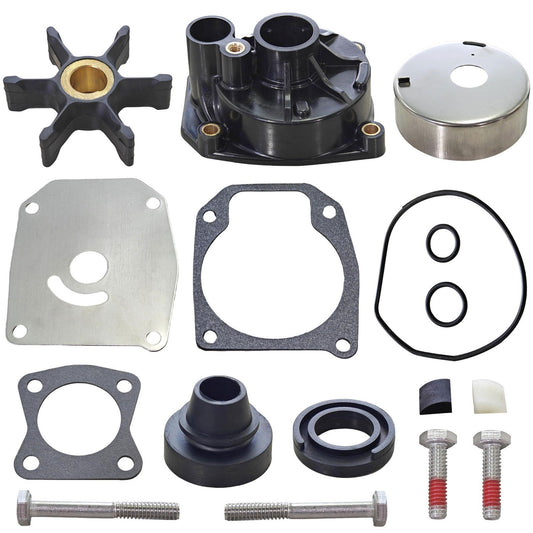
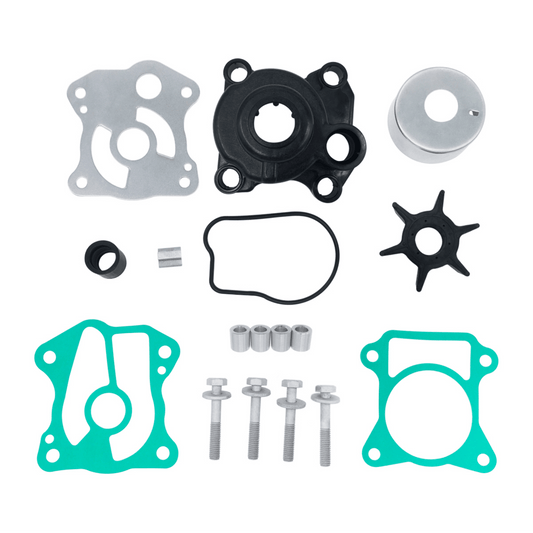
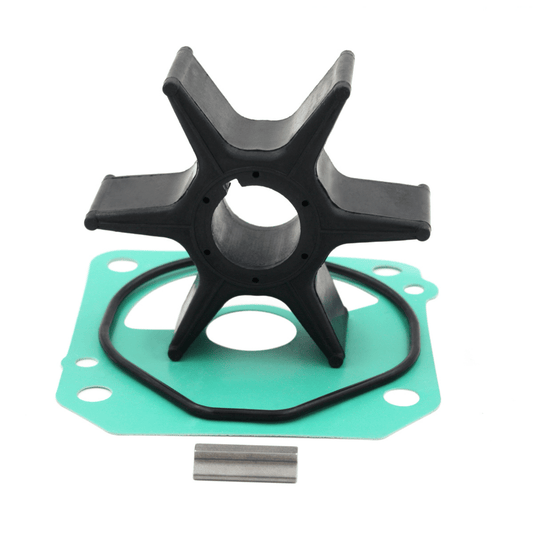
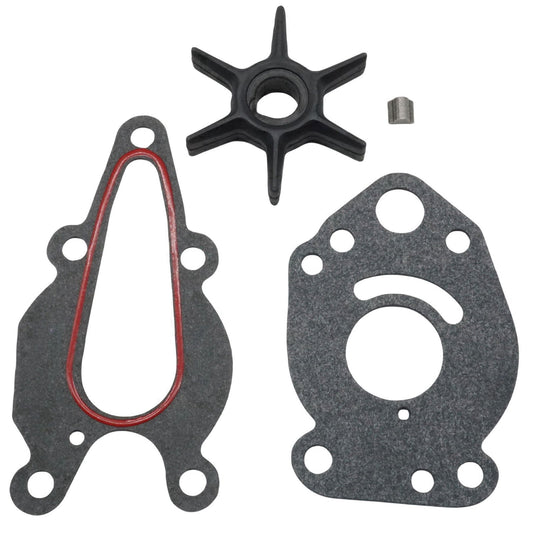
The absolute best part to use is an OEM (Original Equipment Manufacturer) Water Pump Repair Kit, or a high-quality aftermarket equivalent like JLM Marine. Cheaping out here is a false economy, as these kits contain precisely the right components designed for your engine.
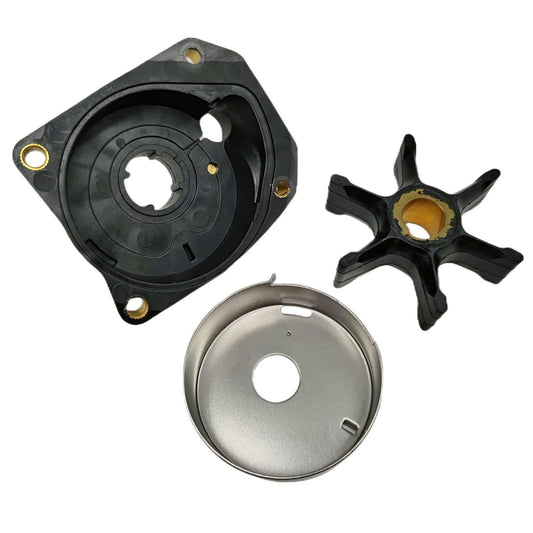
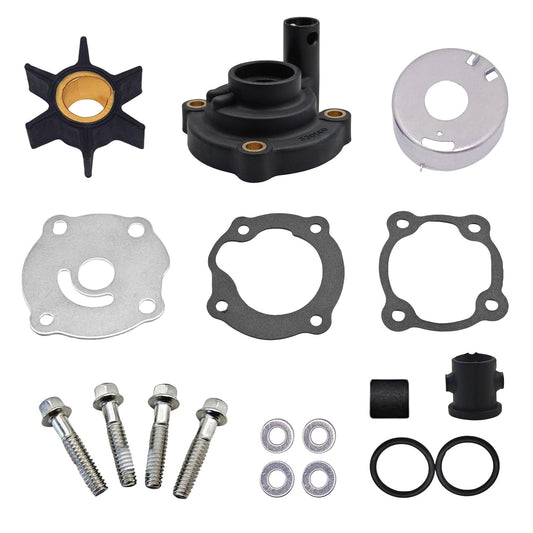
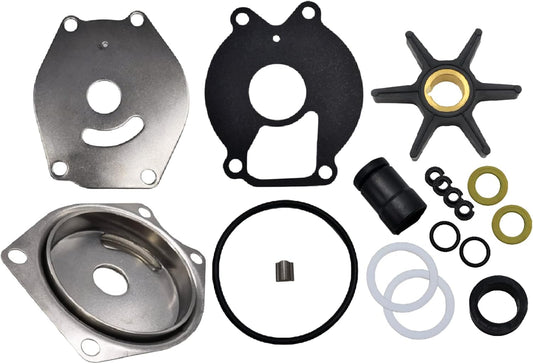
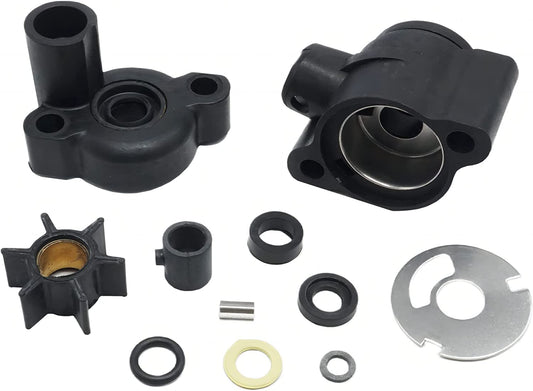
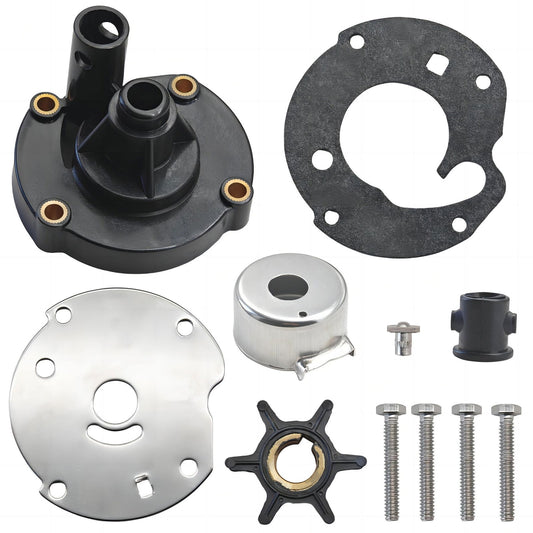
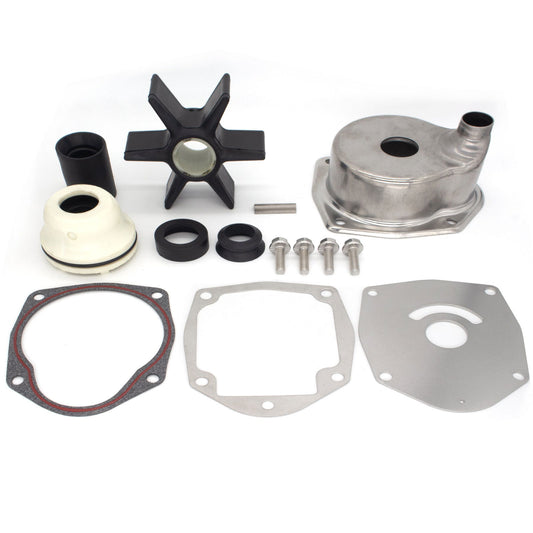
A typical kit will include the new impeller, water pump housing gaskets, seals, and sometimes even a new wear plate or O-rings. Using a comprehensive kit ensures you're replacing all the critical sealing components that work with the impeller.
You can find quality Mercury Water Pump Impeller Kits at JLM Marine to ensure proper fit and performance.
Additional Tools
Beyond the kit, here's a list of other essentials you'll likely need:
- Socket Wrenches and Extensions: Common sizes like 10mm, 13mm, or 17mm sockets are often required for lower unit bolts.
- Screwdrivers: Both flathead and Phillips head screwdrivers are useful for various small parts and hoses.
- Pliers: Needle-nose pliers are indispensable for carefully removing the small rubber speedo tube and hoses without damaging them.
- Rubber Mallet: For gently persuading the lower unit to separate from the midsection if it's stuck due to corrosion or old sealant.
- Grease: Marine-grade grease, specifically Mercury 2-4-C or a similar water-resistant marine grease, is vital for lubricating splines and ensuring proper seating of components.
- Torque Wrench: If you want to be precise, a small torque wrench is helpful for tightening bolts to manufacturer specifications, though many DIYers rely on snugging them down firmly.
- Shop Towels/Rags: You'll need plenty for cleaning parts and absorbing any residual water or grease.
- Work Stand/Support: A sturdy stand or something to safely support the lower unit once it's removed is highly recommended so you can work on it at a comfortable height.
Safety Equipment and Preparation Tips
Safety first, always! Before you begin, make sure you have:
- Gloves: To protect your hands from grease and sharp edges.
- Eye Protection: Always wear safety glasses.
- Secure the Outboard: Ensure your outboard is securely mounted on a stand or tilt lock. You never want it to fall or shift unexpectedly.
- Work Area: Choose a clean, well-lit area where you can spread out your parts without losing anything.
According to Mercury Marine's Safety Operation Bulletin, "Proper safety equipment and secure working conditions are essential when performing maintenance on any outboard engine. Failure to secure the engine properly may result in personal injury or equipment damage."
Proper preparation ensures the job is not only safer but also much smoother from start to finish. I once rushed into an impeller replacement without properly securing the outboard, and it shifted during the job, causing me to drop a critical bolt into the water. What should have been a 45-minute job turned into a half-day ordeal. Learn from my mistake!
Step-by-Step Guide to Replacing the Water Pump Impeller

Alright, this is where the rubber meets the road, so to speak. I find this process incredibly satisfying because you're directly improving your engine's health. It's like giving your outboard a much-needed internal tune-up.
Removing the Lower Unit
The first major step is detaching the lower unit, which houses the water pump.
- Locate and Remove the Anode: You'll usually find a sacrificial anode (a zinc or aluminum block) on the lower unit. Remove it; sometimes, this bolt also holds a critical component or wire, so pay attention.
- Remove Lower Unit Bolts: Most outboards have several bolts around the seam where the lower unit meets the midsection. These bolts vary in length and placement, so it's wise to keep track of which bolt goes where, perhaps noting them on a diagram or with tape.
- Disconnect the Speedo Tube and Shift Linkage: There's typically a small rubber hose (the speedometer pickup tube) that runs from the lower unit up to your helm. Carefully disconnect this using needle-nose pliers. In some models, you might need to disconnect or partially unbolt the shift linkage rod that connects your shifter to the gearbox. Be gentle here; this linkage is critical for gear engagement.
- Separate the Lower Unit: Once all bolts and connections are clear, the lower unit should slide off the driveshaft and prop shaft. It might be stuck due to corrosion or old sealant. Gently tap on the anti-ventilation plate with a rubber mallet to help break the seal. Never pry forcefully; you could damage the mating surfaces. Support the lower unit as it comes free to avoid dropping it. Some sources suggest using bungee cords to hold the lower unit up as you remove the last bolts, preventing it from falling.
I remember working on a 2008 Mercury 90HP that had been in saltwater its entire life. The lower unit was so seized to the midsection that gentle tapping wasn't budging it. I applied a penetrating lubricant to the seam and waited 30 minutes before trying again. That patience saved me from potentially damaging the casing by using excessive force.
According to the Mercury Service Manual (Publication 90-13645), "When separating the lower unit, use only gentle tapping with a soft mallet. Excessive force may damage the housing or internal components."
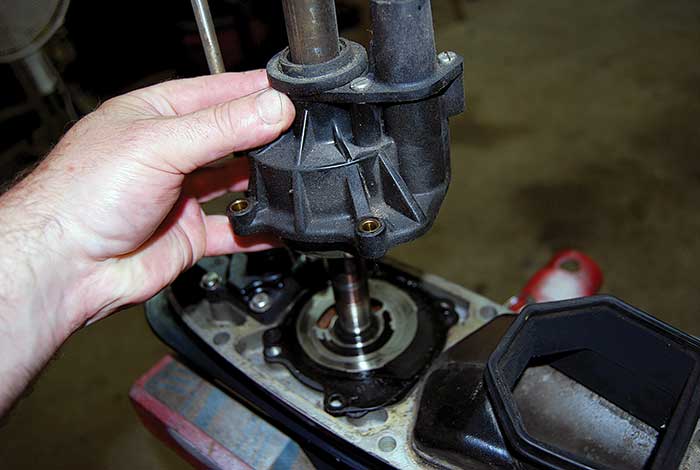
Accessing the Water Pump Housing
With the lower unit detached and placed on your workbench, you'll find the water pump assembly typically located on top of the lower unit, around the driveshaft.
- Identify the Housing Bolts: The water pump housing is usually secured by four bolts. Remove these bolts.
- Remove the Housing: Once the bolts are out, the housing might slide straight up. If it's stuck, a very gentle tap with the rubber mallet or a careful twist can help free it. You'll also need to carefully guide the driveshaft out of the impeller and housing.
Removing the Old Impeller
Inside the housing, you'll find the old impeller.
- Observe Impeller Vanes: Note the direction the impeller vanes are bent. This is critical for correct installation.
- Remove Impeller and Components: The impeller might slide right off the shaft if it hasn't been permanently bonded to the shaft or housing by heat or age. If it's stuck, you might need to carefully pry it off or use the driveshaft itself to help work it free. Remove the old gaskets, wear plate, and any seals from the pump base and housing.
On a recent job with a Mercury 150 FourStroke, I encountered an impeller that had basically "welded" itself to the shaft from heat exposure after running partially dry. I had to use a specialized impeller puller tool to remove it without damaging the shaft. This isn't common, but it shows how heat can transform rubber parts. If you encounter extreme resistance, consider consulting a professional rather than risking damage to the driveshaft.
Installing the New Impeller
This is the core of the replacement. Precision here ensures efficiency.
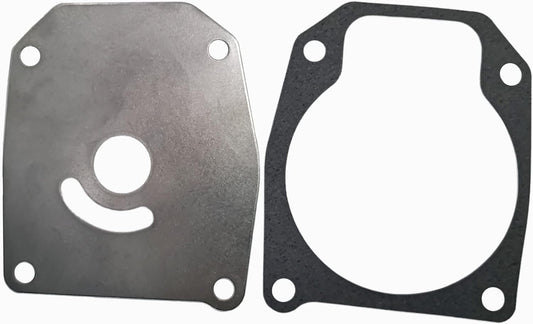
- Install Base Gasket and Wear Plate: Place the new, correct gasket onto the base of the water pump assembly, followed by the new wear plate. Ensure they are seated properly and aligned with any bolt holes or locating pins.
- Prepare the Impeller: Lightly coat the inside of the new impeller and the driveshaft with marine grease. This helps it slide on easier and prevents it from seizing.
- Seat the Impeller: Slide the new impeller onto the driveshaft. Ensure the woodruff key (a small D-shaped metal key that drives the impeller) is properly seated in its slot on the driveshaft and that the impeller has a corresponding slot that engages this key. The impeller will likely feel "loose" on the shaft because its vanes are not yet under tension.
Mercury's Technical Service Manager, Tom Wilson, once explained to me during a training session: "The woodruff key alignment is the most misunderstood part of impeller installation. If it's not properly seated, the impeller will spin on the shaft without pumping water, leading to immediate overheating."
Reassembling and Reinstalling the Lower Unit
Putting it all back together requires careful alignment.
- Grease the Housing and Driveshaft: Apply a thin layer of marine grease to the inside of the water pump housing and the driveshaft splines.
- Align and Install the Housing: Slip the water pump housing over the driveshaft and down onto the base. As you slide it down, you'll need to rotate the driveshaft clockwise. This is crucial: rotating it clockwise will cause the new impeller's vanes to bend in the direction of rotation, ensuring it pumps water effectively. You'll feel resistance as the vanes compress. Once the housing is in place, secure it with the four bolts.
- Reattach the Lower Unit: Carefully guide the lower unit back onto the outboard. You'll need to align the driveshaft, prop shaft, and potentially the shift shaft all at once. This can be the trickiest part. Wiggle the lower unit and rotate the prop or shaft slightly to help everything mesh correctly.
- Reconnect and Secure: Once aligned, reconnect the speedometer tube and shift linkage (if you disconnected it). Reinstall all the lower unit mounting bolts, ensuring you put them back in their original locations and tighten them securely. Reinstall the anode.
Last summer, I was replacing the impeller on my own Mercury 60HP before a fishing tournament. After reinstalling everything, I noticed the engine wouldn't shift properly. I had to drop the lower unit again and discovered I'd misaligned the shift rod by just a fraction of an inch. It taught me to always verify proper shifting before considering the job complete.
According to Mercury Service Bulletin #2019-07, "Proper alignment of the shift mechanism during lower unit reinstallation is critical. Failure to align correctly will result in gear engagement issues that may damage the transmission."
Troubleshooting Common Problems Post-Replacement
Even with the best intentions, sometimes things don't go perfectly on the first try.
Gear Selector Rod Misalignment
This is arguably the most common issue after a lower unit reinstall. If your engine won't shift into forward, reverse, or neutral, or if it pops out of gear, the gear selector rod likely wasn't aligned correctly when you put the lower unit back on. The rod is typically connected via a spline or a linkage that needs to mate precisely with the shifter mechanism in the midsection.
Diagnosing and Fixing: The solution usually involves dropping the lower unit again and carefully re-aligning the rod. Some mechanics suggest rotating the driveshaft by hand while simultaneously manipulating the shift lever (often by turning the prop shaft) until the linkage for the gear selector rod aligns. You might need to try several times.
Frank Thompson, a certified Mercury technician with over 20 years of experience, notes, "If it doesn't want to go, don't force it. Back off, re-examine your alignment points, and try again. Patience is key with gear selector rods." It's often a matter of tiny adjustments. If you encounter significant resistance, double-check that you haven't missed a step or that the linkage itself hasn't been damaged.
I once spent nearly 45 minutes trying to properly align a shift rod on a Mercury 225HP during a routine impeller replacement. The trick that finally worked was placing the lower unit in neutral position before attempting to install it, ensuring the alignment points matched perfectly before fully seating the unit.
Dealing with Stiff Shifting or Propeller Issues
If the shifting feels stiff or the propeller seems difficult to turn even in neutral, it could again be a sign of misalignment. Ensure the driveshaft splines are properly greased. If the prop shaft feels tight or rough, double-check that no debris or old gasket material is interfering with the prop shaft seal or bearing.
When to Seek Professional Help
If you've tried re-aligning the lower unit multiple times and are still experiencing shifting problems, or if you've encountered significant difficulty during the process, it's perfectly acceptable to call a professional. A marine mechanic has the experience and specialized tools to get it right quickly.
In my workshop, I see several "DIY gone wrong" cases each season, typically involving impellers installed backwards or shift mechanisms forced out of alignment. Having a professional complete the job is far less expensive than repairing damage from improper installation, especially when it comes to transmission components.
Safety and Operation Tips After Replacement

You've done the hard work, but there are a few crucial steps to ensure your hard-earned maintenance pays off.
Never Run the Impeller Dry
This is the cardinal rule. An impeller needs water to lubricate and cool itself as it spins. Running the engine for even a few seconds without water going through the pump can cause the impeller to overheat, melt, and be destroyed. Always ensure the outboard is submerged in water (in a test tank or the water) or has a water hose attached via a flushing muffs before starting the engine.
I've seen catastrophic failures from this simple mistake. One client ran his freshly serviced outboard in his driveway "just to check if it starts" without water. In less than 10 seconds, the new impeller was damaged beyond use, and he had to repeat the entire replacement process.
Mercury's technical documentation explicitly warns: "Operating an outboard motor without adequate water supply to the water pump can damage the impeller and lead to engine overheating in as little as 15-30 seconds."
For flushing systems and accessories, see the available Boat Accessories collection to protect your investment during maintenance.
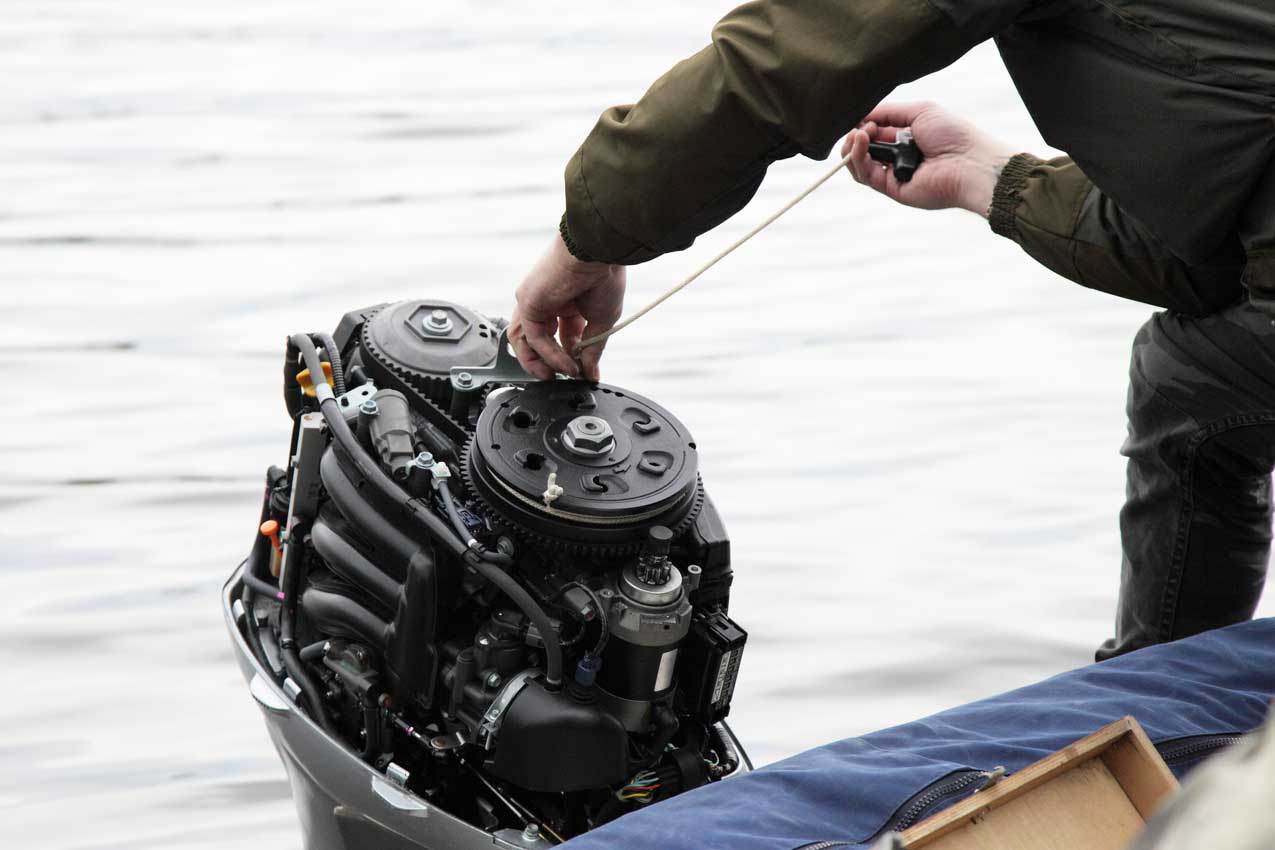
Ensuring Proper Water Lubrication Upon Startup
When you first start the engine after replacing the impeller, listen to it carefully. Watch that telltale stream. It should emerge quickly and be a strong, steady flow. If it's weak or intermittent, shut down the engine immediately. This usually indicates an issue with the impeller orientation, a blockage, or air trapped in the system. You might need to prime it again by rotating the driveshaft while the housing is on, or re-seat the lower unit.
My own procedure includes running the engine at idle for at least 2-3 minutes after an impeller replacement, carefully monitoring the telltale stream and listening for any unusual sounds. Only after I'm satisfied with the cooling performance do I gradually increase RPMs to ensure the system functions properly under load.
Benefits of a Fresh Impeller
The reward for your efforts is immense. A new impeller means a reliable cooling system, which directly translates to stable engine performance, reduced risk of costly overheating damage, and the peace of mind that comes from knowing your engine is running optimally. It's a proactive step that ensures your time on the water is spent enjoying it, not worrying about your engine.
According to Mercury Marine's reliability studies, outboards with regularly maintained cooling systems have up to 35% fewer major service issues over their operational lifespan compared to those with neglected maintenance.
Recap of Key Points
We've journeyed through the essential task of replacing your Mercury outboard's water pump impeller, a critical maintenance item for preventing overheating and ensuring engine longevity. We covered how the impeller works, the vital signs of wear like a weak telltale or engine overheating, and the importance of regular replacement, typically every 1-3 years or 100-300 hours, especially considering environmental factors and storage conditions. We detailed the necessary tools, from specific repair kits to common wrenches, and walked through the step-by-step process of removing the lower unit, accessing and replacing the impeller, and reassembling everything. Crucially, we addressed common post-replacement troubleshooting, particularly gear selector rod misalignment, and emphasized the safety practice of never running the engine dry.
Final Takeaway
Performing this maintenance yourself is empowering. It not only saves you money on labor but instills a deeper understanding and connection with your outboard. It's a tangible way to protect your investment and ensure countless hours of reliable operation on the water. Remember, if you're unsure about any step, especially delicate alignment issues, seeking advice from a certified marine mechanic is always a wise decision. Your outboard is more than just a boat part; it's your ticket to freedom and adventure.
Closing Thought
Keep that telltale stream strong, and your adventures on the water will be that much more enjoyable and worry-free. Happy boating!
Additional Resources for Mercury Outboard Maintenance
For more in-depth information and support with your Mercury outboard maintenance:
- Mercury Marine Official Service Manuals - Factory service documentation for your specific model
- BoatUS Maintenance Resources - Comprehensive guides on all aspects of boat care
- Mercury Marine YouTube Channel - Video tutorials on specific maintenance procedures
- Professional Boatbuilder Magazine Technical Section - In-depth articles on marine systems and best practices
Sources
[1] Mercury Marine. (2022). Mercury Outboard Owner's Manual (Publication 8M0063722).
[2] Mercury Marine Service Manual. (2021). Water Cooling System Maintenance (Publication 90-13645).
[3] Mercury Marine Technical Service Bulletin #2019-07. Lower Unit Alignment Procedures.
[4] Mercury Marine Service Bulletin #2018-05. Importance of OEM Water Pump Components.
[5] BoatUS Foundation. (2022). Expert Advice: Outboard Cooling Systems.
[6] Mercury Marine. (2023). Outboard Maintenance Schedules and Procedures.
Hi—I’m Jim Walker
I grew up in a Florida boatyard, earning pocket money (and a few scars) by rebuilding outboard carbs before I could drive. That hands-on habit carried me through a Ph.D. in mechanical engineering, where I studied how salt water quietly murders metal.
I spent ten years designing cooling systems for high-horsepower outboards, then joined JLM Marine as CTO. We bench-test every new part in the lab, but I still bolt early prototypes onto my own 23-foot skiff for a weekend shake-down— nothing beats real wake and spray for finding weak spots.
Here on the blog I share the fixes and shortcuts I’ve learned so your engine—and your day on the water—run smooth.

About JLM Marine
Founded in 2002, JLM Marine has established itself as a dedicated manufacturer of high-quality marine parts, based in China. Our commitment to excellence in manufacturing has earned us the trust of top marine brands globally.
As a direct supplier, we bypass intermediaries, which allows us to offer competitive prices without compromising on quality. This approach not only supports cost-efficiency but also ensures that our customers receive the best value directly from the source.
We are excited to expand our reach through retail channels, bringing our expertise and commitment to quality directly to boat owners and enthusiasts worldwide.
Water Pump Repair Kits on Sale
- $32.00
$38.00- $32.00
- Unit price
- per
- $26.90
- $26.90
- Unit price
- per
- $42.00
$39.00- $42.00
- Unit price
- per
- $42.00
$42.00- $42.00
- Unit price
- per
- $41.00
$46.00- $41.00
- Unit price
- per
- $57.50
$63.00- $57.50
- Unit price
- per
- $35.00
$34.00- $35.00
- Unit price
- per
- $39.89
$45.00- $39.89
- Unit price
- per
- $39.98
$45.00- $39.98
- Unit price
- per
- $51.50
$55.00- $51.50
- Unit price
- per

- $69.90
- $69.90
- Unit price
- per
- $44.50
- $44.50
- Unit price
- per

- $34.20
$40.00- $34.20
- Unit price
- per

- $30.99
$37.00- $30.99
- Unit price
- per
- $26.69
$29.00- $26.69
- Unit price
- per
- $52.50
$64.00- $52.50
- Unit price
- per

- $39.99
$46.00- $39.99
- Unit price
- per
- $86.00
- $86.00
- Unit price
- per
- $55.00
- $55.00
- Unit price
- per


- $22.78
- $22.78
- Unit price
- per